
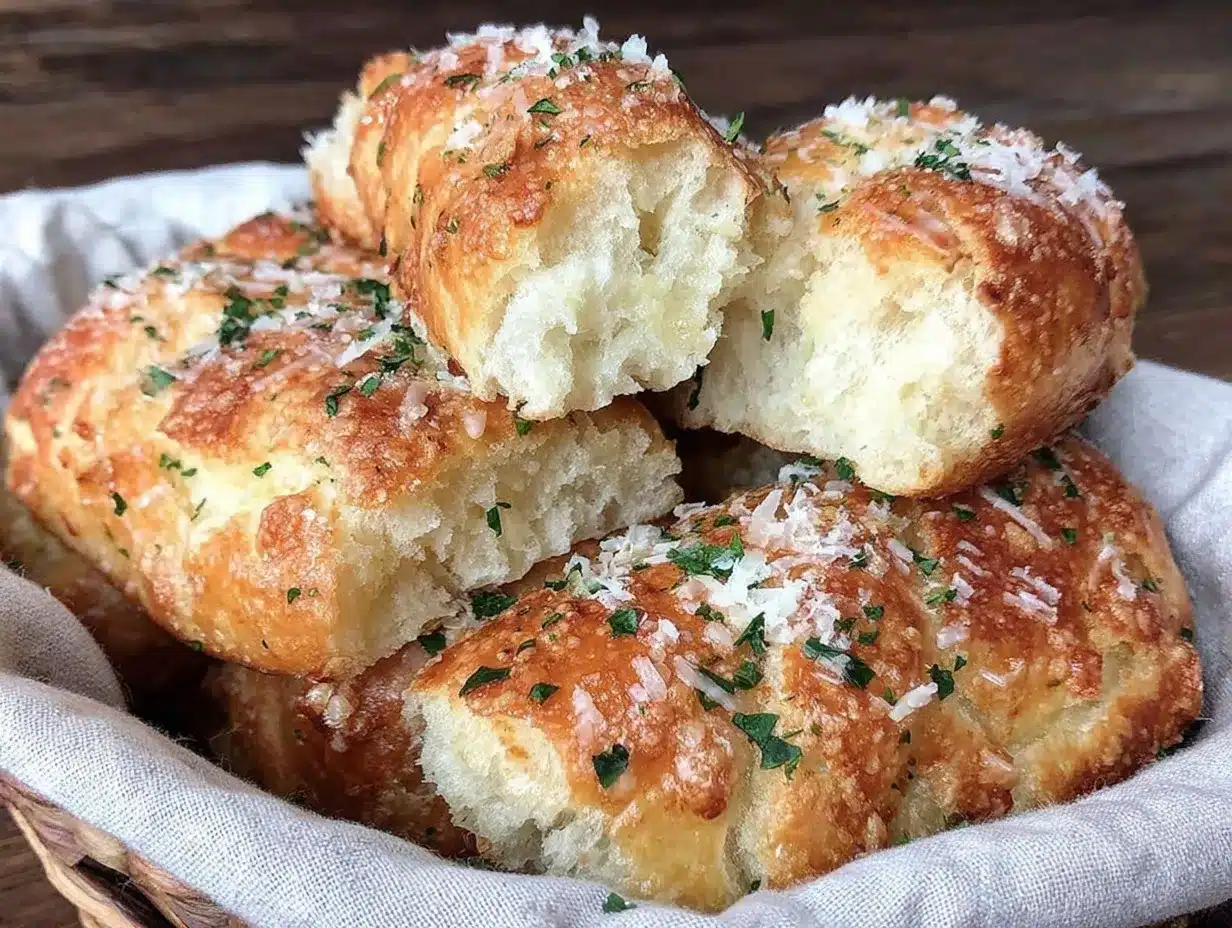
There was this one evening when I found myself staring at a nearly empty pantry, feeling too tired to make a full dinner but craving something comforting. Honestly, I just wanted those soft, garlicky breadsticks from Olive Garden — you know, the kind you can’t stop nibbling on while waiting for your meal. But with no chance of a quick takeout, I decided to wing it, mixing a simple dough with a generous garlic butter slather. The first bite was a revelation: tender, warm, and buttery with just the right hint of garlic and herbs. That night, I realized making copycat Olive Garden breadsticks wasn’t just doable; it could be downright addictive.
Since then, these tender copycat Olive Garden breadsticks with garlic butter have popped up on my table more times than I care to admit. Whether it’s a spontaneous snack or part of a cozy dinner, they have this unpretentious charm — soft inside, lightly golden outside, and that buttery garlic aroma filling the kitchen. It’s funny how something so simple turns out to be such a crowd-pleaser, a little comfort nugget that feels both nostalgic and fresh.
It’s not just about mimicking a restaurant favorite; it’s about capturing that homey vibe that makes you want to pull up a chair and linger over a meal with friends or family. These breadsticks have stuck with me because they’re easy to make, forgiving to work with, and honestly, they just hit the spot every single time. I’m pretty sure you’ll feel the same once you try them.
Why You’ll Love This Tender Copycat Olive Garden Breadsticks Recipe
- Quick & Easy: Comes together in under 45 minutes, including rising time — perfect for busy nights or last-minute snack cravings.
- Simple Ingredients: Uses pantry staples like flour, yeast, and butter — no fancy or hard-to-find items needed.
- Perfect for Any Occasion: Great for family dinners, casual gatherings, or pairing with your favorite pasta or soup.
- Crowd-Pleaser: Kids, adults, and even picky eaters tend to go back for seconds — they’re just that good.
- Unbelievably Delicious: The garlic butter glaze infused with herbs gives a mouthwatering flavor that’s soft, buttery, and perfectly seasoned.
- Unique Touch: Unlike other breadsticks, this recipe uses a light brushing of garlic butter at two key moments — before and after baking — creating that iconic Olive Garden texture and flavor.
- Comfort Food, Reinvented: It’s easy, approachable, and satisfies that craving for warm, soft bread with a garlicky kick without feeling heavy or greasy.
This recipe isn’t just a copy; it’s a little kitchen magic that brings you the same cozy feeling Olive Garden breadsticks do, but in your own home, whenever you want.
What Ingredients You Will Need
This recipe uses simple, wholesome ingredients to deliver bold flavor and satisfying texture without the fuss. Most of these are pantry staples, and substitutions are easy if you need to tweak for dietary preferences.
- All-purpose flour (about 3 ½ cups / 440g) – the base for tender, soft breadsticks; I prefer King Arthur flour for its consistent texture
- Active dry yeast (2 ¼ teaspoons / 1 packet) – for that perfect rise and fluffiness
- Sugar (1 tablespoon) – feeds the yeast and adds a touch of sweetness
- Warm water (1 ¼ cups / 300 ml) – around 110°F/43°C to activate the yeast comfortably
- Unsalted butter (4 tablespoons / 56g), melted and divided – half for the dough, half for garlic butter glaze
- Garlic cloves (3, minced) – fresh garlic gives that authentic punch; avoid pre-minced jarred garlic for best flavor
- Salt (1 teaspoon) – balances flavor in the dough
- Dried Italian seasoning (1 teaspoon) – adds a subtle herb note reminiscent of Olive Garden’s breadsticks; you can swap with dried oregano or basil
- Optional: Parmesan cheese (2 tablespoons, grated) – for sprinkling on top if you want a cheesy twist
- Optional: Garlic powder (1/2 teaspoon) – can boost garlic flavor in the glaze if you like it extra garlicky
Substitution tips: For a gluten-free option, try a cup-for-cup gluten-free flour blend, though texture will be slightly different. Swap dairy butter with vegan butter if needed, and use warm almond or oat milk instead of water for a richer dough.
Equipment Needed
- Mixing bowl: A large bowl for combining and proofing dough. Glass or stainless steel works fine.
- Measuring cups and spoons: Accurate measurements help with consistent results.
- Whisk or fork: For mixing yeast and sugar into warm water.
- Wooden spoon or dough hook: To mix the dough; a stand mixer with a dough hook makes things even easier but isn’t required.
- Baking sheet: Preferably rimmed to catch any butter drips.
- Parchment paper or silicone baking mat: Prevents sticking and makes cleanup simple.
- Pastry brush: Essential for brushing the garlic butter glaze before and after baking.
- Kitchen towel or plastic wrap: For covering the dough during rising to keep it moist.
Personally, I find a stand mixer helpful but not necessary. The dough is soft and forgiving—kneading by hand works just fine. A good pastry brush makes a difference for that even garlic butter coating; I recommend investing in a silicone brush that’s easy to clean and gentle on your pans.
Preparation Method
- Activate the yeast: In a large bowl, whisk together 1 ¼ cups (300 ml) warm water (about 110°F/43°C), 1 tablespoon sugar, and 2 ¼ teaspoons active dry yeast. Let it sit for 5–10 minutes until foamy and bubbly. If it doesn’t foam, your yeast might be old or water too hot/cold—start again for best rise.
- Mix the dough: Add 2 tablespoons melted unsalted butter, 1 teaspoon salt, 1 teaspoon dried Italian seasoning, and about 3 cups (375g) all-purpose flour to the yeast mixture. Stir with a wooden spoon or dough hook until the dough starts to come together.
- Knead and add flour: Turn the dough out onto a lightly floured surface and knead for about 6–8 minutes, adding remaining flour as needed until the dough is smooth, elastic, and slightly tacky but not sticky. You want it soft and pliable, not dry or stiff.
- First rise: Lightly grease the mixing bowl with olive oil or butter, place the dough inside, and cover with a damp kitchen towel or plastic wrap. Let it rise in a warm, draft-free place for about 1 hour or until doubled in size.
- Prepare garlic butter glaze: While the dough rises, melt 2 tablespoons butter in a small saucepan or microwave-safe bowl. Stir in minced garlic and a pinch of salt. Let it sit to infuse; the garlic flavor will mellow slightly as it cools.
- Shape breadsticks: Once the dough has doubled, punch it down gently and turn it out onto a lightly floured surface. Divide into 12 equal portions (about 2 ounces / 56g each). Roll each piece into a 6-inch (15 cm) long stick, tapering the edges slightly if you like.
- Arrange and brush: Place breadsticks on a parchment-lined baking sheet, spaced about 1 inch (2.5 cm) apart. Brush each with half of the garlic butter mixture, coating evenly for flavor and shine.
- Second rise: Cover loosely with plastic wrap or a kitchen towel again and let the breadsticks rise for 20–30 minutes until puffy but not quite doubled.
- Bake: Preheat your oven to 400°F (200°C). Bake the breadsticks for 12–15 minutes or until the tops turn light golden brown.
- Final garlic butter brush: As soon as the breadsticks come out of the oven, brush them with the remaining garlic butter glaze generously. If desired, sprinkle with grated Parmesan cheese while still warm.
- Cool slightly and serve: Let the breadsticks rest for 5 minutes before serving so they’re warm but not too hot to enjoy.
Note: If the garlic butter cools and solidifies while you’re working, gently rewarm but don’t overheat or burn the garlic flavor.
Cooking Tips & Techniques
- Temperature matters: Yeast loves warmth but hates extremes. Using water around 110°F (43°C) helps activate yeast without killing it. Too hot and your dough won’t rise; too cold and it’ll take forever.
- Don’t over-flour: Adding too much flour during kneading makes breadsticks dense and tough. The dough should feel slightly sticky but manageable.
- Double rise is key: That second rise after shaping is what keeps the breadsticks tender and fluffy inside. Don’t skip or rush it!
- Garlic butter timing: Brushing before baking helps with browning and flavor absorption. Brushing again after baking locks in butteriness and fresh garlic aroma.
- Use fresh garlic: Minced fresh garlic beats jarred for flavor every time. If you want a milder garlic taste, sauté the garlic in butter for a minute before brushing.
- Watch your oven: Every oven is different — check the breadsticks at 12 minutes to avoid overbaking, which dries them out.
- Make ahead tip: You can prepare dough the night before, refrigerate after first rise, then shape and bake fresh the next day for convenience.
Variations & Adaptations
- Cheesy breadsticks: Add ¼ cup (30g) shredded mozzarella or Parmesan inside the dough or sprinkle on top before baking for a melty twist.
- Herb flavor swap: Experiment with fresh rosemary, thyme, or parsley in place of dried Italian seasoning for a bright, fresh note.
- Gluten-free version: Use a gluten-free flour blend designed for yeast baking; texture will be slightly different but still delicious.
- Vegan adaptation: Substitute butter with vegan margarine and use water or plant-based milk (almond, soy) to keep it dairy-free.
- Spicy garlic butter: Mix a pinch of red pepper flakes into the garlic butter glaze to add a gentle heat that pairs well with the soft bread.
- Personal tried variation: I once tossed in finely chopped sun-dried tomatoes into the dough for a subtle tangy surprise — it was great alongside a simple marinara dip.
Serving & Storage Suggestions
These tender copycat Olive Garden breadsticks are best served warm, fresh from the oven. They pair beautifully with marinara sauce, creamy Alfredo, or even a simple olive oil dip with herbs.
For a complete meal, serve alongside soups like tomato basil or minestrone, or as a side to salad and pasta dishes. A chilled glass of white wine or sparkling water with lemon complements the garlic butter flavor nicely.
Storage: Store leftover breadsticks in an airtight container at room temperature for up to 2 days. To keep them soft, warm briefly in the microwave wrapped in a damp paper towel.
For longer storage, freeze cooled breadsticks in a sealed bag for up to 1 month. Reheat in a 350°F (175°C) oven for 8–10 minutes, covered with foil to avoid drying out.
Flavors tend to deepen after a day, so if you can wait, the garlic and herbs meld nicely overnight.
Nutritional Information & Benefits
Each breadstick (about 2 ounces / 56g) contains approximately:
| Calories | 150-170 |
|---|---|
| Carbohydrates | 22g |
| Fat | 6g (mostly from butter) |
| Protein | 4g |
| Sodium | 250mg |
The key ingredients offer some benefits: yeast provides B vitamins and minerals; garlic is known for its antioxidant properties and potential immune support; butter adds richness but can be moderated with portion control.
This recipe is naturally gluten-containing (all-purpose flour) but can be adapted for gluten-free needs. It’s a moderately indulgent snack or side that fits well into balanced meals.
Conclusion
The tender copycat Olive Garden breadsticks with garlic butter have become one of those recipes that feels like a warm hug from the kitchen. Easy enough to whip up on a whim, satisfying enough to make you smile after the first bite, they bring a little restaurant magic home without the fuss.
Feel free to tweak the herbs, cheese, or spice level to suit your taste — that’s part of the fun. For me, these breadsticks are a reminder that simple ingredients and a little patience can create something truly comforting.
Give them a try, and you might find yourself making these soft, buttery, garlicky sticks your go-to snack or dinner companion. I’d love to hear how you customize them or what memories they bring up for you!
Frequently Asked Questions About Tender Copycat Olive Garden Breadsticks
Can I make the dough ahead of time?
Yes! After the first rise, you can refrigerate the dough in a covered bowl overnight. When ready, shape the breadsticks, let them rise again, and bake as usual.
What if I don’t have fresh garlic?
Fresh garlic is best for flavor, but in a pinch, garlic powder works. Use about ½ teaspoon mixed into the melted butter for the glaze.
How do I keep the breadsticks soft the next day?
Store them in an airtight container at room temperature. To reheat, wrap in a damp paper towel and microwave for 15–20 seconds or warm briefly in the oven covered with foil.
Can I use whole wheat flour instead of all-purpose?
You can substitute up to half the flour with whole wheat, but the texture will be denser. For best results, stick to all-purpose or bread flour for that soft, tender crumb.
Are these breadsticks vegan?
The original recipe uses butter, which isn’t vegan, but you can swap in vegan butter and use plant-based milk or water to make a vegan-friendly version.
Pin This Recipe!
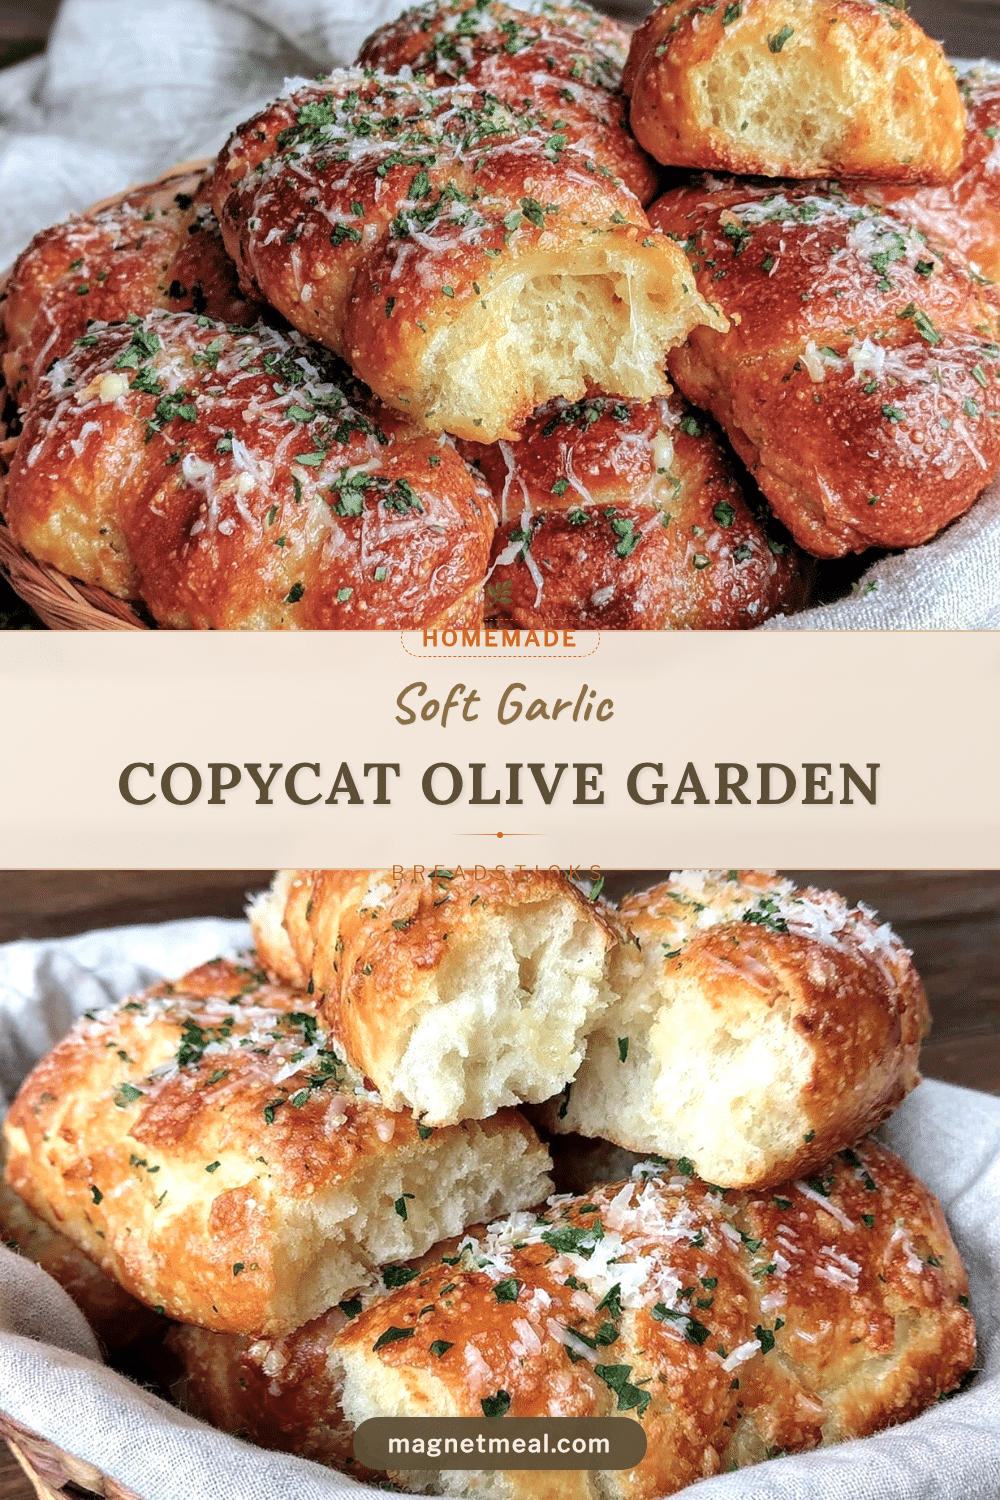
Tender Copycat Olive Garden Breadsticks Recipe Easy Garlic Butter Snack

These tender copycat Olive Garden breadsticks are soft, buttery, and infused with garlic butter glaze, perfect for a quick snack or a cozy dinner side. They come together easily with simple pantry ingredients and deliver that iconic restaurant flavor at home.
- Prep Time: 15 minutes
- Cook Time: 15 minutes
- Total Time: 1 hour 30 minutes
- Yield: 12 breadsticks 1x
- Category: Snack
- Cuisine: Italian-American
Ingredients
- 3 ½ cups (440g) all-purpose flour
- 2 ¼ teaspoons (1 packet) active dry yeast
- 1 tablespoon sugar
- 1 ¼ cups (300 ml) warm water (about 110°F/43°C)
- 4 tablespoons (56g) unsalted butter, melted and divided
- 3 garlic cloves, minced
- 1 teaspoon salt
- 1 teaspoon dried Italian seasoning
- Optional: 2 tablespoons grated Parmesan cheese
- Optional: ½ teaspoon garlic powder
Instructions
- Activate the yeast: In a large bowl, whisk together 1 ¼ cups warm water (about 110°F/43°C), 1 tablespoon sugar, and 2 ¼ teaspoons active dry yeast. Let sit for 5–10 minutes until foamy.
- Mix the dough: Add 2 tablespoons melted unsalted butter, 1 teaspoon salt, 1 teaspoon dried Italian seasoning, and about 3 cups all-purpose flour to the yeast mixture. Stir until dough starts to come together.
- Knead and add flour: Turn dough onto a lightly floured surface and knead for 6–8 minutes, adding remaining flour as needed until smooth, elastic, and slightly tacky but not sticky.
- First rise: Lightly grease a mixing bowl, place dough inside, cover with a damp towel or plastic wrap, and let rise in a warm place for about 1 hour or until doubled in size.
- Prepare garlic butter glaze: Melt 2 tablespoons butter and stir in minced garlic and a pinch of salt. Let sit to infuse and cool slightly.
- Shape breadsticks: Punch down dough, divide into 12 equal portions (about 2 ounces each), and roll each into a 6-inch long stick.
- Arrange and brush: Place breadsticks on parchment-lined baking sheet spaced 1 inch apart. Brush with half of the garlic butter glaze.
- Second rise: Cover loosely and let rise for 20–30 minutes until puffy but not doubled.
- Bake: Preheat oven to 400°F (200°C). Bake breadsticks for 12–15 minutes until light golden brown.
- Final garlic butter brush: Brush breadsticks with remaining garlic butter glaze immediately after baking. Sprinkle with Parmesan cheese if desired.
- Cool slightly and serve: Let rest for 5 minutes before serving.
Notes
Use water around 110°F to activate yeast properly. Avoid over-flouring dough to keep breadsticks tender. Brush garlic butter before and after baking for best flavor. Fresh garlic is preferred over jarred or powder. Dough can be refrigerated after first rise for next-day baking.
Nutrition
- Serving Size: 1 breadstick (about
- Calories: 160
- Sodium: 250
- Fat: 6
- Carbohydrates: 22
- Protein: 4
Keywords: Olive Garden breadsticks, copycat recipe, garlic butter breadsticks, soft breadsticks, easy breadsticks, homemade breadsticks, garlic snack


