“Hey, have you tried those mini lemon meringue tarts with the torched topping yet?” my friend asked over a lazy Sunday brunch. Honestly, I was skeptical. Lemon meringue always felt a little intimidating—like it needed a pastry chef’s touch or some secret magic. But that day, something clicked. I found myself pulling out my little kitchen torch (yes, the same one I use for crème brûlée) and giving it a shot. The torched meringue, golden and slightly crisp on top, contrasted perfectly with the tart, zesty lemon filling, all nestled inside buttery, flaky mini tart shells. It wasn’t just good—it was quietly addictive.
That afternoon, I made these tarts not once, but three times. Each batch was a little better, smoother, more balanced, until I landed on what I now call the perfect mini lemon meringue tarts with torched topping. They’re the kind of dessert that doesn’t scream for attention but invites you in gently, with that unmistakable citrus aroma and the soft crackle of torched meringue. If you’re someone who’s avoided lemon meringue because it seems tricky, I get you—and this recipe might just change your mind.
There’s something about the simple joy of torching that topping yourself—watching the sugar bubble and brown—that feels like a tiny celebration in the kitchen. These tarts stuck with me because they’re approachable, fun, and just the right size for a delicate indulgence. Plus, they pair beautifully with coffee or tea, making any afternoon feel a bit more special.
Why You’ll Love This Recipe
- Quick & Easy: This recipe comes together in under 90 minutes, perfect for fitting into busy days or last-minute dessert plans.
- Simple Ingredients: You probably have most of what you need in your pantry and fridge—no fancy or exotic items required.
- Perfect for Gatherings: These mini tarts are ideal for brunches, tea parties, or as a charming finish to dinner with friends.
- Crowd-Pleaser: Kids love the sweet and tangy combo, while adults appreciate the sophisticated texture contrast.
- Unbelievably Delicious: The buttery tart shell, smooth citrus curd, and torched meringue topping create a symphony of flavors and textures.
What makes this recipe stand out from the countless lemon meringue tart variations? For starters, I use a combination of fresh lemon juice and zest to give the curd a bright but rounded flavor. The tart shells are made with a quick pâte sucrée that’s both sturdy and tender, so they don’t collapse or get soggy. Also, the torched meringue isn’t just for show—it adds a caramelized sugar crunch that contrasts beautifully with the silky lemon filling.
This isn’t one of those recipes where you end up with a watery filling or meringue that falls flat. It’s been tested and tweaked, with personal tips to keep everything smooth and stable. Honestly, after making these, you might find yourself wanting to serve lemon meringue in mini form every time. If you’ve enjoyed the luscious flavors in our stunning pink and green ombre wicked birthday cake, you’ll appreciate the careful balance of tart and sweet here too.
What Ingredients You Will Need
This recipe uses simple, wholesome ingredients to deliver bold flavor and satisfying texture without the fuss. You’ll find most of these items in your pantry or fridge, and they’re easy to source. Here’s what you’ll need, grouped by function:
- For the Tart Shells:
- All-purpose flour (1 1/4 cups / 160g) — I prefer King Arthur for consistent texture
- Unsalted butter, cold and cubed (7 tbsp / 100g)
- Powdered sugar (1/4 cup / 30g) — adds just the right sweetness
- Egg yolk (1 large) — room temperature
- Vanilla extract (1/2 tsp) — optional, but adds depth
- Salt (a pinch)
- For the Lemon Curd Filling:
- Fresh lemon juice (1/2 cup / 120ml) — about 3-4 lemons, depending on size
- Lemon zest (1 tbsp) — finely grated for maximum aroma
- Granulated sugar (3/4 cup / 150g) — balances the tartness
- Large eggs (3) — room temperature
- Unsalted butter (5 tbsp / 70g) — cubed and softened
- For the Meringue Topping:
- Large egg whites (3) — room temperature to whip up fluffy meringue
- Granulated sugar (1/2 cup / 100g) — fine is best, but regular works
- Cream of tartar (1/4 tsp) — helps stabilize the meringue
- Pure vanilla extract (1/2 tsp) — optional, adds a gentle sweetness
If you want a gluten-free option, swapping the all-purpose flour with almond flour works well, though the texture changes slightly. For a dairy-free version, use coconut oil or vegan butter substitutes in the tart shells and lemon curd. And if fresh lemons aren’t in season, bottled lemon juice can work—but fresh zest is key for that vibrant lemon zing.
Equipment Needed
- Mini tart pans or a mini muffin tin: 6 to 8 individual tart shells are ideal. If you don’t have tart pans, a muffin tin lined with parchment cups works fine.
- Mixing bowls: For making dough, lemon curd, and meringue separately.
- Whisk or electric mixer: A stand or hand mixer will speed up the meringue whipping, but a sturdy whisk can do it too (though it takes more arm power).
- Kitchen torch: Essential for getting that perfect torched meringue topping. If you don’t have one, the broiler can substitute, but watch carefully to avoid burning.
- Fine grater or zester: For lemon zest.
- Saucepan: For gently heating the lemon curd mixture.
- Fine mesh sieve: Optional, but helpful for smooth lemon curd.
I’ve used a budget-friendly butane kitchen torch with great results—just refill and you’re good to go. For cleaning, always wipe the torch head with a damp cloth when cool to prevent residue buildup. If you love homemade desserts, investing in a torch is worth it; it’s also handy for other recipes like garlic butter shrimp ramen where a quick sear adds flavor.
Preparation Method

- Make the tart shells: In a bowl, combine flour, powdered sugar, and salt. Cut in the cold, cubed butter with your fingers or a pastry cutter until the mixture resembles coarse crumbs. Add the egg yolk and vanilla extract, mixing gently until the dough comes together. Don’t overwork it—if it feels too dry, add a teaspoon of cold water. Wrap in plastic wrap and chill for at least 30 minutes.
- Preheat the oven: Set to 350°F (175°C). Roll out the chilled dough on a lightly floured surface to about 1/8-inch (3mm) thickness. Cut rounds slightly larger than your tart pans. Gently press the dough into the pans, trimming excess edges. Prick the bottoms with a fork to prevent puffing.
- Bake the tart shells: Place tart pans on a baking sheet and bake for 12-15 minutes, or until golden brown. Remove from oven and let cool completely before filling.
- Prepare the lemon curd: In a medium saucepan, whisk together eggs, sugar, lemon juice, and zest. Cook over medium-low heat, stirring constantly with a wooden spoon or silicone spatula until the mixture thickens and coats the back of the spoon (about 8-10 minutes). Remove from heat and stir in butter cubes until smooth. For extra smoothness, strain through a fine mesh sieve. Let cool to room temperature.
- Fill the tart shells: Spoon the cooled lemon curd into each tart shell, filling nearly to the top but leaving a little room for meringue.
- Make the meringue: In a clean, dry bowl, whisk egg whites and cream of tartar until soft peaks form. Gradually add sugar, a tablespoon at a time, continuing to whisk until stiff, glossy peaks form. Stir in vanilla extract if using.
- Top the tarts: Using a spoon or piping bag, spread or pipe meringue over the lemon curd, making sure to seal the edges to prevent shrinking.
- Torch the meringue: Lightly brown the meringue with your kitchen torch, holding the flame about 2 inches (5cm) away and moving in circular motions until golden spots appear. If you don’t have a torch, broil for 1-2 minutes but watch closely.
- Chill before serving: Refrigerate the tarts for at least 1 hour to let flavors meld and the lemon curd set properly.
Pro tip: When cooking the lemon curd, keep the heat low and whisk constantly to avoid scrambling the eggs. If little lumps form, don’t panic—straining will fix that. Also, if your meringue starts to weep (release liquid), it often means it wasn’t whipped enough or got overmixed after adding sugar.
Cooking Tips & Techniques
Making mini lemon meringue tarts can seem tricky, but a few techniques make all the difference. First, always use room temperature eggs; they whip better and produce more volume. When making the tart dough, chilling is key to prevent shrinking during baking. If the dough warms up too much while rolling, pop it back in the fridge for 10 minutes.
For the lemon curd, constant stirring prevents curdling. I learned the hard way that rushing this step leads to scrambled eggs in your curd—a big no-no. If you want that ultra-smooth texture, don’t skip straining. It’s a small step that pays off.
The meringue topping can make or break the tart. Adding cream of tartar helps stabilize those glossy peaks. When torching, patience is your friend—move the flame steadily so you get an even golden-brown without burning. If you notice the meringue shrinking away from the tart edge, it might mean it wasn’t sealed well or was exposed to moisture.
Multitasking helps here: while the tart shells bake, prepare the lemon curd so everything flows smoothly. And if you want to get fancy, piping the meringue in swirls creates a beautiful effect that’s sure to impress your guests.
Variations & Adaptations
- Berry Lemon Meringue Tarts: Add a layer of fresh raspberries or blueberries inside the tart before spooning the lemon curd. It adds a lovely freshness and color contrast.
- Key Lime Twist: Substitute lime juice and zest for lemons to give the tart a tangier, tropical vibe.
- Vegan Version: Use aquafaba (the liquid from canned chickpeas) whipped into meringue and replace butter with vegan margarine or coconut oil. The texture shifts slightly but still delicious.
- Mini Pavlova Style: Instead of tart shells, bake small meringue nests and fill with lemon curd and fresh fruit—an elegant alternative.
- Spiced Meringue: Add a pinch of ground cinnamon or cardamom to the meringue for a warm twist, perfect around the holidays.
I once tried adding lavender essence to the lemon curd for a floral note—it was subtle but charming. Feel free to experiment with your favorite citrus or infusions. For a no-torch option, try gently browning the meringue under a broiler, but watch carefully—it happens fast!
Serving & Storage Suggestions
Serve these mini lemon meringue tarts chilled or at room temperature, depending on your mood. The contrast between the slightly cool curd and warm torched meringue is delightful. They’re perfect as a light dessert after a rich meal, or alongside a cup of tea or coffee for an afternoon treat.
Pair them with simple accompaniments like fresh berries, a dollop of whipped cream, or even a scoop of vanilla ice cream for an extra indulgence. If you’re hosting a brunch, these tarts complement savory dishes beautifully—something like our classic tuna melt on sourdough bread or a fresh salad.
Store leftover tarts in an airtight container in the refrigerator for up to 3 days. The lemon curd will firm up, and the meringue might soften but remains tasty. Avoid freezing as the texture suffers, especially the meringue topping.
When reheating, it’s best to enjoy them cold or at room temperature. The flavors actually deepen after a few hours in the fridge, so making them a day ahead is a smart move.
Nutritional Information & Benefits
Each mini lemon meringue tart contains approximately 220 calories, with 10 grams of fat, 28 grams of carbohydrates, and 3 grams of protein. The fresh lemon juice and zest provide a boost of vitamin C, which supports immune health and adds antioxidant benefits.
Using fresh ingredients helps keep sugars moderate, though these are still a dessert to enjoy in moderation. If you prefer, swapping white sugar with coconut sugar is an option, though it may affect the flavor and meringue stability.
Gluten-free adaptations can be made by using almond or coconut flour blends, making this treat accessible for those with dietary restrictions. Just be mindful of potential allergens like eggs and dairy in the meringue and curd.
Conclusion
Perfect mini lemon meringue tarts with torched topping are a delightful way to bring a classic dessert into your kitchen without stress or fuss. They come together with simple ingredients, offer that satisfying balance of tart and sweet, and add a little kitchen theater with the torching step.
Whether you’re baking for a casual afternoon treat or a special occasion, these tarts invite you to customize and play around with flavors—try swapping in fresh berries or experimenting with spices. I love these tarts because they feel special but are surprisingly easy, making them a go-to when I want to impress without overdoing it.
If you’ve enjoyed recipes like the spicy peanut noodles with chicken sesame or the Greek lemon chicken soup avgolemono, this lemon meringue tart will fit right into your repertoire as a delicious, tangy finish. I’d love to hear how your tarts turn out or any twists you try—drop a comment and share your experience!
Happy baking and torching!
FAQs
- Can I make the tart shells ahead of time? Yes! You can bake the shells up to two days in advance and store them in an airtight container at room temperature.
- What if I don’t have a kitchen torch? You can use the broiler to brown the meringue, but watch it closely to prevent burning, as it happens quickly.
- How do I prevent the meringue from weeping? Use cream of tartar to stabilize the egg whites, and avoid adding sugar too quickly. Also, seal the meringue to the edges of the tart to prevent shrinking.
- Can I use bottled lemon juice instead of fresh? Fresh lemon juice and zest give the best flavor, but bottled lemon juice can be used in a pinch. Be sure to add fresh zest for brightness.
- Are these tarts freezer-friendly? Freezing is not recommended as the meringue texture will suffer. Best to enjoy within a few days refrigerated.
Pin This Recipe!

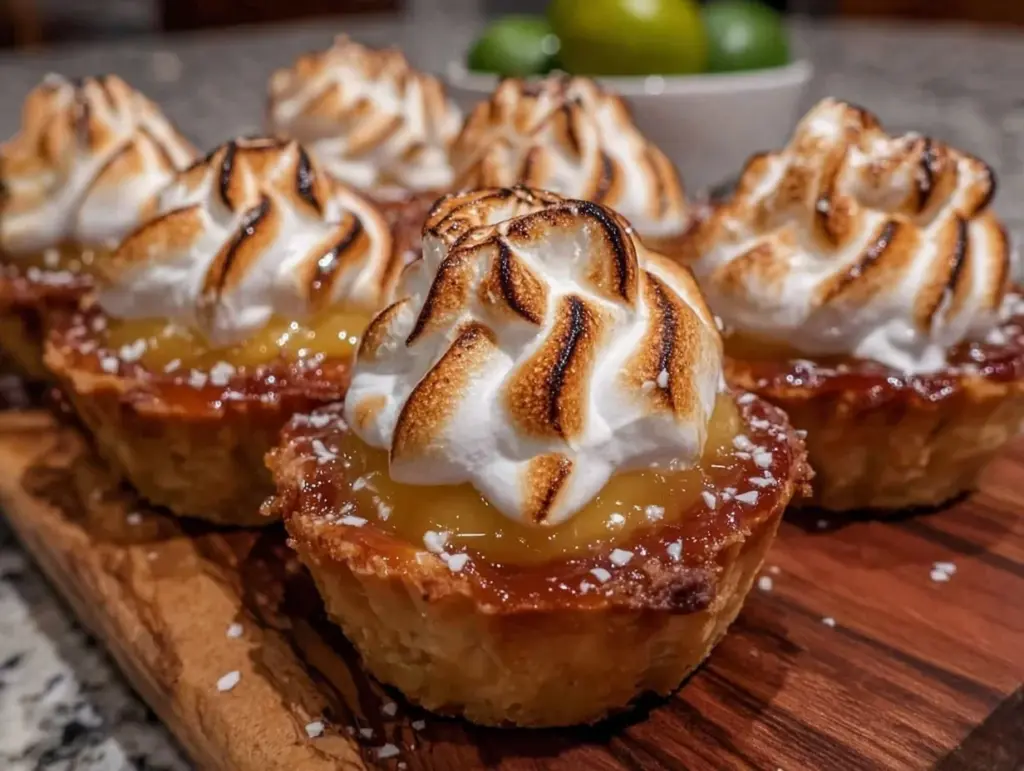
Perfect Mini Lemon Meringue Tarts with Torched Topping

These mini lemon meringue tarts feature a buttery, flaky tart shell filled with smooth, tangy lemon curd and topped with a golden, torched meringue. They are quick, easy, and perfect for gatherings or a delicate indulgence.
- Prep Time: 40 minutes
- Cook Time: 15 minutes
- Total Time: 1 hour 55 minutes
- Yield: 6 to 8 mini tarts 1x
- Category: Dessert
- Cuisine: American
Ingredients
- 1 1/4 cups all-purpose flour (160g)
- 7 tbsp unsalted butter, cold and cubed (100g)
- 1/4 cup powdered sugar (30g)
- 1 large egg yolk, room temperature
- 1/2 tsp vanilla extract (optional)
- Pinch of salt
- 1/2 cup fresh lemon juice (120ml, about 3–4 lemons)
- 1 tbsp lemon zest, finely grated
- 3/4 cup granulated sugar (150g)
- 3 large eggs, room temperature
- 5 tbsp unsalted butter, cubed and softened (70g)
- 3 large egg whites, room temperature
- 1/2 cup granulated sugar (100g)
- 1/4 tsp cream of tartar
- 1/2 tsp pure vanilla extract (optional)
Instructions
- Make the tart shells: In a bowl, combine flour, powdered sugar, and salt. Cut in the cold, cubed butter with your fingers or a pastry cutter until the mixture resembles coarse crumbs. Add the egg yolk and vanilla extract, mixing gently until the dough comes together. If too dry, add a teaspoon of cold water. Wrap in plastic wrap and chill for at least 30 minutes.
- Preheat the oven to 350°F (175°C). Roll out the chilled dough on a lightly floured surface to about 1/8-inch (3mm) thickness. Cut rounds slightly larger than your tart pans. Gently press the dough into the pans, trimming excess edges. Prick the bottoms with a fork to prevent puffing.
- Bake the tart shells for 12-15 minutes, or until golden brown. Remove from oven and let cool completely before filling.
- Prepare the lemon curd: In a medium saucepan, whisk together eggs, sugar, lemon juice, and zest. Cook over medium-low heat, stirring constantly until the mixture thickens and coats the back of a spoon (about 8-10 minutes). Remove from heat and stir in butter cubes until smooth. Strain through a fine mesh sieve for extra smoothness. Let cool to room temperature.
- Fill the tart shells with the cooled lemon curd, filling nearly to the top but leaving room for meringue.
- Make the meringue: In a clean, dry bowl, whisk egg whites and cream of tartar until soft peaks form. Gradually add sugar, a tablespoon at a time, whisking until stiff, glossy peaks form. Stir in vanilla extract if using.
- Top the tarts with meringue using a spoon or piping bag, sealing the edges to prevent shrinking.
- Torch the meringue with a kitchen torch held about 2 inches (5cm) away, moving in circular motions until golden spots appear. Alternatively, broil for 1-2 minutes watching closely to avoid burning.
- Chill the tarts in the refrigerator for at least 1 hour before serving to let flavors meld and lemon curd set.
Notes
Use room temperature eggs for better meringue volume. Chill dough to prevent shrinking. Stir lemon curd constantly on low heat to avoid scrambling eggs. Strain lemon curd for smooth texture. Seal meringue edges well to prevent shrinking. If no torch, use broiler carefully. Store leftovers refrigerated up to 3 days; avoid freezing.
Nutrition
- Serving Size: 1 mini tart
- Calories: 220
- Fat: 10
- Carbohydrates: 28
- Protein: 3
Keywords: lemon meringue tarts, mini lemon tarts, torched meringue, lemon curd, easy dessert, tart shells, brunch dessert


