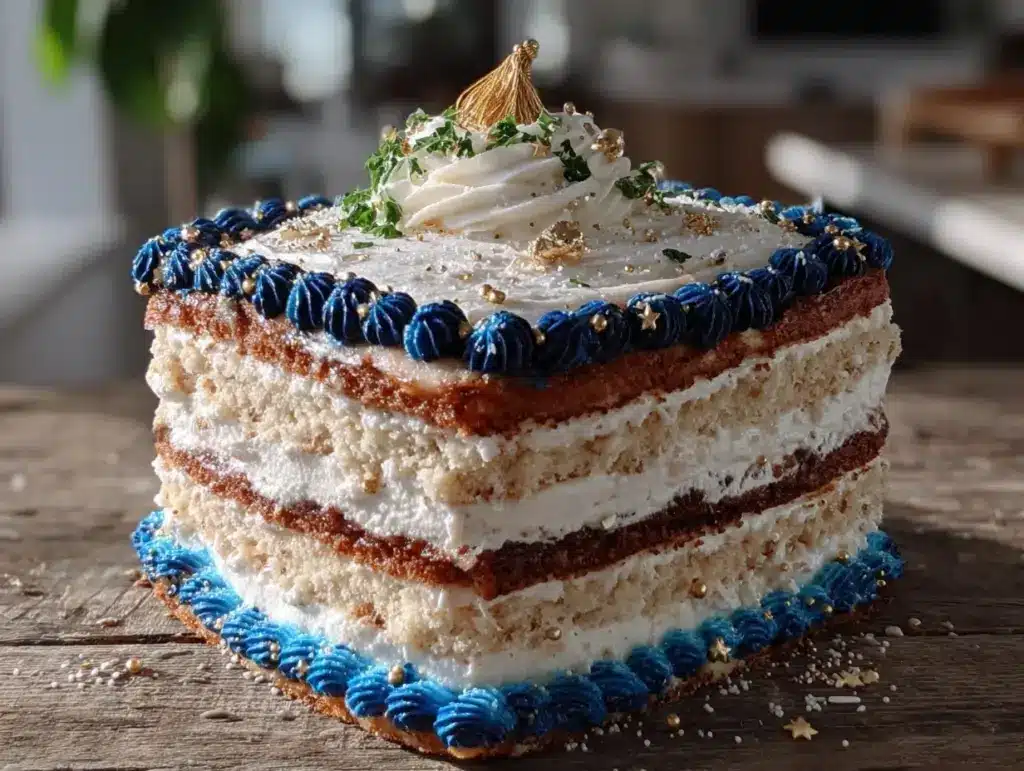
“Are you sure this is going to work?” my sister asked, eyeing the towering mess of colorful cake layers I was juggling in my tiny kitchen. Honestly, I was skeptical too. Attempting a three-tier graduation sheet cake with bold school colors felt like juggling flaming pins for a home baker who usually sticks to simple one-pan meals. But with graduation day looming and a last-minute request from my niece, I figured, why not? It started as a chaotic afternoon of mixing, frosting, and a few near disasters—like the time I almost dropped the middle tier while trying to balance it! The kitchen smelled like sweet vanilla and buttercream, and the vibrant blue and gold frosting made a mess on my fingers, but somehow, it all came together.
That cake became the centerpiece of the celebration, drawing compliments and a few requests for the recipe. What stuck with me wasn’t just the look or the colors but the way it brought everyone together—old friends reminiscing, kids buzzing with excitement, and that proud glow on the graduate’s face. This recipe isn’t just about baking a cake; it’s about crafting a memory wrapped in layers of flavor and school spirit. I promise this three-tier graduation sheet cake will feel less like a juggling act and more like your next favorite celebration tradition.
Why You’ll Love This Recipe
Making a three-tier graduation sheet cake with bold school colors might sound intimidating, but this recipe has been tested again and again in my kitchen (and by eager friends). Here’s why it stands out:
- Quick & Easy: The batter comes together in under 30 minutes, and the frosting is straightforward—no complicated piping skills required.
- Simple Ingredients: You probably have everything on hand—basic pantry staples like flour, sugar, eggs, and butter, plus your school’s colors in gel food coloring.
- Perfect for Graduations: Whether you’re celebrating high school, college, or any milestone, this cake’s size and design fit well for gatherings big and small.
- Crowd-Pleaser: The moist vanilla layers paired with creamy buttercream frosting get rave reviews from kids and adults alike—trust me, it disappears fast.
- Bold School Colors: The vibrant gel colors hold up beautifully without bleeding, making the cake a true showstopper that honors your graduate’s spirit.
What sets this recipe apart is the mix of classic sheet cake ease and the layered grandeur of a tiered cake, all with a bold splash of color that won’t fade. It’s not just a cake; it’s a statement piece for your party table. And honestly, after making the defying gravity layer cake recently, I felt confident pushing my decorating skills further. This recipe is practical enough for home bakers but impressive enough for the biggest celebrations.
What Ingredients You Will Need
This recipe uses simple, wholesome ingredients to deliver moist layers and a rich, creamy frosting. You can find most of these in any well-stocked pantry, and the bold colors come from high-quality gel food coloring—key for vibrant school colors without changing texture.
- For the Cake Batter:
- All-purpose flour, 4 cups (480g) – for a tender crumb
- Baking powder, 2 tablespoons – helps the layers rise nicely
- Baking soda, 1 teaspoon – adds lightness
- Salt, 1 teaspoon – balances sweetness
- Unsalted butter, 1 cup (226g), softened – use a trusted brand like Kerrygold for richness
- Granulated sugar, 2 ½ cups (500g) – for sweetness with a fine texture
- Large eggs, 4, room temperature – important for structure and moisture
- Pure vanilla extract, 2 teaspoons – quality vanilla makes a difference
- Buttermilk, 1 ½ cups (360ml), room temperature – keeps the cake moist and tender; you can make your own by adding 1 ½ tablespoons lemon juice to milk
- For the Buttercream Frosting:
- Unsalted butter, 2 cups (452g), softened – again, quality butter is key
- Powdered sugar, 8 cups (960g), sifted – for smooth frosting
- Whole milk or heavy cream, 6-8 tablespoons (90-120ml) – adjust for desired consistency
- Pure vanilla extract, 2 teaspoons
- Gel food coloring in your school colors – I recommend brands like AmeriColor or Wilton for vibrant, stable colors
- Optional Decorations:
- Edible gold or silver sprinkles – adds a celebratory touch
- Fresh flowers (make sure they’re food-safe) or themed cake toppers
If you need gluten-free options, swapping the all-purpose flour with a 1:1 gluten-free baking flour blend works well. For dairy-free, try coconut or almond milk in place of buttermilk and use vegan butter substitutes—just be cautious with how that affects frosting consistency.
Equipment Needed
- Three sheet pans in graduated sizes (e.g., 9×13-inch, 8×12-inch, and 6×10-inch) – if you don’t have all three, you can bake in batches.
- Mixing bowls – large and medium sizes
- Electric mixer (stand or hand) – essential for smooth batter and fluffy buttercream
- Offset spatula and bench scraper – makes frosting smooth and leveling tiers easier
- Cooling racks – to cool layers evenly and fast
- Parchment paper – for lining pans and easy cake removal
- Measuring cups and spoons – precise measurements matter here
I’ve tried hand mixing, but honestly, an electric mixer saves so much time and prevents overworking the batter. For frosting, an offset spatula is a small investment that pays off big for neat edges. If you’re on a budget, silicone spatulas and plastic scrapers work fine, but the metal ones offer better control. Keeping your pans well-greased and parchment-lined helps avoid those frustrating stuck bits.
Preparation Method

- Preheat your oven to 350°F (175°C). Line each sheet pan with parchment paper and grease lightly. This step saves headaches later.
- Mix dry ingredients: In a large bowl, sift together the flour, baking powder, baking soda, and salt. Set aside.
- Cream butter and sugar: Using your mixer, beat the softened butter and granulated sugar on medium speed for about 3-4 minutes until light and fluffy. You’ll notice the texture becomes pale and airy—that’s what you want.
- Add eggs and vanilla: Beat in eggs one at a time, making sure each is fully incorporated before adding the next. Stir in vanilla extract.
- Alternate adding dry ingredients and buttermilk: Reduce mixer speed to low. Add the dry ingredients in three parts, alternating with buttermilk in two parts. Start and end with dry ingredients. Mix just until combined—overmixing can make the cake tough.
- Divide batter evenly: Pour batter into the prepared pans, smoothing the tops with a spatula. For even layers, weigh the pans with batter if you want to be super precise.
- Bake: Place the pans on the middle rack, bake for 28-35 minutes. The smallest pan will bake faster; start checking at 25 minutes. Insert a toothpick in the center—if it comes out clean or with a few crumbs, it’s done.
- Cool: Let the cakes cool in the pans for 10 minutes, then invert onto cooling racks. Peel off parchment and cool completely before frosting to avoid melting your buttercream.
- Prepare buttercream: Beat softened butter until creamy. Gradually add powdered sugar, alternating with milk and vanilla. Mix on medium-high speed for 5 minutes until fluffy. Divide frosting into bowls and tint with gel colors to match school colors.
- Assemble tiers: Place the largest cake on your serving board. Spread a thick layer of frosting evenly on top. Add the middle tier, then repeat. Finish with the smallest tier on top. Use the bench scraper and offset spatula to apply a crumb coat, chill for 20 minutes, then finish frosting smoothly.
- Decorate: Add piped accents, sprinkles, or toppers as desired. Keep the cake refrigerated if not serving immediately.
Pro tip: When layering, a quick chill between crumb coat and final frosting helps keep crumbs from mixing in. Also, don’t be shy with frosting between layers—it acts as glue! If your frosting feels too stiff, add a splash more milk; too soft, sprinkle in extra powdered sugar.
Cooking Tips & Techniques
Getting a three-tier sheet cake right can be tricky, but here’s what I’ve learned from trying (and sometimes fumbling) it:
- Measure ingredients carefully: Baking is a science. I always double-check flour by spooning into the cup and leveling off rather than scooping directly.
- Room temperature ingredients: Butter, eggs, and buttermilk all at room temp mix more evenly, preventing lumps and dense spots.
- Don’t overmix batter: Once you add flour, mix just enough to combine. Overmixing develops gluten and makes cakes chewy.
- Use gel food coloring sparingly: Too much liquid color can thin your frosting. Add color a drop at a time and mix well.
- Level cake layers: If your layers dome, slice off the top with a serrated knife for stable stacking.
- Stack carefully: Support your cake tiers with dowels or straws if you’re worried about sinking, especially for bigger cakes.
- Chill between frosting steps: It helps the buttercream firm up, making it easier to smooth.
One time, I ignored the chilling step and ended up with frosting sliding off the sides—lesson learned! Multitasking is key here; while cakes bake, whip up frosting and prep your decorating station. This way, everything flows smoothly without last-minute stress.
Variations & Adaptations
Feel like shaking things up? This three-tier graduation sheet cake recipe is flexible enough for plenty of twists:
- Flavor swaps: Replace vanilla with almond extract or add lemon zest for a citrus pop. You can also swap one layer for chocolate by mixing in cocoa powder.
- Dairy-free or vegan: Use plant-based milk and vegan butter substitutes. Aquafaba or flax eggs can replace eggs, though texture might be a bit different.
- Color themes: Instead of bold school colors, try a pastel palette for spring graduations or metallics (with edible luster dust) for extra glam. For a Halloween graduate, check out the wicked green velvet cupcakes for some spooky inspiration.
- Filling ideas: Add layers of jam, chocolate ganache, or fruit curd between tiers for surprise flavors.
Personally, I once swapped the middle tier for a rich chocolate layer and topped it with a raspberry filling—it was a hit at a friend’s graduation. Feel free to tailor it to your taste or dietary needs!
Serving & Storage Suggestions
This cake shines best served at room temperature. About 30 minutes before serving, take it out of the fridge to let the buttercream soften slightly for perfect slices. Presentation-wise, a simple platter or cake stand lets the bold colors pop.
Pair with classic party beverages like sparkling lemonade or iced tea, or even a creamy coffee—graduations call for celebration fuel! If you want to round out the meal, light finger foods or sandwiches work well alongside; you might find inspiration in the classic tuna melt on sourdough bread recipe for a savory touch.
To store, cover the cake loosely with a cake dome or plastic wrap and refrigerate. It keeps well for 3-4 days. For longer storage, you can freeze individual layers wrapped tightly in plastic wrap and foil, thawing overnight in the fridge before assembly. Reheat slices gently in the microwave for 10-15 seconds if you want that fresh-from-the-oven feel.
Flavors tend to deepen after a day or two, so sometimes I make the cake a day ahead to let everything meld beautifully.
Nutritional Information & Benefits
Each slice of this three-tier graduation cake contains approximately 450 calories, with 25 grams of fat, 60 grams of carbohydrates, and 5 grams of protein. It’s definitely a treat, perfect for celebrations rather than everyday indulgence.
The cake’s core ingredients like eggs and butter provide some protein and fat for satiety, while the buttermilk adds a touch of calcium. Using real vanilla extract and fresh ingredients means no artificial flavors or preservatives, which I always prefer for family gatherings.
If you’re watching carbs or gluten, swapping flours or trying low-sugar frosting alternatives can adjust the recipe to better fit your needs. Just keep in mind that texture and flavor may shift slightly.
Conclusion
This perfect three-tier graduation sheet cake with bold school colors is more than just a dessert—it’s a celebration in every bite. Whether you’re a first-time tier baker or someone who’s made plenty of cakes, this recipe balances simplicity with a big wow factor. The layers bring moist, tender cake; the frosting is rich but not overwhelming; and the vibrant colors make it a focal point for your party table.
I love this cake because it captures the excitement of graduation day while being doable in a home kitchen. It’s flexible and forgiving, letting you put your own spin on it. If you give it a try, I’d be thrilled to hear how it turned out or what creative twists you added! Sharing your baking stories always makes this whole food blogging adventure worthwhile.
Remember, every celebration deserves a cake that feels special but isn’t a headache to make. Here’s to your next graduation party being deliciously memorable!
Frequently Asked Questions
- Can I make this cake gluten-free? Yes! Substitute all-purpose flour with a 1:1 gluten-free baking blend. Just watch baking time, as it may vary slightly.
- How do I prevent the cake layers from drying out? Use room temperature ingredients and don’t overbake. Also, frosting layers generously helps seal in moisture.
- Can I prepare the cake a day ahead? Absolutely. Bake and frost a day before, then store in the fridge covered. Bring to room temp before serving.
- What’s the best way to get vibrant school colors? Use gel food coloring from brands like AmeriColor or Wilton, and add the color gradually to avoid over-thinning the frosting.
- Do I need special tools for decorating? While offset spatulas and bench scrapers help smooth frosting beautifully, you can use regular butter knives and spoons if needed.
Pin This Recipe!
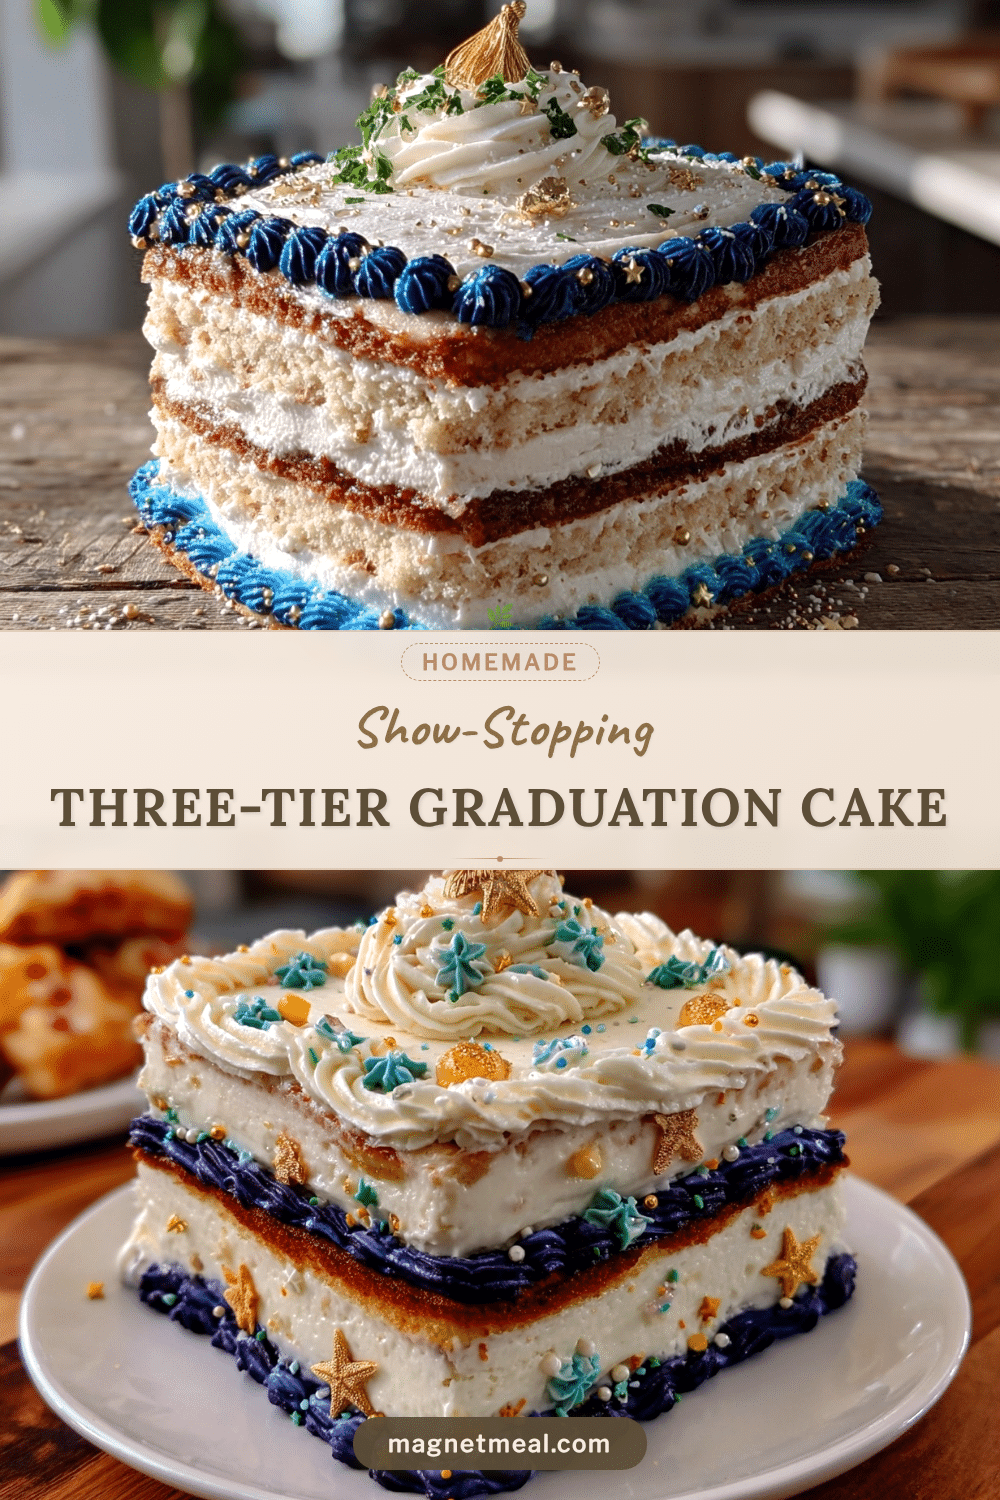
Perfect Three-Tier Graduation Sheet Cake Recipe with Bold School Colors
A moist and tender three-tier vanilla sheet cake with creamy buttercream frosting in vibrant school colors, perfect for graduation celebrations and large gatherings.
- Prep Time: 30 minutes
- Cook Time: 35 minutes
- Total Time: 1 hour 5 minutes
- Yield: 12-16 servings 1x
- Category: Dessert
- Cuisine: American
Ingredients
- 4 cups all-purpose flour (480g)
- 2 tablespoons baking powder
- 1 teaspoon baking soda
- 1 teaspoon salt
- 1 cup (2 sticks) unsalted butter, softened
- 2 ½ cups granulated sugar (500g)
- 4 large eggs, room temperature
- 2 teaspoons pure vanilla extract
- 1 ½ cups buttermilk (360ml), room temperature
- 2 cups (4 sticks) unsalted butter, softened (for frosting)
- 8 cups powdered sugar (960g), sifted
- 6–8 tablespoons whole milk or heavy cream (90-120ml)
- 2 teaspoons pure vanilla extract (for frosting)
- Gel food coloring in your school colors
- Optional decorations: edible gold or silver sprinkles, fresh food-safe flowers, themed cake toppers
Instructions
- Preheat your oven to 350°F (175°C). Line each sheet pan with parchment paper and grease lightly.
- In a large bowl, sift together the flour, baking powder, baking soda, and salt. Set aside.
- Using an electric mixer, beat the softened butter and granulated sugar on medium speed for 3-4 minutes until light and fluffy.
- Beat in eggs one at a time, ensuring each is fully incorporated before adding the next. Stir in vanilla extract.
- Reduce mixer speed to low. Add dry ingredients in three parts, alternating with buttermilk in two parts, starting and ending with dry ingredients. Mix just until combined.
- Divide batter evenly among prepared pans, smoothing tops with a spatula.
- Bake on the middle rack for 28-35 minutes, starting to check the smallest pan at 25 minutes. Insert a toothpick to check doneness.
- Cool cakes in pans for 10 minutes, then invert onto cooling racks. Remove parchment and cool completely before frosting.
- For the buttercream, beat softened butter until creamy. Gradually add powdered sugar, alternating with milk and vanilla. Mix on medium-high speed for 5 minutes until fluffy.
- Divide frosting into bowls and tint with gel food coloring to match school colors.
- Assemble tiers by placing the largest cake on a serving board, spreading a thick layer of frosting on top. Add the middle tier and repeat. Finish with the smallest tier on top.
- Apply a crumb coat using a bench scraper and offset spatula, chill for 20 minutes, then finish frosting smoothly.
- Decorate with piped accents, sprinkles, or toppers as desired. Keep refrigerated if not serving immediately.
Notes
Use room temperature ingredients for best results. Avoid overmixing batter to prevent tough cake. Add gel food coloring a drop at a time to avoid thinning frosting. Chill cake between crumb coat and final frosting for easier smoothing. Support tiers with dowels or straws if needed. Store cake covered in fridge for 3-4 days or freeze layers for longer storage.
Nutrition
- Serving Size: One slice (approxima
- Calories: 450
- Fat: 25
- Carbohydrates: 60
- Protein: 5
Keywords: graduation cake, three-tier cake, sheet cake, vanilla cake, buttercream frosting, school colors, celebration cake, easy tiered cake


