
“You’re telling me I don’t have to knead this dough at all?” That was my first skeptical thought when a friend slid this recipe across the table during a weekend brunch. Honestly, I was half-expecting the bread to be some dense, disappointing brick — you know, the kind that looks artisan but tastes like regret. But I was wrong. So very wrong.
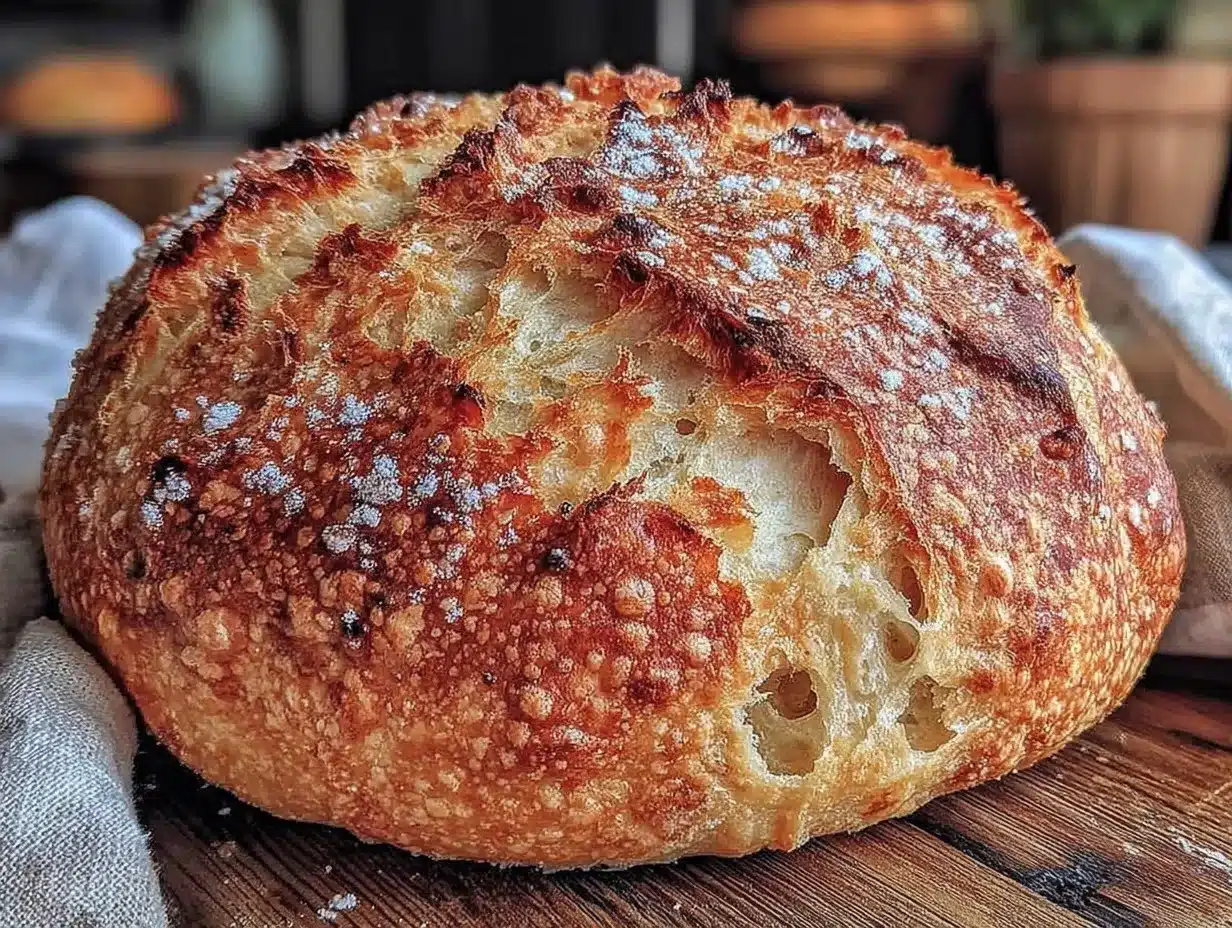
That night, with a bit of curiosity and a dash of impatience, I mixed the simple ingredients, left the dough to rest overnight, and woke up to a kitchen filled with the warm, comforting smell of freshly baked bread. The crust? Crispy and golden, just like those bakery loaves I admired but never dared try to recreate. The crumb? Soft, airy, with those perfect little pockets that make you smile with every bite.
It wasn’t just a loaf; it was a revelation. No fancy equipment, no hours of kneading, just patience and trust in the process. This easy overnight no-knead artisan bread quickly became my go-to for everything from classic tuna melts to cozy dinners where you just want something honest and simple on the table. The kind of bread that feels like a hug — crusty on the outside, tender inside, and endlessly forgiving.
What stuck with me is how this recipe fits into life’s chaos (or quiet moments) so naturally. No stress, no fuss, just a loaf that somehow makes everything taste a little better. It’s the kind of bread that’s perfect for late-night cravings or when you want to impress without the usual kitchen marathon. That’s why I keep coming back to it — a little overnight magic for perfect crust and crumb, every single time.
Why You’ll Love This Recipe
After testing this easy overnight no-knead artisan bread recipe multiple times, I can confidently say it’s a game-changer for anyone who loves good bread but hates the mess and time of traditional baking. Here’s why it’s quickly become a staple in my kitchen:
- Quick & Easy: The hands-on part takes just 10 minutes. Then, you let the dough rest overnight — perfect for busy weeknights or last-minute plans.
- Simple Ingredients: Flour, water, salt, and yeast — no fancy flours or additives needed. You probably already have everything at home.
- Perfect for Any Occasion: Whether you’re making a comforting garlic butter shrimp ramen or a hearty sandwich, this bread’s got your back.
- Crowd-Pleaser: It’s the kind of bread everyone asks about — from kids to seasoned home bakers.
- Unbelievably Delicious: The crust crackles with just the right crunch while the crumb stays soft and chewy. It’s a texture combo that feels special but isn’t complicated.
What makes this recipe stand apart is its simplicity combined with that bakery-quality finish. The slow fermentation overnight develops flavor and texture without any kneading or special tools. Honestly, it’s the easiest way to get artisan bread at home without fuss. And if you’re like me — juggling a million things and craving homemade quality — this bread feels like a little kitchen win that never gets old.
What Ingredients You Will Need
This recipe uses straightforward ingredients that come together to create bold flavor and perfect texture, no fuss required. Most are pantry staples, and you can swap a few if needed without losing that signature crust and crumb.
- All-Purpose Flour – 3 cups (375 grams). I prefer King Arthur flour for consistent texture, but any brand works.
- Instant Yeast – 1/4 teaspoon (about 1 gram). Instant yeast saves time since it doesn’t need proofing, but active dry yeast can be used (just proof it first).
- Coarse Salt – 1 1/2 teaspoons (9 grams). Sea salt adds a nice mineral touch.
- Lukewarm Water – 1 1/2 cups (360 ml). Not too hot or cold — this wakes up the yeast gently and helps with gluten development.
- Olive Oil – Optional, 1 tablespoon (15 ml) for greasing the bowl or adding a touch of richness.
Optional but helpful:
- Flour for Dusting: Use extra flour (all-purpose or bread flour) to dust your work surface and hands.
- Semolina or Cornmeal: Sprinkled on your baking vessel or parchment paper to prevent sticking and add a slight texture to the crust.
If you want a gluten-free option, swapping all-purpose flour with a gluten-free blend is possible, but expect a different crumb and texture. For dairy-free diets, this recipe is naturally free of dairy, making it super accessible.
Equipment Needed
- Large Mixing Bowl: For combining ingredients and allowing the dough to rise. I like glass or stainless steel for easy cleaning.
- Plastic Wrap or Clean Kitchen Towel: To cover the dough during the overnight rise.
- Cast Iron Dutch Oven or Heavy Oven-Safe Pot with Lid: Key for trapping steam and creating that signature crispy crust. If you don’t have one, a heavy roasting pan with a lid or inverted baking sheet can work.
- Parchment Paper: Makes transferring the dough easier and prevents sticking.
- Kitchen Scale (Optional but Recommended): For precise measurements, especially flour and water. Baking by weight really helps consistency.
Specialty tools like a bread lame or scoring knife are nice but not necessary—you can use a sharp kitchen knife or even scissors to score the dough. For budget-friendly baking, simple household items do the job just fine.
Preparation Method
- Mix the Dough (10 minutes): In your large bowl, combine 3 cups (375 g) of all-purpose flour, 1/4 teaspoon (1 g) instant yeast, and 1 1/2 teaspoons (9 g) coarse salt. Stir to distribute evenly. Slowly add 1 1/2 cups (360 ml) lukewarm water while mixing with a wooden spoon or your hand. The dough will be shaggy and sticky — that’s exactly right! No kneading required here.
- First Rise (Overnight, 12-18 hours): Cover the bowl tightly with plastic wrap or a damp towel. Leave it at room temperature overnight (or up to 18 hours). During this slow fermentation, the dough will bubble and double in size. If it looks ready earlier, that’s fine too—just don’t let it collapse.
- Preheat the Oven & Prepare Baking Vessel (30 minutes before baking): Place your Dutch oven with lid inside the oven and preheat to 450°F (230°C). This step is crucial for that perfect crust—hot vessel = instant steam.
- Shape the Dough (5 minutes): Lightly flour your work surface and gently turn out the dough. Don’t punch it down! Fold the edges into the center once or twice to form a rough ball. Use a bench scraper or spatula to help if sticky. Let it rest for 15 minutes.
- Transfer Dough to Baking Vessel: Place a piece of parchment paper over the dough ball and carefully lift it into the hot Dutch oven. Remove the lid and score the top with a sharp knife or scissors (this lets steam escape and creates that classic artisan look).
- Bake Covered (30 minutes): Cover with the lid and bake at 450°F (230°C) for 30 minutes. The trapped steam crisps the crust beautifully.
- Bake Uncovered (15-20 minutes): Remove the lid and bake for an additional 15-20 minutes until the crust is deep golden brown and crackly. Look for that irresistible crackle sound when it cools—pure magic.
- Cool Completely: Transfer the bread to a wire rack and let it cool for at least 1 hour before slicing. This step is key to avoid gummy crumb.
Pro tip: If the dough feels too sticky when shaping, lightly dust your hands and surface with flour but avoid adding too much, or it will dry out the bread. The smell of that fresh crust baking? Honestly, nothing beats it.
Cooking Tips & Techniques
Getting the perfect crust and crumb is all about patience and attention to a few details. Here are some tips I learned the hard way:
- Don’t Skip the Rest: The overnight rise is what builds flavor and texture. Shortcuts here mean dense bread.
- Use Hot Dutch Oven: A cold pot won’t create steam fast enough. Preheat for at least 30 minutes.
- Score Thoughtfully: Proper scoring prevents random cracking and helps the bread expand beautifully.
- Watch the Crust Color: Baking time varies by oven. The crust should be deep golden, not burnt.
- Cool Before Slicing: I know it’s tempting, but cutting too early leads to gummy texture inside.
Once, I tried skipping the covered baking step because I was impatient — big mistake. The crust was dry and pale, with zero crackle. Lesson learned: steam is your friend! Also, timing your prep so you can bake right after the overnight rise makes everything smoother. Multitasking by preheating the oven while shaping dough really saves time.
Variations & Adaptations
While the classic version hits all the right notes, I’ve played around with a few twists that keep this bread fresh and exciting:
- Herb & Garlic: Add 1-2 teaspoons of dried rosemary or thyme and some minced garlic to the dough for a fragrant loaf perfect alongside Mediterranean baked salmon.
- Whole Wheat: Substitute half the all-purpose flour with whole wheat for a nuttier flavor and heartier texture.
- Seeded Crust: Sprinkle sesame, poppy, or sunflower seeds on top before baking for texture and visual appeal.
- Gluten-Free Adaptation: Use a gluten-free flour blend formulated for bread. The crumb will differ but still tasty.
- Alternate Cooking Methods: If no Dutch oven, try baking on a preheated baking stone with a pan of water nearby to create steam.
One variation I keep coming back to is folding in caramelized onions before the final rise — it adds a sweet-savory surprise that pairs beautifully with sharp cheese. That personal touch made the bread a hit at a casual dinner party where I served it alongside spicy peanut noodles with chicken.
Serving & Storage Suggestions
This artisan bread shines best fresh out of the oven, still warm with a crackly crust that invites you to tear off a chunk. Serve it simply with butter, olive oil, or alongside soups and stews. It also makes an incredible base for sandwiches like the classic tuna melt on sourdough bread.
Store leftover bread wrapped loosely in a clean kitchen towel at room temperature for up to 2 days. For longer storage, slice and freeze in a sealed bag; toast or warm slices directly from frozen for best texture.
Reheating in a hot oven (350°F/175°C) for 5-10 minutes refreshes the crust nicely. Over time, the flavors mature and deepen, making this bread even more comforting the next day.
Nutritional Information & Benefits
This bread offers a wholesome, straightforward nutrition profile with approximately 150-170 calories per slice (about 1/12th of the loaf). It’s low in fat and sugar, making it a great base for balanced meals.
Key ingredients like flour provide energy-rich carbohydrates, while the slow fermentation process may improve digestibility. Using whole wheat flour boosts fiber content and adds micronutrients.
Gluten-sensitive individuals should avoid this recipe unless adapted with gluten-free flours. This bread is naturally dairy-free.
From a wellness perspective, making bread at home means controlling ingredients and avoiding preservatives, which aligns with a mindful approach to eating.
Conclusion
This easy overnight no-knead artisan bread recipe is more than just a loaf; it’s a quiet kitchen companion that fits effortlessly into busy lives. Whether you’re new to baking or just tired of complicated recipes, it offers a way to enjoy fresh, bakery-style bread without the usual drama.
Feel free to customize it with your favorite herbs, seeds, or flours to match your taste and lifestyle. For me, it’s that perfect balance of simple ingredients and thoughtful timing that keeps me coming back — especially when craving something homemade yet hassle-free.
Give it a try, and I’d love to hear how you make this recipe your own. Sharing your bread adventures always brightens my day — happy baking!
Frequently Asked Questions
Can I use active dry yeast instead of instant yeast?
Yes! If using active dry yeast, proof it first in warm water for 5-10 minutes before mixing with flour. Instant yeast can be added directly.
Do I have to use a Dutch oven?
While a Dutch oven creates the best crust by trapping steam, you can bake on a preheated baking stone or heavy pan and add a pan of water to the oven to create steam.
How long can I store this bread?
Store at room temperature wrapped in a towel for up to 2 days. For longer, slice and freeze. Toast slices straight from the freezer to refresh.
Can I make the dough rise faster?
Warmer room temperatures speed up fermentation, but the slow overnight rise develops better flavor and texture. Rushing it may result in less flavorful bread.
What’s the best way to score the dough?
Use a sharp knife or kitchen scissors to make shallow cuts on the dough’s surface before baking. This helps the bread expand evenly and looks artisanal.
Pin This Recipe!

Easy Overnight No-Knead Artisan Bread Recipe for Perfect Crust and Crumb
A simple, no-knead artisan bread recipe that requires minimal hands-on time and yields a crusty, golden loaf with a soft, airy crumb. Perfect for busy schedules and beginner bakers.
- Prep Time: 10 minutes
- Cook Time: 45-50 minutes
- Total Time: 12 hours 55 minutes to 18 hours 10 minutes
- Yield: 1 loaf (about 12 slices) 1x
- Category: Bread
- Cuisine: American
Ingredients
- 3 cups (375 grams) all-purpose flour
- 1/4 teaspoon (about 1 gram) instant yeast
- 1 1/2 teaspoons (9 grams) coarse salt
- 1 1/2 cups (360 ml) lukewarm water
- 1 tablespoon (15 ml) olive oil (optional, for greasing or richness)
- Extra flour for dusting (optional)
- Semolina or cornmeal for dusting baking vessel (optional)
Instructions
- Mix the Dough (10 minutes): In a large bowl, combine 3 cups (375 g) all-purpose flour, 1/4 teaspoon (1 g) instant yeast, and 1 1/2 teaspoons (9 g) coarse salt. Stir to distribute evenly. Slowly add 1 1/2 cups (360 ml) lukewarm water while mixing with a wooden spoon or your hand until a shaggy, sticky dough forms. No kneading required.
- First Rise (Overnight, 12-18 hours): Cover the bowl tightly with plastic wrap or a damp towel. Leave at room temperature overnight or up to 18 hours until the dough bubbles and doubles in size.
- Preheat Oven & Prepare Baking Vessel (30 minutes before baking): Place a Dutch oven with lid inside the oven and preheat to 450°F (230°C).
- Shape the Dough (5 minutes): Lightly flour your work surface and gently turn out the dough. Fold edges into the center once or twice to form a rough ball. Let rest for 15 minutes.
- Transfer Dough to Baking Vessel: Place parchment paper over the dough ball and carefully lift it into the hot Dutch oven. Score the top with a sharp knife or scissors.
- Bake Covered (30 minutes): Cover with lid and bake at 450°F (230°C) for 30 minutes.
- Bake Uncovered (15-20 minutes): Remove lid and bake an additional 15-20 minutes until crust is deep golden brown and crackly.
- Cool Completely: Transfer bread to a wire rack and cool for at least 1 hour before slicing.
Notes
Use a hot Dutch oven preheated for at least 30 minutes to create steam for a crispy crust. Do not skip the overnight rise for best flavor and texture. Cool bread completely before slicing to avoid gummy crumb. If dough is too sticky when shaping, lightly dust hands and surface with flour but avoid adding too much.
Nutrition
- Serving Size: 1 slice (1/12th of l
- Calories: 160
- Sugar: 0.1
- Sodium: 300
- Fat: 0.8
- Saturated Fat: 0.1
- Carbohydrates: 33
- Fiber: 1
- Protein: 5
Keywords: no-knead bread, artisan bread, overnight bread, easy bread recipe, homemade bread, crusty bread, simple bread


