Introduction
“Can you believe how this turned out?” my friend texted me one chilly evening after I sent her a snap of the golden, bubbling masterpiece fresh from the oven. Honestly, that crispy cheesy pull-apart garlic bread wasn’t part of any grand plan. I was just trying to whip up something quick, comforting, and, well, edible after a long day that had me too tired to fuss with a proper dinner. The smell of roasting garlic and melting cheese filling my tiny kitchen made me pause—maybe this wasn’t just a snack; maybe it was the kind of food that feels like a warm hug.
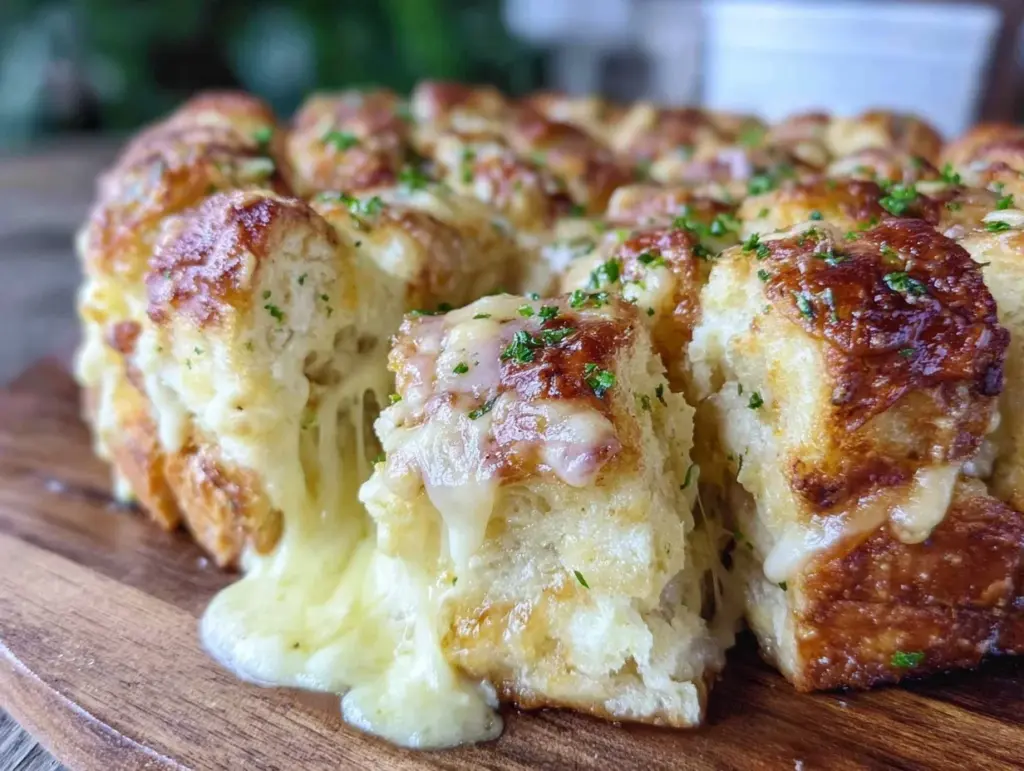
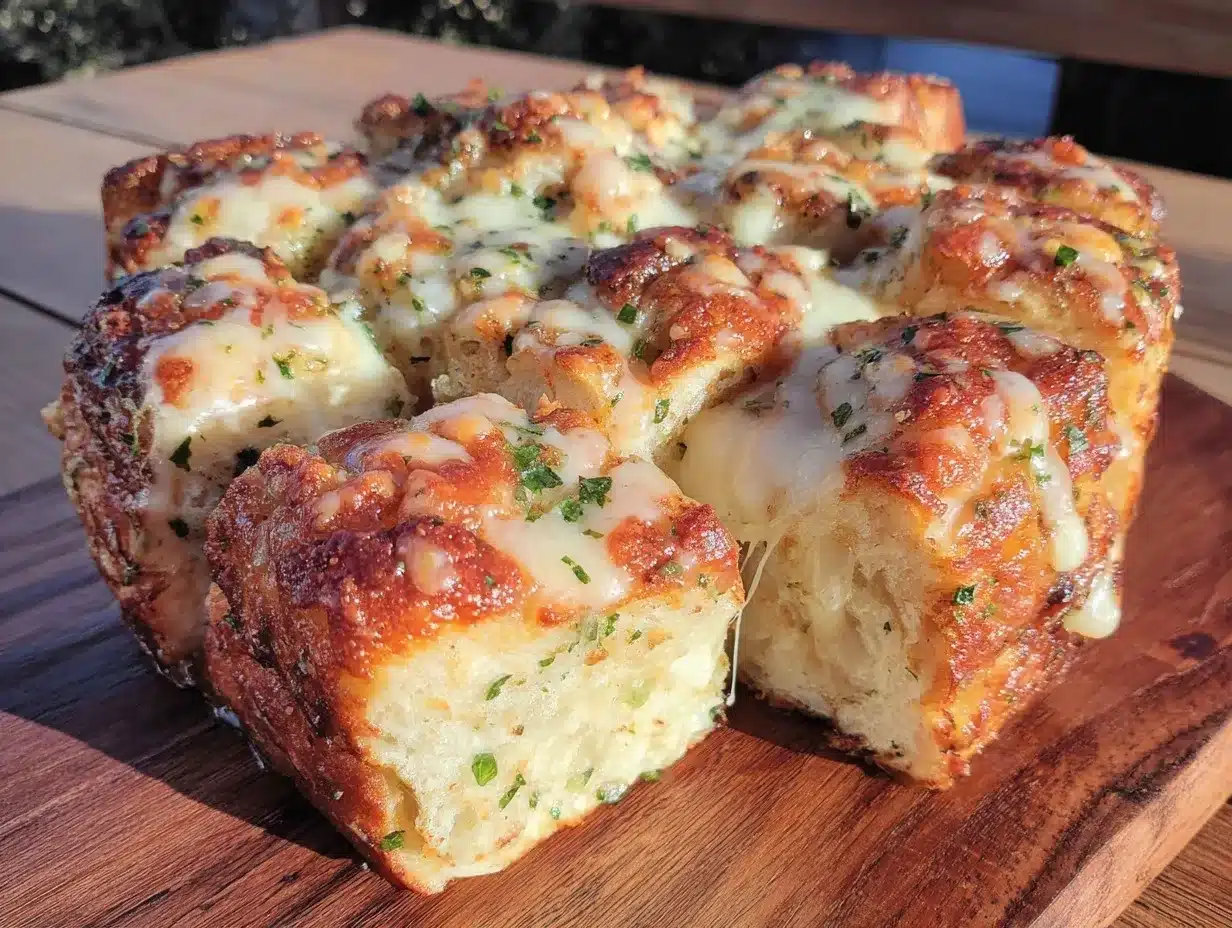
I’d tried garlic bread before, sure, but it was usually a flat, butter-slathered side dish that didn’t quite hit the spot. This recipe, though, came together with a bit of curiosity and a dash of impatience. I sliced through a loaf of crusty bread just right, stuffed it with cheese and garlic butter, and popped it in the oven. The result? Crispy, gooey, irresistible pockets of flavor that pulled apart in perfect bite-sized pieces.
It’s funny how something so simple can become a go-to. Whether I’m sharing it with friends or sneaking pieces late at night, this pull-apart garlic bread has a way of turning ordinary moments into little celebrations. It’s not about fancy ingredients or complicated steps; it’s about that familiar mix of crunchy, cheesy, and garlicky goodness that feels just right. If you’re someone who appreciates a snack that’s easy to make but rich in flavor, you might find yourself reaching for this recipe over and over — just like I do.
Why You’ll Love This Recipe
From my kitchen to yours, this crispy cheesy pull-apart garlic bread recipe has earned its spot as a crowd favorite. After testing countless variations, I can honestly say it nails comfort food vibes without demanding hours or fancy ingredients. Here’s why it stands out:
- Quick & Easy: Ready in under 30 minutes, perfect when you want a hot snack in a flash or need a last-minute addition to dinner.
- Simple Ingredients: You probably already have garlic, butter, cheese, and a good loaf of bread sitting around — no fancy grocery trips necessary.
- Perfect for Any Occasion: Whether it’s game night, a casual get-together, or just a cozy snack, this bread fits right in.
- Crowd-Pleaser: Kids, adults, picky eaters — everyone digs into this cheesy, pull-apart delight.
- Unbelievably Delicious: The crispy edges paired with gooey melty cheese and garlicky butter make you want to close your eyes and savor every bite.
What really sets this recipe apart is the technique of slicing the bread in a crisscross pattern and packing it with a blend of cheeses and garlic butter that melts perfectly inside. It’s not just another garlic bread — it’s that little twist that turns a humble loaf into an irresistible snack. Plus, it’s flexible: swap cheeses, add herbs, or even sprinkle in some chili flakes for a kick. And yes, if you’re curious about pairing it with a hearty main, it goes wonderfully alongside dishes like the butter-basted ribeye steak I shared a while back.
What Ingredients You Will Need
This recipe uses simple, wholesome ingredients to deliver bold flavor and satisfying texture without the fuss. Most are pantry staples, so it’s perfect for a quick snack or an impromptu appetizer.
- Loaf of bread: Choose a crusty pull-apart or round sourdough loaf (about 12 oz / 340 g). I like using a fresh bakery-style loaf for the best texture.
- Unsalted butter: 6 tbsp (85 g), softened — this lets the garlic and herbs infuse perfectly.
- Fresh garlic: 4 cloves, minced — fresh garlic is non-negotiable here for that punchy aroma.
- Mozzarella cheese: 1 ½ cups (150 g), shredded — melts beautifully and gives that ooey-gooey pull-apart effect.
- Parmesan cheese: ½ cup (50 g), grated — adds a sharp, nutty flavor that balances the richness.
- Fresh parsley: 2 tbsp, finely chopped — for a pop of color and fresh herbal notes.
- Italian seasoning: 1 tsp — optional but adds depth to the garlic butter.
- Salt: a pinch — to taste.
- Red pepper flakes: a pinch — only if you like a subtle heat kick.
If you want to switch things up, swapping mozzarella for cheddar or gouda works well, and you can use dairy-free butter or cheese alternatives to suit dietary needs. For a gluten-free option, grab a gluten-free loaf that holds up well when sliced.
Equipment Needed
- Baking sheet or ovenproof dish: to hold the loaf while it bakes and catch any melted cheese drips.
- Sharp bread knife: for making precise cuts without squishing the loaf.
- Mixing bowl: to combine the garlic butter and herbs.
- Measuring spoons and cups: for accuracy, especially with butter and seasonings.
- Grater: for shredding mozzarella and grating Parmesan.
If you don’t have a sharp bread knife, a serrated kitchen knife can work but take care with the cuts. For a budget-friendly option, any sturdy baking pan will do. Personally, I find that a rimmed baking sheet makes cleanup easier since this bread can get delightfully messy!
Preparation Method
- Preheat your oven to 350°F (175°C). This moderate heat lets the cheese melt evenly without burning the garlic butter.
- Prepare the garlic butter: In a bowl, mix together the softened butter, minced garlic, Italian seasoning, salt, and red pepper flakes if using. Stir in the chopped parsley last to keep its freshness.
- Slice the bread: Place the loaf on a cutting board. Using your bread knife, make vertical cuts about 1 inch (2.5 cm) apart, slicing nearly down to the bottom but not all the way through. Turn the loaf 90 degrees and make horizontal cuts the same way, creating a grid pattern of squares that still hold together at the base.
- Stuff the bread: Using a spoon or small spatula, gently spread the garlic butter mixture deep into each cut. Next, stuff shredded mozzarella and Parmesan cheese between the slices, ensuring every pocket has plenty of cheesy goodness.
- Wrap and bake: Wrap the loaf loosely in foil to keep it moist and bake for 15 minutes. Then unwrap and bake for another 10-15 minutes until the cheese is melted and the edges of the bread are crispy and golden.
- Serve warm: Let it cool for a couple of minutes, then pull apart each cheesy square and enjoy. The bread should be crispy on the outside and bursting with melty cheese and garlic on the inside.
Pro tip: If you notice the garlic butter mixture is too firm to spread, pop it in the microwave for 10 seconds to soften it up. Also, watch the bread closely during the last baking phase—every oven’s different, and you want that perfect crust without burning.
Cooking Tips & Techniques
Getting that crispy cheesy pull-apart garlic bread just right takes a few tricks I’ve picked up along the way. First, don’t rush the slicing. The cuts should be deep but not so much that the bread falls apart — think of it as creating little pockets for flavor without sacrificing structure.
Another tip: soften your butter well before mixing to make sure the garlic, herbs, and spices blend evenly. If the butter is too cold, the flavors won’t distribute properly, and you might get uneven pockets of garlic.
When baking, wrapping the bread in foil at first traps steam, melting the cheese and softening the bread inside. Removing the foil later crisps up the crust. Skipping the foil can lead to a dry, burnt exterior before the cheese melts fully.
One mistake I made early on was using pre-shredded cheese with additives that don’t melt as smoothly. Freshly shredded mozzarella and Parmesan give the best texture and flavor, melting into those nooks and crannies just right.
Lastly, multitasking in the kitchen helps: while the bread bakes, I like to prep a quick salad or set out dipping sauces like marinara or ranch. This snack pairs beautifully with fresh sides or can stand alone as a satisfying treat.
Variations & Adaptations
One of the best things about this recipe is how easy it is to tweak based on what you have or prefer. Here are a few variations I’ve tried:
- Herb-infused: Add fresh rosemary or thyme to the garlic butter for a fragrant twist.
- Spicy kick: Toss in some chopped jalapeños or sprinkle cayenne pepper into the butter mix for extra heat.
- Vegan version: Use dairy-free butter and vegan cheese shreds. I’ve found brands like Daiya melt pretty well for this.
- Cheese swap: Replace mozzarella with sharp cheddar or smoked gouda for a different flavor profile.
- Stuffed with extras: Add finely chopped cooked bacon, sun-dried tomatoes, or caramelized onions inside the cuts for an indulgent upgrade.
Also, if you want to try a different cooking method, this bread can be reheated in an air fryer for a few minutes to re-crisp the crust and melt the cheese again without drying it out.
I once made a version inspired by the classic tuna melt on sourdough bread I love, adding a bit of finely shredded cheddar and a drizzle of mustard in the pockets. It was an unexpected but tasty spin that had everyone asking for seconds.
Serving & Storage Suggestions
This crispy cheesy pull-apart garlic bread is best enjoyed warm when the cheese is still gooey and the crust is at its crunchiest. Serve it straight from the oven with a side of marinara sauce or a fresh green salad to balance the richness.
Leftovers? No worries. Store the bread in an airtight container or wrap tightly in foil and refrigerate for up to 2 days. To reheat, pop it in a preheated oven at 350°F (175°C) for about 10 minutes or use an air fryer for a few minutes to bring back that crispy crust.
Flavors actually deepen a bit when it sits overnight, though the crust softens, so reheating crisp is key. This recipe also makes a fantastic party snack that you can prepare ahead of time and warm up just before guests arrive.
If you’re looking for more cozy bread-based dishes, you might enjoy pairing it with dishes like the BBQ chicken cheddar wrap, which shares that irresistible cheesy, savory vibe.
Nutritional Information & Benefits
One serving (about 1/8 of the loaf) contains approximately:
| Calories | 320 kcal |
|---|---|
| Fat | 22 g |
| Carbohydrates | 22 g |
| Protein | 10 g |
| Sodium | 410 mg |
This recipe balances indulgence with familiar wholesome ingredients. Garlic provides antioxidants and supports immune health, while fresh parsley adds vitamin C and K. Using real butter and cheese means you get calcium and fat-soluble vitamins, though it’s definitely a treat to enjoy in moderation.
For those watching carbs or gluten, swapping the bread for a low-carb or gluten-free version can keep this snack friendly to different diets without sacrificing flavor.
Conclusion
If you want a snack that’s equal parts simple and satisfying, this crispy cheesy pull-apart garlic bread recipe is a winner. It’s flexible, forgiving, and downright delicious, making it a recipe I keep coming back to whether for weekday comfort or casual entertaining.
Make it your own by adjusting the herbs, cheeses, or spice level — it’s a blank canvas that rewards creativity. For me, it’s the kind of food that brings people together, invites conversation, and makes even the busiest evenings feel a little more special.
So go ahead, try it out, and don’t be surprised if it becomes your new favorite way to enjoy garlic bread. And hey, if you do tweak it or pair it with a main like the garlic butter shrimp ramen, drop a comment — I’d love to hear how you make it yours!
FAQs
How do I keep the bread from getting soggy?
Wrapping the bread in foil during the first part of baking traps steam and melts the cheese, but removing the foil at the end lets the crust crisp up. This two-stage baking process helps prevent sogginess.
Can I use pre-shredded cheese?
While you can, freshly shredded cheese melts better and gives a creamier texture. Pre-shredded cheese often contains anti-caking agents that can affect melting.
What type of bread works best?
A round or pull-apart loaf with a sturdy crust like sourdough is ideal. Soft sandwich bread won’t hold the cheese and butter as well.
Can I prepare this ahead of time?
Yes! Assemble the loaf with garlic butter and cheese, wrap tightly, and refrigerate for up to 24 hours. Bake just before serving.
How can I make this vegan?
Use dairy-free butter and vegan cheese alternatives that melt well, like those from Daiya or Follow Your Heart. Fresh garlic and herbs stay the same.
Pin This Recipe!
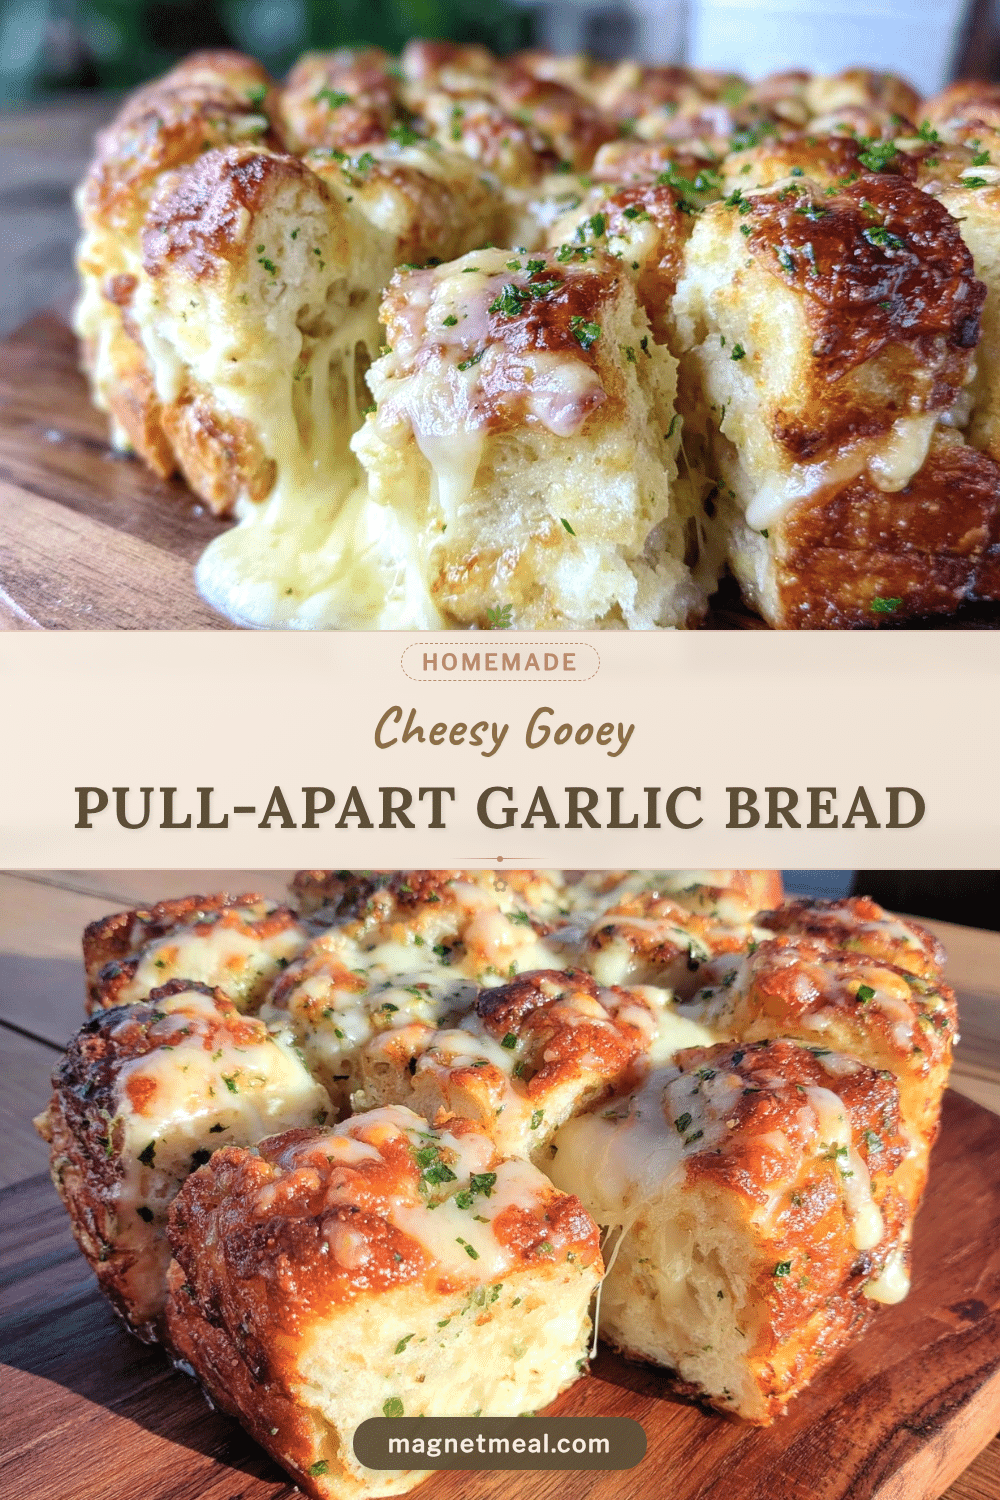
Crispy Cheesy Pull-Apart Garlic Bread
A quick and easy homemade snack featuring a crusty loaf stuffed with garlic butter and a blend of melted cheeses, baked to crispy, gooey perfection.
- Prep Time: 10 minutes
- Cook Time: 25-30 minutes
- Total Time: 35-40 minutes
- Yield: 8 servings 1x
- Category: Snack
- Cuisine: American
Ingredients
- 1 loaf crusty pull-apart or round sourdough bread (about 12 oz / 340 g)
- 6 tbsp (85 g) unsalted butter, softened
- 4 cloves fresh garlic, minced
- 1 ½ cups (150 g) shredded mozzarella cheese
- ½ cup (50 g) grated Parmesan cheese
- 2 tbsp fresh parsley, finely chopped
- 1 tsp Italian seasoning (optional)
- Pinch of salt, to taste
- Pinch of red pepper flakes (optional)
Instructions
- Preheat your oven to 350°F (175°C).
- In a mixing bowl, combine softened butter, minced garlic, Italian seasoning, salt, and red pepper flakes if using. Stir in chopped parsley last.
- Place the loaf on a cutting board. Using a sharp bread knife, make vertical cuts about 1 inch apart, slicing nearly down to the bottom but not all the way through. Turn the loaf 90 degrees and make horizontal cuts the same way, creating a grid pattern.
- Gently spread the garlic butter mixture deep into each cut. Stuff shredded mozzarella and Parmesan cheese between the slices, ensuring every pocket is filled.
- Wrap the loaf loosely in foil and bake for 15 minutes.
- Unwrap the foil and bake for another 10-15 minutes until the cheese is melted and the edges are crispy and golden.
- Let cool for a couple of minutes, then pull apart each cheesy square and serve warm.
Notes
If the garlic butter is too firm to spread, soften it in the microwave for 10 seconds. Watch the bread closely during the last baking phase to avoid burning. Freshly shredded cheese melts better than pre-shredded. Wrap the bread in foil initially to trap steam and soften the bread, then unwrap to crisp the crust.
Nutrition
- Serving Size: About 1/8 of the loa
- Calories: 320
- Sodium: 410
- Fat: 22
- Carbohydrates: 22
- Protein: 10
Keywords: garlic bread, pull-apart bread, cheesy bread, snack, appetizer, easy recipe, homemade garlic bread


