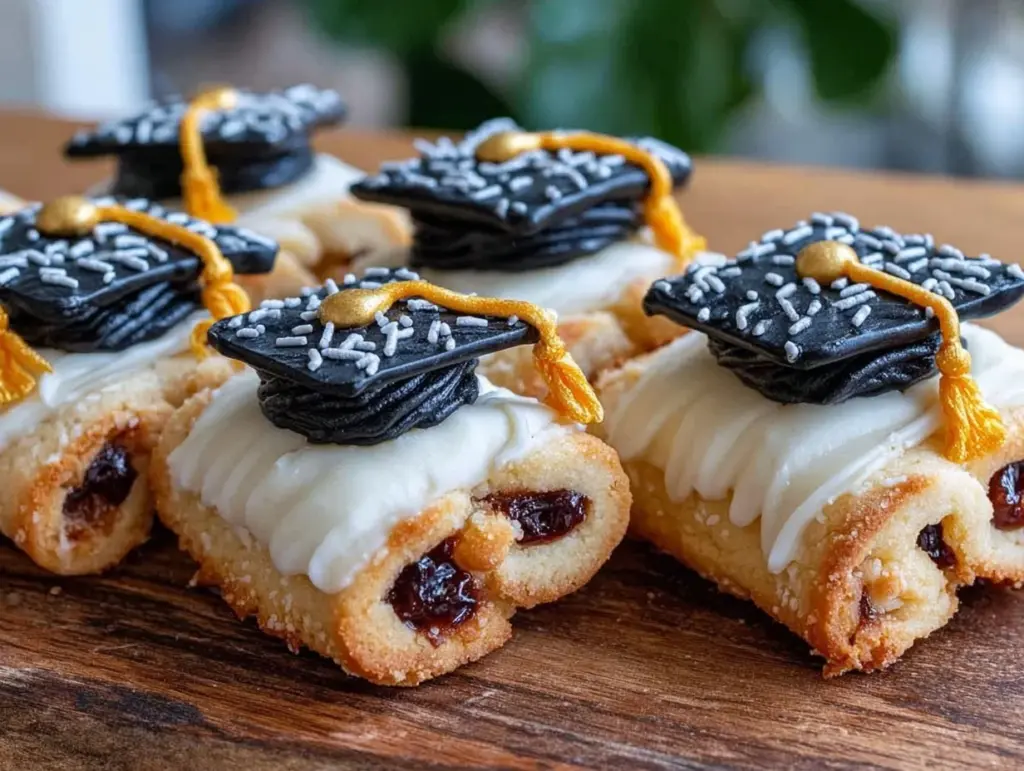
“Hey, did you see those adorable cookie diplomas at the party?” That text popped up just as I was about to dive into a mountain of paperwork, and honestly, it paused my chaos-filled afternoon. I had been juggling graduation plans for weeks, feeling overwhelmed with too many to-do lists and not enough time. But those little cookie diplomas and caps? They looked like tiny, edible celebrations—so perfect and cheerful. I was skeptical at first, thinking royal icing decorating would be a nightmare for someone like me who’s “not really a baker.” Yet, there was something about the way they brought smiles that made me decide to give it a shot.
The first batch was a bit messy—I won’t pretend otherwise—but as I kept at it (yeah, made these cookies four times that week), I discovered some neat shortcuts and tricks that turned those awkward blobs into charming little diplomas and caps. The best part? Each cookie carried a little sense of pride and accomplishment, a sweet symbol of hard work finally paying off. That quiet moment of frosting a tiny tassel made me realize why these royal icing sugar cookie diplomas and caps had stuck with me—they are more than just cookies; they’re mini celebrations you can hold in your hand.
Why You’ll Love This Recipe
After lots of trial and error in my kitchen, I can honestly say this royal icing sugar cookie diploma and cap recipe is a keeper. Here’s why it’s become a go-to for celebrations around here:
- Quick & Easy: You can whip up the cookies and decorate them in under two hours total. Perfect for last-minute graduation parties or surprise treats.
- Simple Ingredients: No need for fancy or hard-to-find products — most are pantry staples you probably have on hand.
- Perfect for Graduation Celebrations: Whether it’s a big university event or a little preschool ceremony, these cookies fit the mood and theme beautifully.
- Crowd-Pleaser: Kids, teens, and adults all love these—especially once they realize the diplomas are sugar cookies and not just decorations.
- Unbelievably Delicious: The balance of buttery cookie and smooth royal icing is just right, with a texture that’s crisp yet tender.
What makes this recipe stand out? It’s the way the royal icing is just the right consistency—not too runny, not too stiff—so you get those sharp edges and neat lettering that look professional but are totally doable for beginners. Plus, the secret to that perfectly smooth cookie base is a quick chill before baking, which I learned after a few too many misshapen cookies. Honestly, this isn’t just another sugar cookie recipe; it’s the sweet handshake between festive charm and beginner-friendly decorating.
Every time I make a batch, I find myself closing my eyes for a moment after the first bite, savoring a simple joy. It’s comfort food that carries a little celebration in every crumb, and that’s why it’s stuck around in my recipe box.
What Ingredients You Will Need
This recipe calls for straightforward, wholesome ingredients that come together to create bold flavor and that classic sugar cookie texture. Most are pantry staples, so no need for a special shopping trip.
- For the Sugar Cookies:
- All-purpose flour (2 ¾ cups / 345g) — I use Gold Medal for consistent texture
- Baking powder (1 teaspoon)
- Salt (½ teaspoon)
- Unsalted butter (1 cup / 227g), softened — room temperature for easy mixing
- Granulated sugar (1 ½ cups / 300g)
- Large eggs (2), room temperature
- Pure vanilla extract (1 teaspoon)
- For the Royal Icing:
- Powdered sugar (4 cups / 480g), sifted to avoid lumps
- Meringue powder (3 tablespoons) — I recommend Wilton brand for reliable results
- Warm water (6 tablespoons), adjust as needed for consistency
- Food coloring gels (black, white, gold) — gel colors offer vibrant hues without watering down the icing
- Decorating Extras:
- Edible gold dust or shimmer powder (optional, for caps’ tassels)
- Fine-tip piping bags and tips for detailed work
In summer months, I sometimes swap regular vanilla extract for a hint of almond or lemon to add a fresh twist. If you need a gluten-free option, almond flour can substitute about 25% of the all-purpose flour, but be warned it changes the crumb a bit. For dairy-free baking, swap butter for coconut oil or a vegan butter blend; the flavor shifts but the texture stays lovely.
Equipment Needed
Making these royal icing sugar cookie diplomas and caps doesn’t require fancy gadgets, but having the right tools helps a ton.
- Stand mixer or hand mixer — I’ve learned that a stand mixer makes creaming the butter and sugar much easier, but a sturdy hand mixer works fine too.
- Rolling pin — a smooth, solid rolling pin gives even thickness for cookies, which is key for uniform baking.
- Cookie cutters — diploma-shaped rectangle and graduation cap-shaped cutters make life simpler, but if you don’t have these, a sharp knife and a printed template are great alternatives.
- Baking sheets lined with parchment paper or silicone mats — these prevent sticking and help cookies bake evenly.
- Piping bags and fine tips (#1 or #2) — for crisp lines and delicate details, especially on the tassels and lettering.
- Small bowls for icing colors — helps keep colors separate and makes switching between them easier.
Budget-friendly tip: If you don’t want to invest in piping bags, disposable ones from the grocery store work just as well and can be snipped to size. Also, a simple plastic squeeze bottle can substitute for piping bags if you’re just starting out, although you’ll lose some precision.
Preparation Method
- Make the Cookie Dough (15 minutes): In a medium bowl, whisk together 2 ¾ cups (345g) all-purpose flour, 1 teaspoon baking powder, and ½ teaspoon salt. In your mixer bowl, cream 1 cup (227g) softened unsalted butter and 1 ½ cups (300g) granulated sugar on medium speed until light and fluffy (about 3 minutes). Add 2 room-temperature eggs one at a time, mixing well after each. Stir in 1 teaspoon vanilla extract. Gradually add the dry ingredients and mix on low until just combined. The dough should be soft but not sticky.
- Chill the Dough (30 minutes): Divide dough into two disks, wrap in plastic wrap, and chill in the fridge for at least 30 minutes. This step helps prevent spreading during baking and makes rolling easier.
- Roll and Cut the Cookies (20 minutes): Preheat oven to 350°F (175°C). On a lightly floured surface, roll out one dough disk to about ¼ inch (6mm) thickness. Use diploma and graduation cap cookie cutters to cut shapes, transferring them gently to parchment-lined baking sheets. If you don’t have cutters, use a knife and a printed template for tracing.
- Bake (10-12 minutes): Bake cookies until edges are just starting to brown, about 10-12 minutes. They’ll look slightly soft in the center but will firm up as they cool. Let cookies cool on the baking sheet for 5 minutes, then transfer to wire racks to cool completely. Cool cookies fully before decorating, or icing will melt.
- Prepare Royal Icing (10 minutes): In a clean bowl, combine 4 cups (480g) sifted powdered sugar, 3 tablespoons meringue powder, and 6 tablespoons warm water. Beat on medium speed until icing holds stiff peaks (about 7-10 minutes). Adjust consistency by adding water or powdered sugar as needed. For outlining, keep icing thick; thin with water for flooding.
- Divide and Color Icing (5 minutes): Separate icing into small bowls for colors: white for diplomas, black for caps, and a touch of gold for tassels. Use gel food coloring to avoid thinning icing. Stir gently to incorporate colors evenly.
- Pipe the Cookies (30-40 minutes): Using piping bags fitted with fine tips, outline each cookie with thick icing to create borders. Let outlines set for 10 minutes. Then flood inside areas with thinner icing for smooth coverage. Use a toothpick or scribe tool to spread icing evenly and pop air bubbles. For diplomas, pipe little lines to mimic rolled paper. For caps, add a gold tassel with shimmer powder dusted on after icing dries.
- Dry and Store (at least 2 hours): Let decorated cookies dry completely at room temperature for 2-4 hours or overnight. This drying time is crucial to prevent smudging and to get that perfect royal icing hard shell.
Pro Tip: If your icing floods too much, add a bit more powdered sugar to stiffen it. Also, working in small batches of icing helps prevent it from drying out mid-project.
Cooking Tips & Techniques
Royal icing can be intimidating, but a few lessons learned have saved me many headaches. First, patience is key—don’t rush letting outlines dry before flooding. That little wait keeps your edges sharp and prevents colors from bleeding.
One mistake I made early on was over-thinning the icing. It’s tempting to make it super runny for flooding, but too much water makes the icing take forever to dry and lose its gloss. The right flood consistency should spread slowly and settle flat within a few minutes.
When piping fine details like the tassels on the caps, I use a #1 tip and steady hands (practice helps!). If your hand isn’t steady, try resting your elbow on the table to stabilize.
Timing-wise, I usually bake cookies in one batch and decorate the next day, so I’m not rushing the drying process. If you’re pressed for time, you can use a fan or place cookies in a low oven (around 150°F / 65°C) for 15 minutes to speed drying, but watch carefully so color doesn’t fade.
Finally, don’t be afraid to mix colors for a personalized touch—maybe a school’s colors or a unique tassel shade. It’s these little details that make the cookies stand out.
Variations & Adaptations
One of the joys of this cookie tutorial is how adaptable it is to different tastes and dietary needs.
- Gluten-Free Version: Swap all-purpose flour for a gluten-free blend. Add ½ teaspoon xanthan gum if your flour blend doesn’t contain it to help cookies hold together.
- Vegan Adaptation: Use vegan butter and substitute eggs with flax eggs (1 tablespoon ground flax + 3 tablespoons water per egg). For royal icing, aquafaba (chickpea water) replaces meringue powder to create stiff peaks.
- Flavor Twists: Add a pinch of cinnamon or lemon zest to the dough for a subtle flavor boost. You can also swap vanilla extract for almond or orange extract for a new twist.
- Alternative Decorations: Instead of royal icing, try melted chocolate for outlining and filling, or use edible markers for simple, kid-friendly decorating.
- Seasonal Spins: For spring graduations, swap gold shimmer with pastel colors on tassels. For winter ceremonies, add edible snowflake sprinkles for extra flair.
I once made a batch with my nephew where we replaced the diploma scroll with a tiny edible “certificate” made from fondant—he loved the creativity, and it was a hit at his school party.
Serving & Storage Suggestions
These royal icing sugar cookie diplomas and caps are best served at room temperature. The icing has the perfect crunch-to-soft-bite ratio when not chilled. Arrange them on a festive platter alongside other graduation-themed treats for a delightful centerpiece.
They pair wonderfully with a cold lemonade, iced tea, or even a creamy coffee for the adults. For a themed party, serve alongside a colorful ombre cake or elegant cupcakes to keep the celebration sweet and coordinated.
Store the cookies in an airtight container at room temperature for up to 5 days. If you need to keep them longer, freeze decorated cookies layered between parchment paper in a sealed container for up to 3 months. When ready to enjoy, thaw at room temperature for 2 hours to avoid condensation ruining the icing.
Leftovers (if there ever are any) often taste even better the next day, as the flavors meld and the cookie softens slightly under the crisp icing.
Nutritional Information & Benefits
Estimated per cookie (based on 24 cookies): 150 calories, 7g fat, 22g carbohydrates, 1g protein.
While these sugar cookies aren’t exactly health food, the recipe uses real butter and eggs, providing a touch of protein and essential fats. Using natural vanilla extract adds flavor without artificial ingredients. For those watching sugar intake, you can experiment with sugar substitutes, but expect a shift in texture.
Allergens include gluten, eggs, and dairy. For allergen-free adaptations, refer to the variations section above.
From a wellness perspective, these cookies remind me that celebrations deserve a little indulgence—balancing nutrition with joy is part of mindful eating.
Conclusion
If you’re looking for a way to mark a graduation that’s as sweet as the accomplishment itself, these decorated royal icing sugar cookie diplomas and caps are a fantastic choice. The recipe is approachable, forgiving for beginners, and endlessly customizable for any celebratory style.
I love how these cookies bring a little sparkle to the party table and a lot of smiles to the faces around it. Plus, the act of decorating them turns into a quiet, satisfying ritual. Whether it’s your first time with royal icing or you’re revisiting a favorite craft, these cookies have a way of making the moment feel special.
Give this recipe a try, tweak it your way, and let me know how your cookies turn out—I’m always curious to hear about creative twists and decorating wins!
FAQs
Can I make the cookie dough ahead of time?
Yes! The dough can be refrigerated for up to 3 days or frozen for up to 3 months. Just thaw completely before rolling out.
How do I get royal icing to the right consistency?
Start with the basic recipe, then add water a teaspoon at a time to thin it for flooding. It should flow slowly but not be runny. For outlining, keep it thicker so it holds shape.
What if my royal icing cracks when drying?
Cracking usually happens if icing is too thick or dries too quickly. Try adding a little glycerin or shortening to your icing to keep it flexible. Avoid placing decorated cookies in direct sunlight.
Can I store decorated cookies in the fridge?
It’s best to keep decorated cookies at room temperature in an airtight container. Refrigeration can cause condensation, which may damage the icing.
What’s the best way to transport these cookies?
Layer cookies between sheets of parchment paper in a sturdy box. Keep them flat and avoid stacking too many layers to prevent smudging.
Pin This Recipe!
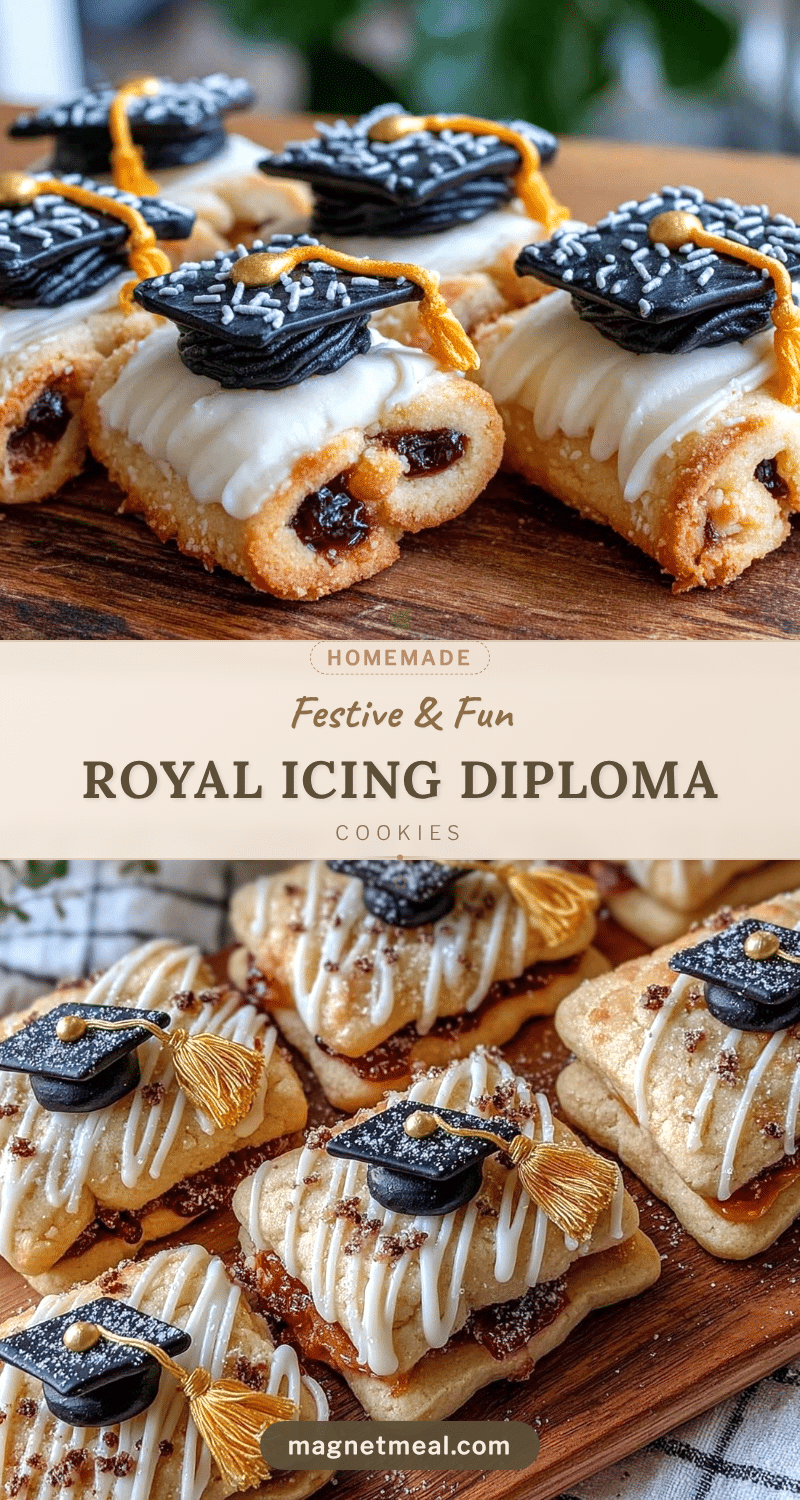
Perfect Decorated Royal Icing Sugar Cookie Diplomas and Caps

These royal icing sugar cookie diplomas and caps are easy to make and perfect for graduation celebrations, combining buttery cookies with smooth royal icing for a festive treat.
- Prep Time: 15 minutes
- Cook Time: 10-12 minutes
- Total Time: 2 hours 30 minutes
- Yield: 24 cookies 1x
- Category: Dessert
- Cuisine: American
Ingredients
- 2 ¾ cups (345g) all-purpose flour
- 1 teaspoon baking powder
- ½ teaspoon salt
- 1 cup (227g) unsalted butter, softened
- 1 ½ cups (300g) granulated sugar
- 2 large eggs, room temperature
- 1 teaspoon pure vanilla extract
- 4 cups (480g) powdered sugar, sifted
- 3 tablespoons meringue powder
- 6 tablespoons warm water, adjust as needed
- Food coloring gels (black, white, gold)
- Edible gold dust or shimmer powder (optional)
- Fine-tip piping bags and tips
Instructions
- Make the Cookie Dough (15 minutes): In a medium bowl, whisk together flour, baking powder, and salt. In a mixer bowl, cream butter and sugar on medium speed until light and fluffy (about 3 minutes). Add eggs one at a time, mixing well after each. Stir in vanilla extract. Gradually add dry ingredients and mix on low until just combined. Dough should be soft but not sticky.
- Chill the Dough (30 minutes): Divide dough into two disks, wrap in plastic wrap, and chill in the fridge for at least 30 minutes to prevent spreading and ease rolling.
- Roll and Cut the Cookies (20 minutes): Preheat oven to 350°F (175°C). Roll out one dough disk to about ¼ inch (6mm) thickness on a lightly floured surface. Use diploma and graduation cap cookie cutters or a knife and template to cut shapes. Transfer to parchment-lined baking sheets.
- Bake (10-12 minutes): Bake cookies until edges start to brown, about 10-12 minutes. Let cool on baking sheet for 5 minutes, then transfer to wire racks to cool completely before decorating.
- Prepare Royal Icing (10 minutes): Combine powdered sugar, meringue powder, and warm water in a clean bowl. Beat on medium speed until stiff peaks form (7-10 minutes). Adjust consistency with water or powdered sugar as needed.
- Divide and Color Icing (5 minutes): Separate icing into small bowls for colors: white for diplomas, black for caps, and gold for tassels. Stir in gel food coloring gently.
- Pipe the Cookies (30-40 minutes): Outline each cookie with thick icing using piping bags fitted with fine tips. Let outlines set for 10 minutes. Flood inside areas with thinner icing for smooth coverage. Use a toothpick to spread icing evenly and pop air bubbles. Pipe details like rolled paper lines on diplomas and gold tassels on caps.
- Dry and Store (at least 2 hours): Let decorated cookies dry completely at room temperature for 2-4 hours or overnight to prevent smudging and achieve a hard royal icing shell.
Notes
Chill dough before rolling to prevent spreading and achieve smooth cookie bases. Let royal icing outlines dry before flooding to keep edges sharp. Adjust icing consistency carefully to avoid cracking or smudging. Store decorated cookies at room temperature in airtight containers. For faster drying, use a low oven (150°F/65°C) for 15 minutes but watch for color fading.
Nutrition
- Serving Size: 1 cookie
- Calories: 150
- Fat: 7
- Carbohydrates: 22
- Protein: 1
Keywords: royal icing, sugar cookies, graduation cookies, decorated cookies, cookie diplomas, cookie caps, easy cookie recipe, beginner baking


