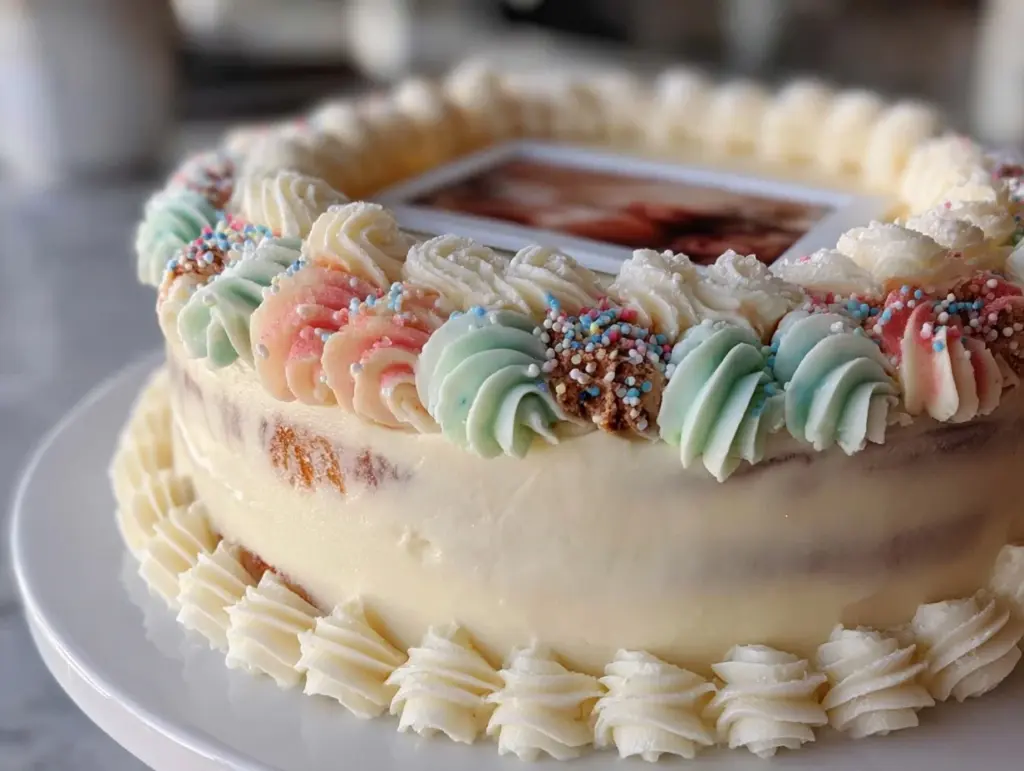
“Wait, you actually made the cake yourself?” my cousin asked as she eyed the simple yet elegant one-tier graduation cake sitting proudly on the kitchen counter. Honestly, I was half-surprised myself. I had been juggling a mountain of last-minute details for the graduation party and hadn’t planned on baking anything fancy. But somehow, between a hectic workday and frantic calls to caterers who were booked solid, I decided to try my hand at creating an easy elegant one-tier graduation cake with a personalized photo frame. Well, that decision turned into this little masterpiece that not only saved the day but also stole the spotlight.
What started as a rushed experiment ended up being a sweet celebration centerpiece featuring a crisp edible photo frame showcasing the graduate’s proudest moments. There’s something quietly satisfying about making a cake that looks so polished without a bakery price tag or stress. Plus, the personalized touch made the whole thing feel more meaningful — like the cake was telling a story, not just filling a table.
Looking back, I realize this cake stuck with me because it proves you don’t need to be a professional baker or spend hours to make something special. It’s approachable, adaptable, and honestly, a bit of a confidence booster for anyone who’s ever thought, “Can I really pull this off?” So, if you’re looking for a recipe that’s both easy on the hands and elegant enough to impress, this graduation cake might just become your go-to for celebrations that deserve a personal touch.
Why You’ll Love This Recipe
After testing this easy elegant one-tier graduation cake recipe several times (yes, I baked it more than a handful of times in one week), I can say it’s a keeper for these reasons:
- Quick & Easy: The entire process takes under 2 hours from start to finish, making it perfect for those last-minute party plans or when you’re tight on time after a busy day.
- Simple Ingredients: No hunting for obscure baking supplies here — just classic pantry staples like all-purpose flour, butter, eggs, and sugar. I usually shop for organic eggs and recommend a trusted brand of vanilla extract like Nielsen-Massey for the best flavor.
- Perfect for Graduation Celebrations: The personalized photo frame adds a unique, heartfelt touch that guests love, making it ideal for honoring the graduate’s achievements.
- Crowd-Pleaser: The cake combines moist vanilla layers with a smooth buttercream that’s universally enjoyed — it’s never too sweet or heavy.
- Unbelievably Delicious: The texture is soft but sturdy enough to hold the photo frame decoration without sagging or crumbling.
This isn’t just another vanilla cake recipe; the secret lies in the gentle crumb and the customized edible photo frame that adds personality and charm. What really sets it apart is the balance between elegance and simplicity — you get a stunning cake that doesn’t require hours of piping or complicated decorations. It’s the kind of dessert that invites you to pause, smile, and savor a moment of celebration, making every bite feel special.
What Ingredients You Will Need
This easy elegant one-tier graduation cake uses straightforward, wholesome ingredients to deliver a tender crumb and a creamy, smooth finish. Most of these are likely already in your pantry or fridge, making it a no-fuss project.
- For the Cake Batter:
- All-purpose flour – 2 ½ cups (320g), sifted for lightness
- Baking powder – 2 ½ teaspoons (10g), to give that perfect rise
- Salt – ½ teaspoon (3g), to balance flavors
- Unsalted butter – 1 cup (226g), softened (I prefer Plugrá for its creamy texture)
- Granulated sugar – 1 ¾ cups (350g), for just the right sweetness
- Large eggs – 4, at room temperature for smooth mixing
- Whole milk – 1 cup (240ml), warmed slightly to blend well
- Pure vanilla extract – 2 teaspoons (10ml), using a quality brand like Nielsen-Massey makes a difference
- For the Buttercream Frosting:
- Unsalted butter – 1 cup (226g), softened
- Powdered sugar – 4 cups (480g), sifted to avoid lumps
- Vanilla extract – 1 teaspoon (5ml)
- Heavy cream – 2-3 tablespoons (30-45ml), to achieve the right spreadable consistency
- Pinch of salt – optional, to cut sweetness slightly
- For the Personalized Photo Frame Decoration:
- Edible photo print – custom-ordered or printed with edible ink on wafer paper
- Fondant – white or colored, about 200g, to craft the frame
- Edible glue or water – to stick fondant pieces together
- Edible gold or silver dust – optional, to add subtle shimmer
For those who want a gluten-free option, swapping the all-purpose flour for a high-quality gluten-free blend like Bob’s Red Mill works well. If you prefer a dairy-free version, substitute milk with almond or oat milk, and use dairy-free butter alternatives like Earth Balance.
Equipment Needed
- 8-inch (20cm) round cake pan – a non-stick metal pan works best for even baking
- Mixing bowls – medium and large sizes for batter and frosting
- Electric mixer – a stand or hand mixer makes creaming butter and sugar much easier
- Spatula and whisk – for folding and smoothing
- Cooling rack – to let the cake cool completely without sogginess
- Offset spatula – essential for smooth frosting application
- Rolling pin – to roll out fondant for the photo frame
- Small paintbrush – for applying edible glue or water to fondant pieces
- Sharp knife or fondant cutter – for precise shaping
If you don’t have a fancy cake turntable, no worries! I’ve managed just fine using a lazy Susan or carefully rotating the cake with your hands while frosting. For fondant work, a clean, flat surface dusted lightly with cornstarch helps prevent sticking. Maintaining your mixer by cleaning the beaters promptly prevents hardened sugar from gumming up the works.
Preparation Method
- Preheat and Prep: Heat your oven to 350°F (175°C). Grease the 8-inch cake pan with butter and lightly dust with flour or line it with parchment paper. This helps the cake release easily later (about 10 minutes).
- Mix Dry Ingredients: In a medium bowl, sift together the flour, baking powder, and salt. This ensures even distribution and a lighter cake crumb (5 minutes).
- Cream Butter and Sugar: Using your mixer on medium speed, beat the softened butter and granulated sugar until pale and fluffy—this usually takes 3-5 minutes. Don’t rush this step; it’s what gives the cake its tender texture.
- Add Eggs: Crack in the eggs one at a time, beating well after each addition. If the mix looks like it might curdle, add a tablespoon of flour to bring it back together (2-3 minutes).
- Incorporate Dry Ingredients and Milk: Alternately add the flour mixture and warm milk to the batter, starting and ending with flour. Mix each addition on low speed just until combined to avoid overmixing, which can toughen the cake (4-5 minutes).
- Stir in Vanilla: Add the vanilla extract and fold in gently with a spatula (1 minute).
- Bake: Pour the batter into the prepared pan, smooth the surface with a spatula, and bake for 35-40 minutes. The cake is done when a toothpick inserted in the center comes out clean and the top springs back lightly when touched.
- Cool: Let the cake sit in the pan for 10 minutes, then turn it onto a cooling rack to cool completely. Cake that’s too warm will melt your frosting, so patience here pays off (about 1 hour).
- Prepare Buttercream: Beat the softened butter until creamy, then gradually add powdered sugar. Add vanilla, salt, and heavy cream tablespoon by tablespoon until you get a spreadable consistency. Taste and adjust sweetness or creaminess as you like (10 minutes).
- Frost the Cake: Level the cake top if needed, then apply a thin crumb coat of buttercream. Chill the cake in the fridge for 20 minutes to set the crumb coat. After chilling, apply a smooth final layer of frosting using your offset spatula (15-20 minutes).
- Create the Photo Frame: Roll out fondant to about ⅛-inch (3mm) thickness. Cut strips to frame the edible photo print sized exactly to your cake’s top. Attach the fondant frame gently with edible glue or water. Add details or shimmer with edible gold dust if you like (20-30 minutes).
- Assemble: Position the edible photo in the center of the cake top and gently press the fondant frame around it. Chill the cake again if desired before serving.
If you notice the cake edges browning too quickly, tent with foil halfway through baking. For a smoother frosting finish, dip your spatula in hot water and wipe it dry before smoothing the buttercream. This little trick helps with that sleek, professional look.
Cooking Tips & Techniques
Honestly, frosting a cake can feel intimidating, but a few tricks make it way easier. First, always let your cake cool completely—that’s the number one reason frosting melts or slides off. I’ve learned this the hard way more than once!
When creaming butter and sugar, don’t skimp on the time. The fluffier the mixture, the lighter the cake crumb. And beating eggs in one at a time helps avoid curdling.
For the buttercream, adding cream gradually helps you control thickness without making it runny. If it gets too soft, pop it in the fridge for a few minutes and then whip again.
Working with fondant can be tricky if you’re new to it. Keep your hands and workspace lightly dusted with cornstarch or powdered sugar to prevent sticking. If the fondant cracks, knead it a bit to warm it up before rolling.
Lastly, don’t rush the crumb coat! It traps loose crumbs and gives a smooth base for your final layer. Chill between coats for best results. This cake is simple but these small details really bring it to life.
Variations & Adaptations
This easy elegant one-tier graduation cake is flexible enough to suit many tastes and needs.
- Flavor Twists: Swap vanilla extract for almond or lemon zest to add a fresh note. I once made a lemon version for a spring graduation, and the bright flavor paired wonderfully with the creamy frosting.
- Dietary Adjustments: Use gluten-free flour blends for those avoiding gluten, or replace butter and milk with plant-based alternatives for a vegan-friendly cake. Just remember to check your edible paper and photo ink are vegan-safe if you go that route.
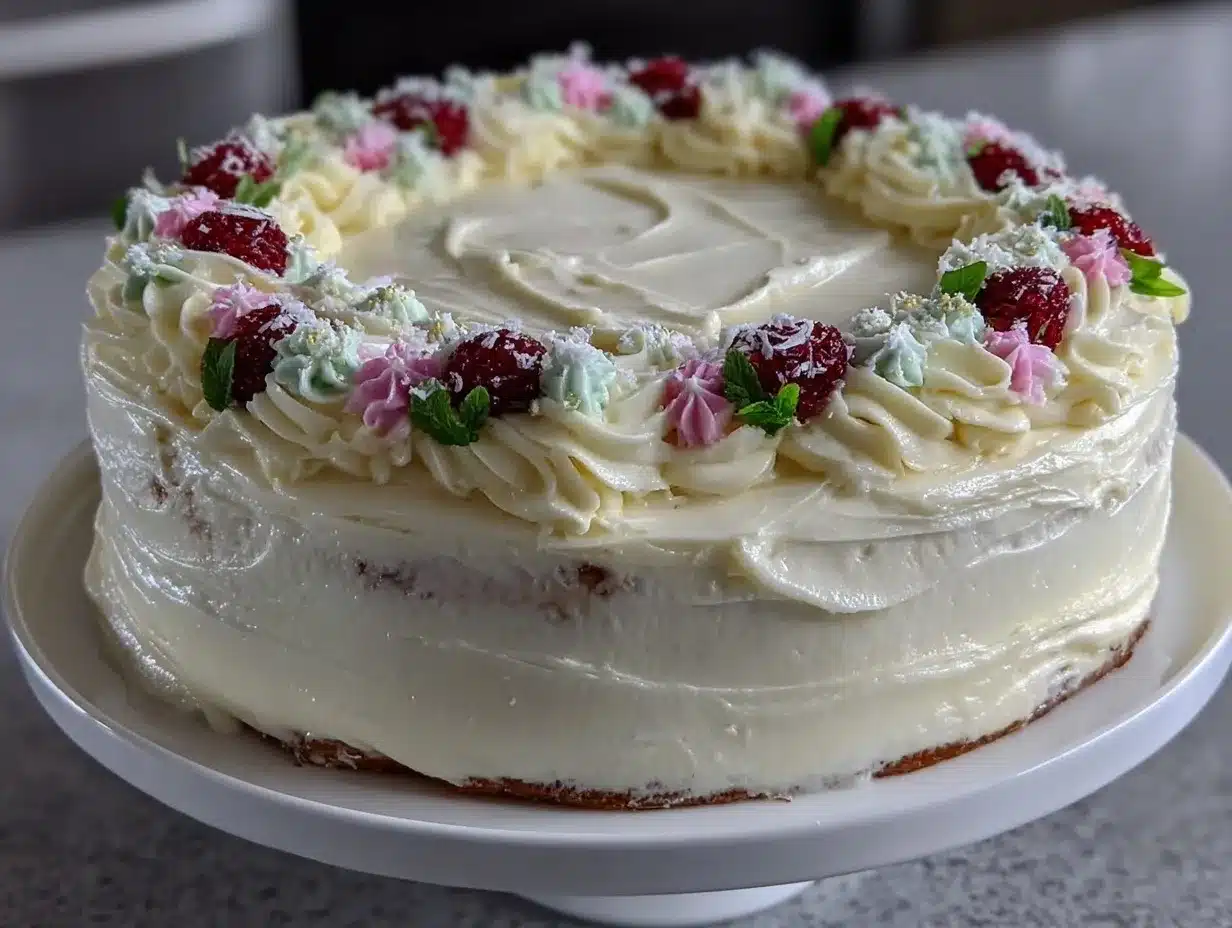
- Decorating Styles: Instead of the fondant photo frame, try piped buttercream borders or edible flowers for a more natural look. For a bolder statement, a touch of colored fondant or shimmer dust can match school colors perfectly.
- Cooking Methods: If you don’t have an oven, a microwave mug cake version of the batter works for a quick personal treat, though it won’t be suitable for the photo frame decoration.
One personal favorite variation is adding a layer of fresh berries or lemon curd between the cake layers for an extra surprise. It brings a wonderful contrast to the smooth vanilla base. If you want to see more creative cakes with elegant finishes, check out this stunning pink and green ombre birthday cake or the emerald green defying gravity layer cake for inspiration on balancing simplicity with wow factor.
Serving & Storage Suggestions
This graduation cake is best served at room temperature to let the buttercream soften slightly and flavors shine through. I like slicing it into modest wedges so everyone can enjoy a taste without feeling overwhelmed.
Pair it with a light, bubbly beverage or even a fresh brewed coffee to complement the creamy texture. For a full celebration spread, a fresh fruit platter or simple finger sandwiches balance the richness nicely.
To store, cover the cake loosely with plastic wrap or place in a cake carrier and keep it refrigerated for up to 3 days. Bringing the cake to room temperature before serving ensures the frosting is soft and luscious again. If you need to freeze, wrap the entire cake tightly in plastic wrap and aluminum foil, then thaw overnight in the fridge.
Flavors tend to meld and improve after a day, so if you can, make the cake a day ahead for a subtle depth of flavor. Just be mindful the edible photo frame is best fresh and kept cool.
Nutritional Information & Benefits
This vanilla butter cake with buttercream frosting is an indulgent treat, offering approximately 350 calories per 3-inch slice, with about 18 grams of fat and 40 grams of carbs. While not a health food, it uses real butter and eggs, providing vitamin A and protein.
Vanilla extract contains antioxidants, and homemade versions avoid preservatives common in store-bought cakes. Using organic eggs and quality dairy can slightly boost nutritional value. For those mindful of allergens, this recipe contains gluten, dairy, and eggs, so substitutions are necessary for sensitivities.
Enjoying this cake as a celebratory treat fits well within a balanced lifestyle. I find that sharing a slice with friends at milestones adds a little sweetness to the moment—not just on the palate but in memory too.
Conclusion
This easy elegant one-tier graduation cake with a personalized photo frame is proof that simple ingredients and a little creativity can create something truly memorable. It’s approachable for home bakers who want a polished, heartfelt dessert without fuss.
Feel free to customize the decoration, flavors, or dietary options to suit your graduate’s personality and your kitchen’s pantry. I keep coming back to this recipe because it’s reliable, beautiful, and carries a personal touch that no store-bought cake can match.
Give it a try, and I’d love to hear how your cake turned out or what special twists you added — sharing those moments makes the whole process even sweeter.
FAQs
Can I make this cake ahead of time?
Yes! You can bake and frost the cake a day in advance. Just store it in the fridge and bring it to room temperature before serving.
How do I get an edible photo for the cake?
Edible photos can be ordered from bakeries or specialty baking stores. Some home bakers use edible ink printers on wafer paper, but professional printing ensures the best quality.
What if I don’t have fondant for the photo frame?
You can pipe a decorative border with buttercream or use pre-made edible decorations to frame the photo instead.
Can I use this recipe to make a layered cake?
Absolutely! This batter works well for multiple layers if you double the ingredients and bake in smaller pans.
How do I prevent the cake from drying out?
Make sure to measure ingredients accurately and avoid overbaking. Wrapping leftover cake tightly and refrigerating helps retain moisture.
Pin This Recipe!
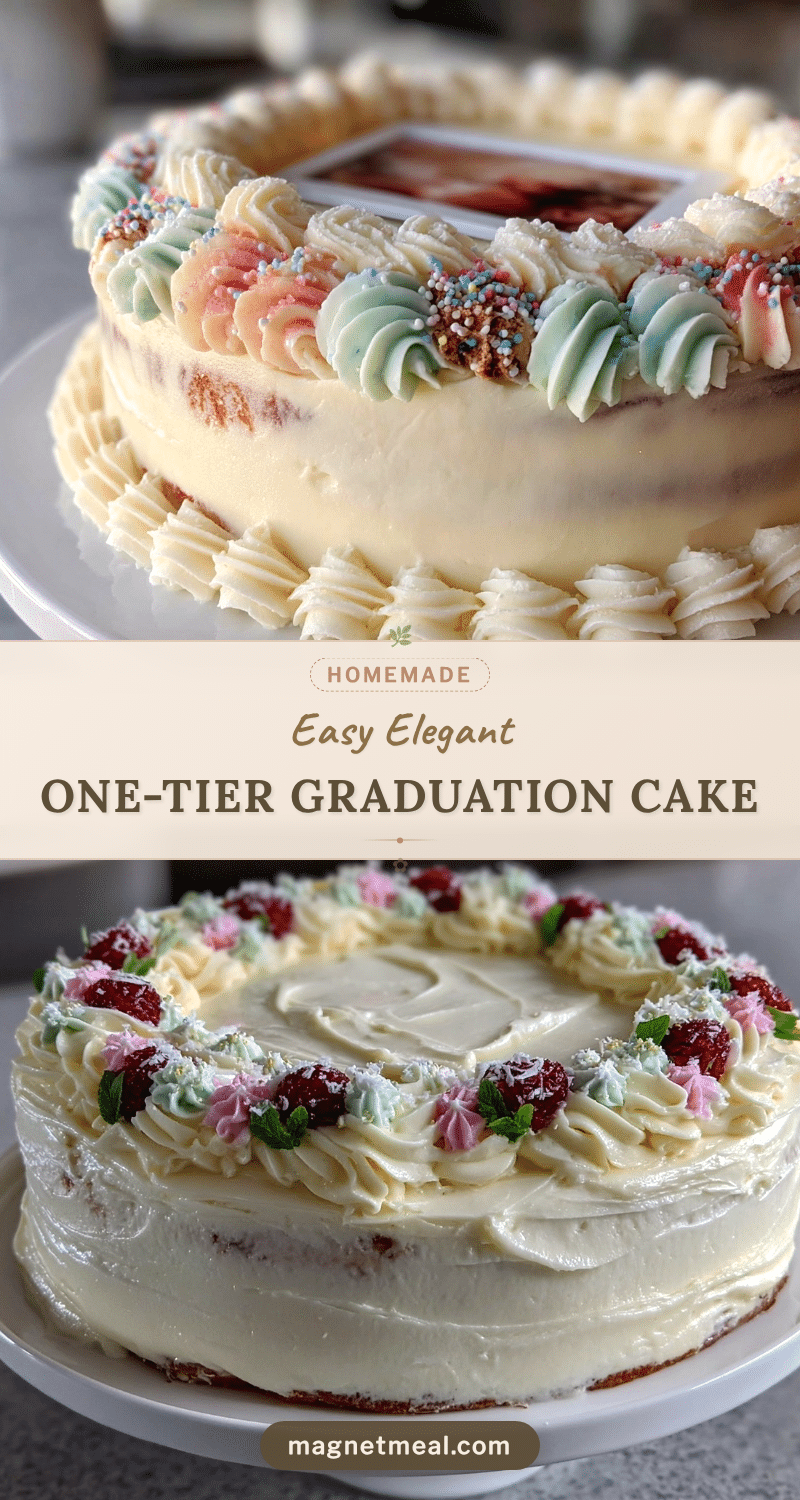
Easy Elegant One-Tier Graduation Cake Recipe with Personalized Photo Frame Tutorial
An easy and elegant one-tier vanilla cake with smooth buttercream frosting and a personalized edible photo frame decoration, perfect for graduation celebrations.
- Prep Time: 30 minutes
- Cook Time: 40 minutes
- Total Time: 1 hour 40 minutes
- Yield: 12 servings
- Category: Dessert
- Cuisine: American
Ingredients
- All-purpose flour – 2 ½ cups (320g), sifted
- Baking powder – 2 ½ teaspoons (10g)
- Salt – ½ teaspoon (3g)
- Unsalted butter – 1 cup (226g), softened
- Granulated sugar – 1 ¾ cups (350g)
- Large eggs – 4, at room temperature
- Whole milk – 1 cup (240ml), warmed slightly
- Pure vanilla extract – 2 teaspoons (10ml)
- For Buttercream Frosting:
- Unsalted butter – 1 cup (226g), softened
- Powdered sugar – 4 cups (480g), sifted
- Vanilla extract – 1 teaspoon (5ml)
- Heavy cream – 2-3 tablespoons (30-45ml)
- Pinch of salt – optional
- For Personalized Photo Frame Decoration:
- Edible photo print – custom-ordered or printed with edible ink on wafer paper
- Fondant – white or colored, about 200g
- Edible glue or water
- Edible gold or silver dust – optional
Instructions
- Preheat oven to 350°F (175°C). Grease an 8-inch round cake pan and dust with flour or line with parchment paper.
- In a medium bowl, sift together flour, baking powder, and salt.
- Using a mixer on medium speed, beat softened butter and granulated sugar until pale and fluffy (3-5 minutes).
- Add eggs one at a time, beating well after each addition. If mixture curdles, add a tablespoon of flour to bring it back together.
- Alternately add flour mixture and warm milk to the batter, starting and ending with flour. Mix on low speed just until combined.
- Fold in vanilla extract gently with a spatula.
- Pour batter into prepared pan, smooth surface, and bake for 35-40 minutes until a toothpick comes out clean and top springs back.
- Let cake sit in pan for 10 minutes, then turn onto a cooling rack to cool completely (about 1 hour).
- Prepare buttercream by beating softened butter until creamy, gradually adding powdered sugar, vanilla, salt, and heavy cream until spreadable consistency is reached.
- Level cake top if needed, apply a thin crumb coat of buttercream, and chill in fridge for 20 minutes.
- Apply a smooth final layer of frosting using an offset spatula.
- Roll out fondant to about 1/8-inch thickness. Cut strips to frame the edible photo print sized to cake top.
- Attach fondant frame gently with edible glue or water. Add edible gold dust if desired.
- Position edible photo in center of cake top and press fondant frame around it. Chill cake again if desired before serving.
Notes
If cake edges brown too quickly, tent with foil halfway through baking. Dip spatula in hot water and dry before smoothing frosting for a professional finish. Keep hands and surface dusted with cornstarch or powdered sugar when working with fondant to prevent sticking. Chill between crumb coat and final frosting layer for best results.
Nutrition
- Serving Size: One 3-inch slice
- Calories: 350
- Fat: 18
- Carbohydrates: 40
Keywords: graduation cake, vanilla cake, buttercream frosting, edible photo frame, easy cake recipe, celebration cake, personalized cake


