
“Are you sure that’s supposed to look like a spider web?” my niece asked with a smirk as I nervously dragged the toothpick through the melted white chocolate. Honestly, I wasn’t expecting to nail the “Perfect Spider Web Chocolate Bark” the first time around. I was just winging it — trying to whip up a spooky treat for a last-minute Halloween party. The kitchen smelled like a mix of rich cocoa and something sweetly burnt (yep, that was me getting a bit too ambitious with the tempering), and I was halfway convinced this would end up as a chocolate disaster.
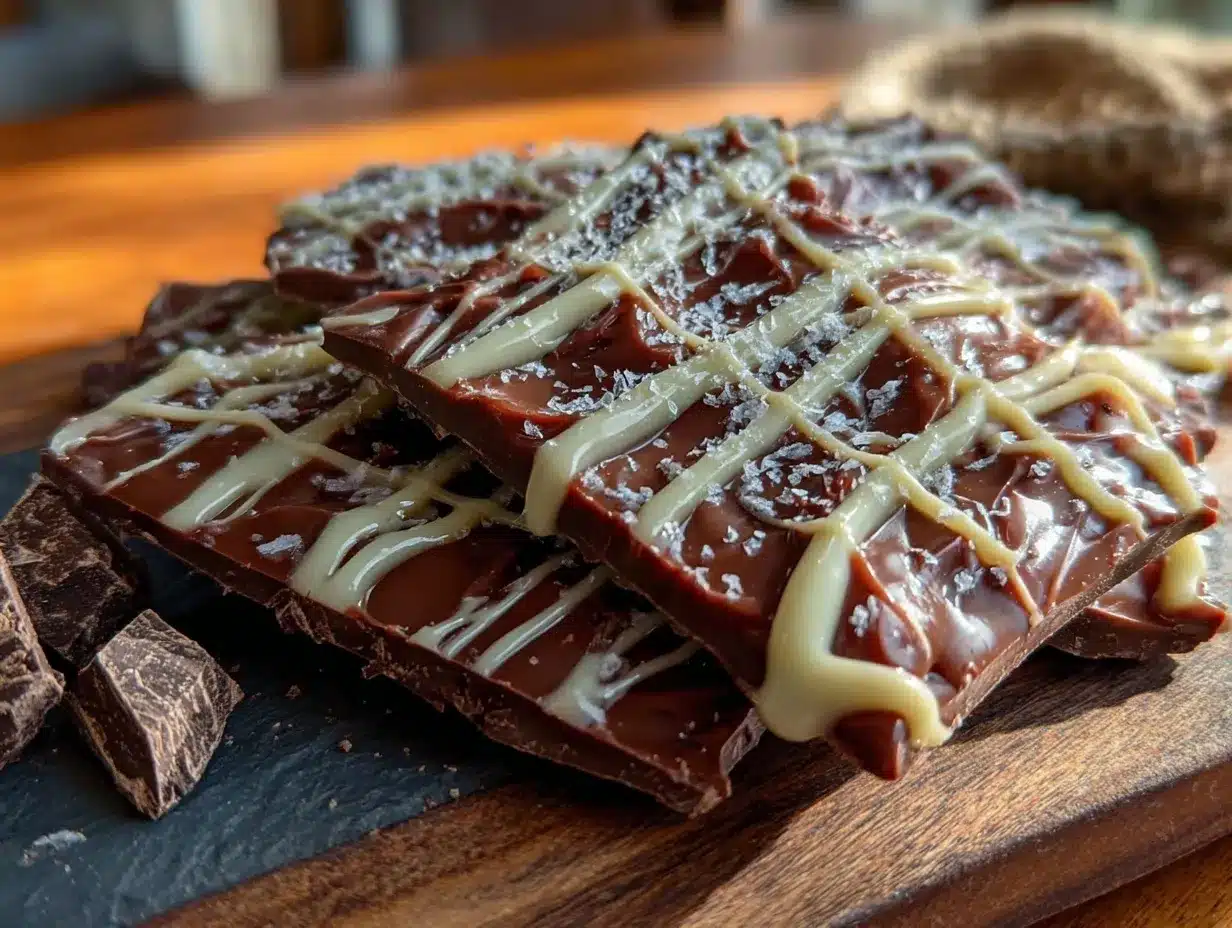
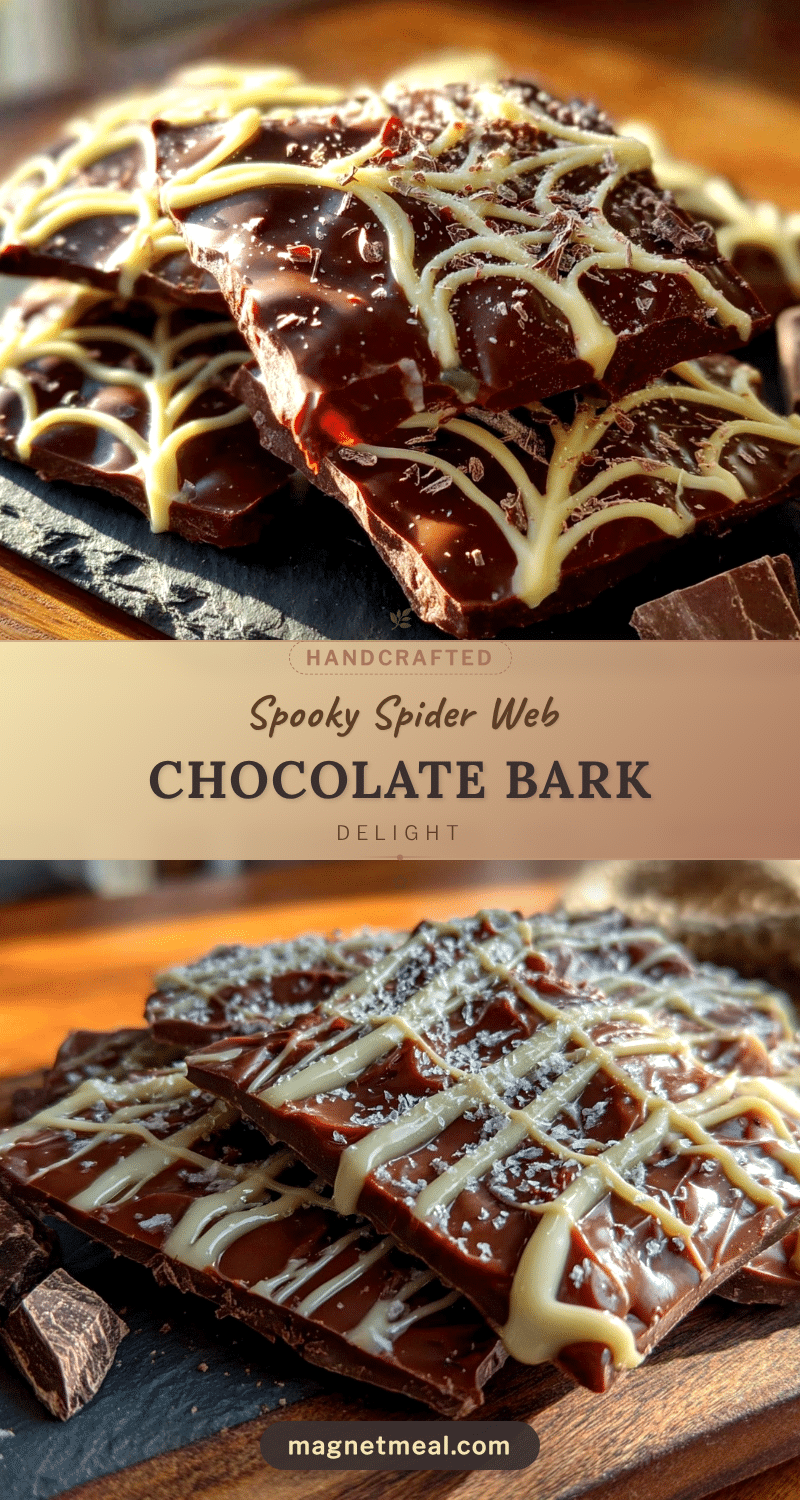
But then, as the chocolate bark cooled, the delicate spider web patterns took shape, and I realized this wasn’t just a Halloween snack — it was a conversation starter. The glossy dark chocolate base with the contrasting white swirl looked almost too good to eat, and the kids were already hovering, fingers twitching. That night, I found myself making this bark again, and again, perfecting the design and tweaking the balance of flavors. Turns out, this recipe wasn’t just a quick fix; it became my go-to for spooky season treats.
There’s something cozy about the quiet moments in the kitchen, crafting a dessert that’s part art, part chocolate magic, and completely fun. This spider web chocolate bark stuck with me because it’s easy enough for a solo late-night cook like me but impressive enough to bring a little festive flair to any Halloween gathering. No fuss, just sweet, slightly messy, and totally addictive—the kind of recipe that makes you smile quietly as you sneak a piece (or two) before the party even starts.
Why You’ll Love This Recipe
After testing this Perfect Spider Web Chocolate Bark recipe multiple times (and trust me, I’ve learned a thing or two), I can say this treat brings both fun and flavor to your Halloween spread. Here’s why it’s a winner:
- Quick & Easy: You can have this ready in under 30 minutes, perfect for those last-minute Halloween plans or craving a quick festive dessert.
- Simple Ingredients: No need for fancy chocolates or rare toppings—just quality dark and white chocolate, and a few extras you probably already have.
- Perfect for Halloween Parties: The spider web design adds a spooky, charming touch that’s ideal for kids, adults, or anyone who loves a little holiday fun on their plate.
- Crowd-Pleaser: The mix of smooth dark chocolate and creamy white chocolate creates a flavor combo that’s universally loved — even the pickiest eaters ask for seconds.
- Unbelievably Delicious: The rich, bittersweet base paired with the sweet swirls offers a texture and taste that’s both comforting and decadent.
What really sets this recipe apart is the technique for creating that spider web effect without any fancy tools. I personally like using a toothpick or a skewer to pull the white chocolate across the dark base, which gives you full control over the design — no cookie-cutter shapes here. Plus, the balance of chocolate types means it’s not overly sweet, which is a relief when you want a treat but don’t want to feel like you’ve gone overboard.
This bark isn’t just candy; it’s a little piece of Halloween charm that’s easy to make, fun to share, and just the right kind of spooky. It’s been a quiet favorite at gatherings, often sparking compliments and requests for the recipe—something I never expected from a dessert born out of a last-minute idea.
What Ingredients You Will Need
This recipe uses simple, wholesome ingredients to deliver bold flavor and satisfying texture without the fuss. Most of these are pantry staples, so you can get started without hunting for anything exotic.
- Dark chocolate (8 oz / 225 g): Choose a good-quality bar or chips with at least 60% cocoa for a deep, rich flavor (I recommend Ghirardelli or Lindt for the best smoothness).
- White chocolate (4 oz / 115 g): Use good melting white chocolate wafers or bars; avoid candy melts as they can be too sweet and waxy.
- Butter (1 tbsp / 15 g, optional): Adds silkiness to the melted chocolate if you want a smoother texture.
- Sea salt flakes (a pinch): To sprinkle on top for a contrast that brightens the chocolate’s flavor.
- Optional toppings: Small Halloween-themed sprinkles, chopped nuts, or edible glitter for extra flair.
You can swap dark chocolate for milk chocolate if you prefer something sweeter, or use vegan chocolate options to keep this treat dairy-free. If you’re feeling adventurous, add a drop of peppermint extract to the white chocolate for a subtle festive twist.
For the best results, avoid chocolate chips that aren’t meant for melting since they can seize or become grainy. I usually keep a stash of quality baking bars on hand, which come in handy not just for this bark but also for recipes like the Pink Velvet Cheesecake Swirl Brownies I’ve shared before—both recipes rely on smooth, meltable chocolate.
Equipment Needed
- Baking sheet or tray: A rimmed baking sheet lined with parchment or a silicone mat works best for easy removal.
- Microwave-safe bowls or double boiler: For melting your dark and white chocolate separately; I usually go for a double boiler to avoid overheating.
- Toothpick or wooden skewer: Essential for creating the spider web effect by dragging through the white chocolate.
- Spatula or spoon: To spread the dark chocolate evenly on the tray.
- Sharp knife: For breaking or cutting the bark into pieces once set.
If you don’t have a double boiler, a microwave works fine—just melt in short bursts and stir often to prevent burning. I’ve also used an old metal bowl over a pot of simmering water, which does the job perfectly. For spreading, a small offset spatula makes the process smoother but a regular spoon can manage just fine if you’re improvising.
Preparation Method
- Prepare your workspace (5 minutes): Line your baking sheet with parchment paper or a silicone mat. This helps the chocolate bark lift easily without sticking.
- Melt the dark chocolate (7-10 minutes): Using a double boiler or microwave, melt the dark chocolate until smooth, stirring frequently. Add the butter here if using, to enrich the texture. It should be glossy and free of lumps.
- Spread the dark chocolate (3-5 minutes): Pour the melted dark chocolate onto the prepared sheet and spread it evenly with a spatula to about 1/4 inch (6 mm) thickness. Don’t worry if it’s not perfectly smooth; some texture adds character.
- Melt the white chocolate (5-7 minutes): Melt the white chocolate separately until smooth and creamy. Use the same method as the dark chocolate but watch carefully—it burns more easily.
- Create the spider web design (7-10 minutes): Drop small dollops or thin lines of white chocolate across the dark chocolate surface. Then, using a toothpick or skewer, gently drag lines from the center outward and between the dollops to form the web pattern. Work quickly before the dark chocolate sets.
- Set and chill (30-40 minutes): Place the baking sheet in the fridge to let the bark harden completely. This step is key for clean, firm pieces.
- Break into pieces (2-3 minutes): Once set, remove bark from the tray and break into irregular shards. Sprinkle with sea salt flakes or any optional toppings for that finishing touch.
Quick tip: If the white chocolate starts to harden before you finish your design, just gently rewarm it for a few seconds. And if the dark chocolate cools too much before you add the white, your web might crack, so timing is everything here.
Cooking Tips & Techniques
One of the trickiest parts of this recipe is getting the chocolate to the right melting point. Too hot, and the chocolate becomes grainy; too cool, and it won’t spread smoothly. I’ve learned (sometimes the hard way) that melting in short bursts and stirring often helps a lot.
When spreading the dark chocolate, don’t stress about a perfectly smooth surface. The spider web pattern hides imperfections, and a little unevenness adds to the homemade charm.
For the web effect, the key is gentle, steady pressure with the toothpick. Dragging too fast or pressing too hard can tear the chocolate layer, so slow and steady wins the race here.
Also, try to work in a cool room to avoid the chocolate melting on your fingers—it’s a small detail but makes cleanup easier.
Multi-tasking during the chilling phase is a lifesaver—while the bark sets, you can prep your Halloween party drinks or arrange other spooky snacks. If you’re planning a full spooky spread, the Wicked Green Velvet Cupcakes make a perfect companion to this chocolate bark!
Variations & Adaptations
Feel free to switch things up and make this spider web chocolate bark your own:
- Dietary swaps: Use dairy-free dark and white chocolate for a vegan-friendly treat.
- Seasonal flavors: Add a pinch of cinnamon or pumpkin spice to the dark chocolate for a subtle autumn twist.
- Alternative toppings: Crushed peppermint candies, orange zest, or mini marshmallows can add texture and surprise.
- Color play: Swap white chocolate for colored candy melts in orange or purple for a more vivid Halloween vibe.
- Texture boost: Stir in toasted nuts or seeds into the dark chocolate before spreading for a crunchy surprise.
One variation I tried recently was using a thin layer of avocado oil-infused dark chocolate that added a silky finish and a subtle richness. It’s a little unexpected but seriously delicious!
Serving & Storage Suggestions
This chocolate bark is best served at room temperature so the flavors and textures come through fully. Break it into bite-sized pieces and arrange on a festive platter for a party-ready display. It pairs wonderfully with hot apple cider or a creamy pumpkin latte for that cozy Halloween vibe.
Store leftover bark in an airtight container in a cool, dry place or refrigerate if your kitchen is warm. It’ll keep well for up to two weeks, but honestly, it rarely lasts that long in my house.
For longer storage, the bark freezes beautifully—just wrap tightly in plastic wrap and place in a sealed freezer bag. When you’re ready to enjoy, let it thaw at room temperature for about 15 minutes.
Pro tip: The chocolate flavor actually deepens if you let the bark sit for a day, so making it a day ahead can amp up the taste. Just be sure to keep it covered to prevent any fridge odors sneaking in.
Nutritional Information & Benefits
Here’s an estimated breakdown per serving (based on 10 servings):
| Calories | Fat | Carbohydrates | Sugar | Protein |
|---|---|---|---|---|
| 180 kcal | 12 g | 18 g | 15 g | 2 g |
Dark chocolate is rich in antioxidants and can offer a small mood boost, while the white chocolate adds sweetness without overwhelming. This treat is gluten-free by nature, making it suitable for many dietary needs. Just watch portions if you’re mindful about sugar intake.
From a personal wellness angle, I appreciate this chocolate bark because it satisfies my sweet tooth with real ingredients and no artificial junk. It’s a small indulgence that feels special without overdoing it.
Conclusion
Making the Perfect Spider Web Chocolate Bark for Halloween was one of those kitchen moments that surprised me — from a skeptical “this might flop” to a proud “this looks amazing!” It’s a simple recipe that brings a bit of spooky fun, a lot of chocolatey goodness, and the kind of satisfaction you get from crafting something by hand.
Feel free to tweak the design, swap ingredients, or add your own twist. Whether you’re serving it at a party or sneaking bites late at night, this bark is a cozy, sweet reminder that Halloween treats don’t have to be complicated to be memorable.
If you try it, I’d love to hear how your spider webs turned out or what creative toppings you added. Sharing those little kitchen wins always makes the season feel even more festive.
Happy haunting and happy baking!
FAQs
- Can I use milk chocolate instead of dark chocolate?
Yes, milk chocolate works fine but the bark will be sweeter and less intense in flavor. - How do I prevent the chocolate from seizing while melting?
Melt slowly in short bursts and stir often. Avoid water contact with chocolate during melting. - Can I make the spider web design ahead of time?
Yes, but work quickly once the white chocolate is on the dark chocolate to create clean lines before it sets. - What’s the best way to store leftover chocolate bark?
Keep it in an airtight container at room temperature or in the fridge if it’s warm. It also freezes well for longer storage. - Can I add nuts or other mix-ins to the bark?
Absolutely! Chopped nuts, seeds, or small candies can be stirred into the dark chocolate before spreading for extra texture.
Pin This Recipe!
Perfect Spider Web Chocolate Bark
A quick and easy Halloween treat featuring a glossy dark chocolate base with a delicate white chocolate spider web design. Perfect for parties and festive gatherings.
- Prep Time: 10 minutes
- Cook Time: 20 minutes
- Total Time: 40-50 minutes
- Yield: 10 servings 1x
- Category: Dessert
- Cuisine: American
Ingredients
- 8 oz (225 g) dark chocolate (at least 60% cocoa)
- 4 oz (115 g) white chocolate
- 1 tbsp (15 g) butter (optional)
- Sea salt flakes (a pinch)
- Optional toppings: Halloween-themed sprinkles, chopped nuts, edible glitter
Instructions
- Prepare your workspace by lining a baking sheet with parchment paper or a silicone mat.
- Melt the dark chocolate using a double boiler or microwave until smooth, stirring frequently. Add butter if using.
- Pour and spread the melted dark chocolate evenly on the prepared sheet to about 1/4 inch (6 mm) thickness.
- Melt the white chocolate separately until smooth and creamy.
- Drop small dollops or thin lines of white chocolate across the dark chocolate surface. Use a toothpick or skewer to drag lines from the center outward to create a spider web pattern.
- Place the baking sheet in the fridge to let the bark harden completely, about 30-40 minutes.
- Remove the bark from the tray and break into irregular pieces. Sprinkle with sea salt flakes or optional toppings.
Notes
Melt chocolate in short bursts and stir often to avoid graininess. Work quickly when creating the spider web design before the chocolate sets. Store bark in an airtight container at room temperature or refrigerate if warm. Freezes well for longer storage.
Nutrition
- Serving Size: 1 piece (based on 10
- Calories: 180
- Sugar: 15
- Fat: 12
- Carbohydrates: 18
- Protein: 2
Keywords: Halloween, chocolate bark, spider web, easy dessert, festive treat, dark chocolate, white chocolate


