“You’d better not mess up this one,” my friend warned over text as I nervously lined ramekins side by side on my kitchen counter. The idea of making a decadent red velvet lava cake for two sounded like the perfect way to salvage a chaotic evening, but honestly, I wasn’t convinced it would turn out as dreamy as I imagined. Yet here I was, whisking together cocoa and buttermilk, the rich scent of vanilla filling the air, while the soft hum of the refrigerator and the dim lighting set an oddly intimate mood for what started as a rushed dessert plan.
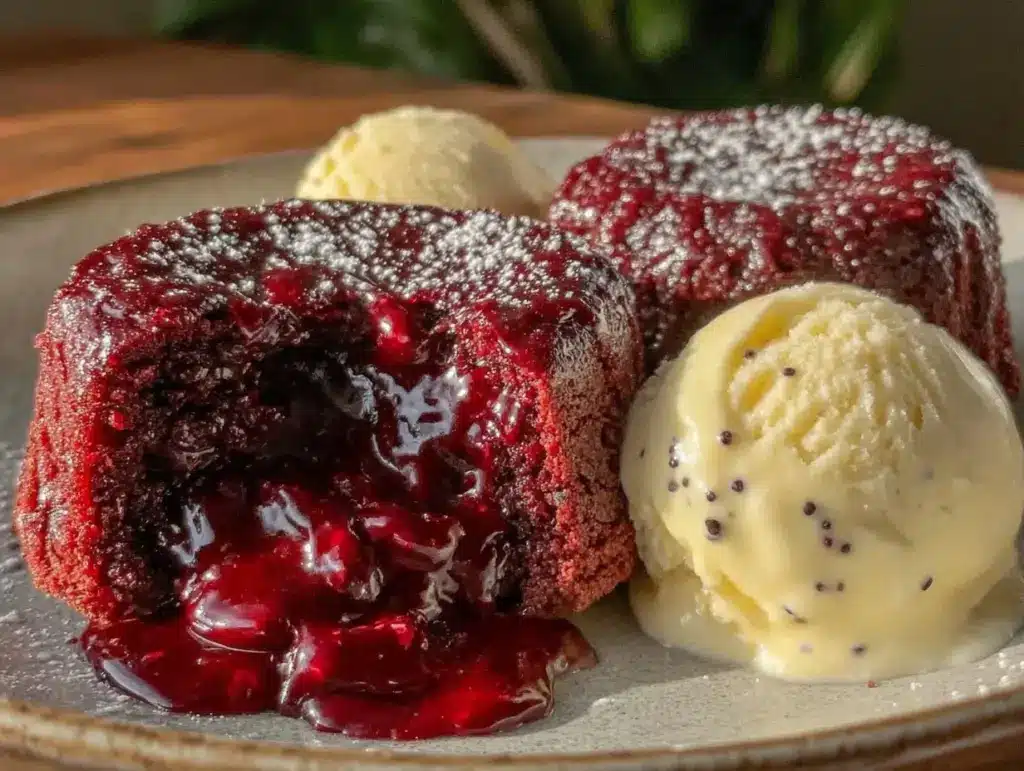
It wasn’t my usual baking jam—usually, I lean on quick fixes or no-fuss treats. But something about the gooey center promised a comforting reward for the madness of the day. When I finally pulled the molten cakes from the oven, that luscious red velvet crust gave way to a warm, flowing center that felt like a gentle hug. Paired with a scoop of vanilla bean ice cream melting slowly beside it, the whole thing was a quiet moment of pure indulgence. I realized then, this dessert wasn’t just for show; it was a little celebration you could share, even with just one other person, that felt special without much hassle.
So this recipe stuck with me—not because it’s fancy or complicated, but because it’s honest and satisfying, the kind of treat that quietly turns an ordinary night into something memorable. And honestly, once you try it, you might find yourself making it more often than you expect.
Why You’ll Love This Recipe
After testing this recipe multiple times (sometimes twice in one week—no shame here), I’m confident this decadent red velvet lava cake for two is a keeper. The balance of rich red velvet flavor with that molten, velvety center is something that just hits right every time.
- Quick & Easy: Ready in under 30 minutes (including baking), perfect for those nights when you want something indulgent without the fuss.
- Simple Ingredients: No need to hunt down fancy stuff—most are pantry staples like cocoa powder, buttermilk, and cream cheese.
- Perfect for Date Nights or Cozy Evenings: Designed for two, so no over-the-top leftovers or waste.
- Crowd-Pleaser: Even my pickiest friends have asked for the recipe after trying this one.
- Unbelievably Delicious: The contrast between the slightly crisp cake edge and molten center, paired with creamy vanilla bean ice cream, is pure magic.
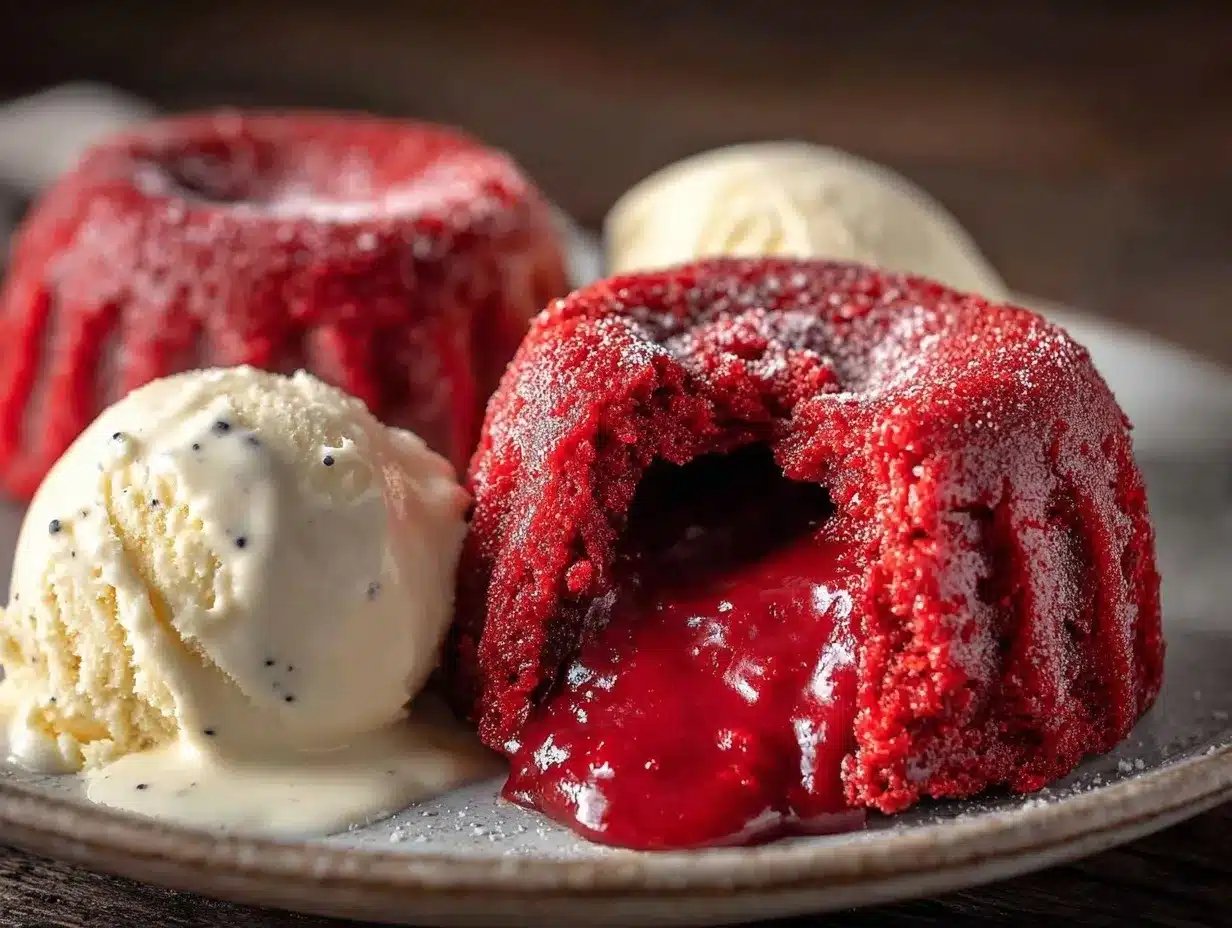
What sets this lava cake apart isn’t just the classic red velvet flavor—it’s the way the cake’s texture melts into that luscious lava core, thanks to a careful balance of cocoa and buttermilk, and a secret touch of cream cheese that adds richness without heaviness. Plus, the homemade vanilla bean ice cream topping makes it feel like you’re treating yourself at a boutique dessert bar rather than just your kitchen.
This recipe isn’t just a dessert; it’s a little luxury you can whip up on a whim. Whether you’re celebrating a special moment or just want to turn an ordinary evening into something a bit more indulgent, this red velvet lava cake hits the spot every time.
What Ingredients You Will Need
This decadent red velvet lava cake recipe relies on straightforward, wholesome ingredients that come together to create that signature flavor and molten texture. Most are likely hanging out in your pantry or fridge right now.
- For the Cake Batter:
- All-purpose flour (65g / ½ cup)
- Cocoa powder (unsweetened, 15g / 2 tbsp) – I prefer Valrhona for its deep, rich taste
- Granulated sugar (100g / ½ cup plus 2 tbsp)
- Butter (unsalted, 60g / 4 tbsp), melted and slightly cooled
- Buttermilk (60ml / ¼ cup), room temperature (adds moistness and subtle tang)
- Large egg (1), room temperature
- Vanilla extract (1 tsp) – real vanilla is worth it here
- Red food coloring (1 tbsp) – gel or liquid, whichever you have on hand
- Baking powder (¼ tsp)
- Salt (a pinch)
- For the Lava Center:
- Cream cheese (40g / about 1.5 tbsp), softened – this is the secret for that luscious molten center
- Powdered sugar (15g / 1 tbsp), sifted
- For the Vanilla Bean Ice Cream:
- Heavy cream (120ml / ½ cup)
- Whole milk (60ml / ¼ cup)
- Granulated sugar (50g / ¼ cup)
- Vanilla bean (1), split and scraped – or 1 tsp pure vanilla extract
Feel free to swap the all-purpose flour with almond flour for a gluten-free version, though the texture will be a bit different. If you don’t have buttermilk, a quick mix of milk and lemon juice or vinegar works just fine. For the red food coloring, gel types tend to give a more vibrant color without watering down the batter.
For the ice cream, I recommend using a good-quality vanilla bean or pure extract to get that rich, authentic flavor. If you want to skip making ice cream, a scoop of store-bought vanilla bean ice cream (something like Haagen-Dazs or Ben & Jerry’s) works beautifully too.
Equipment Needed
- Two 6-ounce ramekins or small oven-safe dishes – perfect for individual servings
- Mixing bowls – one for dry ingredients, one for wet
- Whisk and rubber spatula – for easy mixing and folding
- Measuring cups and spoons – precise measurements keep the lava cake perfect
- Baking sheet or tray – to place ramekins on for easy transfer to the oven
- Electric hand mixer or stand mixer (optional) – helpful for the ice cream base but not mandatory
- Ice cream maker (optional) – for homemade ice cream, though a no-churn method works too
Personally, I’ve found that ramekins with straight sides give the best lava cake shape and help the molten center flow perfectly when served. If you don’t have ramekins, small oven-safe mugs can work as a substitute, just adjust baking time slightly. For the ice cream, an ice cream maker makes the process smoother, but if you’re in a pinch, a simple no-churn vanilla bean ice cream recipe can be whipped up in the freezer with just a few ingredients.
Keeping your tools clean and dry, especially your ramekins, helps prevent the cake from sticking. A quick butter and dusting of cocoa powder on the ramekins creates an easy release so your lava cake slides out effortlessly.
Preparation Method
- Preheat your oven to 425°F (220°C). Position a rack in the center. Lightly butter and dust two 6-ounce ramekins with cocoa powder to prevent sticking.
- Mix dry ingredients. In a small bowl, sift together 65g (½ cup) all-purpose flour, 15g (2 tbsp) unsweetened cocoa powder, ¼ tsp baking powder, and a pinch of salt. Set aside.
- Combine wet ingredients. In a medium bowl, whisk 100g (½ cup plus 2 tbsp) granulated sugar with 60g (4 tbsp) melted butter until smooth. Add 1 large room temperature egg, 60ml (¼ cup) buttermilk, 1 tsp vanilla extract, and 1 tbsp red food coloring. Whisk until fully combined and the batter is vibrant red.
- Incorporate dry into wet. Gently fold the dry ingredient mixture into the wet ingredients using a rubber spatula. Mix just until no flour streaks remain; don’t overmix or the cake might get tough.
- Prepare the lava center. In a small bowl, beat 40g (1.5 tbsp) softened cream cheese with 15g (1 tbsp) powdered sugar until smooth and creamy.
- Fill ramekins. Spoon a couple of tablespoons of batter into each ramekin, then add a dollop of the cream cheese mixture in the center. Cover with remaining batter, spreading gently to the edges.
- Bake. Place ramekins on a baking sheet and bake for 12-14 minutes. The edges should be set and slightly puffed, but the center will be soft and jiggly. Watch closely — overbaking kills the lava effect.
- Rest and unmold. Let cakes cool for about 2 minutes. Run a knife gently around the edges, then invert onto dessert plates. If they resist, a quick tap on the counter usually helps.
- Make the vanilla bean ice cream. While cakes bake, combine 120ml (½ cup) heavy cream, 60ml (¼ cup) whole milk, 50g (¼ cup) sugar, and vanilla bean seeds in a bowl. Whisk until sugar dissolves. Chill mixture for 15 minutes, then churn in an ice cream maker according to manufacturer instructions. If no ice cream maker is available, whip heavy cream and fold into sweetened condensed milk with vanilla extract for a no-churn version.
- Serve immediately. Plate each lava cake with a generous scoop of vanilla bean ice cream. The contrast of warm, molten cake and cold, creamy ice cream is where the magic happens.
Pro tip: If you’re unsure about doneness, give the ramekin a gentle shake; if the center jiggles slightly, it’s ready. Overbaking will result in a cake with no molten center, which is a bummer when you’re craving that lava flow. Also, timing is everything here—try to have the ice cream ready to go as soon as the cakes come out of the oven to enjoy them at their best.
Cooking Tips & Techniques
Getting that perfect lava cake texture can feel tricky, but a few tricks I’ve learned make all the difference:
- Room Temperature Ingredients: This helps the batter come together smoothly and ensures even baking.
- Don’t Overmix: Folding the dry ingredients gently keeps the cake tender. Overmixing can create a dense texture instead of the light, crumbly edges you want.
- Watch the Baking Time: Every oven is different, so keep an eye past the 12-minute mark. The cake should be set on the edges but still slightly jiggly in the center.
- Prepping Ramekins: Butter and dusting with cocoa powder instead of flour prevents any white residue and complements the chocolate flavor.
- Rest Before Serving: Letting the cakes cool for a minute or two helps the lava set just enough to hold its shape without losing that molten center.
- Multitasking: I usually start the ice cream base while the batter is mixing, so everything finishes around the same time.
- Personal Fails: I once baked these too long and ended up with a red velvet cake that was lovely but not molten. Lesson learned: timing is everything.
Using fresh, high-quality cocoa powder and real vanilla bean or extract really lifts the flavor beyond a typical boxed mix. It’s worth the extra few minutes to whisk and fold carefully rather than rushing through.
Variations & Adaptations
While this decadent red velvet lava cake recipe is perfect as is, I’ve tried a few tweaks to keep things interesting or accommodate different needs:
- Dietary Variation: Swap all-purpose flour with almond or oat flour for gluten-free versions. Use coconut sugar and coconut oil instead of granulated sugar and butter for a dairy-free, refined sugar-free option. Pair with dairy-free coconut vanilla ice cream.
- Seasonal Twist: Add a teaspoon of orange zest to the batter for a bright, citrusy note that complements red velvet beautifully. Or swirl in a few fresh raspberries before baking for a fruity surprise.
- Flavor Boost: Mix a tablespoon of espresso powder into the cocoa for a subtle mocha undertone that makes the chocolate flavor pop.
- Different Cooking Methods: Try making these in a microwave-safe mug for a 90-second quick fix lava cake, though the texture will be slightly different and less delicate.
- Personal Favorite: I once topped the molten center with a spoonful of homemade salted caramel right before serving—pure indulgence!
For those who love a little crunch, sprinkling chopped pecans or walnuts on top before baking adds a lovely texture contrast. And if you want to impress at a party, consider pairing these with a glass of sparkling rosé or a rich coffee.
Serving & Storage Suggestions
Serve these decadent red velvet lava cakes warm, right out of the oven, with a generous scoop of vanilla bean ice cream melting slowly beside them. The contrast of hot and cold, soft cake and creamy ice cream, is what makes this dessert unforgettable.
For presentation, dust a bit of powdered sugar or cocoa on top of the cakes for a pretty finish. Fresh berries or a sprig of mint make lovely garnishes if you want to get fancy.
Leftovers? Honestly, these are best enjoyed fresh but can be stored in an airtight container in the refrigerator for up to 2 days. Reheat gently in a microwave for 15-20 seconds to revive the lava effect. The ice cream should be stored separately and scooped fresh when serving.
Flavors deepen a bit after refrigeration, but the lava center loses some of its flow, so if you plan ahead, it’s best to bake fresh or just reheat briefly. If you want to prep in advance, you can assemble the batter and cream cheese centers and refrigerate for a few hours before baking.
For a special touch, serve alongside a freshly brewed cup of coffee or a glass of dessert wine to round out the experience. If you like desserts with a fruity lift, try pairing with the strawberry white chocolate scones recipe for a sweet brunch twist.
Nutritional Information & Benefits
Each decadent red velvet lava cake serving (including the ice cream) contains roughly:
| Calories | 420 kcal |
|---|---|
| Protein | 6g |
| Fat | 28g |
| Carbohydrates | 35g |
| Sugar | 28g |
| Fiber | 1.5g |
Key ingredients like cocoa powder deliver antioxidants, while cream cheese adds a small protein boost. Using real vanilla bean adds flavor with no added sugar or calories. This dessert is naturally gluten-containing, but can be adapted for gluten-free diets using almond flour.
While indulgent, this recipe balances richness with portion control by serving just two. It’s a sweet treat that doesn’t demand overindulgence and fits well within a realistic approach to comfort food.
Conclusion
This decadent red velvet lava cake for two with vanilla bean ice cream is one of those rare desserts that feels like a luxurious treat but comes together with surprisingly little effort. It’s perfect for sharing, for quiet nights in, or even for impressing a guest without stress. I love how it combines classic flavors with a molten twist that always gets a “wow” reaction.
Feel free to experiment with the recipe to suit your taste—whether that’s a dash of espresso, a sprinkle of nuts, or a different ice cream topping. It’s a recipe that invites personalization, and that’s part of why I keep making it.
If you’ve enjoyed this, you might appreciate the rich, comforting vibes in the creamy ramen carbonara or the festive fun of the stunning pink and green ombre wicked birthday cake. Both recipes share that same approach of simple ingredients and bold flavor that makes cooking enjoyable and rewarding.
Now, it’s your turn to try this one out—trust me, you’ll want to keep it in your dessert rotation. Let me know how your lava cakes turn out or if you’ve tried any fun variations. There’s nothing like sharing a little kitchen success to brighten the day.
FAQs
Can I make the red velvet lava cake ahead of time?
You can prepare the batter and cream cheese centers a few hours ahead and refrigerate. Bake just before serving for the best molten texture.
What if I don’t have buttermilk?
Mix 60ml (¼ cup) milk with 1 tsp lemon juice or vinegar and let sit for 5 minutes to substitute buttermilk.
Can I use boxed cake mix instead of making the batter from scratch?
While convenient, boxed mixes usually don’t produce the same molten center effect. This recipe’s balance of ingredients is key for that signature lava texture.
How do I know when the lava cake is perfectly baked?
The edges should be set and slightly puffed, but the center should jiggle gently when you shake the ramekin. Overbaking will yield a fully cooked cake with no lava.
What if I don’t have an ice cream maker?
You can make a simple no-churn vanilla bean ice cream by folding whipped cream into sweetened condensed milk and vanilla extract, then freezing until firm.
Pin This Recipe!
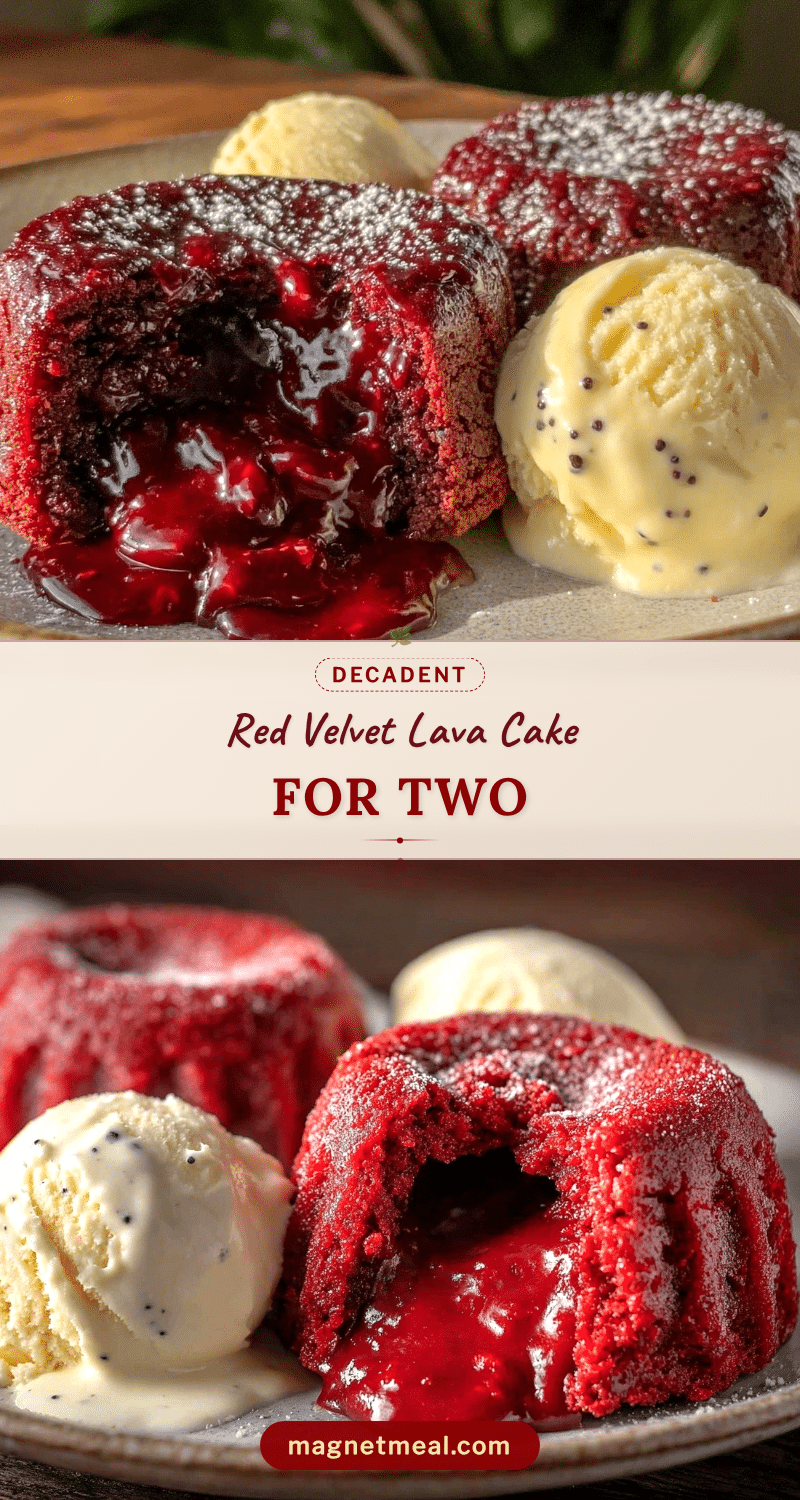
Decadent Red Velvet Lava Cake for Two
A quick and easy homemade dessert featuring a rich red velvet cake with a molten cream cheese center, served with creamy vanilla bean ice cream. Perfect for cozy evenings or date nights.
- Prep Time: 10 minutes
- Cook Time: 14 minutes
- Total Time: 24 minutes
- Yield: 2 servings
- Category: Dessert
- Cuisine: American
Ingredients
- All-purpose flour (65g / ½ cup)
- Cocoa powder, unsweetened (15g / 2 tbsp)
- Granulated sugar (100g / ½ cup plus 2 tbsp)
- Butter, unsalted (60g / 4 tbsp), melted and slightly cooled
- Buttermilk (60ml / ¼ cup), room temperature
- Large egg (1), room temperature
- Vanilla extract (1 tsp)
- Red food coloring (1 tbsp), gel or liquid
- Baking powder (¼ tsp)
- Salt (a pinch)
- Cream cheese (40g / about 1.5 tbsp), softened
- Powdered sugar (15g / 1 tbsp), sifted
- Heavy cream (120ml / ½ cup)
- Whole milk (60ml / ¼ cup)
- Granulated sugar (50g / ¼ cup)
- Vanilla bean (1), split and scraped or 1 tsp pure vanilla extract
Instructions
- Preheat your oven to 425°F (220°C). Position a rack in the center. Lightly butter and dust two 6-ounce ramekins with cocoa powder to prevent sticking.
- In a small bowl, sift together 65g (½ cup) all-purpose flour, 15g (2 tbsp) unsweetened cocoa powder, ¼ tsp baking powder, and a pinch of salt. Set aside.
- In a medium bowl, whisk 100g (½ cup plus 2 tbsp) granulated sugar with 60g (4 tbsp) melted butter until smooth. Add 1 large room temperature egg, 60ml (¼ cup) buttermilk, 1 tsp vanilla extract, and 1 tbsp red food coloring. Whisk until fully combined and the batter is vibrant red.
- Gently fold the dry ingredient mixture into the wet ingredients using a rubber spatula. Mix just until no flour streaks remain; don’t overmix.
- In a small bowl, beat 40g (1.5 tbsp) softened cream cheese with 15g (1 tbsp) powdered sugar until smooth and creamy.
- Spoon a couple of tablespoons of batter into each ramekin, then add a dollop of the cream cheese mixture in the center. Cover with remaining batter, spreading gently to the edges.
- Place ramekins on a baking sheet and bake for 12-14 minutes. The edges should be set and slightly puffed, but the center will be soft and jiggly. Watch closely to avoid overbaking.
- Let cakes cool for about 2 minutes. Run a knife gently around the edges, then invert onto dessert plates. If they resist, a quick tap on the counter usually helps.
- While cakes bake, combine 120ml (½ cup) heavy cream, 60ml (¼ cup) whole milk, 50g (¼ cup) sugar, and vanilla bean seeds in a bowl. Whisk until sugar dissolves. Chill mixture for 15 minutes, then churn in an ice cream maker according to manufacturer instructions. If no ice cream maker is available, whip heavy cream and fold into sweetened condensed milk with vanilla extract for a no-churn version.
- Serve each lava cake immediately with a generous scoop of vanilla bean ice cream.
Notes
Use room temperature ingredients for best results. Do not overmix the batter to keep the cake tender. Watch baking time closely to maintain the molten center. Butter and dust ramekins with cocoa powder for easy release. The ice cream can be made with or without an ice cream maker. Leftovers can be refrigerated and gently reheated, but best served fresh.
Nutrition
- Serving Size: 1 lava cake with 1 s
- Calories: 420
- Sugar: 28
- Fat: 28
- Carbohydrates: 35
- Fiber: 1.5
- Protein: 6
Keywords: red velvet lava cake, molten cake, dessert for two, homemade lava cake, red velvet dessert, easy dessert, vanilla bean ice cream


