
The first time I stumbled upon making my own sauerkraut, I wasn’t exactly planning on it. Honestly, it was one of those “let’s see if this works” moments sparked by a half-forgotten cabbage sitting at the back of my fridge. I’d heard about fermented foods being healthy and all that jazz, but the thought of tangy, homemade sauerkraut felt a bit intimidating—like something only serious fermenters tackled. Well, surprise: it turned out to be ridiculously simple and way tastier than the jarred stuff.
That tangy kick and satisfying crunch became a quiet obsession, and I found myself making batch after batch, tweaking timing and salt ratios just a little here and there. The smell wafting through the kitchen during fermentation? A bit funky, yes, but oddly comforting—like a cozy science experiment happening right on my countertop. This easy tangy homemade sauerkraut recipe is the result of those kitchen trials, perfect for anyone who’s curious about fermenting but doesn’t want to fuss over complicated steps or special equipment.
I love how this sauerkraut pairs with everything—from a quick sandwich fix like a classic tuna melt on sourdough to a hearty dinner featuring a rich ribeye steak. It’s the kind of thing that quietly makes meals better, adding a punch of probiotic goodness and that unmistakable tang. This recipe stuck with me because it’s approachable, rewarding, and honestly, a little bit magical in how it transforms humble cabbage into something bursting with flavor.
Why You’ll Love This Recipe
After countless attempts and some happy accidents, I’m confident this easy tangy homemade sauerkraut recipe is a keeper. Here’s why it’s earned a permanent spot in my kitchen routine:
- Quick & Easy: From chopping cabbage to sealing the jar, it takes about 20 minutes of hands-on time. The fermentation does the rest, so you don’t have to hover.
- Simple Ingredients: Just cabbage, salt, and optional caraway seeds or juniper berries. No weird extras or preservatives.
- Perfect for Any Occasion: Whether you’re prepping for a cozy dinner or adding zing to your lunchbox, this sauerkraut fits right in.
- Crowd-Pleaser: It’s surprising how many people—especially kids—warm up to the tang and crunch once they try homemade. It’s less harsh than store-bought versions.
- Unbelievably Delicious: The fermentation process brings out a balance of sourness and sweetness that’s hard to beat. The texture stays crisp, not mushy.
What sets this recipe apart? The attention to salt ratios and the choice of fermentation vessel make a difference—I recommend a glass jar with a weight to keep the cabbage submerged. Also, the option to add a pinch of caraway seeds adds a subtle, aromatic twist that’s my personal favorite. I’ve seen recipes that call for complicated starter cultures or special equipment, but this one keeps it real and doable for anyone intrigued by fermentation.
Honestly, after the first bite, you might find yourself closing your eyes and savoring that perfect tang. This isn’t just sauerkraut; it’s a small kitchen victory that’s both healthy and satisfying, making your meals pop without stress.
What Ingredients You Will Need
This recipe uses simple, wholesome ingredients to deliver bold flavor and satisfying texture without the fuss. Most of these you probably have in your pantry, and substitutions are easy if needed.
- Green Cabbage: About 2 pounds (900 g), finely shredded. Firm, fresh cabbage works best for the crunch.
- Sea Salt or Kosher Salt: 1 tablespoon (about 18 g). Avoid iodized salt as it can interfere with fermentation.
- Caraway Seeds (Optional): 1 teaspoon for a traditional, slightly nutty flavor.
- Juniper Berries (Optional): A few whole berries add a piney, fragrant note if you want to get fancy.
Ingredient Tips: I prefer using a non-iodized sea salt from brands like Maldon or Celtic Sea Salt because they’re clean and pure, which helps the fermentation thrive. If you want to experiment with color, purple cabbage or a mix of green and red cabbage can make a stunning jar full of vibrant hues.
For those who want to avoid caraway seeds or juniper berries, feel free to skip them or substitute with mustard seeds or fennel for a different flavor profile. If you’re looking for a gluten-free or paleo-friendly fermented food, this recipe fits right in since it uses nothing but basic veggies and salt.
Equipment Needed
You don’t need fancy gadgets for this sauerkraut recipe, but having the right tools makes the process smoother and more reliable.
- Large Mixing Bowl: To toss and massage the cabbage comfortably.
- Sharp Knife or Mandoline: For shredding the cabbage finely and evenly.
- Fermentation Jar or Mason Jar (1 quart / 1 liter): Glass is best to watch the progress and avoid metallic flavors.
- Fermentation Weight or Small Zip-lock Bag: To keep the cabbage submerged under its brine. You can fill a small food-safe bag with water if you don’t have a weight.
- Cloth or Paper Towel and Rubber Band: To cover the jar during fermentation, allowing gases to escape but keeping dust out.
I once tried fermenting in a plastic container, but the glass jar definitely keeps things cleaner and more stable temperature-wise. Also, if you don’t have a mandoline, just slice cabbage thinly with a sharp knife—it takes a bit longer but works perfectly.
Preparation Method
- Shred the Cabbage (10 minutes): Remove coarse outer leaves, then slice the cabbage into quarters. Use a sharp knife or mandoline to thinly shred into fine ribbons. You want pieces about 1/8 inch thick for best texture.
- Massage with Salt (5-7 minutes): Place shredded cabbage in a large bowl and sprinkle the salt evenly over it. Massage the cabbage with your hands—squeeze and press firmly to start releasing the juices. You’ll notice it softening and becoming slippery as the salty brine forms. This step is crucial for good fermentation.
- Add Flavors (Optional, 1 minute): Mix in caraway seeds or juniper berries if using, distributing them evenly throughout the cabbage.
- Pack into Jar (5 minutes): Transfer the cabbage and all its juices into your clean fermentation jar. Press down firmly with a tamper or spoon to eliminate air pockets and ensure the cabbage is submerged in its own brine. Leave about 1 to 2 inches (2.5-5 cm) of headspace at the top for gases to expand.
- Weight & Cover (1 minute): Place a fermentation weight or a small water-filled bag on top of the cabbage to keep it submerged. Cover the jar with a cloth secured with a rubber band to allow airflow but keep out dust and insects.
- Ferment (7-14 days): Leave the jar at room temperature (65-75°F / 18-24°C) out of direct sunlight. Check daily to press down the cabbage if it rises above the brine. Taste after about a week; when it reaches your preferred tang, seal with a lid and refrigerate.
Note: If white scum or “kahm yeast” forms on the surface, it’s harmless and can be skimmed off. Avoid mold (fuzzy, colored spots), which means something went wrong with your seal or cleanliness.
Cooking Tips & Techniques
Here are some tips from my kitchen that make the difference between just okay sauerkraut and the kind that gets you excited to eat:
- Salt Ratio Matters: Too little salt and the cabbage won’t ferment properly; too much and it becomes overly salty and slows fermentation. Stick to about 2% of the cabbage’s weight in salt.
- Keep It Submerged: Oxygen is the enemy here. Press the cabbage down every day and keep the weight on top to prevent spoilage.
- Room Temperature is Key: Too cold, and fermentation drags; too warm, and it can get mushy or off-flavors develop. Around 70°F (21°C) is ideal.
- Patience Pays Off: You can taste-test after a week, but letting it ferment longer deepens flavor and tang. I often leave mine two weeks or more for that perfect bite.
- Use Clean Tools: Sanitize everything that touches the cabbage to avoid wild bacteria ruining your batch.
One time, I got impatient and tried to speed things along by moving the jar to a warmer spot. The result? Mushy, overly sour sauerkraut that nobody wanted to eat. Lesson learned: slow and steady wins the fermentation race.
Variations & Adaptations
This easy tangy homemade sauerkraut recipe is a great base to customize depending on your mood and pantry:
- Spicy Sauerkraut: Add a sliced jalapeño or a teaspoon of red pepper flakes to the cabbage before packing it into the jar.
- Beet-Infused: Mix in thinly sliced raw beetroot with the cabbage for a vibrant color and an earthy sweetness.
- Low-Salt Version: Reduce salt slightly but ferment longer at a cooler temperature to keep safety and texture intact.
- Quick Refrigerator Sauerkraut: For a faster option, ferment at room temp for 3 days, then move to the fridge to slow down fermentation. It won’t be as tangy but still tasty.
I once tried swapping in napa cabbage for a milder flavor and it worked surprisingly well—so feel free to experiment with what you have. For a tangy twist, you can also check out fermented side dishes like kimchi or tangy pickles to complement meals like kimchi ramen bowls.
Serving & Storage Suggestions
Sauerkraut is incredibly versatile. It’s best served chilled or at room temperature, adding a crunchy, tangy contrast to rich or fatty dishes.
- Serve alongside sausages, pork dishes, or hearty sandwiches. It’s a classic pairing that never gets old.
- Try it as a topping on your favorite BBQ chicken cheddar wrap for a zingy crunch.
- Store in the refrigerator in a sealed jar for up to 3 months. The flavor will continue to develop and mellow over time.
- Reheat gently if desired (though cold or room temp is preferred) to preserve the probiotics.
Flavors deepen over storage, so don’t be surprised if your sauerkraut tastes even better after a couple of weeks in the fridge. It’s like a little gift that keeps on giving.
Nutritional Information & Benefits
Homemade sauerkraut is a probiotic powerhouse, rich in beneficial bacteria that support gut health. Here’s a rough estimate per 1/4 cup (60 g) serving:
| Nutrient | Amount |
|---|---|
| Calories | 15-20 |
| Carbohydrates | 3-4 g |
| Fiber | 2 g |
| Vitamin C | >10% Daily Value |
| Probiotics | Rich source |
The fermented cabbage is naturally gluten-free, low-carb, and suitable for paleo and keto diets. Just watch the salt content if you’re on a sodium-restricted diet. Personally, I appreciate how this sauerkraut adds nutrition and flavor without extra calories or complicated ingredients.
Conclusion
Making this easy tangy homemade sauerkraut recipe opened a new world of flavor and gut-friendly goodness in my kitchen. Its simplicity and reliability make it perfect for anyone curious about fermentation but wary of complicated steps. Plus, it’s a tasty way to add crunch and zing to meals without extra fuss.
Feel free to tweak the seasonings or fermentation times to suit your taste—and don’t hesitate to share what you come up with. I love seeing how home cooks make recipes their own, whether it’s pairing sauerkraut with a comforting butter-basted ribeye steak or mixing it into a vibrant salad bowl.
Give it a try, and you might find yourself quietly obsessed, too.
FAQs
How long does homemade sauerkraut take to ferment?
It usually takes between 7 to 14 days at room temperature (65-75°F / 18-24°C). You can taste-test after a week and refrigerate once it reaches your preferred tanginess.
What kind of salt should I use for fermenting sauerkraut?
Non-iodized salt like sea salt or kosher salt is best. Iodized salt can interfere with fermentation and affect flavor.
Can I use a plastic container instead of glass for fermenting?
While possible, glass jars are preferable because they’re non-reactive and easy to clean. Plastic can harbor bacteria or odors and might affect taste.
What if mold forms on my sauerkraut?
Fuzzy, colored mold is a sign of spoilage and the batch should be discarded. White “kahm yeast” is harmless and can be skimmed off.
Can I add other vegetables or spices to this sauerkraut recipe?
Absolutely! Try beets, carrots, or spices like mustard seeds and garlic for different flavors. Just make sure everything is clean and well-packed under the brine.
Pin This Recipe!

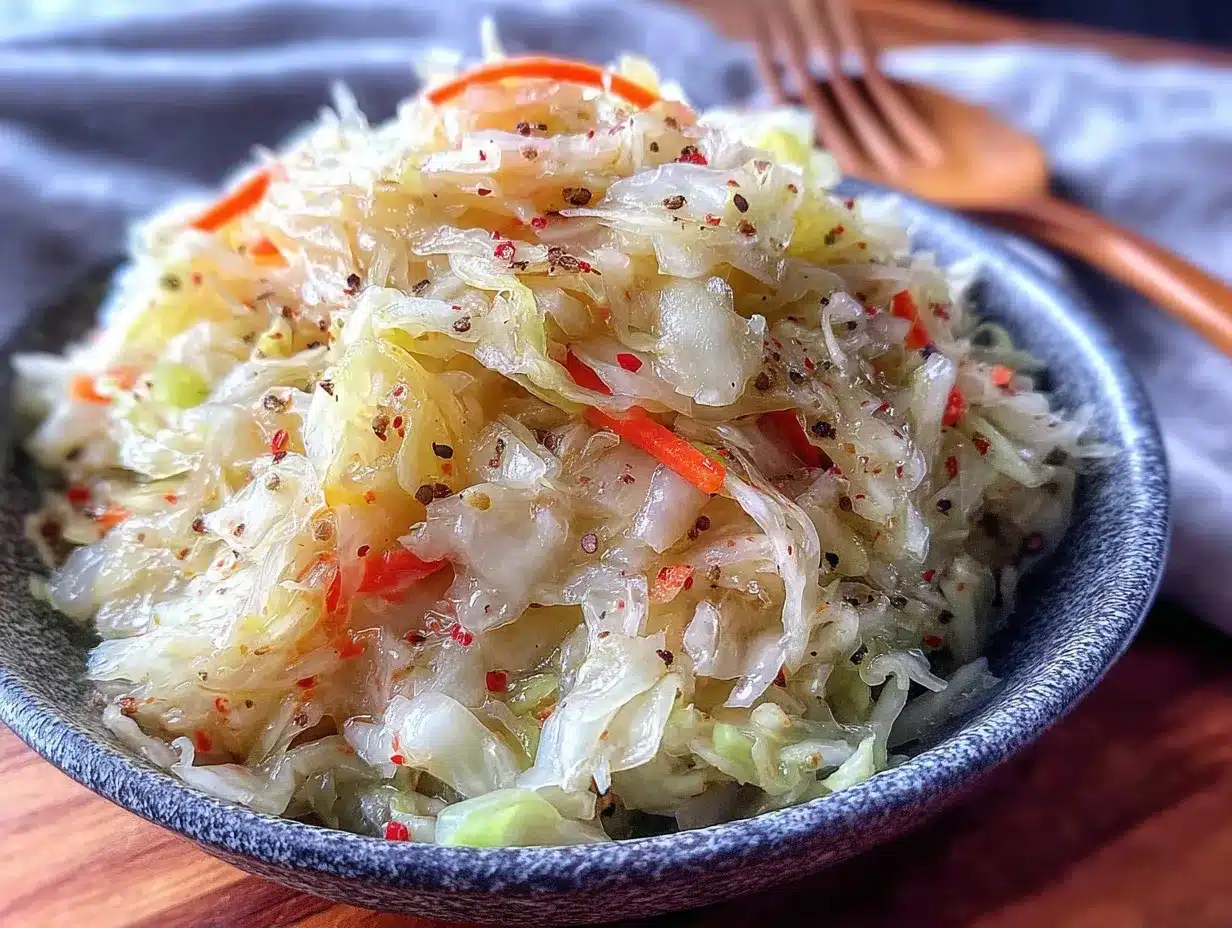
Easy Tangy Homemade Sauerkraut

A simple and rewarding recipe for homemade sauerkraut that delivers a perfect balance of tangy flavor and satisfying crunch through natural fermentation.
- Prep Time: 20 minutes
- Cook Time: 0 minutes
- Total Time: 7 to 14 days (fermentation time)
- Yield: About 4 cups sauerkraut 1x
- Category: Condiment
- Cuisine: German
Ingredients
- 2 pounds green cabbage, finely shredded
- 1 tablespoon sea salt or kosher salt (non-iodized)
- 1 teaspoon caraway seeds (optional)
- A few juniper berries (optional)
Instructions
- Remove coarse outer leaves from the cabbage, then slice into quarters. Shred finely into 1/8 inch thick ribbons using a sharp knife or mandoline.
- Place shredded cabbage in a large bowl and sprinkle evenly with salt. Massage the cabbage with your hands for 5-7 minutes until it softens and releases juices.
- Mix in caraway seeds or juniper berries if using, distributing evenly.
- Pack the cabbage and its juices firmly into a clean 1-quart glass fermentation jar, leaving 1 to 2 inches of headspace.
- Place a fermentation weight or a small water-filled zip-lock bag on top to keep the cabbage submerged. Cover the jar with a cloth secured with a rubber band.
- Ferment at room temperature (65-75°F) out of direct sunlight for 7-14 days. Press down the cabbage daily to keep it submerged. Taste after one week and refrigerate once desired tanginess is reached.
Notes
Use non-iodized salt to ensure proper fermentation. Keep the cabbage submerged under the brine to prevent spoilage. White kahm yeast is harmless and can be skimmed off; discard if mold appears. Ferment at around 70°F for best results. Taste after one week and refrigerate to slow fermentation once desired flavor is reached.
Nutrition
- Serving Size: 1/4 cup (60 g)
- Calories: 1520
- Sugar: 12
- Sodium: 40050
- Carbohydrates: 34
- Fiber: 2
- Protein: 1
Keywords: sauerkraut, fermented foods, homemade sauerkraut, fermentation, probiotic, cabbage, easy sauerkraut


