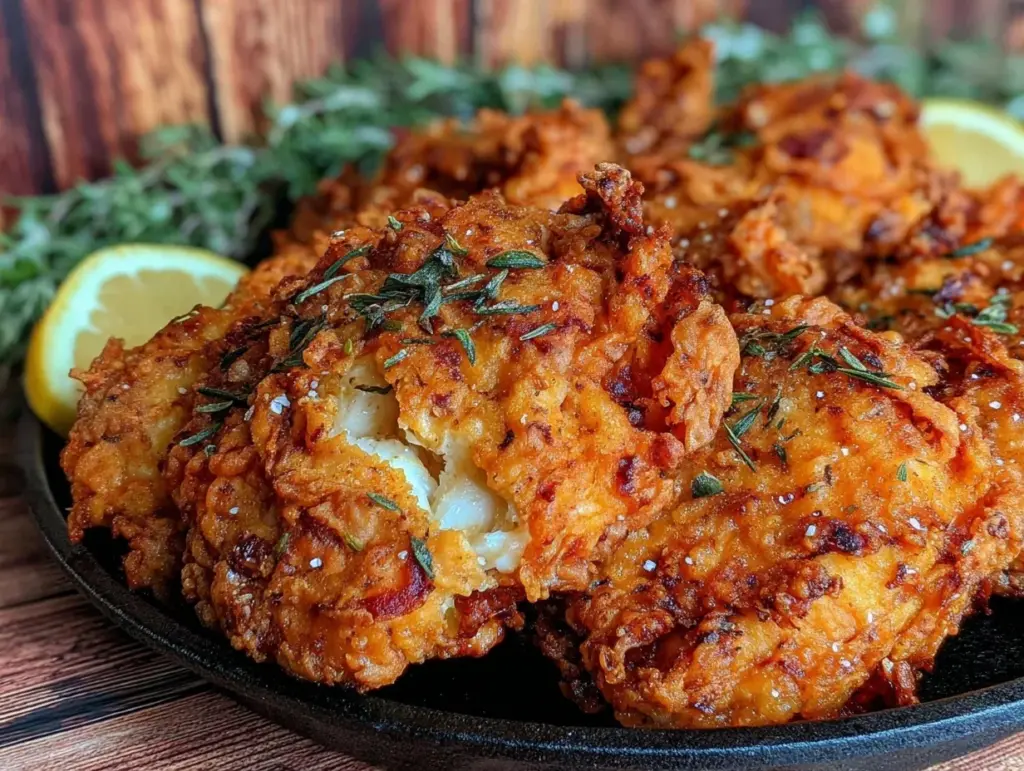
“You ever have one of those nights where the idea of cooking feels like climbing a mountain, but somehow you end up with a plate of fried chicken so good it nearly erases the whole day?” That was me last Friday, honestly. I was wiped out after a long day, and the thought of anything fancy seemed ridiculous. But then I remembered this crispy cast iron fried chicken recipe I’d stumbled on a while back and figured, why not give it one more shot? No fancy marinades, no extra fuss—just cast iron, some simple seasoning, and patience. And let me tell you, that golden crunch was worth every minute.
The smell alone—the sizzle of the chicken hitting the hot pan, the faint hint of paprika and garlic in the air—pulled me out of that exhausted haze. It’s funny how comfort food works like that, right? The crackling crust, juicy inside, and that little bit of nostalgia it carries without trying too hard. I didn’t expect much going in, but this recipe quietly became my go-to for busy nights when I want real flavor with minimal headache.
Funny thing is, I wasn’t always sold on using cast iron for frying chicken. I was skeptical about the maintenance and the learning curve. But after a few tries—burned edges, too greasy bites, you name it—I figured out the rhythm. This recipe is not just about frying chicken; it’s about coaxing out a perfect golden crunch that’s crispy without being greasy, juicy without being undercooked. And now, it’s a quiet favorite in my kitchen, a little ritual that promises satisfaction every time.
Honestly, if you’ve been hunting for that crispy fried chicken that hits all the right notes, this might just be the recipe you didn’t know you needed.
Why You’ll Love This Recipe
After testing countless fried chicken recipes and juggling the frustrations of soggy coatings or burnt crusts, this crispy cast iron fried chicken recipe stands out for several reasons:
- Quick & Easy: Ready in under 45 minutes, it fits perfectly into hectic weeknights or spontaneous dinner plans.
- Simple Ingredients: No complicated spices or rare items—just pantry staples like flour, basic seasonings, and chicken pieces.
- Perfect for Gatherings: Whether it’s a casual family dinner or a small get-together, it’s a proven crowd-pleaser that disappears fast.
- Crowd-Pleaser: Kids, adults, picky eaters, and food enthusiasts alike rave about the crispy texture and flavorful bite.
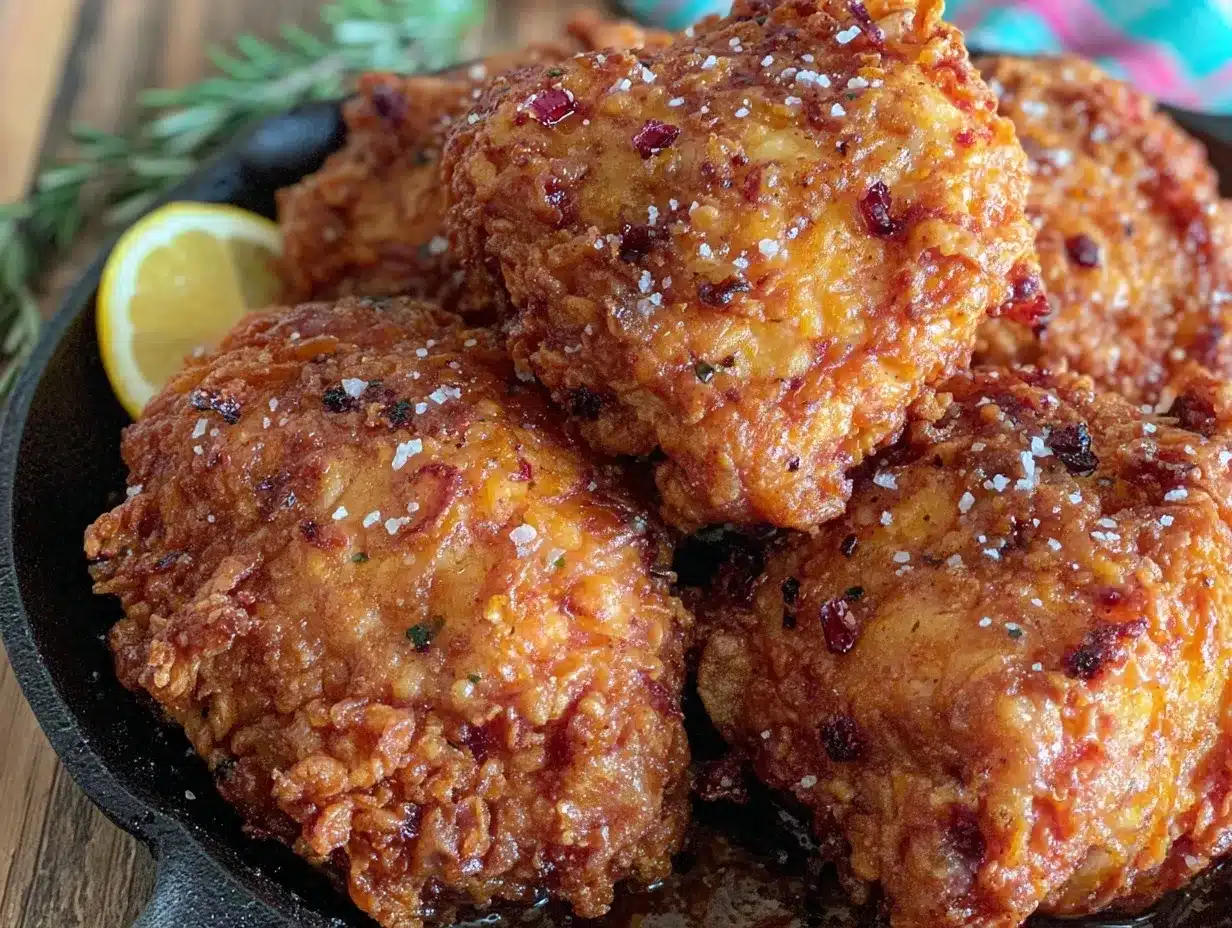
- Unbelievably Delicious: That golden crust with a hint of spice and the juicy tender meat inside is comfort food at its finest.
What makes this recipe different? It’s all about the cast iron skillet’s unique heat retention, creating an even, controlled sear that locks in juiciness while delivering that unbeatable crunch. The seasoned flour mix balances subtle heat and savory notes, giving the coating a flavor depth that’s anything but ordinary. Plus, the method skips complicated double-dips or messy batters, making it accessible even for those who don’t fancy themselves chefs.
This isn’t just fried chicken—it’s the kind that has you closing your eyes with that first bite, savoring the contrast between crispy crust and tender meat. It’s comfort food that feels homemade, not rushed. And if you’re into pairing it with something fresh and bright, you might find it’s the perfect companion to dishes like a fresh avocado tuna salad lettuce wrap or even a classic tuna melt on sourdough bread for lunch the next day.
What Ingredients You Will Need
This recipe uses simple, wholesome ingredients to deliver bold flavor and satisfying texture without the fuss. Most elements are pantry staples, and substitutions are easy if you’re in a pinch.
- Chicken pieces: Bone-in, skin-on thighs or drumsticks work best for juicy results.
- Buttermilk: About 1 ½ cups (360 ml) for marinating (can substitute with 1 ½ cups milk + 1 tbsp lemon juice).
- All-purpose flour: 2 cups (240 g), the base for the crispy coating.
- Seasonings for flour mix:
- 1 tsp smoked paprika (adds mild smoky depth)
- 1 tsp garlic powder
- 1 tsp onion powder
- 1 tsp salt (adjust to taste)
- ½ tsp black pepper
- ¼ tsp cayenne pepper (optional, for a gentle kick)
- Vegetable oil: About 1 ½ to 2 cups (360-480 ml) for frying (can use peanut or canola oil for high smoke point).
- Optional additions: A pinch of dried thyme or oregano in the flour mix for herbal notes.
Ingredient tips: For the best texture, go for skin-on chicken pieces—skin crisps up beautifully in cast iron. I personally trust brands like Perdue or local farm-fresh chicken when possible. If you don’t have buttermilk, the milk and lemon juice trick works just fine and tenderizes the chicken well.
Equipment Needed
- Cast iron skillet: A 10 to 12-inch pan is ideal. It holds heat evenly, which is crucial for that golden crust.
- Tongs: Essential for safely flipping chicken without disturbing the crust.
- Wire rack and baking sheet: For draining excess oil and keeping fried pieces crispy.
- Large mixing bowls: One for buttermilk soak and another for the seasoned flour coating.
- Instant-read thermometer: Helpful to check chicken’s internal temperature (should reach 165°F / 74°C).
If you don’t own cast iron yet, a heavy stainless steel skillet can work, but you might miss out on that characteristic crust. Cast iron requires seasoning and gentle cleaning—avoid soap and drying immediately after washing to keep it in prime condition. On a budget? Look for pre-seasoned pans or secondhand options; it’s worth the investment for this kind of frying.
Preparation Method
- Prep the chicken (10 minutes + marination): Rinse and pat dry 2 pounds (900 g) of bone-in, skin-on chicken pieces. Place them in a large bowl and pour in 1 ½ cups (360 ml) of buttermilk. Cover and refrigerate for at least 1 hour, preferably overnight. This tenderizes and adds moisture for juicy meat.
- Mix the seasoned flour (5 minutes): In a separate large bowl, combine 2 cups (240 g) all-purpose flour with 1 tsp smoked paprika, 1 tsp garlic powder, 1 tsp onion powder, 1 tsp salt, ½ tsp black pepper, and ¼ tsp cayenne pepper if using. Stir well to evenly distribute the spices.
- Coat the chicken (10 minutes): Remove chicken pieces from the buttermilk one at a time, letting excess drip off. Dredge thoroughly in the seasoned flour mix, pressing lightly to ensure the coating sticks well. Place coated pieces on a wire rack to rest for 10-15 minutes—this helps the coating adhere and crisp up better.
- Heat the oil (5 minutes): Pour 1 ½ to 2 cups (360-480 ml) of vegetable oil into your cast iron skillet, about 1 inch deep. Heat over medium heat to around 350°F (175°C). Use an instant-read thermometer if available. The oil should shimmer but not smoke.
- Fry the chicken (20-25 minutes): Carefully add chicken pieces skin-side down, making sure not to crowd the pan. Fry for about 7-8 minutes per side, adjusting heat as necessary to maintain 325-350°F (163-175°C). The crust should turn a deep golden brown and feel firm to the touch. Use tongs to flip gently. Once cooked, transfer to a wire rack set over a baking sheet to drain excess oil and keep crisp.
Pro tip: If the oil temperature drops too low, the crust becomes soggy; too high, and the coating burns before the inside cooks. Patience here pays off. Also, resting the chicken after coating avoids flaking off during frying—trust me, I’ve learned this the hard way.
Cooking Tips & Techniques
Getting that perfect golden crunch isn’t just about frying—it’s about technique and timing. Here’s what I’ve learned:
- Patience is key: Don’t rush the oil temperature. Use a thermometer or test with a small flour pinch—it should bubble and brown within seconds.
- Don’t overcrowd the pan: Too many pieces lower the oil temperature and cause uneven frying.
- Low and slow beats high and fast: Medium heat allows the chicken to cook through without burning the coating.
- Use skin-on pieces: The skin crisps up beautifully and adds flavor and texture.
- Rest coated chicken before frying: This step helps the flour adhere better, resulting in a thicker, crunchier crust.
- Drain properly after frying: Rest the chicken on a wire rack instead of paper towels to keep the coating crispy.
When I first tried this recipe, I made the mistake of frying on too high heat. The crust browned quickly but tasted burnt and the chicken was underdone. After dialing down the heat and testing with a thermometer, I finally got that perfect balance. It’s a little extra effort but worth it for the crunch. And if you want to multitask during frying, prepping a simple side like fresh avocado tuna salad lettuce wraps is a great way to keep things moving in the kitchen.
Variations & Adaptations
Feel like mixing things up? Here are a few ways I’ve played with this recipe to suit different tastes and needs:
- Spicy Southern Style: Add 1 tsp cayenne pepper and 1 tsp hot smoked paprika to the flour mix for a fiery kick.
- Gluten-Free Version: Swap all-purpose flour with a gluten-free flour blend or almond flour, though the crust may be a bit more delicate.
- Herb-Infused: Incorporate dried thyme, oregano, or rosemary into the flour seasoning for an aromatic twist.
- Baked Alternative: For a lighter option, after coating, place chicken on a greased rack in a 400°F (204°C) oven for about 35-40 minutes until crispy and cooked through.
- Buttermilk-Free: Use Greek yogurt thinned with a little water or milk to marinate the chicken for tang and moisture.
Once, I tweaked the flour coating by adding a little crushed cornflakes for extra crunch—and it did add a fun texture. It’s neat to experiment, but the classic flour and spice blend always wins me back.
Serving & Storage Suggestions
This crispy cast iron fried chicken is best served hot and fresh for that signature crunch. Let it rest for 5 minutes after frying so the juices settle. Serve alongside simple sides like coleslaw, mashed potatoes, or a crisp green salad to balance the richness.
If you’re planning leftovers, store chicken in an airtight container in the fridge for up to 3 days. To reheat without losing crunch, pop pieces in a 375°F (190°C) oven for about 10-15 minutes on a wire rack. Avoid microwaving if you want to keep that texture intact.
Flavors actually deepen after a day or so, making this a great make-ahead option for quick meals. I often pair it with a quick garlic butter shrimp ramen recipe or even a creamy ramen carbonara for a cozy dinner mix that’s both indulgent and satisfying.
Nutritional Information & Benefits
Each serving (about 1 chicken thigh) of this fried chicken contains roughly:
| Calories | 350-400 kcal |
|---|---|
| Protein | 28-32 g |
| Fat | 22-25 g (mostly from skin and oil) |
| Carbohydrates | 8-12 g (from flour coating) |
Chicken is a solid source of lean protein, essential for muscle repair and energy. Using skin-on pieces offers flavorful fat, which is satisfying but should be balanced with healthy sides. If you need a low-carb option, swapping flour for almond flour reduces carbs significantly.
Keep in mind the recipe contains gluten and is not dairy-free due to buttermilk, though substitutions can be made. From a wellness perspective, homemade fried chicken allows you to control oil type and seasoning, avoiding the preservatives and additives found in many fast-food versions.
Conclusion
This crispy cast iron fried chicken recipe has become a quiet staple in my kitchen because it delivers exactly what fried chicken should—golden, crunchy, juicy, and satisfying without unnecessary fuss. Whether you’re cooking for family, friends, or just treating yourself, it’s adaptable and approachable.
Feel free to tweak the seasoning or sides to match your mood and pantry. I love how it pairs with comfort dishes like the classic tuna melt on sourdough bread for a laid-back lunch or alongside fresh, light salads for balance.
Give this recipe a go and let it become one of those meals you rely on when you need a bit of comfort and crunch. I’d love to hear how you make it your own!
Frequently Asked Questions
Can I use boneless chicken for this recipe?
Yes, boneless chicken breasts or thighs can work, but cooking times will be shorter. Watch closely to avoid drying out the meat.
What’s the best oil for frying chicken in cast iron?
Vegetable, peanut, or canola oil are great choices due to their high smoke points and neutral flavor.
How do I keep the coating from falling off?
Rest the coated chicken on a wire rack for 10-15 minutes before frying. This helps the flour stick better during cooking.
Is it necessary to marinate the chicken in buttermilk?
Marinating tenderizes and adds flavor, but if you’re short on time, a quick 30-minute soak still helps. Alternatively, use yogurt-based marinades.
Can I make this recipe ahead of time?
You can coat the chicken and refrigerate it for a few hours before frying. Fried chicken leftovers store well and reheat nicely in the oven.
Pin This Recipe!
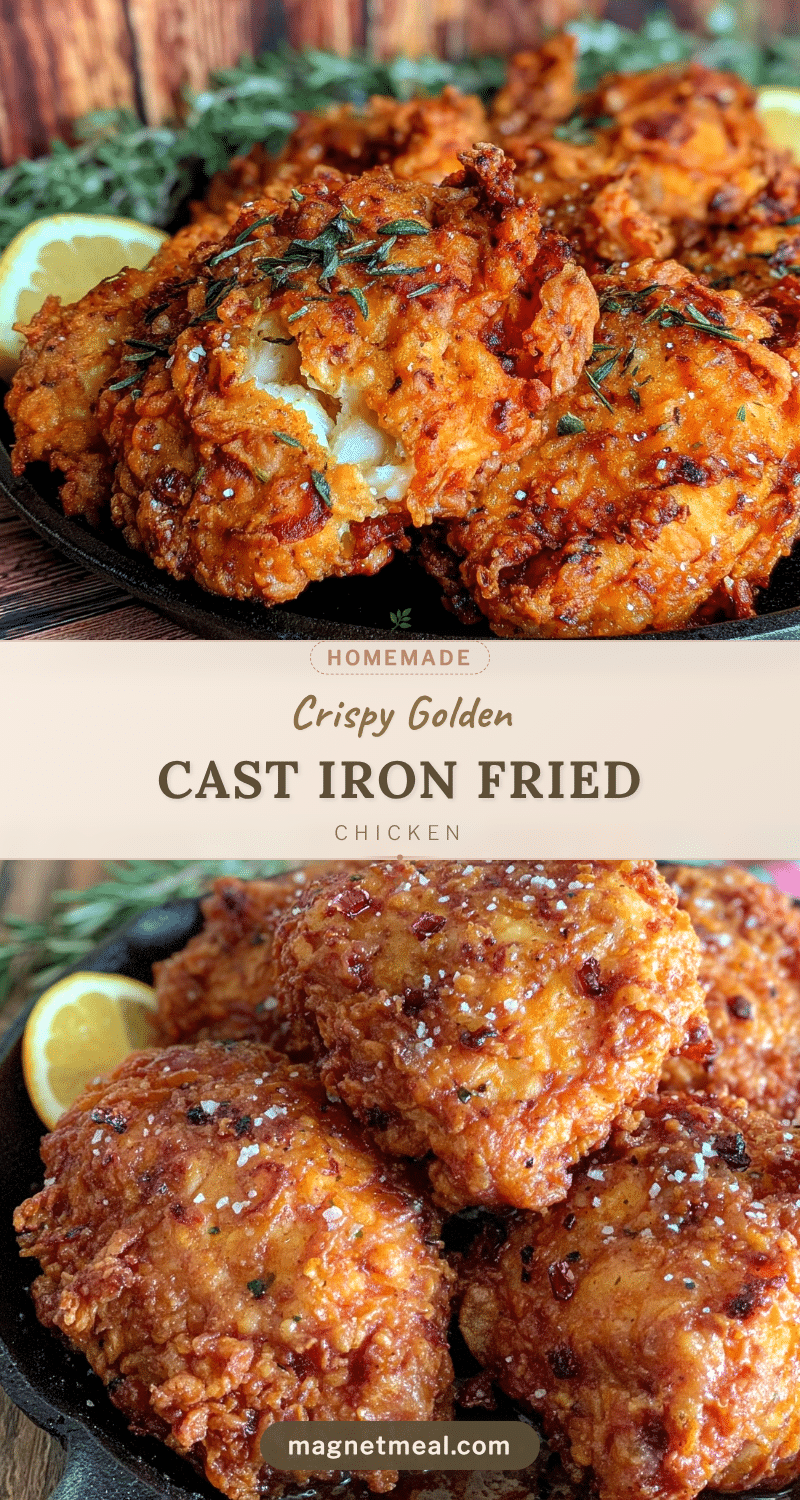
Crispy Cast Iron Fried Chicken

A simple and quick recipe for perfectly golden, crispy fried chicken using a cast iron skillet. Juicy inside with a flavorful, crunchy crust, ideal for busy weeknights or gatherings.
- Prep Time: 15 minutes plus 1 hour marination
- Cook Time: 20-25 minutes
- Total Time: 1 hour 40 minutes
- Yield: 4 servings 1x
- Category: Main Course
- Cuisine: American
Ingredients
- 2 pounds bone-in, skin-on chicken pieces (thighs or drumsticks)
- 1 ½ cups buttermilk (or 1 ½ cups milk + 1 tbsp lemon juice as substitute)
- 2 cups all-purpose flour (240 g)
- 1 tsp smoked paprika
- 1 tsp garlic powder
- 1 tsp onion powder
- 1 tsp salt (adjust to taste)
- ½ tsp black pepper
- ¼ tsp cayenne pepper (optional)
- 1 ½ to 2 cups vegetable oil (360–480 ml) for frying (can substitute peanut or canola oil)
- Optional: pinch of dried thyme or oregano for flour mix
Instructions
- Rinse and pat dry chicken pieces. Place in a large bowl and pour in buttermilk. Cover and refrigerate for at least 1 hour, preferably overnight.
- In a separate large bowl, combine flour, smoked paprika, garlic powder, onion powder, salt, black pepper, and cayenne pepper if using. Stir well.
- Remove chicken from buttermilk one at a time, letting excess drip off. Dredge thoroughly in seasoned flour, pressing lightly to adhere. Place coated pieces on a wire rack and rest for 10-15 minutes.
- Pour vegetable oil into a cast iron skillet about 1 inch deep. Heat over medium heat to 350°F (175°C).
- Carefully add chicken pieces skin-side down without crowding. Fry for 7-8 minutes per side, maintaining oil temperature between 325-350°F (163-175°C), until crust is deep golden brown and chicken is cooked through.
- Transfer fried chicken to a wire rack over a baking sheet to drain excess oil and keep crispy. Let rest 5 minutes before serving.
Notes
Use skin-on chicken pieces for best texture. Maintain oil temperature between 325-350°F to avoid soggy or burnt crust. Rest coated chicken before frying to help flour adhere. Drain fried chicken on wire rack, not paper towels, to keep crust crispy. Can substitute buttermilk with milk and lemon juice or yogurt. For gluten-free, use gluten-free flour blend or almond flour. Leftovers reheat well in oven at 375°F for 10-15 minutes.
Nutrition
- Serving Size: About 1 chicken thig
- Calories: 350400
- Fat: 2225
- Carbohydrates: 812
- Protein: 2832
Keywords: fried chicken, cast iron skillet, crispy fried chicken, easy fried chicken recipe, golden crust chicken, buttermilk fried chicken


