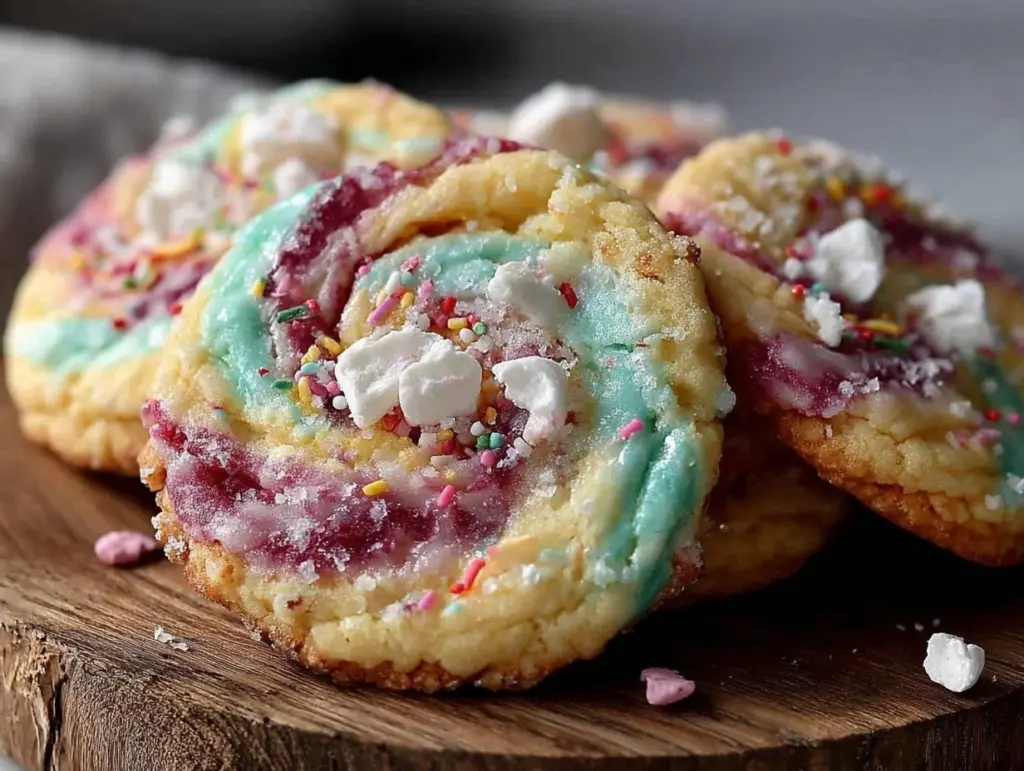
“You seriously have to see this,” my friend texted, dropping a snapshot of the most colorful sugar cookies I’d ever laid eyes on—vibrant tie-dye swirls topped with a glossy glaze that practically screamed fun. Honestly, I was skeptical at first. I mean, sugar cookies are sugar cookies, right? But curiosity got the better of me, and before I knew it, my kitchen was a whirl of pastel dough and dye as I tried my hand at creating these playful treats.
The first batch was a bit of a mess, with colors blending into a muddy swirl instead of that crisp tie-dye effect. But after a couple of tries, I landed on a method that balanced the colors perfectly and gave the cookies that irresistible glossy sheen on top. It wasn’t just about the look, though—the texture was just right, soft with a slight crisp at the edges, and the glaze added a sweet, shiny finish that made them feel special.
Making these vibrant tie-dye swirl sugar cookies with glossy glaze became a bit of an obsession—I found myself baking them more than once a week, tweaking colors and shapes, just to get that perfect pop. It’s funny how something so bright and playful can bring a little sparkle to an otherwise ordinary afternoon. If you’re the kind of person who loves sweet treats that double as eye candy, this recipe might just stick around on your favorites list too.
Why You’ll Love This Recipe
After several trials and lots of colorful fingers, this vibrant tie-dye swirl sugar cookies recipe won me over for good. It’s not just a pretty face; it’s a treat that hits the right notes every time.
- Quick & Easy: You can whip up the dough and have these cookies baked and glazed in under 45 minutes—perfect for those spontaneous baking urges or last-minute celebrations.
- Simple Ingredients: No need to hunt down rare items; the recipe calls for pantry staples like sugar, butter, eggs, and basic food coloring.
- Perfect for Parties and Gifts: These cookies bring a burst of color to birthday tables, potlucks, or as charming homemade gifts that show you care.
- Crowd-Pleaser: Kids and adults alike love the fun look and the balance of sweet and buttery flavors—it’s like a little party in your mouth.
- Unbelievably Delicious: The glossy glaze adds that extra shine and subtle sweetness, making these cookies feel just a touch fancy without the fuss.
What sets this recipe apart is the technique I developed to swirl the colors just right without them blending into a dull mess. Plus, the glossy glaze isn’t your average icing—it’s smooth, thin, and dries with a lovely shine that makes these cookies pop visually and texturally. Honestly, it feels like putting on a shiny coat before the big event!
It’s a recipe that’s as much about the joy of creating something cheerful as it is about the eating. Whether you’re baking for a birthday or just want to brighten up a random Tuesday, these cookies deliver with a smile.
What Ingredients You Will Need
This recipe keeps things straightforward, using simple, wholesome ingredients to create a bold visual impact and a satisfying texture without any complicated fuss. Most of these items are pantry staples, and the color magic comes from basic food coloring gels.
- For the Sugar Cookie Dough:
- 2 ¾ cups (345g) all-purpose flour (I prefer King Arthur for consistent results)
- 1 teaspoon baking powder
- ½ teaspoon salt
- 1 cup (227g) unsalted butter, softened (room temperature for easy mixing)
- 1 ½ cups (300g) granulated sugar
- 1 large egg, room temperature
- 1 teaspoon vanilla extract (a good-quality pure vanilla makes a noticeable difference)
- Assorted gel food coloring (red, blue, yellow, green, or your favorite tie-dye shades)
- For the Glossy Glaze:
- 1 ½ cups (180g) powdered sugar, sifted
- 2–3 tablespoons whole milk or dairy-free alternative (adjust for consistency)
- 1 teaspoon vanilla extract
- Pinch of salt
Ingredient Tips: Look for gel food coloring rather than liquid—it gives vibrant hues without watering down the dough. If you want to try a gluten-free twist, swap the flour for a cup-for-cup gluten-free blend. For the glaze, I’ve had success with almond milk when avoiding dairy—it keeps that smooth texture perfectly.
In summer, I sometimes add a teaspoon of lemon zest to the dough for a fresh zing that pairs beautifully with the sweet glaze. It’s a small tweak that makes the cookies feel a bit more grown-up.
Equipment Needed
- Mixing bowls (at least two for dough and glaze)
- Electric mixer or stand mixer (helps cream the butter and sugar smoothly; a hand mixer works fine too)
- Measuring cups and spoons (accuracy is key for consistent cookies)
- Rubber spatula (for folding and scraping dough)
- Baking sheets lined with parchment paper or silicone baking mats (keeps cookies from sticking and helps with even baking)
- Rolling pin (optional—this recipe uses a hands-on swirling method, but rolling can help shape cookies if you prefer)
- Small bowls or ramekins for dividing dough and mixing colors
- Cooling rack (to let the cookies rest before glazing)
If you don’t have a stand mixer, no worries—the dough comes together well with a sturdy wooden spoon or sturdy hand mixer. I’ve tried silicone spatulas and wooden spoons for mixing; the spatula makes scraping the bowl easier but the spoon works in a pinch. For budget-friendly baking mats, parchment paper is a great substitute and disposable.
Preparation Method
- Mix Dry Ingredients: In a medium bowl, sift together 2 ¾ cups (345g) all-purpose flour, 1 teaspoon baking powder, and ½ teaspoon salt. Set aside. This ensures your cookies have an even crumb without lumps.
- Cream Butter and Sugar: In a large bowl, beat 1 cup (227g) softened unsalted butter with 1 ½ cups (300g) granulated sugar using an electric mixer on medium speed until light and fluffy—about 3–4 minutes. Don’t rush this step; the air you incorporate here gives the cookies a tender texture.
- Add Egg and Vanilla: Beat in 1 large egg and 1 teaspoon vanilla extract until combined and smooth. The batter will look creamy and thick.
- Combine Dry and Wet: Gradually add the dry ingredients to the wet mixture, mixing on low speed or folding gently with a spatula until just combined. Avoid overmixing or you risk tougher cookies.
- Divide and Color Dough: Divide the dough evenly into 4–5 small bowls, depending on how many colors you want. Add a few drops of gel food coloring to each bowl and knead slightly with your fingers or a spatula to swirl the colors but not fully blend. This step is where the magic happens—don’t overmix or colors will muddy.
- Form the Tie-Dye Dough: Take small portions from each colored dough bowl and gently press them together to form a marbled ball about 1 ½ inches (4 cm) in diameter. You want swirls, not a uniform color. Place balls on a parchment-lined baking sheet, spacing them about 2 inches (5 cm) apart.
- Bake: Preheat your oven to 350°F (175°C). Bake the cookies for 10–12 minutes until the edges are just starting to turn golden but the centers still look slightly soft. They’ll firm up as they cool.
- Cool: Transfer cookies to a wire rack and cool completely before glazing. Patience here is key—if the cookies are warm, the glaze will run off.
- Prepare the Glossy Glaze: In a small bowl, whisk together 1 ½ cups (180g) powdered sugar, 2 tablespoons whole milk, 1 teaspoon vanilla extract, and a pinch of salt until smooth and pourable. Add more milk in small increments if needed to reach a glossy, thin consistency.
- Glaze the Cookies: Using a spoon or pastry brush, spread a thin layer of glaze over each cooled cookie. Let the glaze set for about 30 minutes until glossy and slightly firm.
Pro Tip: If your dough feels sticky, chill it for 15 minutes before shaping. Also, rotating your baking sheet halfway through baking helps cookies brown evenly. For a fun twist, try swirling in just three colors for a more subtle effect or four for maximum tie-dye drama.
Cooking Tips & Techniques
One of the trickiest parts of this recipe is getting vibrant, distinct swirls without ending up with a muddied mess. I learned the hard way that less mixing is more—it’s tempting to knead the dough like bread, but that just blends the colors too much.
Using gel food coloring instead of liquid is a game-changer. The gels pack a punch of color without adding extra moisture, which could alter dough texture and baking time.
When shaping the dough balls, gently pressing different colors together rather than kneading creates those beautiful swirls. If you press too hard, you lose the pattern.
For the glaze, consistency is everything. Too thick and it looks dull and cakey; too thin and it runs off the cookie. I usually start with 2 tablespoons of milk and add a bit more if needed. The pinch of salt balances the sweetness and helps the glaze dry with a shiny finish.
Timing matters, too. Let the cookies cool completely before glazing to keep the glaze from melting away. And don’t rush the drying process—30 minutes to an hour is usually perfect.
From my experience, baking in the middle rack gives the best even heat distribution. Overbaking by even a minute or two can make the cookies hard, so keep an eye on the edges—they should be just golden.
Variations & Adaptations
- Dietary Twist: Use almond flour or a gluten-free flour blend for a gluten-free batch. Just be aware the texture might be slightly softer. Swap butter for coconut oil for a dairy-free option.
- Seasonal Colors: Switch up the gel colors to match holidays or events—think red and green for Christmas, pastel shades for spring, or bold neons for summer parties.
- Flavor Boost: Add citrus zest (lemon or orange) to the dough for a fresh note, or a pinch of cinnamon and nutmeg for a cozy fall vibe. A splash of almond extract adds a subtle nutty sweetness.
- Baking Method: Instead of baking balls, roll the dough into a log wrapped in plastic and chill before slicing for a more uniform tie-dye pattern in each cookie.
- Glaze Variations: Swap vanilla for a splash of rum or maple extract in the glaze for a grown-up touch. Or mix in a teaspoon of cocoa powder for a chocolate glaze twist.
One personal favorite variation was using a pink and green color combo inspired by a birthday cake I recently made. The colors popped beautifully and made the cookies a centerpiece on the table.
Serving & Storage Suggestions
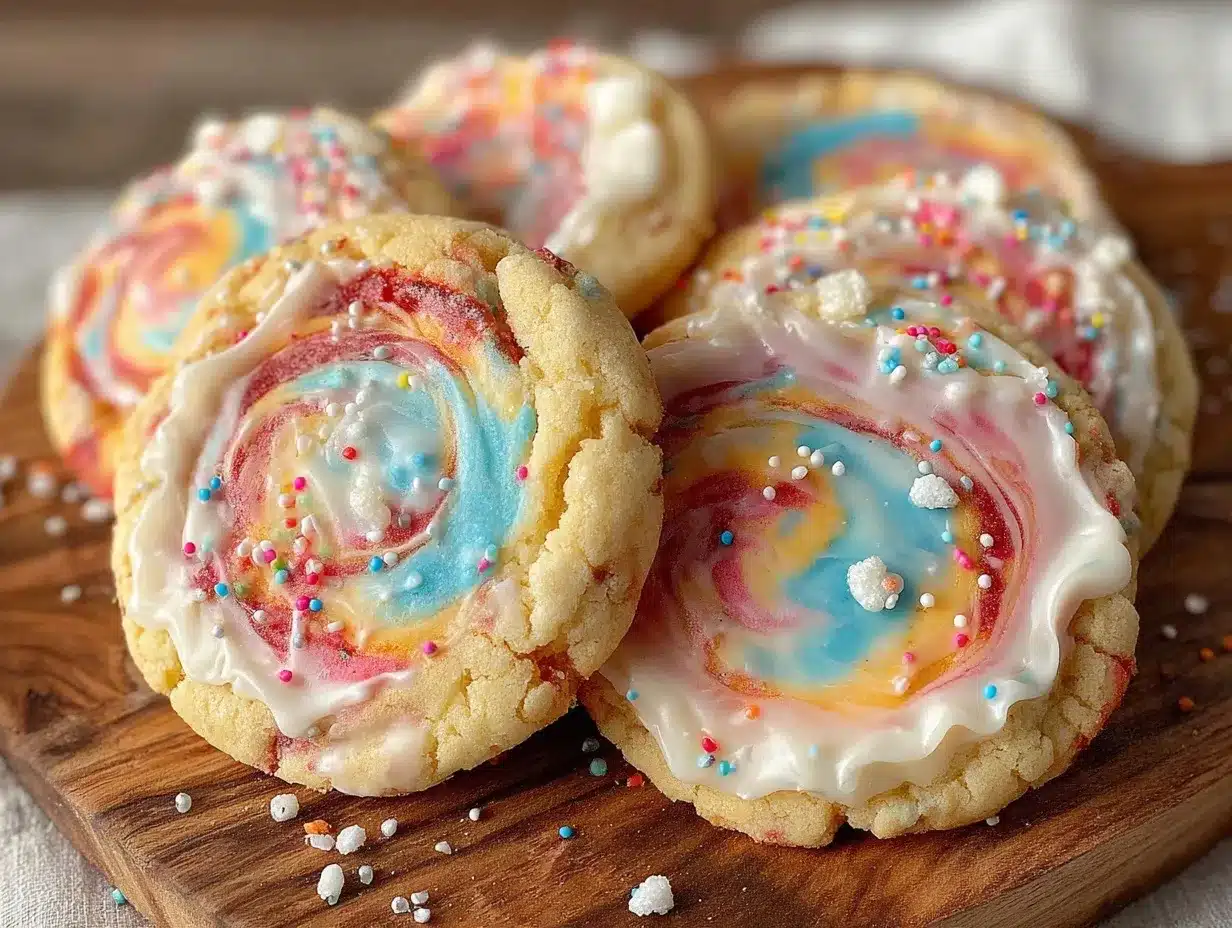
These vibrant tie-dye swirl sugar cookies are best served at room temperature, so the glaze remains glossy and the texture is soft but slightly crisp at the edges. They make a fantastic colorful addition to dessert tables, afternoon tea, or even a fun breakfast treat.
Pair them with a simple cup of black tea or a creamy latte to balance the sweetness. For a party, they’re charming alongside a wicked green velvet cupcake or a defying gravity layer cake for a colorful dessert spread.
Store the cookies in an airtight container at room temperature for up to 4 days. If you want to keep them longer, freezing works well—just freeze the baked, unglazed cookies, then glaze after thawing. Reheat briefly in a low oven (about 300°F/150°C for 5 minutes) to freshen before glazing.
Flavors tend to mellow and the glaze firms up nicely after a few hours, so if you’re prepping ahead, give them some time to rest before serving.
Nutritional Information & Benefits
Each cookie (based on 24 servings) contains approximately 150 calories, 7 grams of fat, 22 grams of carbohydrates, and 2 grams of protein. They’re a treat best enjoyed in moderation but do provide a quick energy boost with simple sugars and fat.
Using real butter adds richness and some fat-soluble vitamins, while the eggs contribute a bit of protein and structure. The powdered sugar glaze, although sweet, is a thin layer that adds texture and shine without too much extra sugar per cookie.
This recipe can be adapted for low-sugar diets by reducing sugar slightly or swapping powdered sugar in the glaze for a sugar-free alternative, though texture and gloss will vary.
For those with allergies, swapping ingredients like dairy butter with plant-based alternatives and gluten flour with gluten-free blends makes this a versatile cookie for many dietary needs.
Conclusion
These vibrant tie-dye swirl sugar cookies with glossy glaze aren’t just about the look—they’re a joyful baking experience and a delicious treat all in one. The playful colors and shiny finish make them a standout, but the tender texture and balanced sweetness keep you coming back for more.
Feel free to make the recipe your own by adjusting colors, flavors, or dietary needs. Honestly, once you try that glossy glaze and see the colors pop, it’s hard not to get hooked.
They’ve become my go-to for brightening up the day or making an impression without hours of fuss. If you give them a try, I’d love to hear how your tie-dye cookies turned out and what fun variations you dreamed up!
Happy baking and sweet swirling!
FAQs
Can I use liquid food coloring instead of gel for the tie-dye effect?
Gel food coloring is best because it provides vibrant colors without adding extra liquid, which can affect dough consistency. Liquid colors may cause the dough to be too soft or runny, making it harder to swirl distinctly.
How do I prevent the colors from blending into a muddy swirl?
Gently press colored dough portions together instead of kneading. Minimal mixing keeps the colors distinct. Also, chilling the dough slightly before shaping helps maintain the swirls.
Can I make these cookies vegan?
Yes! Use vegan butter and an egg substitute like flax or chia egg. For the glaze, swap milk for a plant-based option. The texture might differ slightly but still tasty.
Why is my glaze not glossy after drying?
The glaze consistency might be too thick or too thin. Aim for a pourable but not runny glaze. Also, adding a pinch of salt helps the glaze dry with a shiny finish.
How long do these cookies stay fresh?
Stored in an airtight container at room temperature, they stay fresh for about 4 days. For longer storage, freeze the cookies unglazed and glaze after thawing.
Pin This Recipe!
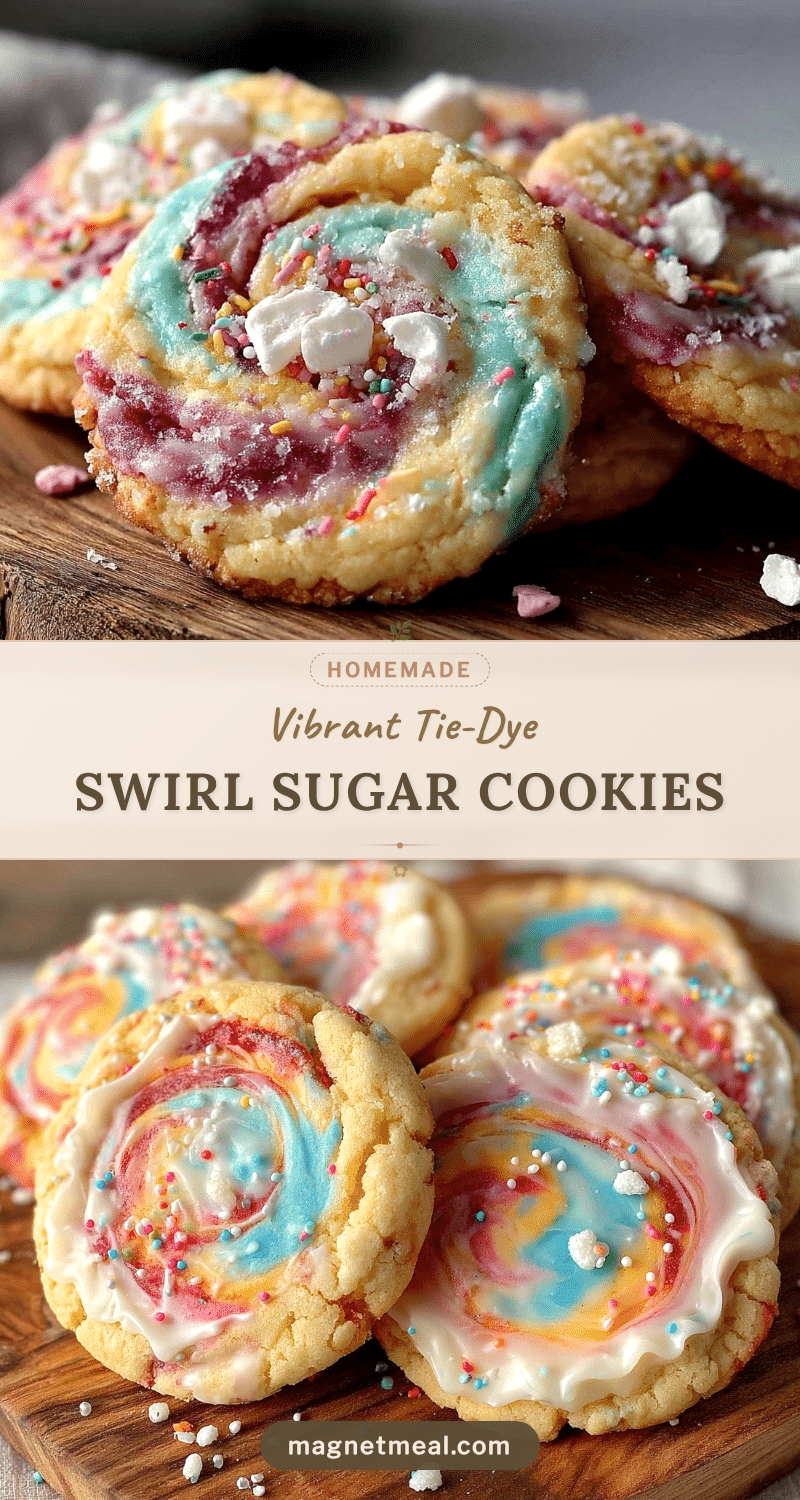
Vibrant Tie-Dye Swirl Sugar Cookies Easy Recipe with Glossy Glaze
These vibrant tie-dye swirl sugar cookies feature colorful swirls topped with a glossy glaze, offering a soft texture with a slight crisp at the edges and a sweet, shiny finish.
- Prep Time: 15 minutes
- Cook Time: 12 minutes
- Total Time: 42 minutes
- Yield: 24 servings 1x
- Category: Dessert
- Cuisine: American
Ingredients
- 2 ¾ cups (345g) all-purpose flour
- 1 teaspoon baking powder
- ½ teaspoon salt
- 1 cup (227g) unsalted butter, softened
- 1 ½ cups (300g) granulated sugar
- 1 large egg, room temperature
- 1 teaspoon vanilla extract
- Assorted gel food coloring (red, blue, yellow, green, or your favorite tie-dye shades)
- 1 ½ cups (180g) powdered sugar, sifted
- 2–3 tablespoons whole milk or dairy-free alternative
- 1 teaspoon vanilla extract (for glaze)
- Pinch of salt (for glaze)
Instructions
- Mix Dry Ingredients: In a medium bowl, sift together 2 ¾ cups (345g) all-purpose flour, 1 teaspoon baking powder, and ½ teaspoon salt. Set aside.
- Cream Butter and Sugar: In a large bowl, beat 1 cup (227g) softened unsalted butter with 1 ½ cups (300g) granulated sugar using an electric mixer on medium speed until light and fluffy, about 3–4 minutes.
- Add Egg and Vanilla: Beat in 1 large egg and 1 teaspoon vanilla extract until combined and smooth.
- Combine Dry and Wet: Gradually add the dry ingredients to the wet mixture, mixing on low speed or folding gently with a spatula until just combined. Avoid overmixing.
- Divide and Color Dough: Divide the dough evenly into 4–5 small bowls. Add a few drops of gel food coloring to each bowl and knead slightly to swirl colors without fully blending.
- Form the Tie-Dye Dough: Take small portions from each colored dough bowl and gently press them together to form marbled balls about 1 ½ inches (4 cm) in diameter. Place on parchment-lined baking sheet, spacing 2 inches apart.
- Bake: Preheat oven to 350°F (175°C). Bake cookies for 10–12 minutes until edges start to turn golden but centers remain slightly soft.
- Cool: Transfer cookies to a wire rack and cool completely before glazing.
- Prepare the Glossy Glaze: In a small bowl, whisk together 1 ½ cups (180g) powdered sugar, 2 tablespoons whole milk, 1 teaspoon vanilla extract, and a pinch of salt until smooth and pourable. Adjust milk for consistency.
- Glaze the Cookies: Spread a thin layer of glaze over each cooled cookie using a spoon or pastry brush. Let glaze set for about 30 minutes until glossy and slightly firm.
Notes
Use gel food coloring for vibrant colors without adding moisture. Chill dough for 15 minutes if sticky. Rotate baking sheet halfway through baking for even browning. Let cookies cool completely before glazing to prevent glaze from running. Adjust glaze thickness by adding milk gradually. Variations include gluten-free flour, dairy-free butter alternatives, and flavor boosts like citrus zest or spices.
Nutrition
- Serving Size: 1 cookie
- Calories: 150
- Fat: 7
- Carbohydrates: 22
- Protein: 2
Keywords: tie-dye sugar cookies, colorful cookies, glossy glaze, easy sugar cookies, party cookies, swirl cookies


