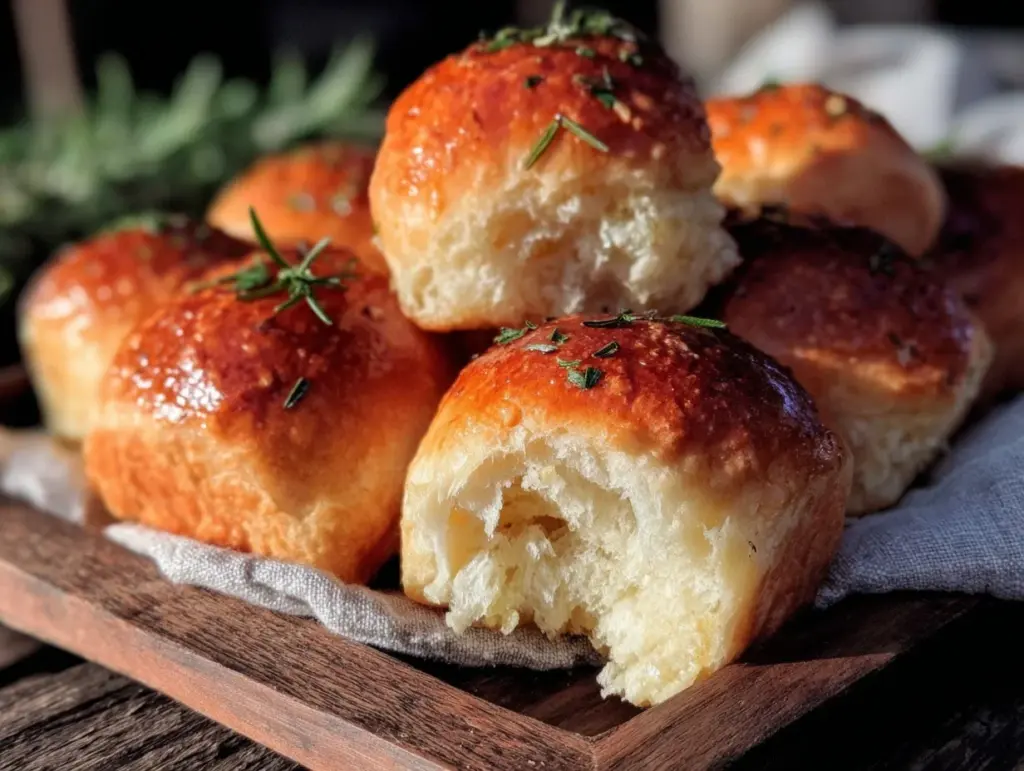
“You sure these rolls are ready?” my partner asked, peeking into the oven just as the kitchen was filling with that unmistakable roasted garlic aroma. Honestly, I was skeptical myself, having tossed together this batch after a long day when all I wanted was something warm and satisfying without the fuss. These cozy roasted garlic dinner rolls from scratch started as a bit of a kitchen experiment, fueled by leftover garlic heads and a craving for soft, pillowy bread that felt like a warm hug. I didn’t expect much, but the results? Well, they quickly became the kind of bread I reach for whenever I want something comforting and homemade.
There’s something about the smell of garlic roasting low and slow that just resets your day, you know? Paired with the soft, golden crust and tender crumb of these dinner rolls, it’s a combo that keeps me coming back. I remember making them multiple times in one week, tweaking the garlic roast time, or how much butter to swirl in, until I landed on this version — the one that’s now a quiet staple whenever I want that cozy feeling on the table. No fancy ingredients, no complicated steps, just straightforward bread-making that feels like a little win after a busy day.
What stuck with me, honestly, was the way these rolls invite you to slow down and savor something simple but truly satisfying. They’re perfect alongside a rich stew or even just a bowl of soup, like the kind you might find paired with a hearty dinner — much like the comforting vibes from a Greek lemon chicken soup on a chilly evening. I’m not usually one who bakes bread often, but these rolls changed that. They taste homemade in the best way, and they’re soft enough to pull apart with your hands, warm enough to melt butter right on top, and just garlicky enough to make you smile without overpowering your meal.
Why You’ll Love This Recipe
Making these cozy roasted garlic dinner rolls from scratch has been a game-changer for my weeknight dinners and weekend comfort food cravings alike. After testing this recipe several times, I can confidently say it hits all the right notes in flavor, texture, and ease.
- Quick & Easy: You can have these rolls ready in about 2 hours, including rising time — perfect for when you want homemade bread without an all-day commitment.
- Simple Ingredients: No need for specialty stores; basic pantry staples like flour, yeast, and garlic come together simply and beautifully.
- Perfect for Cozy Dinners: Whether you’re hosting a family meal or just want to add a little extra love to your dinner, these rolls fit the bill.
- Crowd-Pleaser: I’ve served these alongside dishes ranging from roasted chicken to a spicy pasta, and they always disappear fast — even with picky eaters around.
- Unbelievably Delicious: The roasted garlic adds a mellow sweetness and depth that pairs wonderfully with the soft, buttery crumb.
This recipe isn’t just another bread roll recipe. The secret lies in roasting the garlic first, which turns that raw sharpness into something mellow and caramelized, giving a subtle but distinct flavor. Plus, the dough is enriched with a bit of butter and milk, which makes the rolls tender and soft — not dry or crumbly like some breads can be. I’ve tried recipes where the garlic was mixed raw into the dough, and honestly, they weren’t nearly as smooth or comforting.
What makes these rolls special to me is how they balance indulgence with simplicity. They’re the kind of bread that feels like the perfect side for a cozy meal without stealing the spotlight. If you enjoy recipes like the classic tuna melt on sourdough bread, you’ll appreciate how these rolls bring that same homemade warmth to your dinner table with less fuss.
What Ingredients You Will Need
This recipe uses simple, wholesome ingredients to deliver bold flavor and satisfying texture without the fuss. Most of these are pantry staples, and you can easily swap or adjust based on what you have.
- All-purpose flour (3 ½ cups / 420 g) – provides structure; I like King Arthur flour for consistent results
- Active dry yeast (2 ¼ tsp / 7 g) – the magic that makes the dough rise
- Whole milk, warm (1 cup / 240 ml) – adds tenderness and richness (use dairy-free milk as a substitute)
- Unsalted butter (3 tbsp / 45 g), softened – for richness and softness
- Granulated sugar (2 tbsp / 25 g) – feeds the yeast and adds a touch of sweetness
- Salt (1 ½ tsp / 9 g) – balances flavor
- Garlic heads (2 medium) – roasted for mellow, sweet garlic flavor
- Butter (3 tbsp / 45 g), melted – to brush on rolls for that golden finish
- Optional fresh herbs like parsley or thyme (1 tbsp, chopped) – to sprinkle on top for extra flavor
Roasting the garlic first is key to mellowing its bite and giving these rolls their signature cozy flavor. If you want a twist, you can swap the all-purpose flour for bread flour to get a chewier texture or use almond flour for a gluten-free version (though the texture will be different).
Equipment Needed
- Mixing bowl: A large bowl for combining and kneading the dough; a stand mixer with a dough hook speeds things up but isn’t necessary.
- Baking sheet or round pan: For shaping and baking the rolls. I prefer a rimmed baking sheet lined with parchment paper.
- Kitchen towel or plastic wrap: To cover the dough while it rises. Keeps the dough warm and prevents drying out.
- Small saucepan or oven-safe dish: For roasting garlic heads.
- Pastry brush: To brush melted butter over the rolls before and after baking.
- Measuring cups and spoons: For precise ingredient amounts.
If you don’t have a stand mixer, no worries! I kneaded this dough by hand several times, and it’s actually kind of therapeutic — just a bit of elbow grease. For roasting garlic, if you don’t have a small pan, you can wrap the garlic heads tightly in foil and roast on a baking sheet instead.
Preparation Method
- Roast the garlic (about 40 minutes): Preheat your oven to 400°F (200°C). Slice the tops off each garlic head to expose the cloves. Place the garlic in a small oven-safe dish, drizzle with 1 tablespoon olive oil, cover tightly with foil, and roast until soft and golden, about 40 minutes. Let cool.
- Activate the yeast (5-10 minutes): Warm the milk to about 110°F (43°C) — warm, not hot. Stir in the sugar and yeast. Let it sit until foamy, about 5-10 minutes. If it doesn’t foam, your yeast might be dead; start over.
- Prepare the dough (10-15 minutes): In a large bowl or stand mixer, combine the flour and salt. Add the softened butter, then pour in the yeast mixture. Squeeze the roasted garlic cloves from their skins and mash them into a smooth paste; add this to the dough. Mix until a shaggy dough forms.
- Knead the dough (8-10 minutes): Knead by hand on a lightly floured surface or with a mixer’s dough hook until smooth and elastic. The dough should be soft but not sticky. If it’s too sticky, sprinkle a bit more flour.
- First rise (1 to 1 ½ hours): Place the dough in a greased bowl, cover with a towel or plastic wrap, and let it rise in a warm spot until doubled in size.
- Shape the rolls (10 minutes): Punch down the dough gently and divide it into 12 equal pieces (about 70 g / 2.5 oz each). Shape each piece into a smooth ball and place on a parchment-lined baking sheet, spaced slightly apart for soft sides or closer for pull-apart rolls.
- Second rise (30-45 minutes): Cover the rolls loosely and let rise again until puffy and almost doubled.
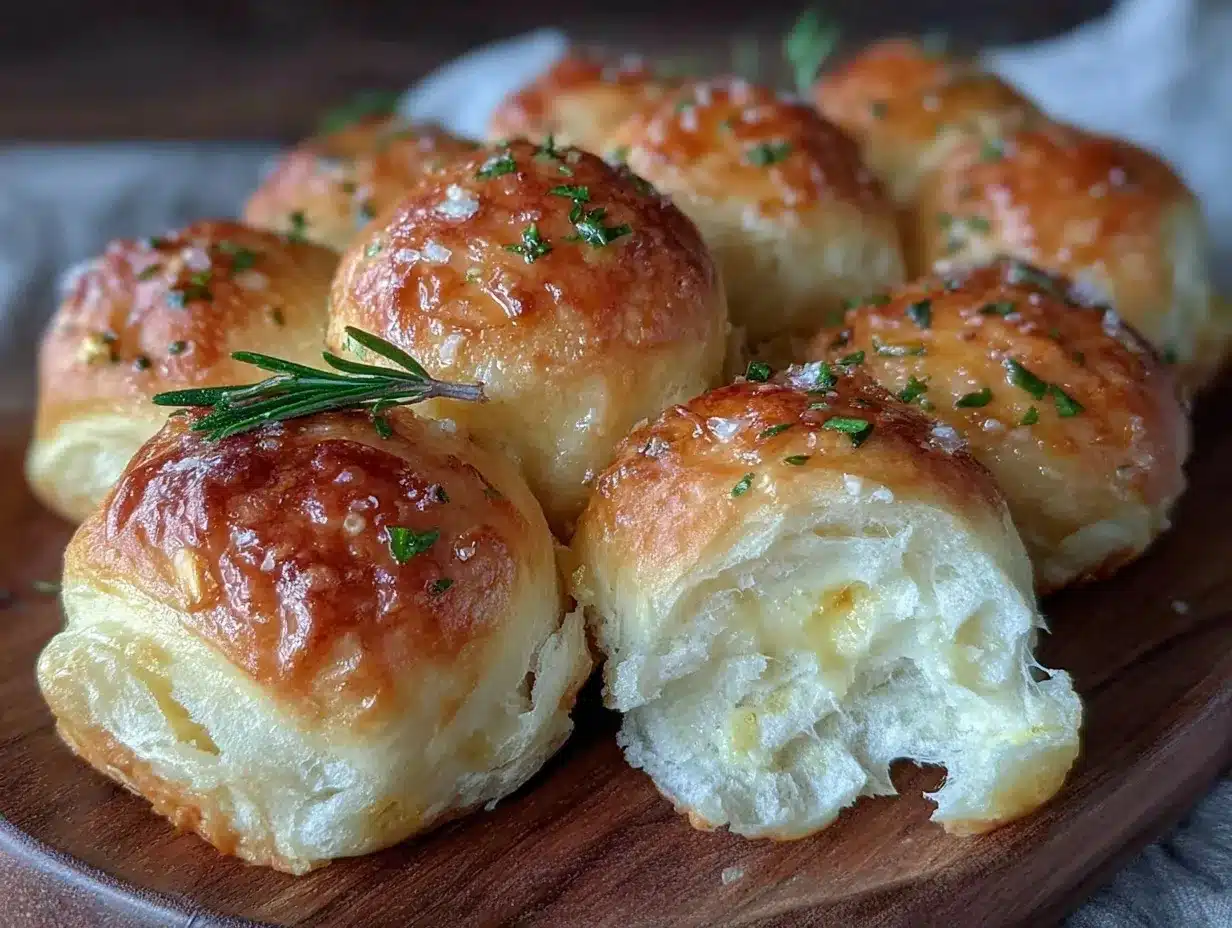
- Preheat oven and prepare for baking: Preheat oven to 375°F (190°C). Brush the tops of the rolls with melted butter and sprinkle optional fresh herbs if you like.
- Bake (18-22 minutes): Bake until the rolls are golden brown and sound hollow when tapped. Keep an eye after 18 minutes to avoid over-baking.
- Final butter brush and cooling: Remove rolls from oven and immediately brush again with melted butter. Let cool slightly before serving to enjoy the soft texture.
These steps are straightforward, but timing is everything when it comes to rising. Too cold, and the dough takes forever; too hot, and the yeast dies. I’ve learned to place my bowl near a sunny window or in my oven with just the light on to get perfect rises every time.
Cooking Tips & Techniques
One tip I swear by is roasting the garlic heads whole instead of mincing raw garlic into the dough. The roasting process transforms the garlic into a sweet, mellow spread that blends beautifully with the dough. If you skip this, the garlic bite can be sharp or overpowering.
Kneading is another crucial step. I’ve tried shortcuts like minimal kneading or using only a mixer, and while the dough still rises, the texture suffers. Dough should feel elastic and smooth — a bit tacky but not sticky. If it clings too much, add a touch more flour, a tablespoon at a time.
For rising, I’ve found covering the dough with a clean kitchen towel keeps humidity just right. If your kitchen is cold, placing the dough inside an off oven with just the light on provides a gentle warmth. Avoid drafts or direct heat sources, which can dry out the dough’s surface.
When shaping, try not to handle the dough too roughly; gentle shaping preserves the air pockets that give you those soft, fluffy rolls. And brushing melted butter just after baking keeps the crust tender and adds a glossy, inviting finish.
Lastly, don’t rush the second rise. That puffiness is what creates the soft crumb inside. I once baked my rolls too soon because I was hungry — the texture was dense and heavy. Lesson learned!
Variations & Adaptations
- Cheesy Garlic Rolls: Add ½ cup (50 g) shredded mozzarella or cheddar cheese into the dough or sprinkle on top before baking for a melty, savory twist.
- Herb-Infused: Mix fresh rosemary, thyme, or chives into the dough along with the roasted garlic to boost the herbal aroma.
- Gluten-Free Version: Swap all-purpose flour for a gluten-free blend designed for baking (like Bob’s Red Mill 1-to-1). Expect a slightly different texture but still delicious.
- Whole Wheat Rolls: Replace half the flour with whole wheat for a nuttier flavor and added fiber.
- Garlic & Honey Rolls: Add 1 tablespoon honey to the dough for a subtle sweetness that pairs perfectly with the savory garlic.
For baking, you can also try shaping the dough into a pull-apart loaf in a loaf pan for a different presentation. I once paired these rolls with a rich butter-basted ribeye steak, and the soft, garlicky rolls soaked up every bit of that steak butter — unforgettable!
Serving & Storage Suggestions
Serve these cozy roasted garlic dinner rolls warm, fresh from the oven, ideally brushed with a little extra butter right before serving. They’re fantastic alongside soups, stews, or any main dish that could use a soft, flavorful bread to mop up sauces.
For leftovers, store the rolls in an airtight container or zip-top bag at room temperature for up to 2 days. To keep them longer, freeze the rolls individually wrapped in plastic wrap and then placed in a freezer bag for up to 3 months.
Reheat frozen rolls by wrapping in foil and warming in a 350°F (175°C) oven for 10-15 minutes. Or microwave wrapped in a damp paper towel for 15-20 seconds for a quick fix—though the oven method keeps them softer.
Interestingly, the roasted garlic flavor deepens a bit after a day or two, making these rolls taste even more robust. I often find myself planning meals around leftover rolls just because that mellow garlic note gets better with time.
Nutritional Information & Benefits
Each cozy roasted garlic dinner roll (assuming 12 rolls total) contains approximately:
| Calories | ~160 kcal |
|---|---|
| Carbohydrates | 28 g |
| Protein | 4 g |
| Fat | 4.5 g |
| Fiber | 1 g |
Garlic is well-known for its potential health benefits, including supporting the immune system and providing antioxidants. Using roasted garlic makes it gentler on the stomach but still flavorful. The use of milk and butter adds richness but also contributes calcium and vitamin D.
This recipe can be adapted for gluten sensitivity by using gluten-free flour blends and dairy-free milk and butter substitutes for lactose intolerance. Though not low-carb, these rolls fit well into a balanced diet when enjoyed in moderation.
Conclusion
These cozy roasted garlic dinner rolls from scratch are the kind of recipe that quietly earns a spot in your kitchen rotation. They bring that warm, homemade bread feeling that makes a meal feel complete and comforting without demanding hours of your time. I love how the roasted garlic adds just enough flavor to make these rolls special yet approachable.
Feel free to tweak the herbs, cheese, or sweetness to suit your taste — this recipe is forgiving and adaptable. Whether you’re pairing them with a simple soup or a hearty main, these rolls bring softness and warmth to the table that everyone will appreciate.
If you give these rolls a try, I’d love to hear how you made them your own — maybe with a herb twist or alongside your favorite roast. Sharing those small kitchen victories is what keeps cooking fun and fresh. Happy baking!
FAQs About Cozy Roasted Garlic Dinner Rolls
How long do these dinner rolls stay fresh?
Stored in an airtight container at room temperature, they stay fresh for about 2 days. For longer storage, freeze them for up to 3 months.
Can I use garlic powder instead of roasted garlic?
You can, but roasted garlic gives a milder, sweeter flavor and soft texture that garlic powder can’t replicate. If using garlic powder, add about 1 teaspoon to the dough and reduce added salt slightly.
Do I have to use milk in the recipe?
Milk enriches the dough and helps create a tender crumb, but you can substitute with non-dairy milk like almond or oat milk for a dairy-free option.
What if my dough is too sticky to handle?
Add a tablespoon of flour at a time while kneading until it’s manageable but still soft. Avoid adding too much flour, or the rolls might turn dense.
Can I make these rolls ahead of time?
Yes! You can prepare and shape the dough, then refrigerate it overnight before the second rise and baking the next day. Just bring the dough to room temperature before baking.
Pin This Recipe!
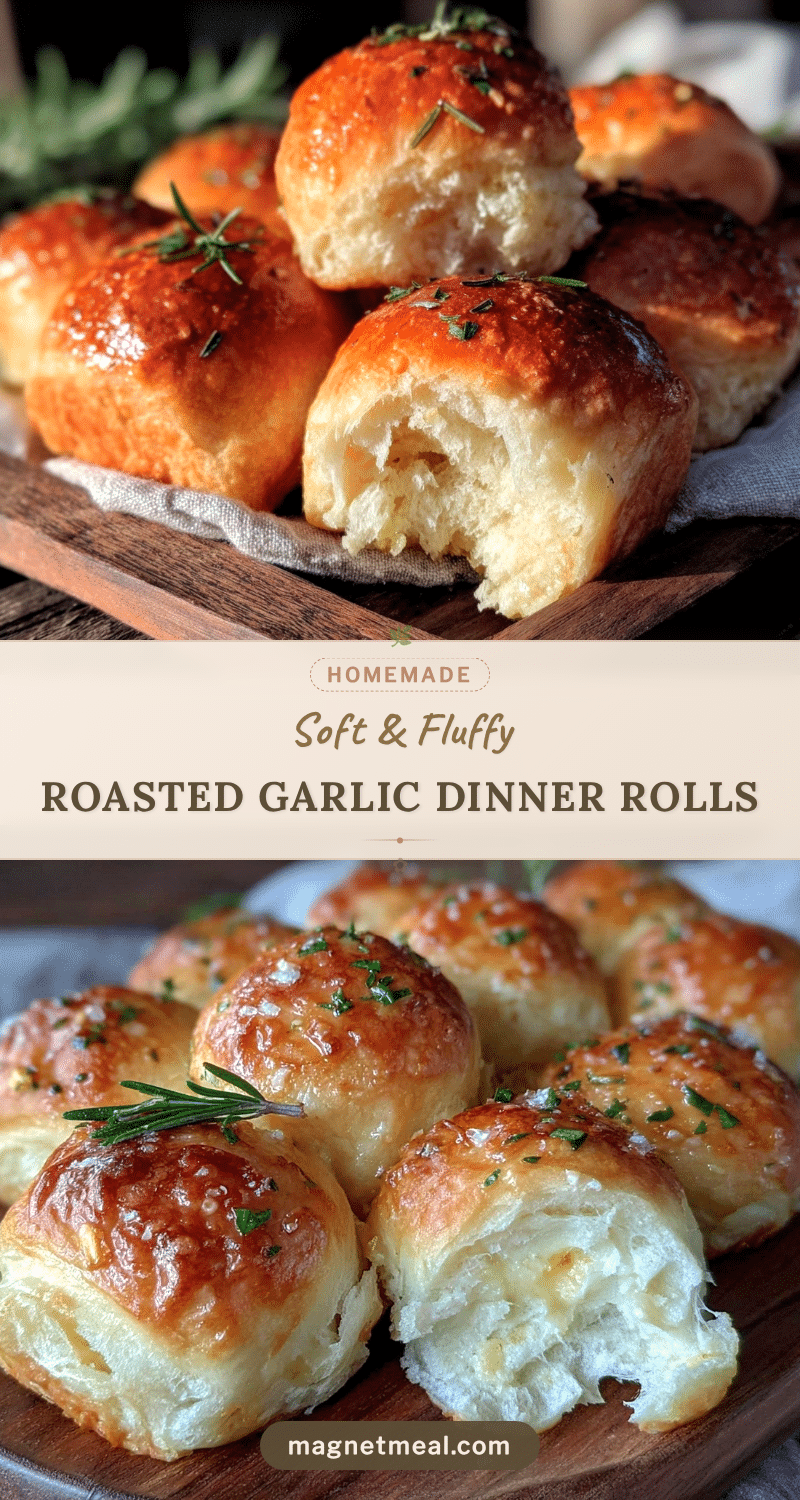
Cozy Roasted Garlic Dinner Rolls from Scratch

Soft, pillowy homemade dinner rolls infused with mellow roasted garlic flavor, perfect for cozy dinners and easy to make from scratch.
- Prep Time: 20 minutes
- Cook Time: 22 minutes
- Total Time: 2 hours 15 minutes
- Yield: 12 rolls 1x
- Category: Bread
- Cuisine: American
Ingredients
- 3 ½ cups (420 g) all-purpose flour
- 2 ¼ tsp (7 g) active dry yeast
- 1 cup (240 ml) warm whole milk
- 3 tbsp (45 g) unsalted butter, softened
- 2 tbsp (25 g) granulated sugar
- 1 ½ tsp (9 g) salt
- 2 medium garlic heads, roasted
- 3 tbsp (45 g) melted butter, for brushing
- 1 tbsp fresh herbs (parsley or thyme), chopped (optional)
Instructions
- Preheat oven to 400°F (200°C). Slice tops off garlic heads, drizzle with 1 tbsp olive oil, cover with foil, and roast for about 40 minutes until soft and golden. Let cool.
- Warm milk to about 110°F (43°C). Stir in sugar and yeast. Let sit 5-10 minutes until foamy.
- In a large bowl, combine flour and salt. Add softened butter, then pour in yeast mixture.
- Squeeze roasted garlic cloves from skins and mash into a smooth paste. Add to dough and mix until shaggy dough forms.
- Knead dough by hand or mixer for 8-10 minutes until smooth and elastic. Add flour if too sticky.
- Place dough in greased bowl, cover, and let rise in warm spot for 1 to 1 ½ hours until doubled.
- Punch down dough and divide into 12 equal pieces (~2.5 oz each). Shape into balls and place on parchment-lined baking sheet.
- Cover rolls loosely and let rise 30-45 minutes until puffy and nearly doubled.
- Preheat oven to 375°F (190°C). Brush rolls with melted butter and sprinkle herbs if using.
- Bake rolls 18-22 minutes until golden brown and hollow sounding when tapped.
- Remove from oven and immediately brush with melted butter. Let cool slightly before serving.
Notes
Roasting garlic mellows its sharpness and adds a sweet, caramelized flavor. Knead dough until elastic but not sticky. Keep dough warm during rising for best results. Brush rolls with melted butter before and after baking for a tender crust. Rolls can be stored at room temperature for 2 days or frozen for up to 3 months.
Nutrition
- Serving Size: 1 roll
- Calories: 160
- Fat: 4.5
- Carbohydrates: 28
- Fiber: 1
- Protein: 4
Keywords: roasted garlic dinner rolls, homemade bread, soft dinner rolls, garlic bread, easy bread recipe, cozy dinner rolls


