“Okay, so you won’t believe how these Easy 7-Layer Dip Jars came to be my go-to party snack,” I said, juggling a bag of groceries and a toddler who suddenly decided the floor was lava. It was one of those chaotic evenings where ordering takeout felt like surrender, but I wanted something quick and crowd-pleasing. I grabbed a few random ingredients from the fridge, threw them into small jars (because, honestly, who has time to fuss over a big dip bowl?), and the result? Total game changer. The layers looked amazing, the flavors hit just right, and somehow, even through the chaos, I felt like I pulled off a snack win.
The magic of these Easy 7-Layer Dip Jars is in their simple assembly and how they transform any gathering, from casual hangouts to last-minute celebrations. I remember my friend texting me mid-party, “What did you put in those jars? Everyone’s obsessed!” That’s when it hit me—these aren’t just party snacks; they’re little flavor explosions, personalized and portable. Plus, the jars keep everything neat and tidy, which means less mess and more mingling. It’s honestly refreshing to have something that looks stunning without requiring a full day in the kitchen.
What really seals the deal for me is how these jars carry that classic 7-layer dip comfort but in a neat, modern way. The layers stay distinct, making every bite a perfect mix of creamy, tangy, and crunchy. I’ve brought these jars to potlucks, birthday parties, and even casual movie nights, and every time they get devoured faster than I can refill them. So, if you’re looking for a no-fuss, visually appealing snack that’ll make you look like you spent hours prepping, these dip jars might just be your new best friend.
Honestly, it’s that quiet realization that simple ingredients and a bit of creative presentation can turn a familiar recipe into something memorable. And really, isn’t that what party snacks should be about? Easy, tasty, and a little bit special.
Why You’ll Love This Recipe
After testing this Easy 7-Layer Dip Jars recipe multiple times (yes, more than a few!), I can say with confidence it’s a rare find that blends simplicity with wow-factor. Here’s why it’s become a staple in my snack rotation:
- Quick & Easy: Ready in under 15 minutes, perfect for those hectic days when you need to throw together something fast but impressive.
- Simple Ingredients: Nothing fancy here—mostly pantry staples and fresh produce you probably already have on hand.
- Perfect for Parties: Whether it’s a casual get-together or a festive celebration, these jars add a pop of color and flavor everyone loves.
- Crowd-Pleaser: Kids and adults alike can’t resist the creamy layers and zesty toppings that make each bite exciting.
- Unbelievably Delicious: The texture contrast—from smooth beans to crunchy chips—is pure comfort food magic.
What sets this recipe apart is the jar presentation. Unlike traditional dips where layers get muddled, the jars keep everything neat and fresh, which makes serving a breeze. Plus, layering the guacamole and salsa separately means you get that fresh tang in every spoonful—no soggy chips here! I’ve also tweaked the seasoning to balance the classic flavors with a hint of smoky cumin and just the right amount of lime zest, so it’s anything but ordinary.
It’s a recipe that feels like a little treat every time. You know that moment when you take the first bite and close your eyes because it just hits the spot? That’s exactly what this is. It’s party food that comforts, excites, and keeps you coming back for more.
What Ingredients You Will Need
This Easy 7-Layer Dip Jars recipe calls for straightforward, fresh ingredients that layer together beautifully for both flavor and texture. Most are pantry staples, with a few fresh touches to keep things lively and bright.
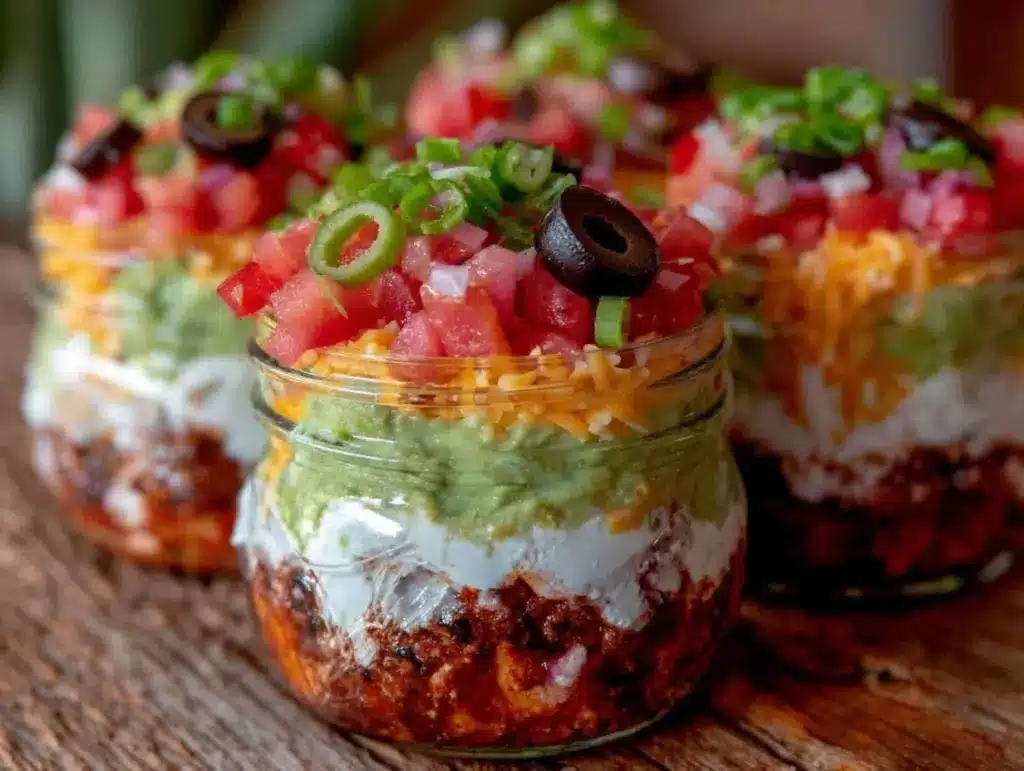
- Refried Beans: 1 cup (about 240g) – I prefer a smooth, mild brand like Rosarita for that creamy base.
- Sour Cream: 1 cup (240ml), full fat for richness, but you can swap with Greek yogurt for a tangier, healthier twist.
- Guacamole: 1 cup (240g), homemade or store-bought – ripe avocados mashed with lime juice and salt.
- Salsa: 1 cup (240ml), chunky or smooth depending on your texture preference – I like a medium-spicy variety to keep things interesting.
- Shredded Cheddar Cheese: 1 cup (about 100g) – sharp cheddar adds a nice tang; Mexican blend works great too.
- Chopped Green Onions: 1/4 cup (about 25g) – fresh and crisp, adds that mild onion bite.
- Black Olives: 1/4 cup (about 30g), sliced – these little gems add a salty contrast.
- Tortilla Chips: For serving – use sturdy, thick chips so they hold up to dipping.
You can easily customize the layers—for instance, swap out the black olives for diced jalapeños if you like a little heat, or add a dollop of hot sauce on top for an extra kick. For a seasonal twist, fresh corn kernels or diced tomatoes work beautifully layered in as well.
Equipment Needed
- Small Mason Jars or Clear Glass Jars: About 8 oz (240 ml) capacity each, perfect for individual servings and showing off those gorgeous layers.
- Spoons or Small Spatulas: For spreading each layer evenly without mixing.
- Mixing Bowls: A couple of medium bowls to prep guacamole and mix sour cream if you decide to add spices.
- Measuring Cups and Spoons: Accuracy matters to keep the flavors balanced.
If you don’t have jars, clear plastic cups are a good fallback for parties, though jars just look a bit more polished. I learned early on that layering with a spoon instead of just dumping helps keep those layers neat — it makes a huge difference when people start snapping photos! Also, if you plan on making these ahead, lids are a must to keep everything fresh.
Preparation Method
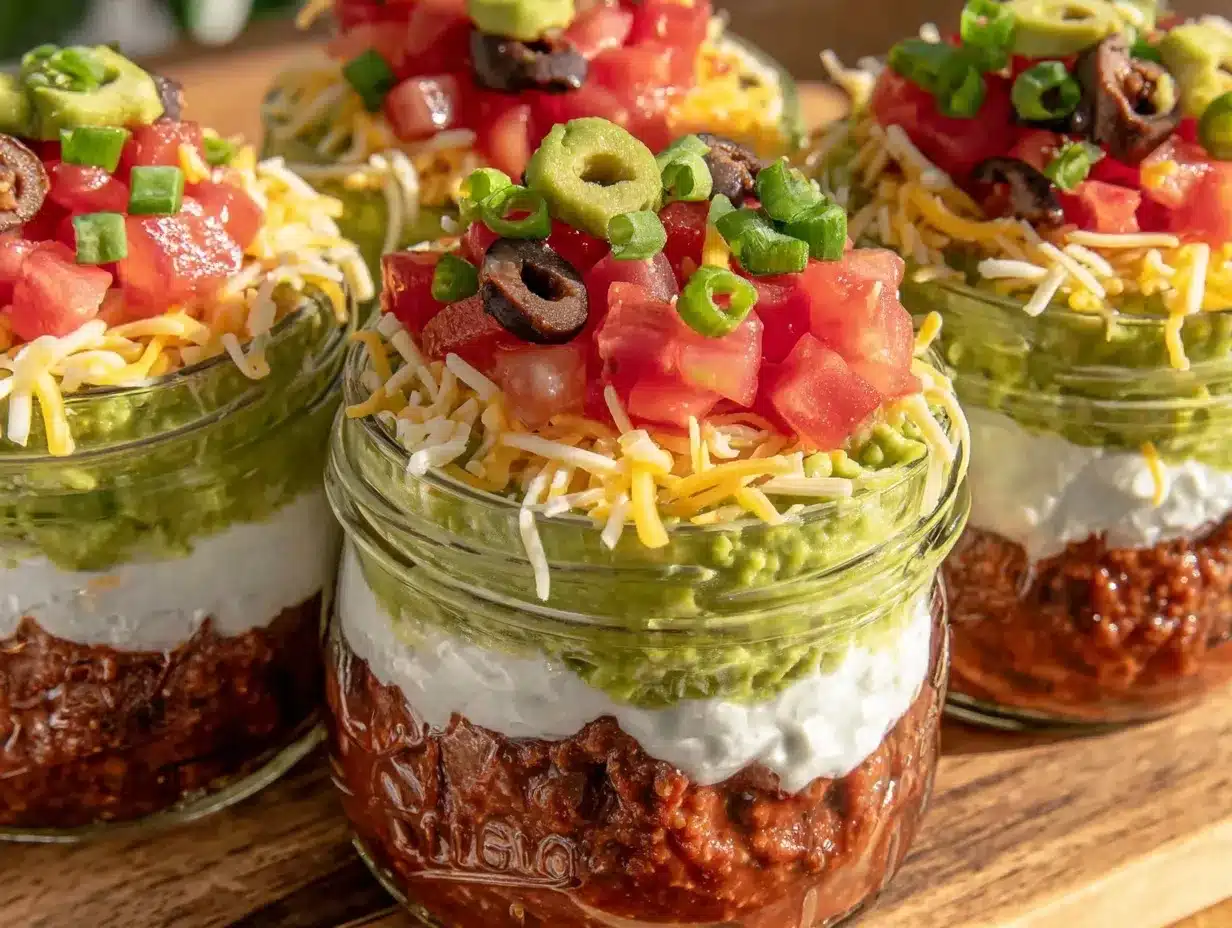
- Prepare the Base Layer (Refried Beans): Spoon about 2 tablespoons (30g) of refried beans into the bottom of each jar. Use the back of a spoon to smooth it evenly. This takes about 2 minutes.
- Add the Sour Cream: Layer 2 tablespoons (30ml) of sour cream gently over the beans. Try not to mix layers; a dollop and gentle spread works best. This step should take 2 minutes.
- Spread the Guacamole: Add 2 tablespoons (30g) of guacamole on top of the sour cream. Use a small spatula or spoon to keep the layer even. Take about 3 minutes here.
- Pour the Salsa: Carefully spoon 2 tablespoons (30ml) of salsa over the guacamole. The key is gentle placement to avoid breaking the guac layer. This takes 2 minutes.
- Sprinkle Cheese: Add a generous 2 tablespoons (15g) of shredded cheddar cheese. The cheese melts slightly if you serve warm, but cold is also great. This step takes 1 minute.
- Add Green Onions: Top with 1 tablespoon (about 6g) of chopped green onions for a fresh crunch. Takes about 1 minute.
- Finish with Black Olives: Place a few slices (about 1 tablespoon, 8g) of black olives on top for contrast and color. This final touch takes less than a minute.
- Chill or Serve: You can refrigerate the jars for up to 2 hours before serving. If chilling, let them sit at room temperature for 10 minutes before serving for best flavor.
Don’t rush the layering—it’s what makes these jars look stunning and keeps the flavors distinct. If you spot any layer mixing, a quick swipe of the spoon can fix it right away. Also, if you’re prepping for a crowd, line up all ingredients and assemble assembly-line style for efficiency!
Cooking Tips & Techniques
Honestly, layering dips in jars might sound simple, but I learned some lessons the hard way. First, always use sturdy jars or cups. I once tried this in flimsy plastic containers, and the layers collapsed during transport—total disaster! Also, spreading each layer gently helps keep that classic 7-layer dip look intact.
One trick I swear by: chill the refried beans before adding them. Warm beans can make the sour cream layer slippery and cause mixing. Also, if your guacamole is runny, drain off excess liquid or add a bit of mashed avocado to thicken it up. No one wants a soupy dip!
Timing-wise, prepping all ingredients first and then layering keeps things smooth. Multitasking by prepping guacamole while the beans chill saves precious minutes. And don’t underestimate the power of fresh lime juice in the guacamole—it brightens everything up.
If you want to impress, consider adding a sprinkle of smoked paprika or a dash of chili powder to the sour cream layer. It adds a subtle depth that guests often ask about.
Variations & Adaptations
This recipe is super flexible—perfect if you want to tailor it to your crowd or dietary needs.
- Vegetarian/Vegan: Use dairy-free sour cream and vegan cheese alternatives. Swap refried beans for mashed black beans or hummus for a different flavor base.
- Low-Carb/Keto: Skip the beans and layer diced avocado or cauliflower rice instead. Use full-fat sour cream and cheese, and serve with low-carb crackers or vegetable sticks.
- Spicy Twist: Add diced jalapeños to the guacamole or salsa layer. A drizzle of sriracha on top adds a nice kick.
- Seasonal Swap: In summer, fresh diced tomatoes or corn kernels can replace or supplement the salsa layer for a fresh burst.
One personal favorite variation is adding a layer of cooked and seasoned ground beef or chorizo for a meatier dip experience—kind of like an easy taco in a jar. It’s a hit at football game nights! Speaking of games, these jars pair perfectly alongside hearty dishes like the loaded tater tot nachos with queso, making your snack table unforgettable.
Serving & Storage Suggestions
These Easy 7-Layer Dip Jars are best served chilled or at room temperature. Serving straight from the fridge keeps the layers fresh and the flavors bright. I like to present them on a tray lined with tortilla chips for easy grabbing.
Pair these jars with a crisp white wine or a refreshing sparkling water with lime for a balanced snack experience. They also complement hearty mains like butter-basted ribeye steak beautifully if you’re planning a full meal.
To store leftovers, seal the jars tightly with lids and refrigerate for up to 2 days. The layers will soften over time, but the flavors actually deepen—just give them a gentle stir before serving again. Avoid freezing, as the creamy layers don’t hold up well.
Nutritional Information & Benefits
Each jar provides a balanced mix of protein, healthy fats, and fiber. The refried beans offer plant-based protein and fiber, supporting digestion and sustained energy. Avocados in the guacamole bring heart-healthy monounsaturated fats and essential vitamins like E and K.
Sour cream and cheese add calcium and richness but use in moderation if watching saturated fat intake. Opting for Greek yogurt instead of sour cream can reduce calories and add a protein boost.
This recipe is naturally gluten-free (just watch the tortilla chips) and can be easily adapted for vegan or low-carb diets, making it accessible for many dietary preferences without sacrificing flavor or enjoyment.
Conclusion
If you want a party snack that’s as easy to put together as it is to eat, these Easy 7-Layer Dip Jars are a no-brainer. They bring together classic, comforting flavors in a neat, portable package that looks fantastic and tastes even better. I love how they let me show up with style without any fuss—plus, they always spark compliments and questions.
Feel free to tweak the layers to your liking or occasion. Honestly, that’s the beauty of this recipe: it’s a blank canvas that’s forgiving and fun. So next time you’re scrambling for a snack idea, grab some jars, toss in these layers, and watch how quickly they disappear. And hey, if you try them out or come up with your own spin, drop a comment below—I’m always excited to hear new twists!
FAQs About Easy 7-Layer Dip Jars
Can I make these dip jars ahead of time?
Yes! You can assemble the jars up to 2 hours before serving and keep them refrigerated. Just let them sit at room temperature for about 10 minutes before serving for the best taste.
What if I don’t have mason jars? What else can I use?
Clear plastic cups or small glass bowls work well too, especially for casual parties. Just keep in mind that jars with lids help keep the dip fresh and are easier to transport.
How can I make this recipe vegan?
Swap the sour cream and cheese with dairy-free alternatives, and make sure your refried beans don’t contain lard. You can also use hummus or mashed black beans as the base.
Can I add meat to these dip jars?
Absolutely! Adding cooked ground beef, shredded chicken, or chorizo between layers makes for a heartier snack—perfect for game days.
What’s the best way to serve these dip jars?
Serve chilled or at room temperature with sturdy tortilla chips or vegetable sticks for dipping. They’re also great alongside dishes like classic tuna melt on sourdough bread for a filling snack spread.
Pin This Recipe!
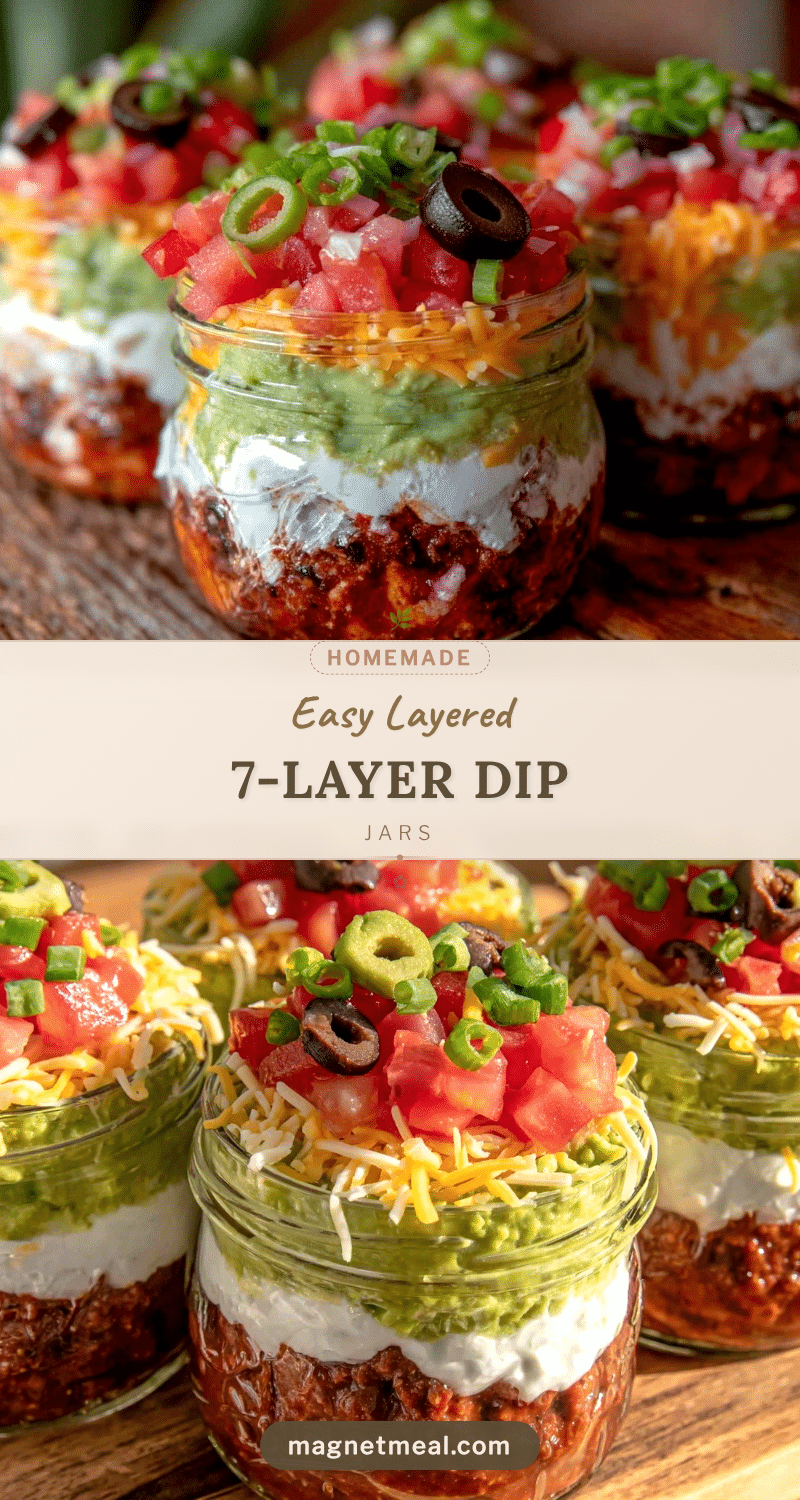
Easy 7-Layer Dip Jars

A quick and crowd-pleasing party snack featuring classic 7-layer dip ingredients served in individual jars for a neat, portable, and visually stunning presentation.
- Prep Time: 10 minutes
- Cook Time: 0 minutes
- Total Time: 10 minutes
- Yield: 6 servings 1x
- Category: Snack
- Cuisine: Mexican-American
Ingredients
- 1 cup refried beans (about 240g)
- 1 cup sour cream (240ml), full fat or Greek yogurt as a substitute
- 1 cup guacamole (about 240g), homemade or store-bought
- 1 cup salsa (240ml), medium-spicy, chunky or smooth
- 1 cup shredded cheddar cheese (about 100g)
- 1/4 cup chopped green onions (about 25g)
- 1/4 cup sliced black olives (about 30g)
- Tortilla chips for serving
Instructions
- Spoon about 2 tablespoons (30g) of refried beans into the bottom of each jar and smooth evenly with the back of a spoon.
- Layer 2 tablespoons (30ml) of sour cream gently over the beans without mixing layers.
- Add 2 tablespoons (30g) of guacamole on top of the sour cream, spreading evenly with a small spatula or spoon.
- Carefully spoon 2 tablespoons (30ml) of salsa over the guacamole, placing gently to avoid breaking the guacamole layer.
- Sprinkle 2 tablespoons (15g) of shredded cheddar cheese on top.
- Top with 1 tablespoon (about 6g) of chopped green onions.
- Finish with about 1 tablespoon (8g) of sliced black olives.
- Chill the jars for up to 2 hours before serving or serve immediately. If chilled, let sit at room temperature for 10 minutes before serving.
Notes
Use sturdy jars or cups to keep layers intact during transport. Chill refried beans before layering to prevent mixing. Drain excess liquid from guacamole if runny. For extra flavor, add smoked paprika or chili powder to sour cream layer. Can be made vegan by substituting dairy ingredients and using vegan refried beans. Can add cooked ground beef or chorizo for a meatier version. Serve with sturdy tortilla chips or vegetable sticks. Store leftovers refrigerated up to 2 days; avoid freezing.
Nutrition
- Serving Size: One 8 oz jar
- Calories: 280
- Sugar: 3
- Sodium: 420
- Fat: 18
- Saturated Fat: 6
- Carbohydrates: 20
- Fiber: 6
- Protein: 8
Keywords: 7-layer dip, party snack, dip jars, easy dip recipe, layered dip, party food, guacamole, refried beans, salsa, cheddar cheese


