“You really think those little cups will hold up?” my friend teased, eyeing the stack of red, white, and blue layers I was trying to assemble in the cramped kitchen at our Fourth of July picnic. Honestly, I was half-expecting the whole thing to collapse into a patriotic mess. But those Perfect Stars and Stripes No-Bake Cheesecake Cups had been my secret weapon for quick summer desserts all season — and, well, they never let me down.
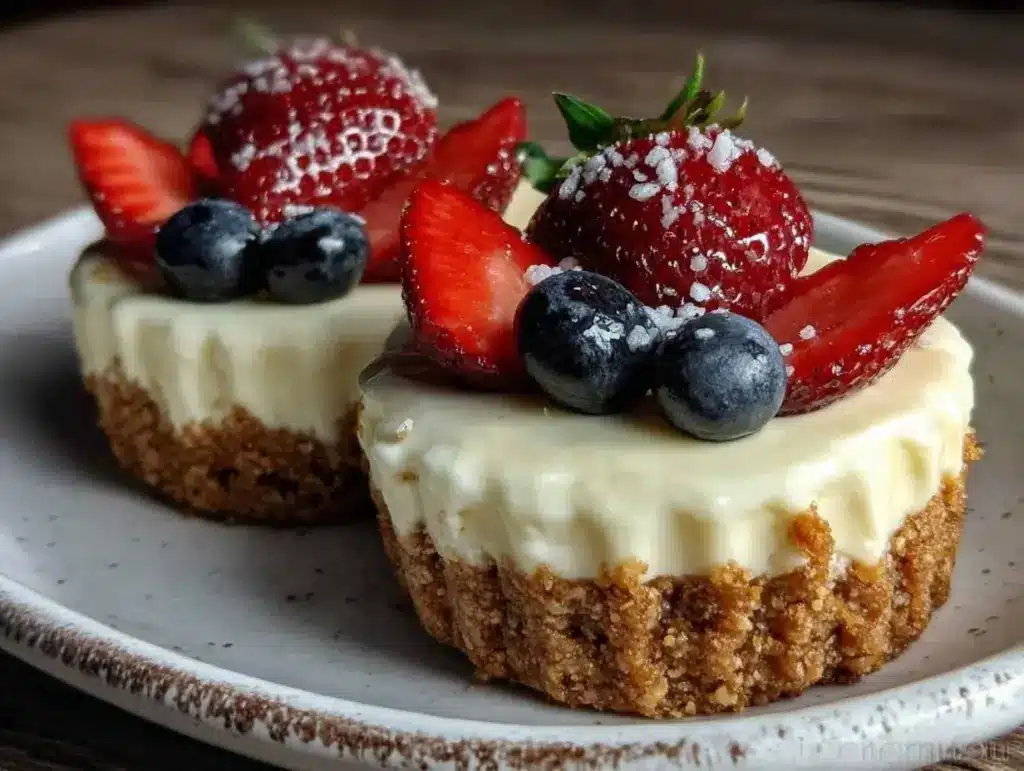
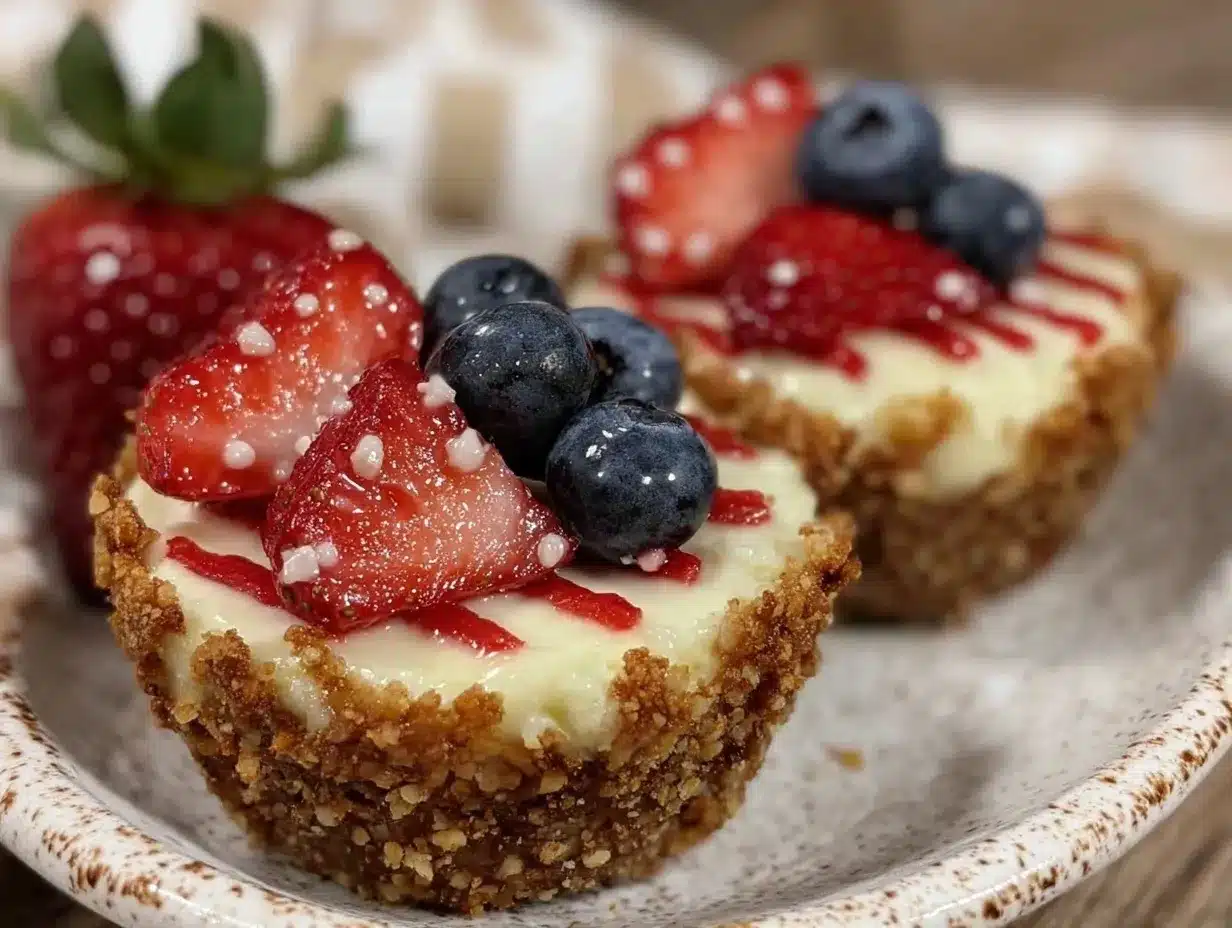
That afternoon, juggling a dozen plates and a curious toddler, I needed something simple yet festive, something that wouldn’t demand turning on the oven in the summer heat. These cheesecake cups came from a few meandering experiments with no-bake bases and fresh berries, inspired by a craving for something cool, creamy, and fun to eat without fuss. The way the crumbly graham cracker crust met the fluffy, tangy filling, topped with juicy strawberries and blueberries — it just worked, every single time.
It’s funny how a dessert can turn from a “let’s just try this” into a staple that friends start asking for at every backyard BBQ. And now, after making these more times than I can count (seriously, I lost track after the third batch last week), I’m still surprised at how easy they come together without skimping on that classic cheesecake flavor. It’s a little sweet celebration, in a cup, that fits perfectly in your hand and your summer mood.
So, if you want a dessert that feels festive but won’t have you sweating over the stove, these no-bake cheesecake cups might just be your new go-to. They’ve stuck around in my kitchen because they’re exactly what you want when you crave something special without the stress.
Why You’ll Love This Recipe
Having tested this recipe through multiple summer gatherings and last-minute dessert emergencies, I can say with confidence these Perfect Stars and Stripes No-Bake Cheesecake Cups are a keeper. Here’s why they’ve become a favorite:
- Quick & Easy: Ready in under 30 minutes, perfect for busy afternoons or unexpected guests.
- Simple Ingredients: No need for fancy or hard-to-find items — mostly pantry staples and fresh berries.
- Perfect for Summer Parties: Ideal for patriotic holidays, potlucks, or any casual get-together.
- Crowd-Pleaser: Kids love the sweet berries, adults appreciate the creamy, balanced cheesecake flavor.
- Unbelievably Delicious: The combination of the crumbly crust, smooth filling, and fresh fruit is something you’ll close your eyes to savor.
What makes these cheesecake cups different? The magic is in the texture — blending the cream cheese just right with a touch of whipped cream makes the filling ultra-light but still rich. Plus, layering the berries in that iconic stars and stripes pattern isn’t just eye-catching; it adds fresh bursts of flavor that balance the richness perfectly.
This dessert isn’t just something to serve, it’s the kind that sparks compliments and repeat requests. It’s kind of like the sweet cousin of my ombre birthday cake — visually stunning but a breeze to make. Honestly, these cheesecake cups have saved me more than once when I needed something quick but didn’t want to settle for just any dessert.
What Ingredients You Will Need
This recipe calls for straightforward, wholesome ingredients that come together in a flash — no complicated shopping trips required. The fresh berries add a seasonal touch, but you can swap them out depending on what’s available or your flavor preferences.
- For the crust:
- 1 ½ cups graham cracker crumbs (about 10 full sheets, finely crushed)
- 5 tablespoons unsalted butter, melted (I like using Kerrygold for a richer flavor)
- 2 tablespoons granulated sugar
- For the cheesecake filling:
- 16 ounces (450 g) cream cheese, softened (room temperature is key for smooth blending)
- ½ cup powdered sugar
- 1 teaspoon pure vanilla extract
- 1 cup heavy whipping cream, cold (for whipped cream; you can substitute with coconut cream for dairy-free)
- For the topping:
- 1 cup fresh strawberries, sliced (look for firm, bright berries)
- 1 cup fresh blueberries
- Optional: a few fresh mint leaves for garnish
- Mixing bowls — a medium and a large one
- Electric hand mixer or stand mixer (important for getting that fluffy whipped cream and smooth cream cheese filling)
- Measuring cups and spoons
- Spoons or rubber spatulas for folding and spreading
- 12 to 16 clear plastic or glass cups (about 6 oz / 180 ml each) — clear ones show off the layers best
- Food processor or rolling pin for crushing graham crackers (if not pre-crumbled)
- Make the crust: In a medium bowl, combine the graham cracker crumbs, sugar, and melted butter. Stir until the mixture resembles wet sand. Press about 2 tablespoons (30 g) firmly into the bottom of each cup to form an even crust layer. Chill while preparing the filling. (Approx. 10 minutes)
- Prepare the cheesecake filling: In a large bowl, beat the softened cream cheese with powdered sugar and vanilla extract until smooth and creamy — no lumps! This usually takes about 2-3 minutes on medium speed with a mixer. (Tip: If your cream cheese is cold, it will clump, so be patient or warm it slightly.)
- Whip the cream: In a separate chilled bowl, whip the heavy cream until soft peaks form. This means when you lift the whisk, the cream holds its shape but the tip curls over gently. (About 3-5 minutes)
- Fold the whipped cream: Gently fold the whipped cream into the cream cheese mixture in three additions. Use a spatula and fold carefully to keep the mixture light and airy without deflating the cream. (This step is key for the perfect texture!)
- Assemble the cups: Spoon or pipe the cheesecake filling over the chilled crust in each cup, filling about ¾ full. Smooth the surface gently with the back of a spoon.
- Add the stars and stripes: Arrange sliced strawberries on one side of the cup to create the red stripes; place blueberries on the other side for the blue star section. You can get creative here — some people like to add a few small white dots with whipped cream to mimic stars.
- Chill: Refrigerate the assembled cups for at least 2 hours (or overnight) to let the filling set and flavors meld. (Patience here means better texture and easier eating.)
- Serve and enjoy: Before serving, garnish with fresh mint leaves if desired. These cups are perfect straight from the fridge and hold up well for a few hours at a party.
- Softening cream cheese: Take it out early or microwave in short bursts (10 seconds max) to avoid lumps. Lumps are the enemy of smoothness here.
- Whipping cream: Cold cream whips best. Chill your bowl and beaters for an extra boost.
- Folding technique: Don’t rush folding. Use a gentle cutting and turning motion to keep as much air in the mixture as possible.
- Layering berries: Pat berries dry to prevent the filling from getting watery. Also, slice strawberries evenly for a neat stripe effect.
- Chilling time: Resist the urge to serve immediately. The cheesecake filling firms up nicely, making these cups easier to eat and more flavorful.
- Berry swap: Use raspberries or blackberries for a different color palette and tart flavor.
- Chocolate crust: Replace graham crackers with crushed chocolate cookies for a richer base.
- Dairy-free option: Use coconut cream instead of heavy cream and dairy-free cream cheese alternatives for a vegan-friendly dessert.
- Mini cheesecakes: Pour the filling into a muffin tin lined with cupcake liners for bite-sized treats perfect for kids’ parties.
- Patriotic twist: Add edible silver stars or sprinkles for an extra festive look that’s great for celebrations.
Pro tip: If you want a gluten-free version, you can swap the graham cracker crumbs for gluten-free cookie crumbs or crushed nuts. And if fresh berries aren’t in season, frozen will work fine — just thaw and drain any excess moisture before layering.
Equipment Needed
These no-bake cheesecake cups are pretty low-tech, so you don’t need a lot of fancy equipment. Here’s what I use:
If you don’t have a mixer, you can whisk by hand, but it takes more elbow grease and patience. For budget-friendly options, small hand mixers from trusted brands like KitchenAid or Cuisinart often go on sale and make a big difference in texture. Also, I’ve found that using clear cups not only looks better but helps portion control at parties.
Preparation Method
Cooking Tips & Techniques
Getting that perfect no-bake cheesecake texture is a bit of an art — here’s what I’ve learned from making these cups dozens of times:
I once tried speeding up chilling in the freezer, but that made the filling too firm and icy. Trust me, slow and steady wins the dessert race here. Also, if you want to add a little extra flair, a touch of lemon zest in the filling brightens things up beautifully.
Variations & Adaptations
This recipe is really flexible — here are some fun ways to make it your own:
One variation I adore is mixing a little almond extract into the filling alongside vanilla — it adds a subtle, nutty depth that surprises guests. When I made these for a casual get-together alongside my classic tuna melt, they really stole the show!
Serving & Storage Suggestions
Serve these cheesecake cups chilled — they taste best straight from the fridge when the filling is firm but still creamy. For presentation, clear cups really show off the stripes and stars, making them ideal for festive occasions.
Pair them with a light iced tea or sparkling lemonade to keep the meal feeling fresh and summery. They also make a great finish after a hearty dinner like a garlic butter shrimp ramen, balancing richness with their bright fruit topping.
Store leftover cups covered in the refrigerator for up to 3 days. Avoid freezing since the texture can suffer. When reheating (if you must), let them sit at room temperature for 10 minutes — microwaving is a no-go here.
Flavors tend to meld and become more harmonious after a few hours, so they actually taste better when made a few hours ahead of time. Just keep the fruit fresh and add any mint garnish just before serving to keep things looking lively.
Nutritional Information & Benefits
Each cheesecake cup is roughly 250 calories, with about 15 grams of fat and 20 grams of carbohydrates — mostly from the graham cracker crust and berries. The cream cheese and whipped cream provide a good amount of calcium and protein, making it more satisfying than typical sugary desserts.
Using fresh berries adds vitamin C and antioxidants, which is a nice bonus in a treat. For those watching carbs, swapping the crust for almond flour or a nut-based crust can reduce the carb load significantly.
Keep in mind the recipe contains dairy and gluten unless substitutions are made, so it may not be suitable for all allergies without modifications. I appreciate this dessert as a realistic indulgence — it’s not just empty calories but includes ingredients that feel nourishing and fresh.
Conclusion
If you want a dessert that’s festive, fuss-free, and downright tasty, these Perfect Stars and Stripes No-Bake Cheesecake Cups fit the bill. They’re easy to customize, quick to whip up, and always impress with their vibrant look and luscious texture.
Personally, I keep coming back to this recipe because it balances the creamy richness I crave with the bright freshness of berries — and I love how it brings that little spark of celebration to any table. Whether you’re planning a backyard bash or need a sweet pick-me-up, these cups are worth making your own.
Give them a try, tweak them to your taste, and don’t hesitate to share how your version turns out. I’m always curious to hear how others put their spin on this classic summer treat. Here’s to sweet, simple, and red-white-and-blue deliciousness!
FAQs
Can I prepare these cheesecake cups a day in advance?
Absolutely! In fact, chilling them overnight helps the flavors meld and the filling set perfectly. Just cover them well in the fridge.
What if I don’t have graham crackers for the crust?
You can substitute with crushed digestive biscuits, vanilla wafers, or gluten-free cookie crumbs depending on your preference.
Can I make these cheesecake cups vegan or dairy-free?
Yes! Use coconut cream whipped for the filling and a dairy-free cream cheese alternative. For the crust, choose vegan cookies or nut crumbs.
How do I prevent the berries from making the cheesecake watery?
Pat the berries dry before layering and add them just before serving if possible. Fresh berries work better than thawed frozen ones for this reason.
Is it possible to double or triple this recipe for larger gatherings?
Definitely. Just multiply the ingredients and assemble in more cups or larger containers. Keep the layering intact for the best presentation and flavor.
Pin This Recipe!
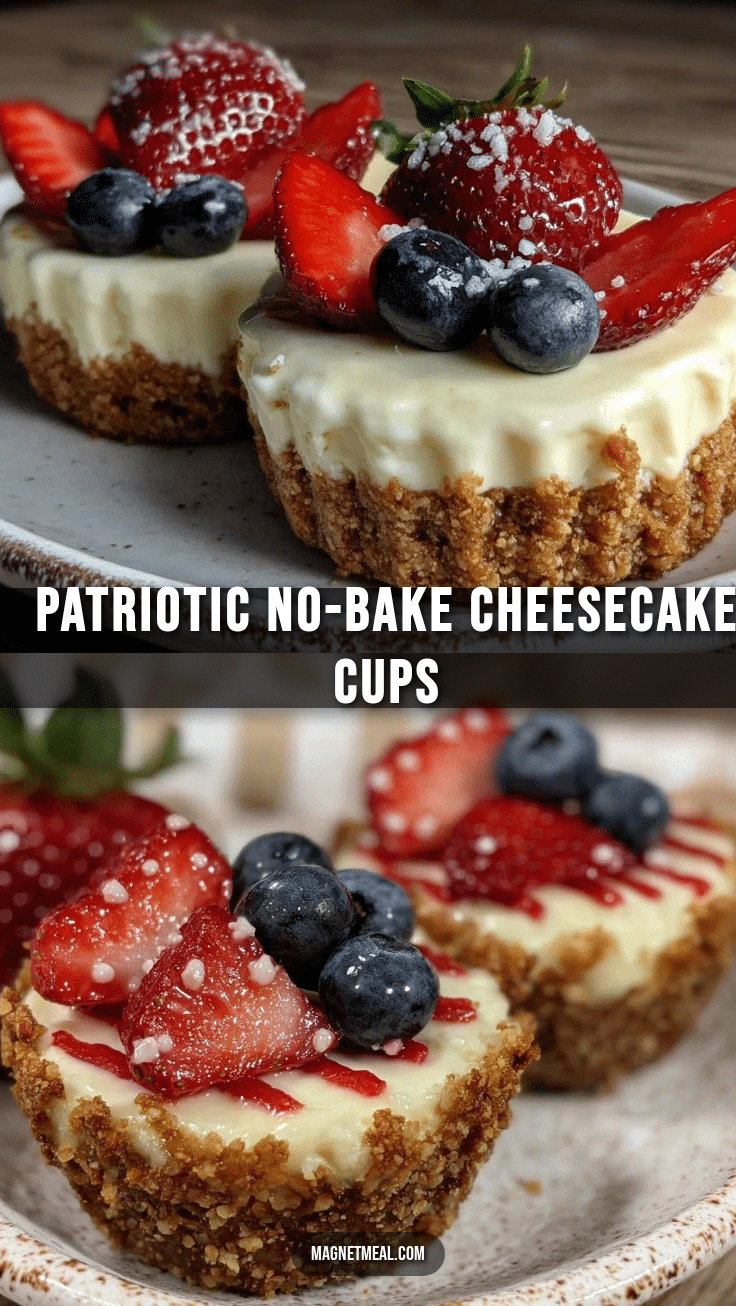
Perfect Stars and Stripes No-Bake Cheesecake Cups
A quick, easy, and festive no-bake cheesecake dessert featuring a graham cracker crust, creamy filling, and fresh strawberries and blueberries arranged in a patriotic stars and stripes pattern.
- Prep Time: 15 minutes
- Cook Time: 0 minutes
- Total Time: 2 hours 15 minutes
- Yield: 12 servings 1x
- Category: Dessert
- Cuisine: American
Ingredients
- 1 ½ cups graham cracker crumbs (about 10 full sheets, finely crushed)
- 5 tablespoons unsalted butter, melted
- 2 tablespoons granulated sugar
- 16 ounces (450 g) cream cheese, softened
- ½ cup powdered sugar
- 1 teaspoon pure vanilla extract
- 1 cup heavy whipping cream, cold
- 1 cup fresh strawberries, sliced
- 1 cup fresh blueberries
- Optional: a few fresh mint leaves for garnish
Instructions
- Make the crust: In a medium bowl, combine the graham cracker crumbs, sugar, and melted butter. Stir until the mixture resembles wet sand. Press about 2 tablespoons (30 g) firmly into the bottom of each cup to form an even crust layer. Chill while preparing the filling (approx. 10 minutes).
- Prepare the cheesecake filling: In a large bowl, beat the softened cream cheese with powdered sugar and vanilla extract until smooth and creamy (2-3 minutes on medium speed).
- Whip the cream: In a separate chilled bowl, whip the heavy cream until soft peaks form (about 3-5 minutes).
- Fold the whipped cream: Gently fold the whipped cream into the cream cheese mixture in three additions, using a spatula to keep the mixture light and airy.
- Assemble the cups: Spoon or pipe the cheesecake filling over the chilled crust in each cup, filling about ¾ full. Smooth the surface gently.
- Add the stars and stripes: Arrange sliced strawberries on one side of the cup to create the red stripes; place blueberries on the other side for the blue star section. Optionally add small white dots with whipped cream to mimic stars.
- Chill: Refrigerate the assembled cups for at least 2 hours or overnight to let the filling set and flavors meld.
- Serve and enjoy: Garnish with fresh mint leaves if desired. Serve chilled.
Notes
Softening cream cheese to room temperature is key for smooth blending. Chill the bowl and beaters for whipping cream to achieve better peaks. Fold whipped cream gently to keep the mixture airy. Pat berries dry before layering to prevent watery filling. Chill at least 2 hours for best texture; avoid freezing. Optional lemon zest can brighten the filling. For gluten-free, substitute graham crackers with gluten-free cookie crumbs or nuts. For dairy-free, use coconut cream and dairy-free cream cheese alternatives.
Nutrition
- Serving Size: 1 cheesecake cup (ab
- Calories: 250
- Sugar: 14
- Sodium: 180
- Fat: 15
- Saturated Fat: 9
- Carbohydrates: 20
- Fiber: 2
- Protein: 5
Keywords: no-bake cheesecake, patriotic dessert, Fourth of July dessert, cheesecake cups, summer dessert, easy cheesecake, berry dessert


