“Are you sure this is going to work?” I remember muttering under my breath, staring skeptically at the bowl of peanut butter filling while my kitchen timer ticked away. It was one of those evenings when I wanted dessert but couldn’t face turning on the oven. Honestly, I thought a no-bake peanut butter pie sounded almost too easy to be good. But here’s the thing — after just one spoonful, I was hooked. The silky filling against that rich, crunchy Oreo crust, all crowned with a shiny chocolate ganache, was unexpectedly perfect.
The recipe came about during a chaotic weekend when I had friends dropping by with zero notice. I needed something quick, indulgent, and fuss-free. I had some peanut butter and a package of Oreos on hand, and without much hope, I threw together this pie. What surprised me was how quickly it set in the fridge and how creamy it stayed without any baking involved. It soon became a crowd favorite — one friend even asked if I’d been hiding a secret recipe all along.
That moment, sitting quietly in my kitchen with a slice of this creamy no-bake peanut butter pie and a cup of coffee, was when I realized why this recipe stuck around. It’s approachable, comforting, with just the right balance of sweet and salty, and it doesn’t demand hours or fancy equipment. Plus, it’s the kind of dessert that invites sharing — or not, if you’re like me and want to savor every bite in peace.
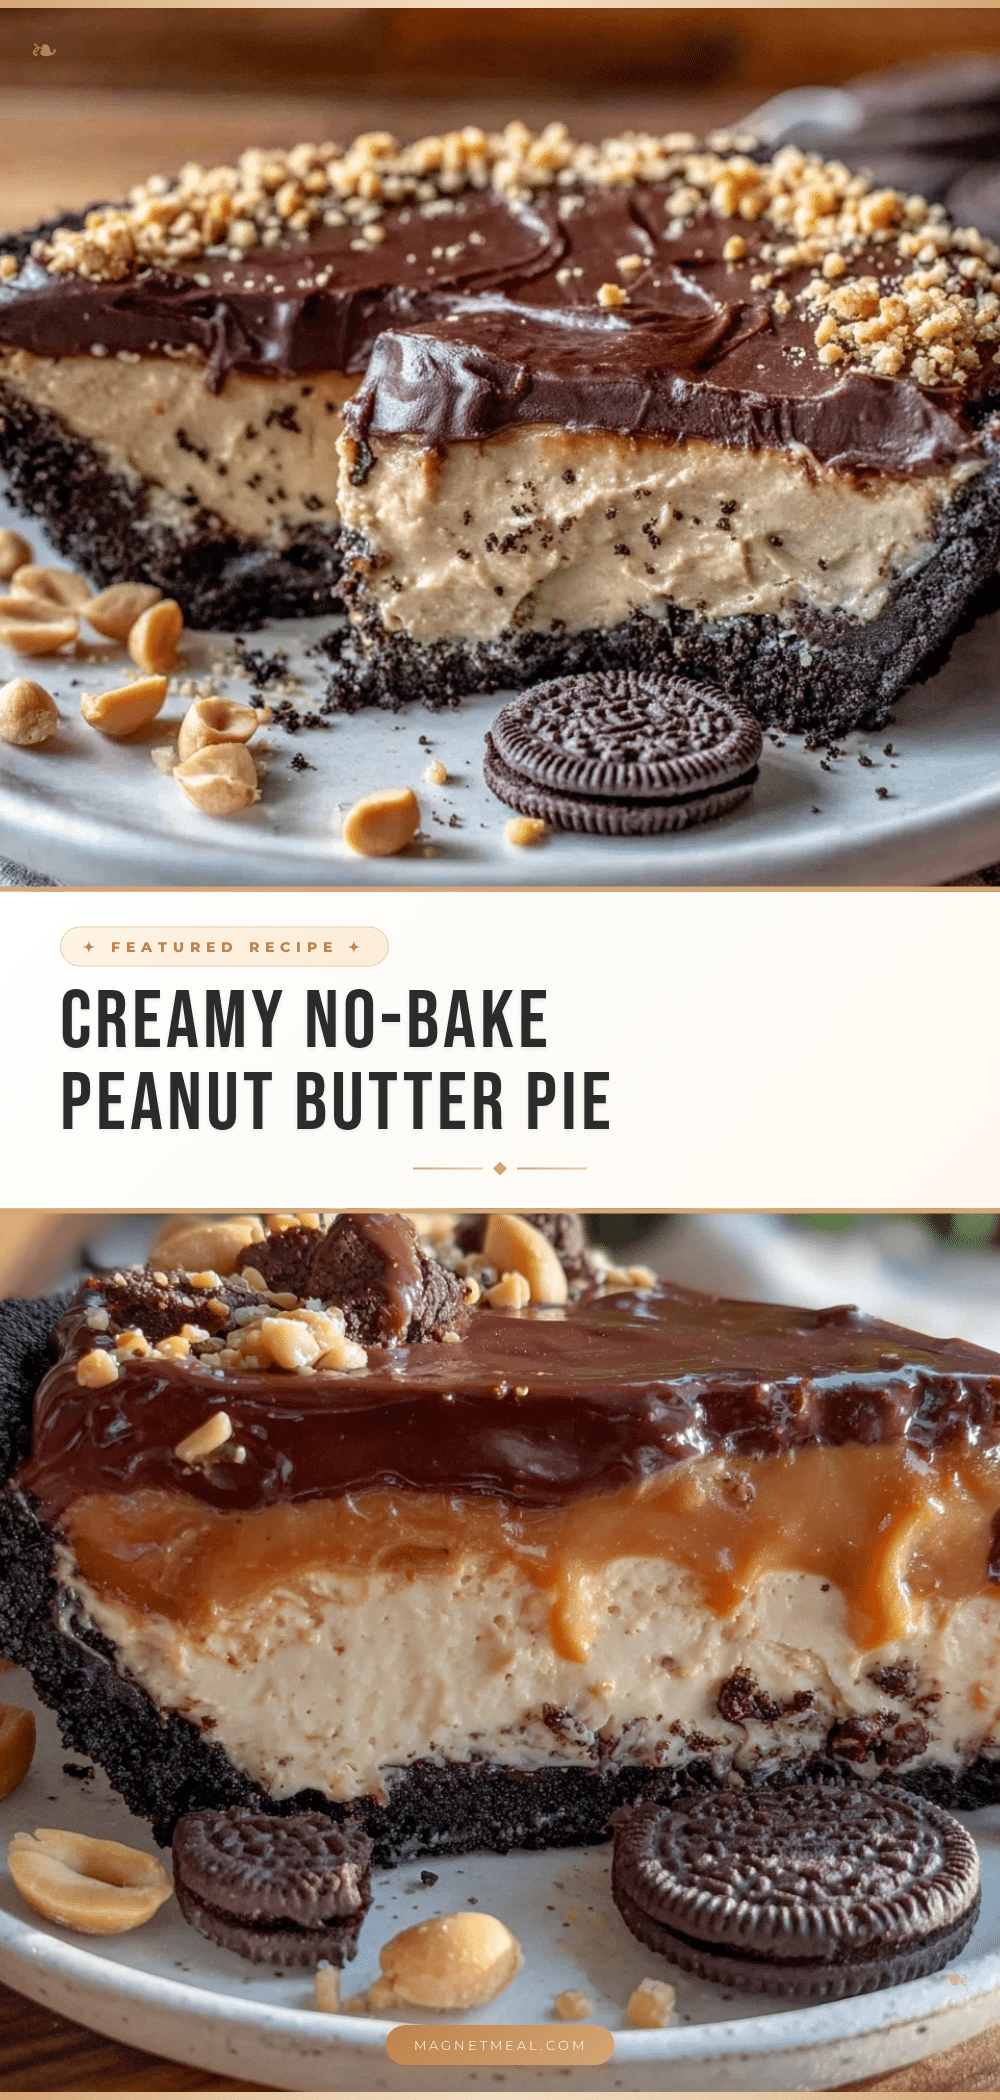
Why You’ll Love This Creamy No-Bake Peanut Butter Pie Recipe
This creamy no-bake peanut butter pie with Oreo crust and chocolate ganache quickly became a staple in my dessert rotation, and here’s why it might become yours too:
- Quick & Easy: Ready in under 30 minutes, making it perfect for last-minute dessert cravings or unexpected guests.
- Simple Ingredients: Uses pantry essentials like peanut butter, cream cheese, and Oreos — no specialty store runs needed.
- Perfect for Gatherings: Ideal for potlucks, casual dinners, or a cozy night in when you want something impressive without stress.
- Crowd-Pleaser: The creamy texture paired with crunchy crust and silky chocolate ganache gets rave reviews from kids and adults alike.
- Unbelievably Delicious: The peanut butter filling is whipped to a fluffy, melt-in-your-mouth consistency that’s just right — not too sweet, not too heavy.
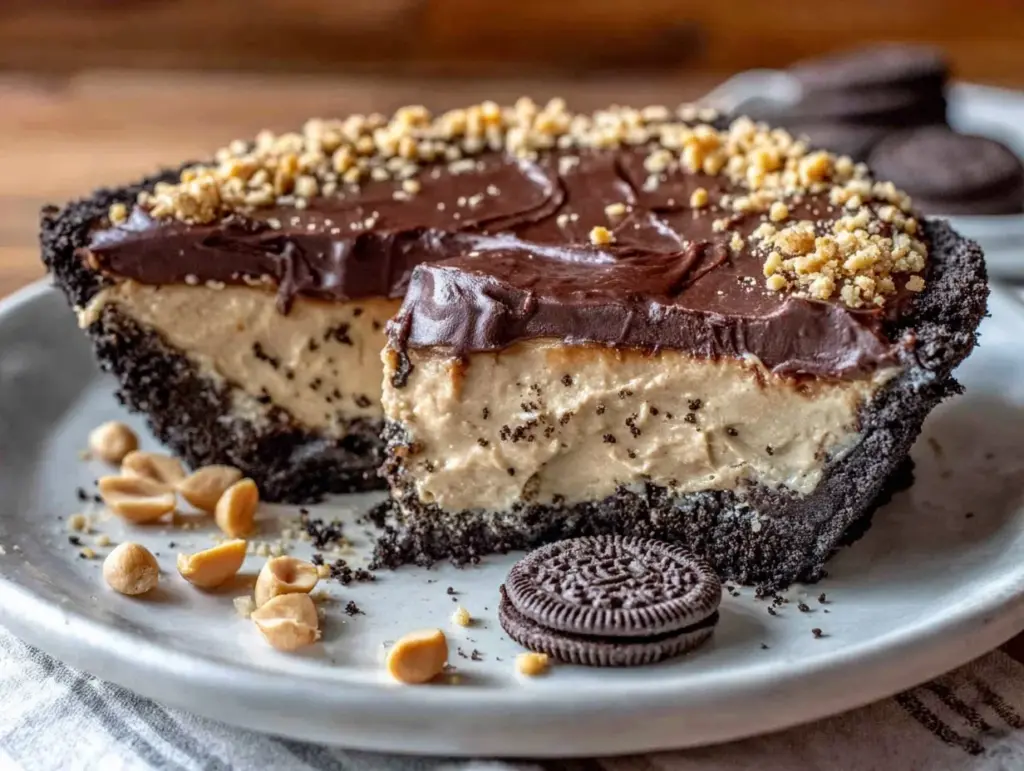
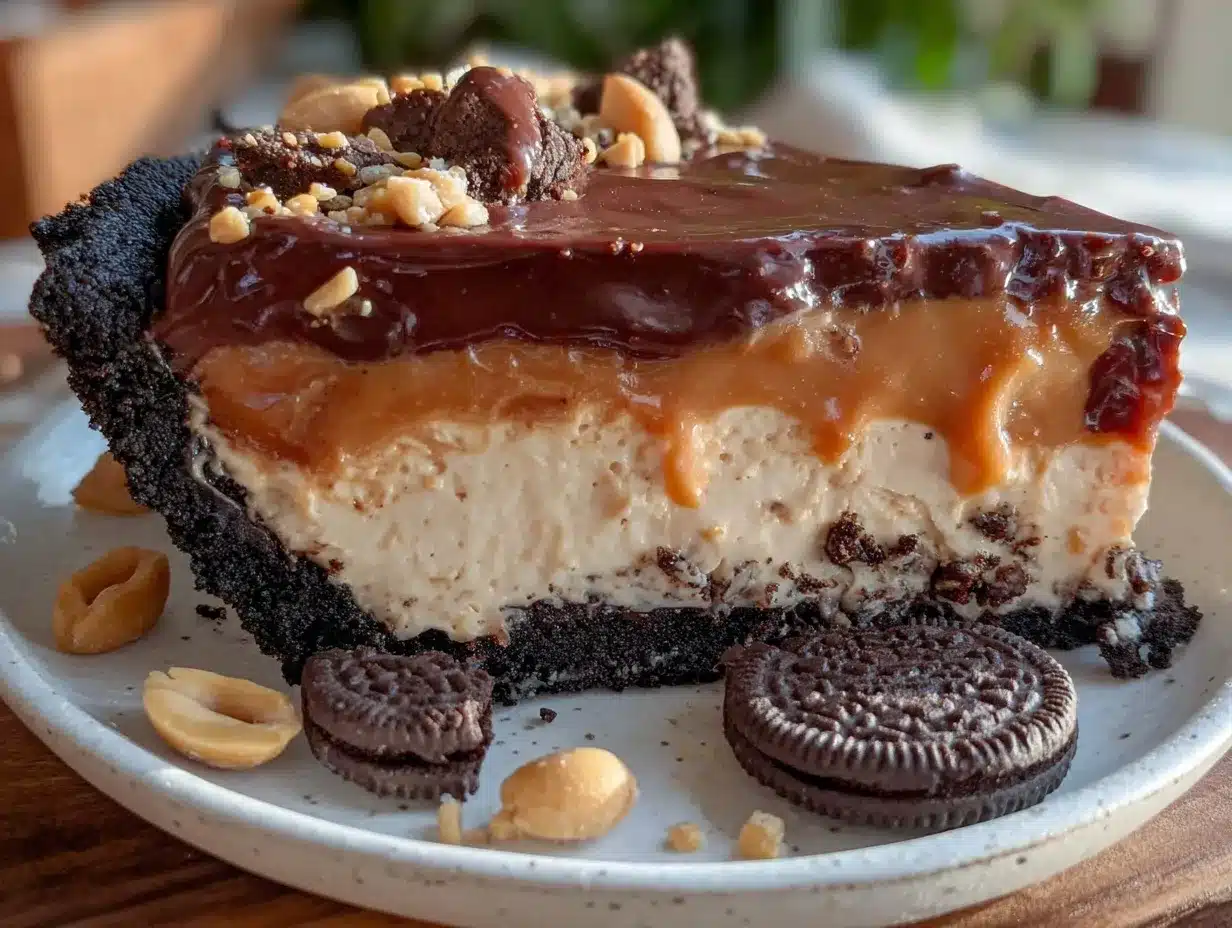
What sets this recipe apart is the balance it strikes. The Oreo crust adds a chocolatey crunch that contrasts beautifully with the luscious peanut butter filling. Topping it with a homemade chocolate ganache adds a glossy finish and extra richness that feels indulgent but not overdone. Plus, I love that it’s no-bake — that means less heat in the kitchen and more time enjoying the pie itself.
This pie isn’t just a dessert; it’s a little moment of joy you can whip up anytime. Whether you’re pairing it with a strong black coffee or serving it chilled after a spicy meal, it hits the spot every time. And if you love peanut butter treats, you might also enjoy my take on spicy peanut noodles with chicken, which offers a savory twist on peanut flavor.
What Ingredients You Will Need for Creamy No-Bake Peanut Butter Pie
This pie keeps things straightforward with a handful of ingredients that combine to create big flavor and texture contrasts. Most are pantry staples, and the few specialty items are easy to find.
- Oreo Cookies (24 cookies): Crushed into fine crumbs for the crust. I prefer the classic Oreo Original for that perfect balance of sweetness and chocolate.
- Unsalted Butter (6 tbsp / 85g), melted: Binds the crust crumbs together and adds richness.
- Cream Cheese (8 oz / 225g), softened: Gives the filling a creamy, tangy base that balances the peanut butter’s sweetness.
- Peanut Butter (1 cup / 240g), creamy: The star ingredient — smooth and rich. I recommend natural peanut butter without added sugar for better flavor control.
- Powdered Sugar (3/4 cup / 90g): Sweetens the filling without grittiness.
- Heavy Whipping Cream (1 cup / 240ml): Whipped to stiff peaks to lighten the filling and add that luscious mouthfeel.
- Vanilla Extract (1 tsp): Adds depth and rounds out the flavors.
- Semi-sweet Chocolate Chips (1 cup / 170g): For the ganache topping, melted with heavy cream.
- Additional Heavy Cream (1/2 cup / 120ml): To mix with chocolate for silky ganache.
If you want to switch things up, almond or sunflower seed butter works in place of peanut butter for allergy-friendly options. You can also swap the Oreo crust with chocolate graham crackers if desired.
Equipment Needed
- 9-inch (23cm) pie dish — glass or ceramic works best to showcase the layers.
- Food processor or sturdy plastic bag and rolling pin for crushing Oreos.
- Mixing bowls — at least two, one for crust and one for filling.
- Electric hand mixer or stand mixer for whipping cream and mixing filling smoothly.
- Spatula for folding and smoothing the filling.
- Small saucepan or microwave-safe bowl to melt chocolate for ganache.
- Measuring cups and spoons for accuracy.
If you don’t have a food processor, crushing the Oreos in a sealed plastic bag with a rolling pin works just fine (takes a bit longer, but no biggie). Using a hand mixer makes whipping cream and combining ingredients easier, but a whisk and some elbow grease can get you there too. I’ve made this pie with both methods and the results were great.
Preparation Method for Creamy No-Bake Peanut Butter Pie
- Prepare the Oreo crust: Crush 24 Oreos into fine crumbs using a food processor or by pounding them in a sealed bag. Transfer crumbs to a bowl and stir in 6 tablespoons (85g) of melted unsalted butter until the mixture resembles wet sand.
- Press the crust: Firmly press the crust mixture into the bottom and up the sides of a 9-inch (23cm) pie dish. Use the back of a spoon or a flat-bottomed glass to compact it evenly. Chill in the fridge for at least 15 minutes to set while you prepare the filling.
- Make the filling base: In a large bowl, beat 8 ounces (225g) softened cream cheese with 1 cup (240g) creamy peanut butter and 3/4 cup (90g) powdered sugar until smooth and creamy, about 2-3 minutes with an electric mixer on medium speed.
- Whip the cream: In a separate chilled bowl, whip 1 cup (240ml) heavy whipping cream with 1 teaspoon vanilla extract until stiff peaks form. This step is key for that airy, creamy texture.
- Combine filling: Gently fold the whipped cream into the peanut butter mixture in batches, using a spatula. Be careful not to deflate the whipped cream — you want the filling light and fluffy.
- Fill the crust: Spoon the filling into the chilled Oreo crust, smoothing the top with a spatula. Return the pie to the fridge to set while you prepare the ganache.
- Prepare the chocolate ganache: Heat 1/2 cup (120ml) heavy cream in a small saucepan over medium heat until it just begins to simmer (don’t boil). Pour over 1 cup (170g) semi-sweet chocolate chips in a heatproof bowl. Let sit for 2 minutes, then stir until smooth and glossy.
- Top the pie: Pour the ganache over the peanut butter filling, spreading evenly. Refrigerate the pie for at least 2 hours, preferably overnight, until fully set.
- Serve and enjoy: Slice with a hot, dry knife for clean edges. Keep refrigerated until serving.
Tip: If the ganache firms too much in the fridge, let the pie sit at room temperature for 10 minutes before slicing. This relaxes the ganache for a smoother cut.
Cooking Tips & Techniques for the Perfect Pie
Getting this no-bake peanut butter pie just right is mostly about technique and timing. Here are some tips from my kitchen experiments:
- Softened cream cheese is key. If it’s too cold, lumps will sneak in. I let mine sit out about 30 minutes before mixing.
- Whip your cream well. Stiff peaks provide the airy texture that turns this pie from dense to dreamy. But don’t overwhip or it’ll become grainy and start turning to butter.
- Fold gently. When mixing whipped cream into the peanut butter base, use a spatula and fold with a light hand. You want to keep as much air in the mixture as possible.
- Press the crust firmly. This helps it hold together and gives a nice crunch contrast to the creamy filling.
- Use a hot, clean knife for slicing. Run the knife under hot water and dry it between cuts for neat slices without smudging the ganache.
- Chill time matters. The longer the pie chills, the firmer and more set the filling becomes — at least 2 hours, but overnight is best to really let flavors meld.
On one occasion, I skipped chilling the crust and found it crumbled a bit when slicing, so trust me — don’t skip that step. Also, if you love a little crunch inside the filling, stirring in some chopped peanuts before folding in the whipped cream adds a nice texture surprise.
Variations & Adaptations for This No-Bake Pie
This recipe is surprisingly adaptable, and I’ve tried a few twists myself over time:
- Chocolate Peanut Butter Pie: Add 1/4 cup (25g) cocoa powder to the filling for a chocolatey swirl. The ganache on top seals the deal.
- Gluten-Free Version: Use gluten-free chocolate sandwich cookies for the crust instead of Oreos. The rest of the recipe stays the same.
- Salted Caramel Drizzle: After the ganache sets, drizzle salted caramel sauce on top for a sweet-salty pop.
- Nut-Free Alternative: Swap peanut butter for sunflower seed butter and use a nut-free cookie crust for allergy-friendly indulgence.
- Mini Pies: Make individual servings using a muffin tin lined with cupcake liners — great for parties or portion control.
One time, I even stirred in some cream cheese and peanut butter filling into a birthday cake base, creating a layered treat that was a hit at a friend’s party. It gave me ideas about combining textures and flavors in one dessert!
Serving & Storage Suggestions
This creamy no-bake peanut butter pie is best served chilled — cold enough to hold its shape but not so cold that the flavors are muted. I like to let slices sit at room temperature for 5-10 minutes before serving to soften the ganache slightly.
Presentation-wise, a dollop of whipped cream or a sprinkle of chopped peanuts on top adds a nice touch. It pairs wonderfully with a cup of black coffee or a glass of cold milk.
Store leftovers tightly covered in the fridge for up to 4 days. The pie holds up well but the ganache may firm up more over time — just let it warm a bit before slicing again. This pie also freezes nicely wrapped in plastic wrap and foil for up to 1 month; thaw overnight in the fridge.
Nutritional Information & Benefits
Estimated per serving (1/8 slice): 420 calories, 32g fat, 25g carbohydrates, 6g protein.
This pie packs a punch of protein and healthy fats from the peanut butter and cream cheese, making it more satisfying than your average sugary dessert. While it’s definitely a treat, using natural peanut butter helps avoid excess added sugars. If you’re watching carbs, swapping the Oreo crust for a low-carb nut crust can reduce the carb load.
Keep in mind this recipe contains dairy, gluten (from Oreos), and nuts, which are common allergens. For a dairy-free or gluten-free option, try using coconut cream and gluten-free cookies respectively.
Conclusion
This creamy no-bake peanut butter pie with Oreo crust and chocolate ganache quickly became one of my favorite desserts — simple enough for a weeknight but fancy enough for guests. It’s that rare recipe that feels like a special occasion without the fuss. I love that it’s customizable, forgiving for beginners, and always a crowd-pleaser.
Whether you’re craving peanut butter decadence or need a quick treat after dinner, this pie delivers every time. Feel free to adjust the sweetness or add your own twists — it’s a great base to make your own. If you give it a try, I’d love to hear how you make it yours in the comments!
And if you’re interested in more indulgent, creamy desserts, you might enjoy the football-shaped chocolate chip cookie cake I whipped up for game day — it’s another winner.
FAQs About Creamy No-Bake Peanut Butter Pie
Can I make this pie ahead of time?
Absolutely! It actually tastes better after chilling overnight when the flavors meld. Just cover tightly and keep refrigerated until serving.
What can I use instead of Oreos for the crust?
Chocolate graham crackers or gluten-free chocolate cookies work well. You can also try crushed pretzels for a salty twist.
How do I store leftover pie?
Store leftovers covered in the fridge for up to 4 days. For longer storage, freeze wrapped tightly for up to 1 month.
Can I use natural peanut butter in this recipe?
Yes, natural peanut butter works great but might make the filling slightly less stable. Whip the cream well to help maintain texture.
Is this pie suitable for kids?
Definitely! It’s creamy, sweet, and not too rich. Just watch portion sizes since it’s a rich dessert.
Pin This Recipe!
Creamy No-Bake Peanut Butter Pie Recipe with Oreo Crust and Chocolate Ganache

A quick and easy no-bake peanut butter pie featuring a crunchy Oreo crust, creamy peanut butter filling, and a silky chocolate ganache topping. Perfect for last-minute desserts and crowd-pleasing occasions.
- Prep Time: 15 minutes
- Cook Time: 0 minutes
- Total Time: 2 hours 15 minutes
- Yield: 8 servings 1x
- Category: Dessert
- Cuisine: American
Ingredients
- 24 Oreo Cookies, crushed into fine crumbs
- 6 tablespoons (85g) unsalted butter, melted
- 8 ounces (225g) cream cheese, softened
- 1 cup (240g) creamy peanut butter
- 3/4 cup (90g) powdered sugar
- 1 cup (240ml) heavy whipping cream
- 1 teaspoon vanilla extract
- 1 cup (170g) semi-sweet chocolate chips
- 1/2 cup (120ml) additional heavy cream
Instructions
- Crush 24 Oreos into fine crumbs using a food processor or by pounding them in a sealed bag. Transfer crumbs to a bowl and stir in 6 tablespoons (85g) of melted unsalted butter until the mixture resembles wet sand.
- Firmly press the crust mixture into the bottom and up the sides of a 9-inch (23cm) pie dish. Use the back of a spoon or a flat-bottomed glass to compact it evenly. Chill in the fridge for at least 15 minutes to set while you prepare the filling.
- In a large bowl, beat 8 ounces (225g) softened cream cheese with 1 cup (240g) creamy peanut butter and 3/4 cup (90g) powdered sugar until smooth and creamy, about 2-3 minutes with an electric mixer on medium speed.
- In a separate chilled bowl, whip 1 cup (240ml) heavy whipping cream with 1 teaspoon vanilla extract until stiff peaks form.
- Gently fold the whipped cream into the peanut butter mixture in batches, using a spatula. Be careful not to deflate the whipped cream — you want the filling light and fluffy.
- Spoon the filling into the chilled Oreo crust, smoothing the top with a spatula. Return the pie to the fridge to set while you prepare the ganache.
- Heat 1/2 cup (120ml) heavy cream in a small saucepan over medium heat until it just begins to simmer (don’t boil). Pour over 1 cup (170g) semi-sweet chocolate chips in a heatproof bowl. Let sit for 2 minutes, then stir until smooth and glossy.
- Pour the ganache over the peanut butter filling, spreading evenly. Refrigerate the pie for at least 2 hours, preferably overnight, until fully set.
- Slice with a hot, dry knife for clean edges. Keep refrigerated until serving.
Notes
Use softened cream cheese to avoid lumps. Whip cream to stiff peaks but do not overwhip. Fold whipped cream gently to keep airiness. Press crust firmly to hold together. Use a hot, clean knife for slicing. Chill pie at least 2 hours or overnight for best results. Let ganache soften at room temperature before slicing if too firm.
Nutrition
- Serving Size: 1 slice (1/8 of pie)
- Calories: 420
- Fat: 32
- Carbohydrates: 25
- Protein: 6
Keywords: no-bake peanut butter pie, Oreo crust, chocolate ganache, easy dessert, creamy pie, peanut butter dessert, no bake pie


