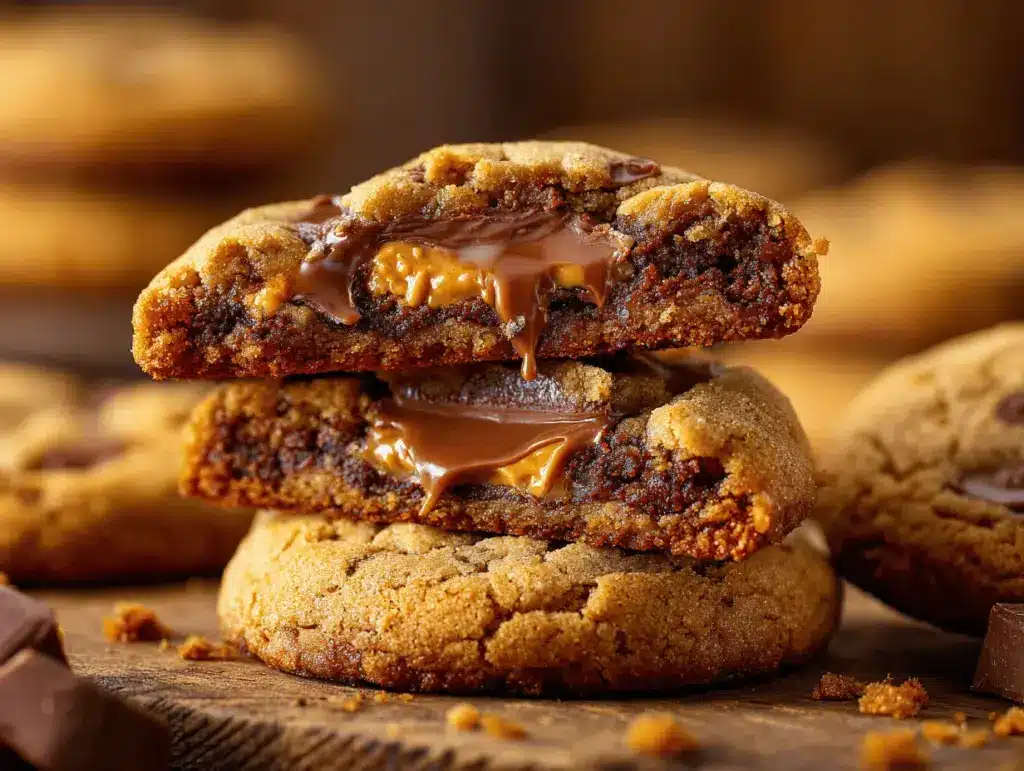
The first time I pulled a pan of peanut butter cup stuffed brookies out of the oven, my entire kitchen smelled like a chocolate shop—and honestly, I couldn’t wait for them to cool. The gooey chocolate, fudgy brownie, and melty peanut butter cups all swirled together in one insane bite. If you’re craving something that’s part cookie, part brownie, and totally over-the-top, this is the treat that’ll make you the hero of any dessert table.
I started making these peanut butter cup stuffed brookies for my family’s movie nights. It was a wild experiment after finding a leftover bag of mini peanut butter cups and, well, a serious craving for both cookies and brownies. Turns out, this mashup is pure magic. I’ve tested versions with different cookies, brownies from scratch, and even boxed mixes (no shame), and this recipe is the one I come back to every time.
What’s so special about peanut butter cup stuffed brookies? It’s the layers! You get a chewy, golden cookie base, a surprise center of peanut butter cup goodness, and a thick, fudgy brownie on top. Each bar is a little gooey, a little crunchy around the edges, and totally dreamy with a scoop of vanilla ice cream. If you have a sweet tooth (or know someone who does), these brookies are basically guaranteed to become a new favorite. Whether you’re baking for a birthday, a potluck, or just because it’s Wednesday, this recipe delivers big-time comfort and wow-factor.
Why You’ll Love This Peanut Butter Cup Stuffed Brookies Recipe
- Ultimate Comfort Dessert: Every bite is a mix of soft cookie, rich brownie, and oozy peanut butter chocolate—seriously, you can’t stop at one.
- Easy to Make: No fancy baking skills required! You can use store-bought mixes or whip up everything from scratch—either way, it’s low-stress and high-reward.
- Perfect for Sharing: These brookies are made for parties, potlucks, or sharing with friends over coffee. They cut easily into bars and travel super well.
- Crowd-Pleaser: Kids, teens, and adults all go wild for the peanut butter cup surprise in the center. If you want “oohs” and “aahs,” this is the dessert to bring!
- Great Make-Ahead Option: The flavors get even better after a day, and they freeze beautifully. Bake now, enjoy later.
- Customizable: Swap the peanut butter cups for caramel squares or use your favorite brownie or cookie dough. This recipe is super forgiving and fun to play with.
I’ve made a lot of brookies over the years (maybe too many—my jeans would agree!), but stuffing them with peanut butter cups just takes them to another level. The best part? You don’t need a stand mixer or fancy pans. Just layer, bake, and dig in. The peanut butter cup stuffed brookies always steal the show, whether it’s at a bake sale or a casual family night. If you’re looking for an easy dessert that gets people talking, trust me—this is it.
Honestly, nothing beats watching someone take their first bite and realize there’s a peanut butter cup hiding inside. It’s like a little surprise party in every bar. These brookies have become my signature treat, and I hope they’ll become yours, too!
What Ingredients You Will Need for Peanut Butter Cup Stuffed Brookies
This recipe uses simple, easy-to-find ingredients, and you probably have most of them in your pantry already. Each layer brings something special—the cookie dough is chewy and buttery, the brownies are rich and chocolatey, and the peanut butter cups are, well, just plain irresistible! Here’s what you need:
- For the Cookie Dough Layer:
- 1/2 cup (113g) unsalted butter, softened
- 1/2 cup (100g) light brown sugar, packed
- 1/4 cup (50g) granulated sugar
- 1 large egg, room temperature
- 1 teaspoon vanilla extract
- 1 1/4 cups (155g) all-purpose flour
- 1/2 teaspoon baking soda
- 1/4 teaspoon salt
- 2/3 cup (115g) semi-sweet chocolate chips (or milk chocolate, if you love it sweet!)
- For the Peanut Butter Cup Center:
- 12-16 mini peanut butter cups (unwrapped; Reese’s or your favorite brand)
- For the Brownie Layer:
- 1/2 cup (113g) unsalted butter
- 1 cup (200g) granulated sugar
- 2 large eggs, room temperature
- 1 teaspoon vanilla extract
- 1/3 cup (40g) unsweetened cocoa powder
- 1/2 cup (65g) all-purpose flour
- 1/4 teaspoon salt
- 1/4 teaspoon baking powder
Ingredient notes and swaps:
- If you’re short on time, you can totally use a boxed brownie mix (18 oz/510g) and refrigerated cookie dough—just follow the package directions for eggs, oil, and water. Homemade always wins for me, but boxed is still delicious.
- For a gluten-free version, use your favorite 1:1 gluten-free flour blend for both the cookie and brownie layers.
- Swap in dark chocolate or white chocolate chips for the cookie dough if you want to change things up.
- Try using almond butter cups or sunflower butter cups for a nut-friendly variation.
- If you’re feeling fancy, add a pinch of flaky sea salt on top before baking for extra flavor pop.
I usually go for classic Reese’s peanut butter cups, but Trader Joe’s and Aldi both make great versions too. The mini size fits perfectly in each bar, but you can chop up larger cups if that’s what you have. Don’t overthink it—whatever peanut butter cup you love will work here!
Equipment Needed
- 8×8-inch (20x20cm) baking pan – Metal or glass both work, but I prefer metal for crispier edges.
- Parchment paper – For easy lifting and clean-up (skip the butter-grease mess, trust me).
- Mixing bowls – One for cookie dough, one for brownies. Use whatever you have on hand.
- Electric hand mixer or sturdy wooden spoon – Either works; I use my old hand mixer that’s survived a decade of cookie dough battles.
- Whisk – For blending the dry ingredients and smoothing out brownie batter lumps.
- Rubber spatula – You’ll want this to scrape every last bit of batter from the bowls.
- Measuring cups and spoons – Essential for getting the gooey layers just right.
If you don’t have parchment, a good spray of nonstick cooking spray or a light buttering will do the trick, but parchment makes it so much easier to lift out the brookies. For budget-friendly options, your local dollar store’s baking pans work just fine (I’ve used them for parties and bake sales). Mixing by hand works, but a hand mixer makes things speedier and your arms less tired. After a few rounds, you’ll find your rhythm with these tools!
How to Make Peanut Butter Cup Stuffed Brookies – Step-by-Step Method
- Preheat & Prep: Preheat your oven to 350°F (175°C). Line an 8×8-inch (20x20cm) baking pan with parchment paper, leaving a little overhang for easy lifting. If you’re out of parchment, grease the pan well.
- Make the Cookie Dough Layer:
- In a mixing bowl, cream together 1/2 cup (113g) softened butter, 1/2 cup (100g) light brown sugar, and 1/4 cup (50g) granulated sugar until light and fluffy (about 2-3 minutes with a hand mixer, or a bit longer by hand).
- Beat in 1 large egg and 1 teaspoon vanilla until just combined.
- In a separate bowl, whisk together 1 1/4 cups (155g) flour, 1/2 teaspoon baking soda, and 1/4 teaspoon salt. Add dry ingredients to wet, mixing until just combined (don’t overmix, or the cookies get tough!).
- Fold in 2/3 cup (115g) chocolate chips. Dough should be thick and a little sticky.
- Layer the Cookie Dough: Press the cookie dough evenly into the bottom of your prepared pan. If it sticks to your hands, lightly wet your fingers or use a spatula. Make sure it covers the whole bottom—don’t stress about perfection.
- Add Peanut Butter Cups: Arrange 12-16 mini peanut butter cups in a single layer over the cookie dough. Press them gently in so they nestle into the dough. If using larger cups, chop and scatter them evenly.
- Make the Brownie Layer:
- Melt 1/2 cup (113g) butter either in the microwave (about 30 seconds) or on the stove. In a bowl, whisk together melted butter and 1 cup (200g) sugar until glossy and combined.
- Whisk in 2 eggs and 1 teaspoon vanilla until smooth and thickened (about 1 minute).
- Add 1/3 cup (40g) cocoa powder, 1/2 cup (65g) flour, 1/4 teaspoon salt, and 1/4 teaspoon baking powder. Stir until just combined—don’t overbeat or the brownies can get dense.
- Spread the Brownie Batter: Pour the brownie batter over the peanut butter cups, using a spatula to spread it evenly to the edges. It will be thick, but that’s what makes the top so fudgy!
- Bake: Bake in the center of the oven for 35-40 minutes. The top should look set and slightly crackly, but a toothpick inserted in the center will come out with a few moist crumbs (not wet batter). If it’s still raw in the middle, bake 5 more minutes and check again.
- Cool & Slice: Cool completely in the pan—about 1 hour if you can wait! Use the parchment overhang to lift out the brookies before slicing. For cleaner squares, chill them for 30 minutes before cutting (but if you want gooey, dig in while they’re warm!).
Troubleshooting: If the top is browning too fast, tent loosely with foil for the last 10 minutes. If the layers seem uneven, don’t worry—it all bakes together in the end. If your brookies look underdone, let them rest; they’ll firm up as they cool.
Tip: For super gooey brookies, underbake by 2 minutes. For a firmer bar, bake on the longer side. Every oven is a little different—watch for that crackly brownie top and trust your nose!
Cooking Tips & Techniques for Gooey Brookies
- Don’t Overmix: Both cookie dough and brownie batter should be mixed until just combined. Overmixing can make your brookies tough instead of tender and gooey.
- Line the Pan Well: Parchment paper saves the day. It makes lifting and slicing a breeze—no stuck-on edges or broken bars.
- Room Temperature Ingredients: Butter and eggs mix more smoothly when not ice-cold. Your batters will be creamier and bake up evenly.
- Even Layering: Use a spatula or the back of a spoon to level both the cookie and brownie layers. If you spot a peanut butter cup peeking out, just nudge a little batter over it.
- Testing for Doneness: The classic toothpick test works, but look for a mix of moist crumbs (not wet batter) for perfect gooeyness. If you prefer firmer bars, let them cool fully and even chill for cleaner slices.
- Personal Oops Moment: Once, I forgot the baking powder in the brownie layer—my brookies still tasted good, but they were extra dense. Don’t panic if you make a mistake; chocolate and peanut butter can cover a lot of sins.
- Batch Baking Tip: Double the recipe and use a 9×13-inch (23x33cm) pan for parties. Just add 5-10 minutes to the baking time and check the center carefully.
- Multitask Like a Pro: While the cookie dough chills (if you pop it in the fridge for 10 minutes), prep your brownie layer. This makes assembly even quicker.
Brookies are forgiving, and honestly, even if they’re a bit messy, folks will still devour them. I’ve learned that the gooier they look coming out of the oven, the more excited everyone gets. Don’t be afraid to experiment—every batch is a little different, and that’s part of the fun!
Variations & Adaptations
- Gluten-Free Brookies: Use a 1:1 gluten-free flour blend in both the cookie and brownie layers. King Arthur and Bob’s Red Mill both work great. Double-check your peanut butter cups are gluten-free too.
- Vegan Option: Use plant-based butter, flax eggs (1 tbsp flaxseed + 2.5 tbsp water per egg), and dairy-free chocolate chips. Swap in vegan peanut butter cups (like Justin’s). The result is still rich and gooey—no one will guess it’s vegan.
- Flavor Swaps: Try caramel-filled chocolates, mint chocolate cups, or cookies & cream candies in place of peanut butter cups. You can also add chopped nuts or swirl in a bit of raspberry jam for a fruity twist.
- Different Pan Sizes: For thinner brookies, bake in a 9×9-inch (23x23cm) pan and reduce the time slightly. For extra-thick bars, use a loaf pan and bake a bit longer.
- Allergen-Friendly: Use sunflower seed butter cups for nut-free brookies, or swap out the chocolate chips for allergy-safe brands like Enjoy Life.
- Personal Favorite: Sometimes I sprinkle a handful of mini pretzels or potato chips on top before baking for a salty-sweet crunch—total game changer!
Honestly, these brookies are the perfect base for whatever you’re craving. Don’t be shy—mix and match fillings, add your favorite candies, or sneak in some espresso powder for a mocha vibe. Your kitchen, your rules!
Serving & Storage Suggestions
These peanut butter cup stuffed brookies are best served slightly warm, when the chocolate and peanut butter are extra melty. They’re fantastic with a scoop of vanilla or peanut butter ice cream, or just a cold glass of milk. For a party platter, dust with powdered sugar for an easy “wow” factor.
- Serving Temperature: Warm is ideal, but they’re also delicious at room temp or chilled straight from the fridge for a fudgy texture.
- Pairings: Pair with coffee, hot cocoa, or even a glass of cold brew for grown-ups. If you’re feeling extra, drizzle a little chocolate sauce on top.
- Storing: Keep them in an airtight container at room temp for up to 3 days, or refrigerate for up to a week. The flavors meld and get even better by day two.
- Freezing: Brookies freeze beautifully! Wrap individual bars in plastic wrap and store in a zip bag for up to 2 months. Thaw at room temp or zap in the microwave for 20 seconds for fresh-from-the-oven gooeyness.
- Reheating: To revive the gooey magic, microwave a bar for 10-15 seconds. Just watch out—molten chocolate can be sneaky hot!
Tip: If you’re storing a big batch, layer them with wax paper to keep them from sticking together. The longer they sit, the richer and more decadent they taste. Not that leftovers ever last long at my house…
Nutritional Information & Benefits
Each peanut butter cup stuffed brookie bar (assuming 16 servings) is approximately:
- Calories: ~270
- Fat: 14g
- Carbohydrates: 32g
- Protein: 4g
- Sugar: 22g
Health Highlights: Peanut butter adds a bit of plant-based protein and healthy fats. The recipe can be made gluten-free or dairy-free with simple swaps. However, these are definitely a treat—enjoy in moderation (easier said than done!). Allergens include peanuts, dairy, eggs, and gluten unless adaptations are made.
From my own wellness journey, I’ve found that homemade treats like these brookies are way more satisfying than store-bought snacks. You control what goes in, and hey, sometimes you just need a gooey chocolate fix to brighten your day!
Conclusion
If you’re hunting for the ultimate gooey dessert, peanut butter cup stuffed brookies are your answer. They’re easy, endlessly adaptable, and always a hit. Whether you’re baking for a crowd or just need something cozy for a night in, these brookies deliver pure joy in every bite.
Don’t be afraid to make these your own—swap ingredients, try new fillings, and add your signature touch. I love them for the surprise factor and how they bring people together (plus, the leftovers are dangerous in the best way).
Give this peanut butter cup stuffed brookies recipe a try and let me know how it goes! Drop your favorite variations or baking questions in the comments—sharing your kitchen wins (and fails) makes this little baking community even sweeter. Can’t wait to hear how your brookies turned out—happy baking!
FAQs About Peanut Butter Cup Stuffed Brookies
Can I use boxed mixes for this brookie recipe?
Absolutely! You can use a boxed brownie mix and store-bought cookie dough to save time. Just follow the package directions for any added eggs or oil and assemble as described above.
How do I prevent the layers from mixing together when baking?
The key is to gently press the cookie dough flat, arrange the peanut butter cups evenly, and carefully spread the brownie batter on top. If the brownie batter is too thick, add a tablespoon of milk to loosen it up.
What’s the best way to get clean brookie slices?
Cool the brookies completely, then chill in the fridge for 30 minutes before slicing. Use a sharp knife, wiping it between cuts for tidy squares.
Can I make these peanut butter cup stuffed brookies ahead of time?
Yes! They taste even better the next day as the flavors meld. Store in an airtight container or freeze for later. Reheat briefly in the microwave for that fresh-baked feel.
Are there nut-free options for this recipe?
Definitely—swap peanut butter cups for sunflower seed butter cups or your favorite nut-free chocolate candies. Check all labels for allergens, especially if baking for kids or parties.
Pin This Recipe!
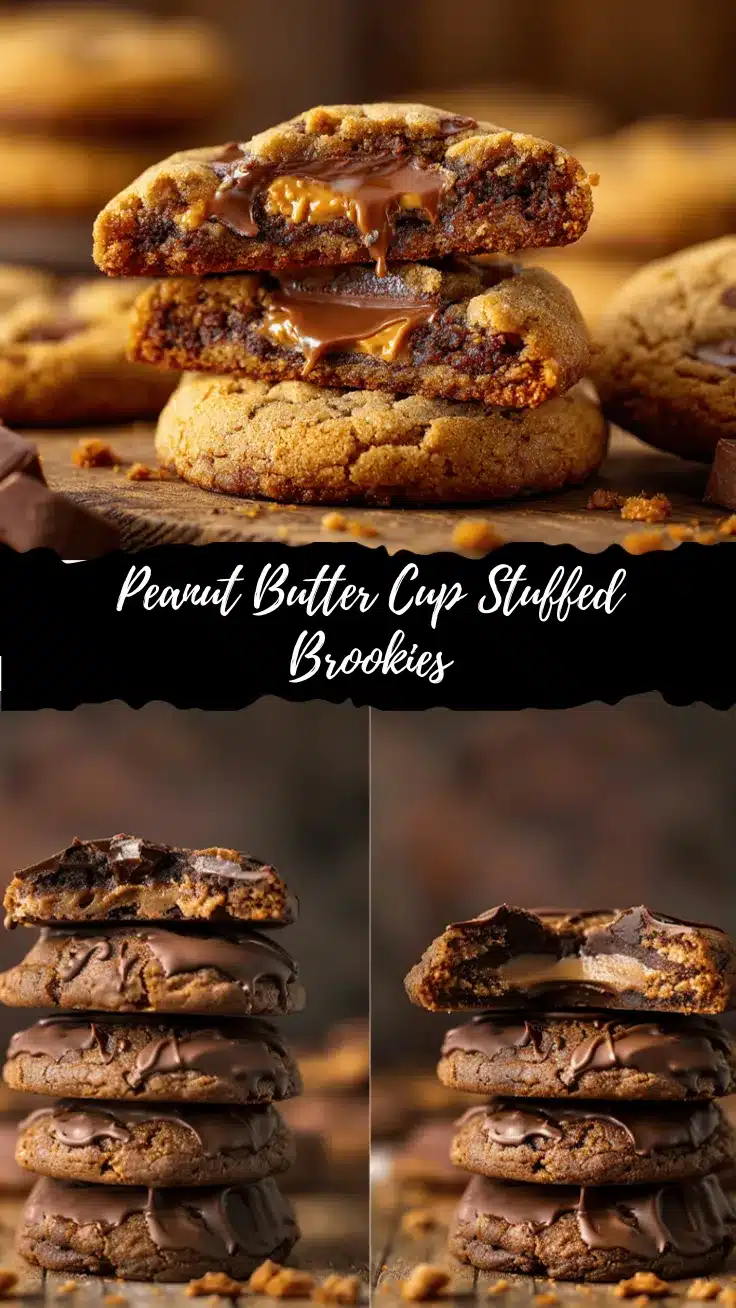
Peanut Butter Cup Stuffed Brookies

These gooey brookies combine a chewy cookie base, a surprise layer of peanut butter cups, and a fudgy brownie top for the ultimate over-the-top dessert bar. Perfect for parties, potlucks, or cozy nights in, they’re easy to make and always a crowd-pleaser.
- Prep Time: 20 minutes
- Cook Time: 35-40 minutes
- Total Time: 1 hour
- Yield: 16 bars 1x
- Category: Dessert
- Cuisine: American
Ingredients
- 1/2 cup (113g) unsalted butter, softened
- 1/2 cup (100g) light brown sugar, packed
- 1/4 cup (50g) granulated sugar
- 1 large egg, room temperature
- 1 teaspoon vanilla extract
- 1 1/4 cups (155g) all-purpose flour
- 1/2 teaspoon baking soda
- 1/4 teaspoon salt
- 2/3 cup (115g) semi-sweet chocolate chips
- 12–16 mini peanut butter cups, unwrapped
- 1/2 cup (113g) unsalted butter
- 1 cup (200g) granulated sugar
- 2 large eggs, room temperature
- 1 teaspoon vanilla extract
- 1/3 cup (40g) unsweetened cocoa powder
- 1/2 cup (65g) all-purpose flour
- 1/4 teaspoon salt
- 1/4 teaspoon baking powder
Instructions
- Preheat your oven to 350°F (175°C). Line an 8×8-inch baking pan with parchment paper, leaving overhang for easy lifting, or grease the pan well.
- Make the cookie dough: In a mixing bowl, cream together 1/2 cup softened butter, 1/2 cup light brown sugar, and 1/4 cup granulated sugar until light and fluffy (2-3 minutes with a hand mixer).
- Beat in 1 large egg and 1 teaspoon vanilla until just combined.
- In a separate bowl, whisk together 1 1/4 cups flour, 1/2 teaspoon baking soda, and 1/4 teaspoon salt. Add dry ingredients to wet, mixing until just combined.
- Fold in 2/3 cup chocolate chips. Dough should be thick and a little sticky.
- Press the cookie dough evenly into the bottom of the prepared pan.
- Arrange 12-16 mini peanut butter cups in a single layer over the cookie dough. Press gently into the dough.
- Make the brownie layer: Melt 1/2 cup butter. In a bowl, whisk together melted butter and 1 cup sugar until glossy and combined.
- Whisk in 2 eggs and 1 teaspoon vanilla until smooth and thickened (about 1 minute).
- Add 1/3 cup cocoa powder, 1/2 cup flour, 1/4 teaspoon salt, and 1/4 teaspoon baking powder. Stir until just combined.
- Pour the brownie batter over the peanut butter cups, using a spatula to spread evenly to the edges.
- Bake in the center of the oven for 35-40 minutes. The top should look set and slightly crackly, and a toothpick inserted in the center should come out with a few moist crumbs.
- Cool completely in the pan (about 1 hour). Use the parchment overhang to lift out the brookies before slicing. For cleaner squares, chill for 30 minutes before cutting.
Notes
For extra gooey brookies, underbake by 2 minutes. For firmer bars, bake on the longer side and chill before slicing. You can use boxed brownie mix and store-bought cookie dough for a shortcut. Swap peanut butter cups for caramel or nut-free candies for variations. Brookies freeze well and taste even better the next day.
Nutrition
- Serving Size: 1 bar (1/16 of pan)
- Calories: 270
- Sugar: 22
- Sodium: 120
- Fat: 14
- Saturated Fat: 7
- Carbohydrates: 32
- Fiber: 2
- Protein: 4
Keywords: brookies, peanut butter cup brookies, stuffed brookies, dessert bars, chocolate peanut butter, easy dessert, brownies, cookies, party dessert, potluck dessert


