
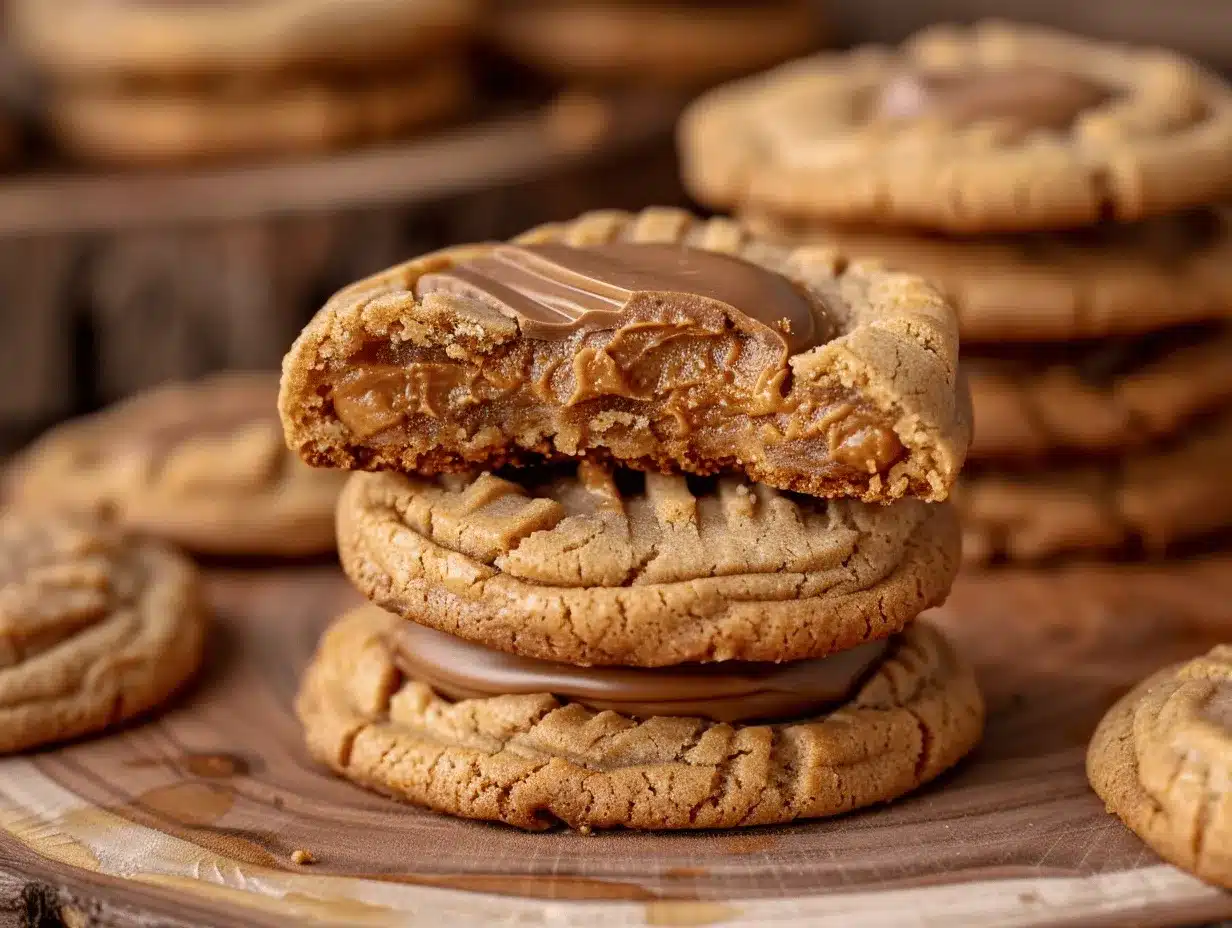
The nutty aroma of brown butter swirling in the kitchen, gooey chocolate oozing out with every bite, and that salty-sweet peanut butter center—these are the moments that make baking downright magical. The first time I made brown butter stuffed peanut butter cup cookies, my entire family hovered around the oven, waiting for that golden, crackled top to set just enough. No bakery has ever matched the way these cookies taste fresh from my own oven—ooey, rich, and loaded with peanut butter cup goodness.
I stumbled onto this recipe one rainy afternoon when my usual chocolate chip cookies felt a little…well, basic. I had a stash of peanut butter cups begging to be used and, honestly, who can resist a cookie stuffed with candy? The twist? Swapping regular melted butter for brown butter. That one step totally transforms the flavor—think nutty, almost toffee-like undertones in every bite. Since then, these cookies have become my go-to for bake sales, birthday parties, and anytime I want to impress with minimal effort.
Why should you make these brown butter stuffed peanut butter cup cookies? For starters, they’re bakery-style—thick, chewy, and bursting with melty chocolate. But they’re also easy enough for a weekday treat. They’re perfect for peanut butter lovers, anyone who wants to wow their friends, or parents looking for a fun weekend baking project with the kids. I’ve tested this recipe more times than I can count (and sampled even more cookies than I’d admit), and every single batch disappears in a flash. If you love that classic peanut butter and chocolate combo, these cookies will become your new favorite—guaranteed!
Why You’ll Love This Recipe
There’s something a little magical about brown butter stuffed peanut butter cup cookies. I’ve baked dozens of different cookie recipes over the years, but this one always gets the loudest “wow” from anyone who tries them. Here’s why you’ll reach for this recipe again and again:
- Bakery-Style Texture: Thick, chewy centers with perfectly crisp edges—just like the cookies from your favorite bake shop.
- Brown Butter Magic: Browning the butter adds a rich, nutty flavor that regular butter just can’t match. It’s that secret touch that makes these cookies unforgettable.
- Easy to Make: You don’t need a mixer or fancy tools. Everything comes together with simple steps and basic pantry ingredients—no stress, just fun.
- Show-Stopping Looks: Each cookie is stuffed with a whole peanut butter cup, so they look as impressive as they taste. Perfect for parties, bake sales, or Instagram-worthy moments.
- Chocolate and Peanut Butter Lovers’ Dream: Every bite is loaded with melty chocolate and creamy peanut butter, making these cookies totally irresistible.
- Customizable: You can use mini or regular peanut butter cups, add a sprinkle of flaky sea salt, or even use dark chocolate instead of milk chocolate. The possibilities are endless.
Unlike plain chocolate chip or peanut butter cookies, these beauties combine both worlds—with a surprise in the middle! The brown butter flavor lingers, and the peanut butter cup melts into the dough, creating a gooey, decadent center. The first time I baked these for a holiday cookie swap, people begged for the recipe. And if you’re anything like me, you’ll find yourself sneaking “just one more” every time you walk through the kitchen. These cookies aren’t just another treat—they’re the kind you’ll crave on a cozy night in or when you want to spoil someone special. Trust me, one batch won’t be enough!
What Ingredients You Will Need
This recipe leans on simple, familiar ingredients to deliver bakery-style flavor and texture. Most of these are pantry staples, so you might already have everything you need. Here’s a full rundown of what goes into these brown butter stuffed peanut butter cup cookies:
- For the Cookie Dough:
- Unsalted butter (1 cup / 226g), browned: Browning the butter is key for that nutty, caramel flavor. I always start with good-quality butter like Kerrygold—it really does make a difference.
- Brown sugar (1 cup / 200g), packed: Adds moisture and chewiness. Light brown sugar works best, but dark brown sugar will give even more depth if you like.
- Granulated sugar (1/2 cup / 100g): Balances the brown sugar and creates a crisp edge.
- Large eggs (2), room temperature: Helps bind everything together. Let them sit out for 30 minutes, or soak in warm water for 10 minutes if you’re in a hurry.
- Pure vanilla extract (2 tsp): For warmth and flavor.
- All-purpose flour (2 1/2 cups / 315g): The backbone of the dough. I’ve tried King Arthur and Bob’s Red Mill—both work great.
- Baking soda (1 tsp): For rise and chewiness.
- Salt (3/4 tsp): Just enough to balance the sweetness and bring out the peanut butter and chocolate flavors.
- Mini chocolate chips (1 cup / 170g): Optional, but highly recommended for extra chocolatey goodness in every bite.
- For the Filling:
- Mini peanut butter cups (24–28, unwrapped): Reese’s are classic, but any brand you love is great. You can use full-size cups for extra-large cookies—just adjust baking time.
- For Topping (optional):
- Flaky sea salt: A pinch on top makes the flavors pop and adds that bakery-style look.
Ingredient Tips & Swaps:
- If you’re gluten-free, swap in a cup-for-cup gluten-free flour blend (like King Arthur Measure for Measure). The texture stays surprisingly close!
- For dairy-free, use a vegan butter and dairy-free chocolate cups, like Unreal or Justin’s dark chocolate peanut butter cups.
- Want less refined sugar? Substitute coconut sugar for brown sugar, and use a natural peanut butter cup.
- No mini cups? Cut full-sized cups in half, or freeze and chop them into chunks for a more rustic look.
Once you’ve got your ingredients assembled, you’re halfway to cookie bliss. Just a few steps stand between you and the best brown butter stuffed peanut butter cup cookies you’ve ever tasted!
Equipment Needed
You don’t need a fancy bakery setup to make these cookies—just reliable kitchen basics. Here’s what I use every time:
- Medium saucepan: For browning the butter. Stainless steel pans help you see the color changes better.
- Mixing bowls (one large, one medium): Glass or stainless steel is fine. I love my old Pyrex bowls—they’re sturdy and easy to clean.
- Whisk and spatula: A whisk for the wet ingredients, and a sturdy spatula for folding in the flour and chocolate chips.
- Measuring cups and spoons: Accurate measuring equals consistent cookies. I always double-check my flour with a kitchen scale for best results.
- Baking sheets: Heavy-duty, rimmed baking sheets work best. Light-colored pans prevent over-browning.
- Parchment paper or silicone baking mats: Prevents sticking and makes cleanup a breeze. I use silicone mats—they last forever.
- Cookie scoop (medium, about 2 tbsp): For even portioning. If you don’t have a scoop, two spoons work just fine.
- Cooling rack: Lets the cookies cool without steaming on the pan.
If you’re missing a cookie scoop, use a heaping tablespoon and shape the dough with your hands. For browning butter, a light-colored pan helps you catch that nutty aroma before it burns (trust me, I’ve learned the hard way). And if you bake a lot, investing in a good silicone mat saves you money and hassle in the long run. No fancy gadgets here—just solid, trusty tools that make baking these cookies a breeze.
How to Make Brown Butter Stuffed Peanut Butter Cup Cookies
-
Brown the butter:
- Add 1 cup (226g) unsalted butter to a medium saucepan over medium heat. Stir constantly as it melts, then foams and begins to brown. Watch for golden-brown bits forming at the bottom (about 5–7 minutes). When it smells nutty and toasty, remove from heat.
- Pour browned butter (scraping all the brown bits) into a heatproof bowl. Let it cool for 10–15 minutes—you want it warm, not hot, or you’ll scramble the eggs later.
-
Mix wet ingredients:
- In a large bowl, whisk together the cooled brown butter, 1 cup (200g) brown sugar, and 1/2 cup (100g) granulated sugar until combined and glossy (about 1 minute).
- Add 2 large eggs and 2 tsp vanilla extract. Whisk until the mixture is smooth and slightly thickened, about 30 seconds.
-
Combine dry ingredients:
- In a separate bowl, whisk 2 1/2 cups (315g) all-purpose flour, 1 tsp baking soda, and 3/4 tsp salt until evenly mixed.
-
Mix it all together:
- Gradually add the dry ingredients to the wet mixture, folding gently with a spatula. Don’t overmix—just until you see no flour streaks. If using, fold in 1 cup (170g) mini chocolate chips.
-
Chill the dough:
- Cover the bowl and chill in the fridge for at least 30 minutes (up to 2 hours is even better). This step helps the flavors develop and keeps the cookies thick.
-
Preheat and prep:
- Preheat your oven to 350°F (175°C). Line baking sheets with parchment paper or silicone mats.
-
Shape and fill:
- Scoop about 2 tablespoons of dough (40g) and flatten slightly in your palm. Place an unwrapped mini peanut butter cup in the center, then wrap the dough around it, sealing the edges. Roll gently into a ball.
- Place cookies 2 inches (5cm) apart on the prepared baking sheets. If desired, sprinkle with flaky sea salt.
-
Bake:
- Bake for 10–12 minutes, until the edges are golden and the centers look just set (they’ll finish cooking as they cool). If you like softer cookies, pull them at 10 minutes.
-
Cool:
- Let cookies cool on the baking sheet for 5 minutes, then transfer to a wire rack to cool completely. The centers will stay gooey if you don’t overbake!
Troubleshooting Tips:
- If the dough is too sticky to handle, pop it in the fridge for another 15–20 minutes.
- If cookies spread too much, check your flour measurements (a little extra flour helps, especially on humid days).
- For extra-thick cookies, chill shaped dough balls for 10 minutes before baking.
Baking is a little messy, but that’s part of the fun. The smell alone will have everyone sneaking into the kitchen to see what’s baking!
Cooking Tips & Techniques
After baking these brown butter stuffed peanut butter cup cookies more times than I can count, I’ve picked up a few tricks to guarantee bakery-level results every time:
- Watch the Butter: Browning butter can go from perfect to burnt in seconds. Stir constantly and don’t walk away. The butter is ready when the foam subsides and you see golden bits at the bottom. Smell for that nutty, almost caramel aroma—when it hits, pull it off the heat!
- Room Temp Ingredients: Cold eggs or butter can make your dough seize or bake unevenly. If you’re short on time, place eggs in warm water for a few minutes before cracking.
- Don’t Skip Chilling: Chilling the dough helps the butter firm up and the flavors meld. Skipping this step leads to flatter, greasier cookies (been there, regretted that!).
- Seal the Filling Well: Make sure the peanut butter cup is fully wrapped in dough. Any cracks or gaps can cause the chocolate to leak out during baking.
- Bake in Batches: Don’t overcrowd the baking sheet. Cookies need space to spread and bake evenly. I usually do 6 per standard pan.
Common mistakes? I’ve made them all. Once, I didn’t let the brown butter cool enough—my eggs curdled. Another time, I under-measured the flour and ended up with delicious (but pancake-flat) cookies. Now, I always double-check measurements and make sure my oven is fully preheated before baking the first batch. Oh, and don’t forget to rotate the pan halfway through baking for even browning. With these tips, you’ll nail that perfect, gooey, bakery-style cookie every single time.
Variations & Adaptations
One of the best things about brown butter stuffed peanut butter cup cookies is how easily you can make them your own. Here are some fun ways to switch things up:
- Gluten-Free: Use a 1:1 gluten-free flour blend. I’ve had great success with King Arthur or Cup4Cup—no one can even tell the difference!
- Dairy-Free: Swap in plant-based butter and dairy-free peanut butter cups (like Justin’s or Unreal). The flavor is still totally decadent.
- Extra-Nutty: Fold in a half cup (60g) chopped roasted peanuts with the chocolate chips for extra crunch and salty flavor.
- Holiday Twist: Use white chocolate peanut butter cups or swap in caramel-filled chocolate candies for a seasonal variation.
- Chunky Style: Instead of stuffing, chop up the peanut butter cups and gently fold into the dough with the chocolate chips for a rustic, chunky cookie.
If you’re baking for someone with a peanut allergy, sunbutter cups or almond butter cups work great too. I once made a double chocolate version by swapping 1/2 cup (60g) of flour for cocoa powder—super rich and fudgy. Whatever your craving, there’s a way to customize these cookies. Sometimes I even press extra mini peanut butter cups into the tops right after baking for maximum wow factor!
Serving & Storage Suggestions
Fresh out of the oven, these brown butter stuffed peanut butter cup cookies are at their best—gooey, warm, and totally irresistible. If you can wait (I rarely do), let them cool for 10 minutes so the centers set just a bit. They’re perfect served with a tall glass of cold milk or a hot cup of coffee.
For parties, stack them on a pretty plate, adding a sprinkle of flaky sea salt for a bakery-style finish. These cookies also make adorable holiday gifts—pack them in a cellophane bag with a ribbon, and you’re set.
To store, keep cookies in an airtight container at room temperature for up to 4 days. They stay soft and chewy. For longer storage, freeze baked cookies in a zip-top bag for up to 2 months. To reheat, pop one in the microwave for 8–10 seconds—it’ll be gooey again, just like fresh!
The flavors of brown butter and peanut butter deepen after a day, making leftovers (if you have any!) even tastier. I’ve even crumbled them over vanilla ice cream for an over-the-top dessert. No matter how you serve them, these cookies are always a crowd-pleaser.
Nutritional Information & Benefits
Each brown butter stuffed peanut butter cup cookie packs in about 240 calories, 14g fat, 3g protein, and 26g carbs. The real stars here are the heart-healthy fats from peanut butter and the protein boost from eggs. Brown butter adds irresistible flavor without any extra ingredients—no need for artificial flavors or preservatives.
Dietary notes: These cookies contain gluten, dairy, eggs, and peanuts. For nut-free or dairy-free adaptations, see the variations section above. While they’re definitely a treat, I love that one cookie truly satisfies my sweet tooth. As someone who believes in balanced indulgence, I say enjoy every bite—life’s too short to skip dessert!
Conclusion
If you’re looking for a recipe that’s as fun to make as it is to eat, these brown butter stuffed peanut butter cup cookies are it. They’re rich, gooey, and just the right mix of salty-sweet. Every batch brings back memories of baking with my family and sharing warm cookies straight from the oven.
Don’t be afraid to put your own spin on them—change up the filling, try gluten-free flour, or add a dash of sea salt. These cookies are meant to be shared, enjoyed, and tweaked to fit your cravings. I hope you love them as much as we do (and don’t forget to save one for yourself before the batch disappears!).
Ready to bake? Drop a comment below with your favorite cookie variation or tag me in your Pinterest photos—I can’t wait to see your bakery-style creations. Happy baking, friends!
Frequently Asked Questions
How do I brown butter without burning it?
Use medium heat and stir constantly. Watch for golden-brown bits and a nutty aroma—pull the pan from heat as soon as you see and smell those signs! Don’t walk away, as butter can burn quickly.
Can I use regular-sized peanut butter cups instead of mini?
Absolutely! Just use a larger scoop of dough to fully cover the cup, and add 1–2 extra minutes to your bake time. The result is a jumbo, bakery-style cookie.
Do I have to chill the dough?
Chilling is highly recommended—it helps the cookies bake up thick and chewy instead of flat. If you skip this step, the cookies may spread more than you’d like.
How do I store baked cookies so they stay soft?
Keep them in an airtight container at room temperature. Add a slice of bread to the container to help maintain softness, or freeze for longer storage and reheat for gooey centers.
Can I freeze the dough for later?
Yes! Shape the dough balls, stuff with peanut butter cups, and freeze on a tray. Once solid, transfer to a zip-top bag. Bake straight from frozen, adding 2–3 minutes to the baking time.
Pin This Recipe!
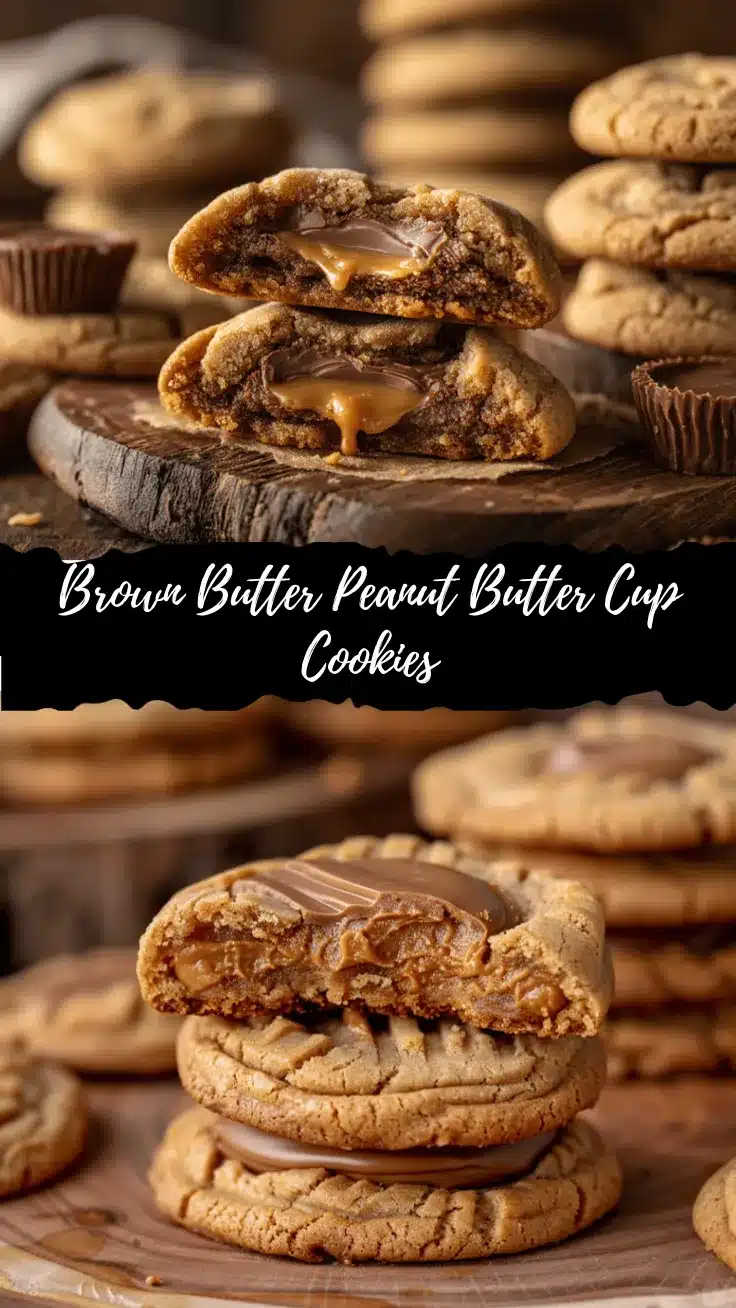
Brown Butter Stuffed Peanut Butter Cup Cookies
Bakery-style cookies with a nutty brown butter dough, stuffed with gooey peanut butter cups and melty chocolate chips. Thick, chewy, and irresistibly rich, these cookies are easy to make and perfect for peanut butter and chocolate lovers.
- Prep Time: 25 minutes
- Cook Time: 12 minutes
- Total Time: 1 hour
- Yield: 24–28 cookies 1x
- Category: Dessert
- Cuisine: American
Ingredients
- 1 cup (226g) unsalted butter, browned
- 1 cup (200g) packed brown sugar (light or dark)
- 1/2 cup (100g) granulated sugar
- 2 large eggs, room temperature
- 2 teaspoons pure vanilla extract
- 2 1/2 cups (315g) all-purpose flour
- 1 teaspoon baking soda
- 3/4 teaspoon salt
- 1 cup (170g) mini chocolate chips (optional)
- 24–28 mini peanut butter cups, unwrapped (or 12–14 regular size, halved if needed)
- Flaky sea salt, for topping (optional)
Instructions
- Add 1 cup unsalted butter to a medium saucepan over medium heat. Stir constantly as it melts, foams, and begins to brown (about 5–7 minutes). When golden-brown bits form and it smells nutty, remove from heat.
- Pour browned butter (including brown bits) into a heatproof bowl. Let cool for 10–15 minutes until warm, not hot.
- In a large bowl, whisk together cooled brown butter, brown sugar, and granulated sugar until combined and glossy (about 1 minute).
- Add eggs and vanilla extract. Whisk until smooth and slightly thickened, about 30 seconds.
- In a separate bowl, whisk together flour, baking soda, and salt.
- Gradually fold dry ingredients into wet mixture with a spatula until just combined. If using, fold in mini chocolate chips.
- Cover dough and chill in the fridge for at least 30 minutes (up to 2 hours for thicker cookies).
- Preheat oven to 350°F (175°C). Line baking sheets with parchment paper or silicone baking mats.
- Scoop about 2 tablespoons of dough and flatten slightly. Place a mini peanut butter cup in the center, wrap dough around it, and roll into a ball. Place on baking sheet 2 inches apart. Sprinkle with flaky sea salt if desired.
- Bake for 10–12 minutes, until edges are golden and centers look just set.
- Let cookies cool on baking sheet for 5 minutes, then transfer to a wire rack to cool completely.
Notes
For best results, chill the dough to prevent spreading and ensure thick, chewy cookies. Seal the peanut butter cup fully in dough to avoid leaks. For extra-thick cookies, chill shaped dough balls before baking. Swap in gluten-free flour or dairy-free butter and chocolate for dietary needs. Store in an airtight container for up to 4 days or freeze for up to 2 months.
Nutrition
- Serving Size: 1 cookie
- Calories: 240
- Sugar: 16
- Sodium: 120
- Fat: 14
- Saturated Fat: 7
- Carbohydrates: 26
- Fiber: 1
- Protein: 3
Keywords: brown butter, peanut butter cup cookies, bakery-style cookies, stuffed cookies, chocolate chip, easy cookie recipe, chewy cookies, peanut butter, chocolate, dessert, homemade cookies


