
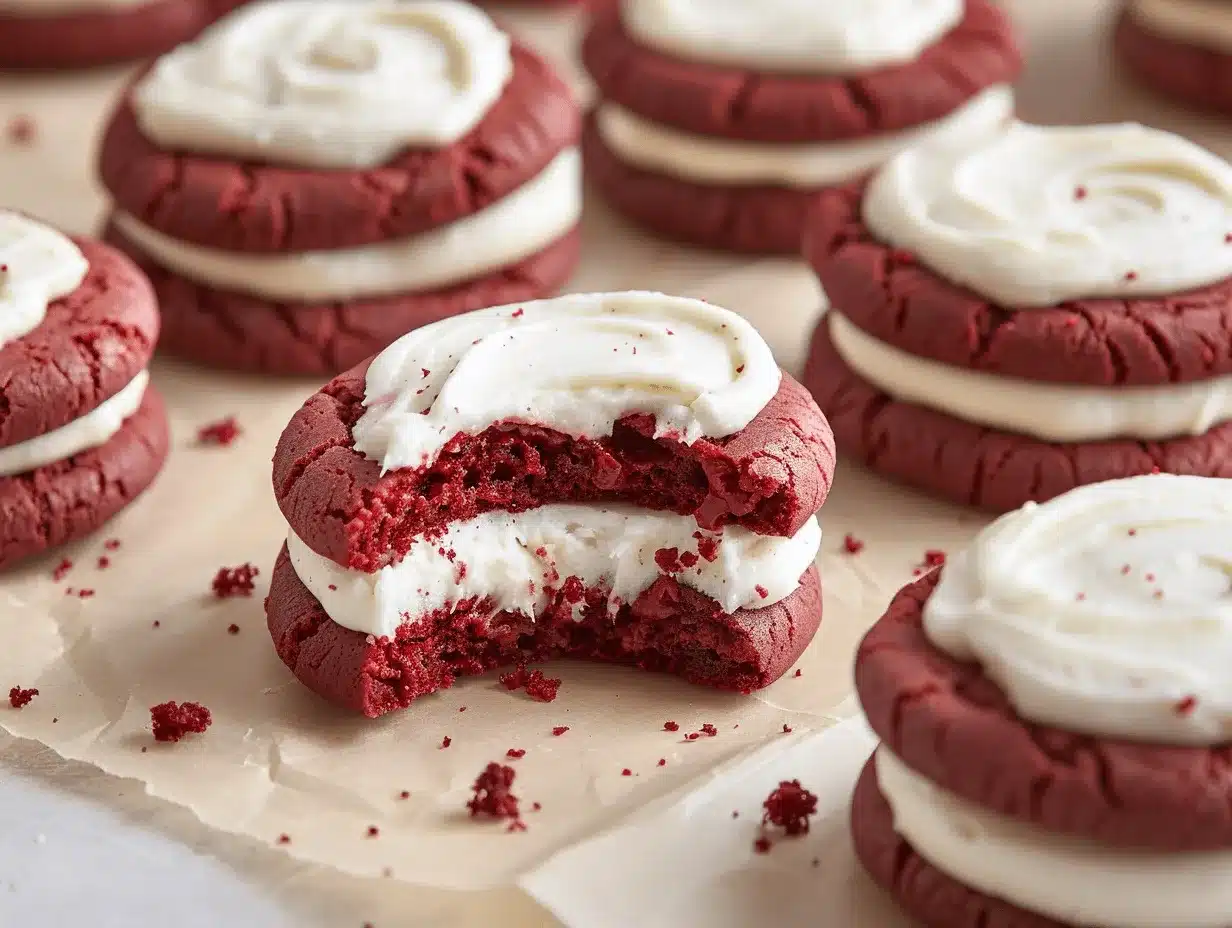
The first time I bit into a red velvet Crumbl cookie sandwich, I swear the world slowed down for just a second. That pillowy-soft cookie, rich with cocoa and that signature hint of tang, paired with a silky cream cheese frosting—yeah, it was basically love at first bite. And honestly, making these irresistible red velvet Crumbl-inspired cookie sandwiches at home is way easier than you might think. You get all the bakery magic, right out of your oven, without the crazy price tag or waiting in a line that stretches out the door.
I started tinkering with this recipe after a family birthday when store-bought treats just didn’t hit the spot. I wanted something special, something bold and beautiful for Instagram (or let’s be real—Pinterest), but with real flavor that would wow my kids and keep my husband sneaking back for seconds. After a few test batches (okay, maybe five), I landed on this version: thick, soft red velvet cookies with a plush, tangy cream cheese filling that doesn’t ooze everywhere when you take a bite. This recipe is now my go-to for holidays, parties, and “just because” weekends.
Whether you’re baking for a crowd, prepping for Valentine’s Day, or just craving a little bakery-style comfort food, these red velvet Crumbl cookie sandwiches bring the goods. They’re perfect for anyone with a sweet tooth, but honestly, even my pickiest eater can’t resist. Plus, the ingredients are easy to find, the steps are surprisingly simple, and you can freeze the extras (if you have any left). If you love thick, soft cookies and swoon-worthy cream cheese frosting, you’re going to want to make these again and again. Ready to bake your own batch of red velvet happiness?
Why You’ll Love This Recipe
- Bakery-Style at Home: These red velvet Crumbl cookie sandwiches look and taste like they came straight from a bakery case. No fancy equipment or secret ingredients required!
- Swoon-Worthy Texture: The cookies are thick, soft, and tender—almost like biting into a cake, but somehow even better. They’re sturdy enough to hold the frosting without falling apart (a must for sandwiches!).
- Easy Cream Cheese Frosting: The frosting is tangy, creamy, and pipes beautifully. It’s not too sweet and spreads like a dream between the cookies.
- Perfect for Any Occasion: These are showstoppers for Valentine’s Day, birthdays, bake sales, Christmas cookie trays, or just a cozy afternoon treat.
- No Fuss Ingredients: Everything you need is probably already in your pantry or fridge—no need for fancy cocoa powder or specialty flours.
- Kid and Adult Approved: My own family (and their friends!) request these constantly, and they disappear at every potluck.
- Instagram-Worthy: These cookies are gorgeous—deep red color, white swirls of frosting, and the cutest sandwich shape. They’ll make your Pinterest board pop!
What really sets this red velvet Crumbl cookie recipe apart is the texture and that perfect balance of flavors. The trick? A bit of cornstarch in the dough for a melt-in-your-mouth crumb, and the right amount of cocoa for that classic red velvet flavor without overpowering the tang. Plus, I whip the cream cheese frosting just long enough so it holds its shape but stays soft and creamy. I’ve baked dozens of batches over the years, and this method is foolproof—even on busy weeknights.
This recipe isn’t just another copycat—it’s my best version, fine-tuned through trial and error (and a few happy taste testers along the way). If you want a treat that’s rich, indulgent, and totally irresistible, these red velvet Crumbl cookie sandwiches with cream cheese frosting will not disappoint!
What Ingredients You Will Need
This recipe uses simple, accessible ingredients to build rich red velvet flavor and a cloud-like cookie texture. Most are pantry staples, and I’ll share a few of my favorite brands and substitution tips below.
- For the Red Velvet Cookies:
- All-purpose flour: (240g/2 cups) – Classic base for a soft, sturdy cookie.
- Unsweetened cocoa powder: (15g/2 tablespoons) – Use natural or Dutch process (I love Ghirardelli for rich flavor).
- Cornstarch: (8g/1 tablespoon) – Adds a tender crumb and keeps the cookies extra soft.
- Baking soda: (1/2 teaspoon) – For just enough lift.
- Salt: (1/2 teaspoon) – Balances the sweetness.
- Unsalted butter, softened: (113g/1/2 cup) – Room temperature for easy creaming.
- Granulated sugar: (150g/3/4 cup) – Sweetens without overpowering the cocoa.
- Light brown sugar, packed: (55g/1/4 cup) – Adds moisture and a caramel note.
- Large egg: (1, room temperature) – Binds everything together.
- Egg yolk: (1) – Extra richness and chew.
- Pure vanilla extract: (2 teaspoons) – Rounds out the flavor.
- Distilled white vinegar: (1 teaspoon) – For that traditional red velvet tang.
- Red gel food coloring: (1 tablespoon) – I recommend Americolor Super Red or Wilton No-Taste Red for best results (liquid food coloring can water down the dough).
- Optional: Mini chocolate chips (1/2 cup/90g) – For a little surprise in each bite (I sometimes skip these for a classic version).
- For the Cream Cheese Frosting:
- Cream cheese, softened: (113g/4 oz, full fat) – Philadelphia is my go-to for smooth texture.
- Unsalted butter, softened: (56g/1/4 cup) – Balances the tanginess.
- Powdered sugar: (180g/1 1/2 cups) – Sift for lump-free frosting.
- Pure vanilla extract: (1 teaspoon) – For classic flavor.
- Pinch of salt – Optional, but helps cut the sweetness.
Ingredient Tips: Always bring your butter, cream cheese, and eggs to room temperature for the smoothest batter and frosting. If you want to go gluten-free, swap the flour for a 1:1 gluten-free blend (like Bob’s Red Mill). For a dairy-free version, use plant-based butter and vegan cream cheese—just note the frosting may be a touch softer.
Equipment Needed
- Stand mixer or hand mixer: Either works, but a stand mixer makes creaming the dough and frosting much easier (and saves your arm!).
- Baking sheets: I use two large, heavy-duty sheets for even baking.
- Parchment paper or silicone baking mats: Prevents sticking and gives you perfect cookie bottoms.
- Medium and large mixing bowls: For wet and dry ingredients.
- Measuring cups and spoons: For accuracy! Weighing is best, but cups work for most home bakers.
- Cookie scoop (large, 3 tablespoons): This helps with uniform size (I use an OXO scoop). You can use two spoons if needed.
- Wire cooling rack: To prevent soggy bottoms—trust me, it makes a difference.
- Piping bag and star tip (optional): For fancy frosting swirls. A zip-top bag with the corner snipped works too for a rustic look.
- Offset spatula or butterknife: For spreading frosting if you don’t want to pipe.
If you’re baking on a budget, don’t worry—a hand mixer and basic cookie sheets work just fine. I started with dollar-store mixing bowls and an old wooden spoon, and these cookies still turned out amazing. Just keep your mixer’s beaters clean and dry for the fluffiest frosting, and line your pans for easy cleanup!
Preparation Method
-
Prep your ingredients and pans:
Preheat your oven to 350°F (175°C). Line two baking sheets with parchment paper or silicone mats. Gather all ingredients—let the butter, cream cheese, and egg come to room temperature (about 30 minutes). -
Mix dry ingredients:
In a medium bowl, whisk together the flour (240g), cocoa powder (15g), cornstarch (8g), baking soda (1/2 tsp), and salt (1/2 tsp). Set aside. -
Cream butter and sugars:
In a large bowl (or stand mixer), beat the softened butter (113g) with the granulated sugar (150g) and brown sugar (55g) on medium speed for 2–3 minutes, until light and fluffy. Scrape down the sides as needed. -
Add eggs and flavorings:
Beat in the egg and egg yolk, one at a time, until fully combined. Add vanilla extract (2 tsp), vinegar (1 tsp), and red gel food coloring (1 tbsp). The dough should turn a bold red. (If the color isn’t deep enough, add a touch more gel.) -
Combine wet and dry:
On low speed, mix in the dry ingredients until just combined. Don’t overmix—stop when the flour streaks disappear. If using, gently fold in mini chocolate chips (90g). -
Scoop and shape:
Using a large cookie scoop (about 3 tbsp per cookie), scoop dough onto prepared baking sheets, spacing at least 2 inches (5cm) apart. You should get 12 cookies (for 6 sandwiches). -
Bake:
Bake one tray at a time for 10–12 minutes, until the edges look set but the centers are still soft. The cookies should be puffed and slightly crackled. (If they look too puffy, tap the tray on the counter right after baking to flatten them slightly.) -
Cool:
Let cookies cool on the baking sheet for 5 minutes, then transfer to a wire rack to cool completely. Warm cookies will melt the frosting—trust me, patience pays off here! -
Make the cream cheese frosting:
In a clean bowl, beat the softened cream cheese (113g) and butter (56g) together for 2 minutes, until smooth and fluffy. Gradually add powdered sugar (180g), mixing on low. Once combined, beat in vanilla (1 tsp) and a pinch of salt. Whip on high speed for 1–2 minutes until light and spreadable. -
Assemble the sandwiches:
Pair cookies by size. Pipe or spread a generous layer of frosting onto the flat side of one cookie. Top with another cookie, pressing gently to create a sandwich. -
Chill and serve:
For best texture, chill sandwiches in the fridge for 30 minutes before serving. This helps set the frosting (especially if you want clean, bakery-style bites).
Troubleshooting tips: If your dough is too sticky, chill for 10–15 minutes before scooping. If cookies spread too much, double-check your flour measurement. For extra height, scoop the dough tall rather than wide. Don’t skip lining your pans—these cookies can stick!
Cooking Tips & Techniques
- Don’t overmix the dough: Overworking the flour will make the cookies tough instead of tender. Mix just until the flour vanishes for that signature Crumbl-style softness.
- Room temperature ingredients matter: Cold butter or cream cheese won’t blend smoothly and can create lumpy frosting. Pull everything out of the fridge ahead of time—even 20 minutes helps.
- Scoop evenly: Use a cookie scoop or weigh your dough for uniform cookies. I once tried to “eyeball” it—ended up with some mini cookies and some giants. Matching pairs makes pretty sandwiches!
- Bake one tray at a time: It’s tempting to stack both trays in the oven, but you’ll get the most even bake if you do one at a time. Rotate the sheet halfway through for perfect bottoms.
- Chill before serving: The magic happens when the cookies and frosting set together in the fridge. If you skip this step, the frosting may squish out and the cookies will be a bit crumbly (learned this the messy way!).
- Pipe or spread the frosting: If you want that bakery look, fill a piping bag with a star tip. For a rustic touch, just use a butterknife and swirl it on thick—it’s all about that generous filling.
Honestly, the biggest mistake is rushing—let the cookies cool before you frost, and use a gentle hand assembling the sandwiches. Oh, and don’t be afraid to taste-test along the way (perks of baking at home!).
Variations & Adaptations
- Gluten-Free Red Velvet Sandwiches: Use a 1:1 gluten-free flour blend in place of all-purpose flour. The cookies might spread a touch more, but the flavor is still spot-on.
- Vegan/Dairy-Free Version: Substitute vegan butter and dairy-free cream cheese for both cookies and frosting. Use a flax egg (1 tbsp flaxseed meal + 2.5 tbsp water, mixed and rested) instead of eggs. The texture will be slightly softer but still delicious.
- Mini Sandwich Cookies: Make smaller cookies using a 1.5-tbsp scoop for bite-sized treats—great for parties! Reduce baking time by 2 minutes.
- Flavor Twists: Add 1/2 teaspoon almond extract to the cookie dough for a bakery-style aroma. Or, stir in 1/4 cup chopped pecans or walnuts for extra crunch.
- Festive Colors: Swap out the red food coloring for green at Christmas, or blue for a fun birthday party spin. The base dough is super adaptable.
I once made these into “birthday cake” sandwiches by rolling the edges in rainbow sprinkles—huge hit with my kids! Don’t be afraid to get creative with mix-ins or colors to match your celebration.
Serving & Storage Suggestions
These red velvet Crumbl cookie sandwiches are best enjoyed chilled or at cool room temperature. The frosting firms up just enough to hold everything together for that perfect bite. For a pretty presentation, pipe the frosting in a swirl and roll the edges in mini chocolate chips or sprinkles. Stack them on a white platter for a Pinterest-worthy dessert table—trust me, they’ll disappear fast!
Pairing ideas: Serve with a tall glass of milk, a hot cup of coffee, or even a scoop of vanilla ice cream. They’re also amazing alongside fresh strawberries or a drizzle of chocolate sauce for an extra treat.
Storage: Store assembled cookie sandwiches in an airtight container in the fridge for up to 5 days. To freeze, wrap each sandwich in plastic wrap and place in a freezer bag; thaw in the fridge overnight before serving. The flavors actually deepen over time—by day two, the cookies are even more irresistible!
Reheating: If you want a softer cookie, let them sit at room temperature for 10–15 minutes before serving. Avoid microwaving, as the frosting will melt and the cookies can become soggy.
Nutritional Information & Benefits
Each red velvet Crumbl cookie sandwich (based on 6 large sandwiches) contains approximately:
- Calories: 430
- Fat: 21g
- Carbohydrates: 57g
- Protein: 4g
- Sugar: 37g
Key benefits: The cocoa provides a little antioxidant boost, and using full-fat cream cheese adds calcium and richness. You can lighten the recipe by using reduced-fat cream cheese or less frosting if desired. For gluten-free diets, swap in your favorite blend. Allergens include dairy, gluten, and eggs—see the variations above for substitutions.
For me, treats like these are about balance and joy—homemade cookies, shared with loved ones. Enjoy in moderation as part of a happy, delicious life!
Conclusion
If you’re searching for a show-stopping cookie that delivers both bakery looks and homemade flavor, these red velvet Crumbl cookie sandwiches with cream cheese frosting are the answer. They’re easy enough for beginner bakers but special enough for any celebration. I love how the rich cocoa, vibrant red hue, and tangy frosting come together for a treat that feels both nostalgic and totally new. Don’t be afraid to put your own spin on them—change up the mix-ins, try a new filling, or make mini sandwiches for your next party.
Honestly, every time I make these, I remember why homemade always wins. They’re the kind of cookies that bring people together and put a smile on your face. So preheat that oven, grab your mixing bowl, and let’s bake something unforgettable! I’d love to hear how your batch turns out—drop a comment, share your photos, or tag me with your creative twists. Happy baking, friends!
Frequently Asked Questions
Can I make these red velvet Crumbl cookie sandwiches ahead of time?
Absolutely! Assemble the sandwiches and store them in an airtight container in the fridge for up to 5 days. The flavor and texture actually improve after a day in the fridge.
What’s the best way to get that bold red color?
Use a concentrated red gel food coloring (like Americolor Super Red). Liquid food coloring tends to water down the dough and makes the color less vibrant.
Can I freeze the cookies or the assembled sandwiches?
Yes! Freeze unfrosted cookies in a zip-top bag for up to 2 months. For assembled sandwiches, wrap each one in plastic wrap and freeze in a bag. Thaw in the fridge before serving.
Is it possible to make these gluten-free?
Definitely—just use a 1:1 gluten-free flour blend in place of the all-purpose flour. The cookies may spread a bit more, but they’ll still taste amazing.
How do I keep the cream cheese frosting from being too runny?
Use full-fat cream cheese and make sure it’s not too warm. If the frosting feels too soft, chill it for 10–15 minutes before piping or spreading onto the cookies.
PrintRed Velvet Crumbl Cookie Sandwiches – Easy Cream Cheese Frosting Recipe

These bakery-style red velvet Crumbl cookie sandwiches feature thick, soft cookies with a rich cocoa flavor and a tangy, plush cream cheese frosting. Perfect for holidays, parties, or any sweet craving, they’re easy to make at home and guaranteed to impress.
- Prep Time: 30 minutes
- Cook Time: 12 minutes
- Total Time: 1 hour
- Yield: 6 large cookie sandwiches 1x
- Category: Dessert
- Cuisine: American
Ingredients
- 2 cups (240g) all-purpose flour
- 2 tablespoons (15g) unsweetened cocoa powder (natural or Dutch process)
- 1 tablespoon (8g) cornstarch
- 1/2 teaspoon baking soda
- 1/2 teaspoon salt
- 1/2 cup (113g) unsalted butter, softened
- 3/4 cup (150g) granulated sugar
- 1/4 cup (55g) light brown sugar, packed
- 1 large egg, room temperature
- 1 egg yolk
- 2 teaspoons pure vanilla extract
- 1 teaspoon distilled white vinegar
- 1 tablespoon red gel food coloring (Americolor Super Red or Wilton No-Taste Red recommended)
- 1/2 cup (90g) mini chocolate chips (optional)
- For the Cream Cheese Frosting:
- 4 oz (113g) cream cheese, softened (full fat)
- 1/4 cup (56g) unsalted butter, softened
- 1 1/2 cups (180g) powdered sugar, sifted
- 1 teaspoon pure vanilla extract
- Pinch of salt (optional)
Instructions
- Preheat oven to 350°F (175°C). Line two baking sheets with parchment paper or silicone mats. Let butter, cream cheese, and egg come to room temperature (about 30 minutes).
- In a medium bowl, whisk together flour, cocoa powder, cornstarch, baking soda, and salt. Set aside.
- In a large bowl or stand mixer, beat softened butter with granulated sugar and brown sugar on medium speed for 2–3 minutes until light and fluffy. Scrape down the sides as needed.
- Beat in the egg and egg yolk, one at a time, until fully combined. Add vanilla extract, vinegar, and red gel food coloring. Mix until the dough turns a bold red.
- On low speed, mix in the dry ingredients until just combined. Do not overmix. If using, gently fold in mini chocolate chips.
- Using a large cookie scoop (about 3 tablespoons per cookie), scoop dough onto prepared baking sheets, spacing at least 2 inches apart. You should get 12 cookies (for 6 sandwiches).
- Bake one tray at a time for 10–12 minutes, until edges look set but centers are still soft. If cookies are too puffy, tap the tray on the counter after baking to flatten slightly.
- Let cookies cool on the baking sheet for 5 minutes, then transfer to a wire rack to cool completely.
- For the frosting: In a clean bowl, beat softened cream cheese and butter together for 2 minutes until smooth and fluffy. Gradually add powdered sugar, mixing on low. Once combined, beat in vanilla and a pinch of salt. Whip on high speed for 1–2 minutes until light and spreadable.
- Pair cookies by size. Pipe or spread a generous layer of frosting onto the flat side of one cookie. Top with another cookie, pressing gently to create a sandwich.
- Chill sandwiches in the fridge for 30 minutes before serving for best texture.
Notes
For best results, use room temperature ingredients and chill the assembled sandwiches before serving. If dough is too sticky, chill for 10–15 minutes before scooping. For gluten-free, use a 1:1 gluten-free flour blend. Cookies can be frozen assembled or unassembled. For a bakery look, pipe the frosting and roll edges in mini chocolate chips or sprinkles.
Nutrition
- Serving Size: 1 large cookie sandwich
- Calories: 430
- Sugar: 37
- Sodium: 210
- Fat: 21
- Saturated Fat: 13
- Carbohydrates: 57
- Fiber: 1
- Protein: 4
Keywords: red velvet, crumbl cookie, cookie sandwich, cream cheese frosting, bakery style, homemade cookies, holiday dessert, party treat, easy cookie recipe


