Introduction
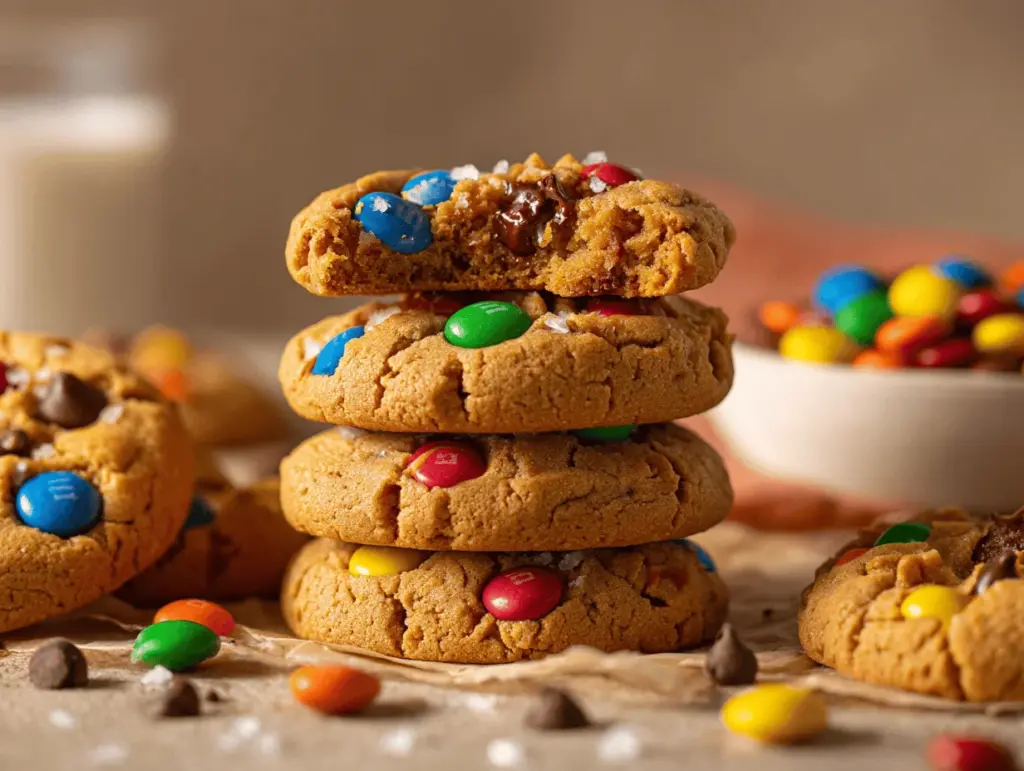
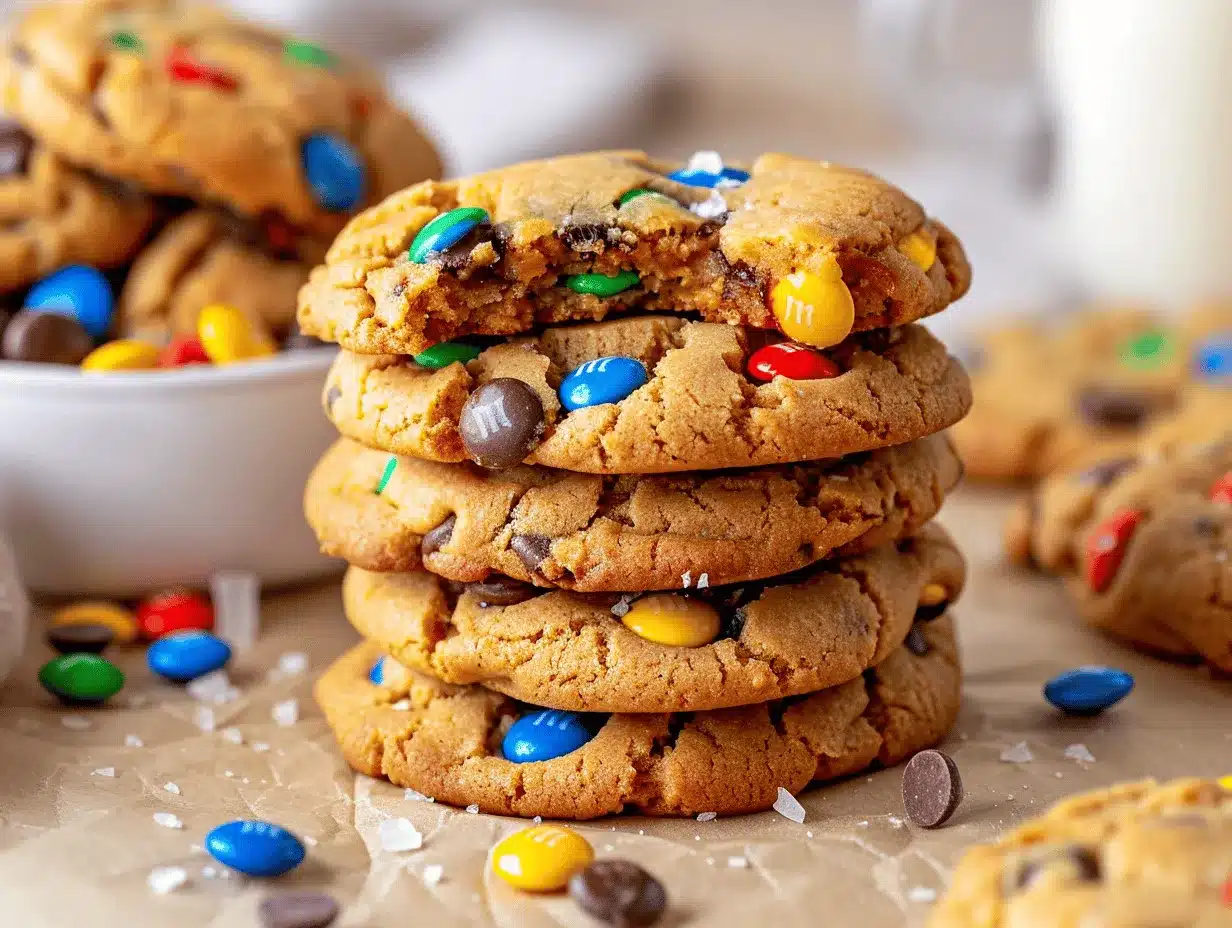
Warm, chewy, and bursting with color—these peanut butter monster cookies with M&Ms are honestly the definition of “can’t eat just one.” The first time I made them, I just wanted a fun afternoon treat, but they instantly became the most-requested cookie in my house. You know that sweet-salty thing? This recipe nails it, thanks to creamy peanut butter, hearty oats, and, of course, a rainbow of M&Ms peeking out of every bite.
I have vivid memories of baking these on rainy days with my kids, letting them toss in handfuls of chocolate chips and candies (sometimes more hit the counter than the bowl, but that’s part of the fun). Over the years, I’ve tinkered with the recipe—adding a little more peanut butter here, swapping out sugars there—until I landed on this perfect version of soft peanut butter monster cookies with M&Ms. They’re thick, pillowy, and packed with just the right amount of chew.
What I love most is how these cookies bring people together. They’re the star of bake sales, birthday parties, and even quiet evenings with a big glass of milk. If you’re searching for a peanut butter monster cookies recipe that’s easy, foolproof, and always a hit, you’re in the right place. Whether you bake for a crowd or just want something sweet to snack on, these M&M treats have your back—no fancy mixers required and barely any cleanup. Trust me, after dozens of batches and countless happy taste-testers, this is the monster cookie recipe you’ll come back to again and again.
Why You’ll Love This Recipe
There’s something magical about a cookie that checks all the boxes—soft, loaded with gooey chocolate, and fun to look at. Here’s why my peanut butter monster cookies recipe is a game-changer (and why I keep getting requests for “those soft M&M cookies” at every family get-together):
- Quick & Easy: These cookies come together in under 30 minutes, start to finish. No chilling, no complicated steps—just mix, scoop, and bake!
- Simple Ingredients: You probably have everything you need in your pantry. No last-minute runs for obscure flours or hard-to-find candies.
- Perfect for Any Occasion: Whether it’s a school bake sale, a holiday cookie tray, or a midweek treat, these cookies fit right in. They’re colorful and festive, but never fussy.
- Crowd-Pleaser: Adults love the nostalgic peanut butter flavor, and kids go wild for the bright M&Ms. There’s seriously never a crumb left.
- Unbelievably Delicious: The texture is exactly what you want—thick and soft in the middle, just a little chewy at the edges, with melty chocolate in every bite.
What truly sets this peanut butter monster cookies recipe apart is the balance. I blend creamy peanut butter with just enough brown sugar for deep flavor, and oats for that classic monster cookie chew. My secret? I use a mix of mini and regular M&Ms so you get those pops of color and chocolate in every bite. And if you’re like me and can’t stand a dry cookie, you’ll love how these stay soft for days (if they last that long!).
This recipe isn’t just about taste—it’s about the experience. It’s the kind of cookie that makes you smile before you’ve even taken a bite. So if you want to bake something that’s as fun as it is delicious, my peanut butter monster cookies are your new go-to. Honestly, don’t be surprised if you end up making a double batch—these disappear fast!
What Ingredients You Will Need
This peanut butter monster cookies recipe uses simple, wholesome ingredients to deliver big flavor and that perfect soft texture. Most of these are pantry staples, and you can easily swap things in or out if needed. Here’s what you’ll need:
- Creamy Peanut Butter (1 cup / 250g) – The star of the show! I like using Jif or Skippy for consistent results. Natural peanut butter can make the dough a bit crumbly, but it works in a pinch if you give it a good stir.
- Unsalted Butter (1/2 cup / 113g, softened) – Adds richness and helps with that soft, bakery-style texture.
- Brown Sugar (1 cup / 200g, packed) – For deep caramel flavor and extra chewiness.
- Granulated Sugar (1/2 cup / 100g) – Balances the brown sugar and helps the cookies spread just the right amount.
- Large Eggs (2, room temperature) – Bind everything together and keep the cookies moist.
- Vanilla Extract (2 tsp / 10ml) – Adds warmth and rounds out the flavors. Don’t skimp on this!
- All-Purpose Flour (1 1/2 cups / 190g) – Just enough to hold the cookies together without making them dense.
- Old-Fashioned Rolled Oats (1 cup / 100g) – Gives that classic “monster cookie” chew. Quick oats work if you’re in a pinch, but rolled oats are best for texture.
- Baking Soda (1 tsp / 5g) – Helps the cookies rise and stay soft.
- Salt (1/2 tsp / 3g) – Balances the sweetness and brings out the peanut butter flavor.
- M&Ms (1 cup / 200g) – I use a mix of regular and mini M&Ms for extra color and pops of chocolate. Feel free to use seasonal colors for holidays!
- Semi-Sweet Chocolate Chips (1/2 cup / 85g) – Optional, but I love a little extra chocolate in each bite. Milk chocolate chips work too.
Ingredient Notes & Swaps:
- For gluten-free, swap the flour for a 1:1 gluten-free blend and check that your oats are certified gluten-free.
- If you want to lower the sugar, you can reduce the granulated sugar by 1/4 cup without losing softness.
- No peanut butter? Almond butter or sunflower seed butter work, but the flavor will change slightly.
- Mix-ins are flexible—try adding chopped pecans, shredded coconut, or mini peanut butter cups for fun twists.
- Dairy-free? Use a plant-based butter and dairy-free chocolate candies. I’ve had great results with Earth Balance sticks.
I love that you can make these cookies your own based on what’s in your pantry. The M&Ms are non-negotiable in my house, though—something about those bright colors just makes everyone happy!
Equipment Needed
You don’t need fancy kitchen gear to make these peanut butter monster cookies. In fact, I’ve made them in college dorms and tiny apartments with just the basics! Here’s what you’ll want to have on hand:
- Mixing Bowls – One large for the dough, one medium for dry ingredients. Glass or stainless steel both work fine.
- Hand Mixer or Stand Mixer – Makes creaming the butter and sugars easy, but you can use a sturdy wooden spoon if you need an arm workout.
- Measuring Cups & Spoons – For accuracy. I always double-check the flour and oats for best texture.
- Rubber Spatula – Helps scrape every bit of dough from the bowl.
- Baking Sheet(s) – Line with parchment paper for easy cleanup and to prevent sticking.
- Cookie Scoop (about 2 tbsp size) – For evenly sized cookies. A regular spoon works in a pinch, but the scoop makes them look bakery-perfect.
- Wire Cooling Rack – Cools the cookies quickly and keeps the bottoms from getting soggy.
Pro Tip: If you bake a lot, invest in a sturdy half-sheet pan—it gives even browning. For budget-friendly tools, I’ve found that the basic sets at Target or IKEA work just as well as the pricier brands. Just be sure to wash your spatula right after mixing, or the dough will stick like crazy!
Preparation Method
-
Cream the Butter, Peanut Butter, and Sugars:
In a large mixing bowl, beat together 1/2 cup (113g) unsalted butter, 1 cup (250g) creamy peanut butter, 1 cup (200g) packed brown sugar, and 1/2 cup (100g) granulated sugar. Use a hand mixer or stand mixer on medium speed for about 2-3 minutes, until light and fluffy. (If you’re mixing by hand, it might take a bit longer—just keep going until it’s smooth!) -
Add Eggs and Vanilla:
Add 2 large eggs, one at a time, beating well after each addition. Pour in 2 teaspoons (10ml) vanilla extract. Scrape down the sides of the bowl with a spatula to make sure everything is evenly mixed. The dough should look creamy and a little glossy. -
Combine Dry Ingredients:
In a separate bowl, whisk together 1 1/2 cups (190g) all-purpose flour, 1 cup (100g) old-fashioned rolled oats, 1 teaspoon (5g) baking soda, and 1/2 teaspoon (3g) salt. (I always fluff the flour with a spoon before measuring to avoid dense cookies.) -
Mix Wet and Dry:
Gradually add the dry ingredients to the wet mixture, mixing on low speed or with a spatula until just combined. Don’t overmix—stop as soon as you don’t see streaks of flour. If the dough seems a bit stiff, that’s perfect. -
Add M&Ms and Chocolate Chips:
Gently fold in 1 cup (200g) M&Ms and 1/2 cup (85g) semi-sweet chocolate chips. Save a small handful of M&Ms to press on top of the cookies before baking for that classic monster cookie look. -
Scoop the Dough:
Use a 2-tablespoon cookie scoop or spoon to portion the dough onto a parchment-lined baking sheet. Leave about 2 inches (5cm) between each cookie—they spread just enough. For a bakery-style finish, press a few extra M&Ms and chips on top of each dough ball. -
Bake:
Bake in a preheated 350°F (175°C) oven for 10-12 minutes, until the edges are set and lightly golden, but the centers still look a touch underbaked. (This is key for soft cookies!) Watch closely—if they brown too much, they’ll lose that pillowy texture. -
Cool:
Let the cookies cool on the baking sheet for 5 minutes—they’ll be really soft at first. Then transfer to a wire rack to cool completely. (If you try to move them too soon, they might fall apart. Learned that one the hard way!) The cookies firm up as they cool but stay super soft inside.
Troubleshooting Tips: If your dough feels too sticky, chill it for 20 minutes. If the cookies are spreading too much, add a tablespoon of flour to the next batch. And if you want that bakery look, always save a few candies for the tops!
Cooking Tips & Techniques
Let’s be real—monster cookies are meant to be a little rustic, but there are a few tricks to getting them just right. After dozens of batches (and a few messy ones), here’s what I’ve learned:
- Don’t Overmix: Once you add the dry ingredients, mix just until combined. Overmixing leads to tough cookies—nobody wants that!
- Room Temperature Ingredients: Make sure your butter and eggs are at room temp. This helps everything blend smoothly and makes for fluffier cookies.
- Press Extra M&Ms on Top: It sounds silly, but adding a few candies to the tops before baking makes the cookies look just like the ones from bakeries or Pinterest.
- Oven Accuracy: Ovens run hot or cool. If your cookies are browning too fast, bake a test cookie first and adjust as needed. I use an oven thermometer just to be sure.
- For Super Soft Cookies: Always pull them from the oven when the centers look a little underdone. They’ll finish setting up as they cool. Overbaking is the enemy of soft monster cookies!
Once, I tried melting the butter because I was in a hurry—ended up with pancake cookies! So, stick to softened butter for the best results. If you want to multitask, prep your baking sheets and measure your mix-ins while the butter softens. And don’t forget to taste the dough—just a little, chef’s treat!
Variations & Adaptations
One of the things I love about peanut butter monster cookies is how customizable they are. Here are a few of my favorite twists and swaps:
- Gluten-Free Version: Use a 1:1 gluten-free flour blend and certified gluten-free oats. The cookies stay just as soft and chewy—promise!
- Nut-Free Option: Swap peanut butter for sunflower seed butter and use nut-free chocolate candies. Great for school lunches or allergy-friendly gatherings.
- Festive Flavors: Try holiday M&Ms (red and green for Christmas, pastels for Easter, or orange and black for Halloween). You can even add mini pretzels or colored sprinkles for extra crunch.
- Protein Boost: Replace 1/4 cup of flour with vanilla protein powder. I’ve tried this for post-workout snacks, and it works surprisingly well!
- Different Nut Butters: Almond butter or cashew butter both give a unique twist, though the flavor will change a bit. My kids love the almond version with white chocolate chips.
- Mix-In Madness: Toss in chopped pecans, shredded coconut, or crushed potato chips for salty-sweet magic. Once, I even added crushed toffee bits—so good!
Honestly, you can get creative based on what you have in your pantry. The base dough is forgiving, so don’t be afraid to experiment. Let me know your favorite combos in the comments!
Serving & Storage Suggestions
Monster cookies are best served slightly warm, with the M&Ms still a little melty. If you’re making them for a party, pile them high on a pretty platter or stack them in a big glass jar for a colorful display. For a real treat, sandwich a scoop of vanilla ice cream between two cookies—totally over-the-top, but worth it!
To store, keep the cookies in an airtight container at room temperature for up to 5 days. They actually get softer after the first day (if they last that long!). For longer storage, freeze baked cookies in a zip-top bag for up to 3 months. Just let them thaw at room temperature, or zap in the microwave for 15 seconds for that fresh-baked taste.
If you’re prepping ahead, you can freeze unbaked dough balls and bake them straight from the freezer—just add an extra 2 minutes to the baking time. I sometimes stash a batch for “cookie emergencies.” And honestly, the flavors deepen over time, so don’t be afraid to enjoy them on day three or four!
Nutritional Information & Benefits
Each peanut butter monster cookie (about 2 tablespoons of dough) has roughly 180-210 calories, with 4g protein, 22g carbs, and 10g fat. The oats add fiber, and the peanut butter offers a boost of healthy fats and plant-based protein, making these a little more satisfying than your average cookie.
Keep in mind, these do contain common allergens like peanuts, eggs, dairy, and wheat. You can easily make swaps for gluten-free or nut-free diets. I love that you can sneak in some whole grains thanks to the oats—makes them feel a bit more wholesome, you know?
From a wellness perspective, these cookies are all about balance. Enjoy one (or two!) as a fun treat—the mix of protein, fiber, and just enough sugar leaves you feeling happy, not weighed down. And, of course, they’re good for the soul. That counts, right?
Conclusion
There’s just something timeless about a soft, colorful peanut butter monster cookie loaded with M&Ms. This recipe is easy, endlessly adaptable, and—trust me—always a hit. Whether you’re baking for a crowd, a family movie night, or just because you need a little pick-me-up, these cookies deliver comfort and joy in every bite.
I love how you can make them your own—change up the mix-ins, go nut-free, or use holiday colors for any celebration. They’re fun to bake, fun to eat, and even more fun to share. If you give these a try, I’d love to hear how you customize your batch. Leave a comment, share a photo, or let me know your favorite monster cookie memory!
So, what are you waiting for? Grab that jar of peanut butter and a bag of M&Ms, and let’s bake up some happiness. Happy baking!
Frequently Asked Questions
How do I keep my peanut butter monster cookies soft?
Take them out of the oven when the centers still look a bit underdone—they’ll finish setting as they cool. Store in an airtight container with a slice of bread to keep them extra soft.
Can I make these cookies gluten-free?
Absolutely! Use a 1:1 gluten-free flour blend and certified gluten-free oats. The texture stays just as good.
Can I use natural peanut butter?
You can, but the cookies might be a bit crumblier. Stir the peanut butter well before using and maybe add 2 tablespoons more flour if the dough feels too sticky.
Can I freeze the dough or baked cookies?
Yes! Scoop dough balls onto a baking sheet, freeze until solid, then transfer to a zip-top bag. Bake straight from frozen, adding 2 minutes to the bake time. Baked cookies freeze well too—just thaw and enjoy.
What mix-ins work besides M&Ms and chocolate chips?
Try peanut butter chips, chopped nuts, shredded coconut, dried cranberries, or even mini pretzels. The base dough is super flexible, so get creative!
PrintPeanut Butter Monster Cookies

These soft, chewy peanut butter monster cookies are packed with M&Ms, oats, and chocolate chips for the ultimate sweet-and-salty treat. Quick to make and endlessly customizable, they’re perfect for bake sales, parties, or a fun family baking day.
- Prep Time: 15 minutes
- Cook Time: 10-12 minutes
- Total Time: 25-27 minutes
- Yield: 24 cookies 1x
- Category: Dessert
- Cuisine: American
Ingredients
- 1 cup creamy peanut butter (Jif or Skippy recommended)
- 1/2 cup unsalted butter, softened
- 1 cup packed brown sugar
- 1/2 cup granulated sugar
- 2 large eggs, room temperature
- 2 teaspoons vanilla extract
- 1 1/2 cups all-purpose flour
- 1 cup old-fashioned rolled oats
- 1 teaspoon baking soda
- 1/2 teaspoon salt
- 1 cup M&Ms (mix of regular and mini recommended)
- 1/2 cup semi-sweet chocolate chips (optional)
Instructions
- Preheat oven to 350°F (175°C). Line baking sheets with parchment paper.
- In a large mixing bowl, beat together the unsalted butter, creamy peanut butter, brown sugar, and granulated sugar with a hand mixer or stand mixer on medium speed for 2-3 minutes, until light and fluffy.
- Add eggs one at a time, beating well after each addition. Mix in vanilla extract. Scrape down the sides of the bowl as needed.
- In a separate bowl, whisk together the all-purpose flour, rolled oats, baking soda, and salt.
- Gradually add the dry ingredients to the wet mixture, mixing on low speed or with a spatula until just combined. Do not overmix.
- Gently fold in the M&Ms and chocolate chips, reserving a small handful of M&Ms to press on top of the cookies before baking.
- Use a 2-tablespoon cookie scoop or spoon to portion dough onto prepared baking sheets, leaving about 2 inches between each cookie. Press extra M&Ms and chips on top for a bakery-style look.
- Bake for 10-12 minutes, until edges are set and lightly golden but centers still look slightly underbaked.
- Let cookies cool on the baking sheet for 5 minutes, then transfer to a wire rack to cool completely.
Notes
For gluten-free cookies, use a 1:1 gluten-free flour blend and certified gluten-free oats. For extra soft cookies, pull them from the oven when the centers look slightly underdone. Store in an airtight container with a slice of bread to keep them soft. Dough and baked cookies freeze well. Customize with your favorite mix-ins like chopped nuts, coconut, or pretzels.
Nutrition
- Serving Size: 1 cookie (about 2 tablespoons dough)
- Calories: 200
- Sugar: 13
- Sodium: 120
- Fat: 10
- Saturated Fat: 4
- Carbohydrates: 22
- Fiber: 1
- Protein: 4
Keywords: peanut butter monster cookies, M&M cookies, soft cookies, easy cookie recipe, bake sale cookies, chewy cookies, kid-friendly cookies, party cookies, oatmeal cookies, chocolate chip cookies


