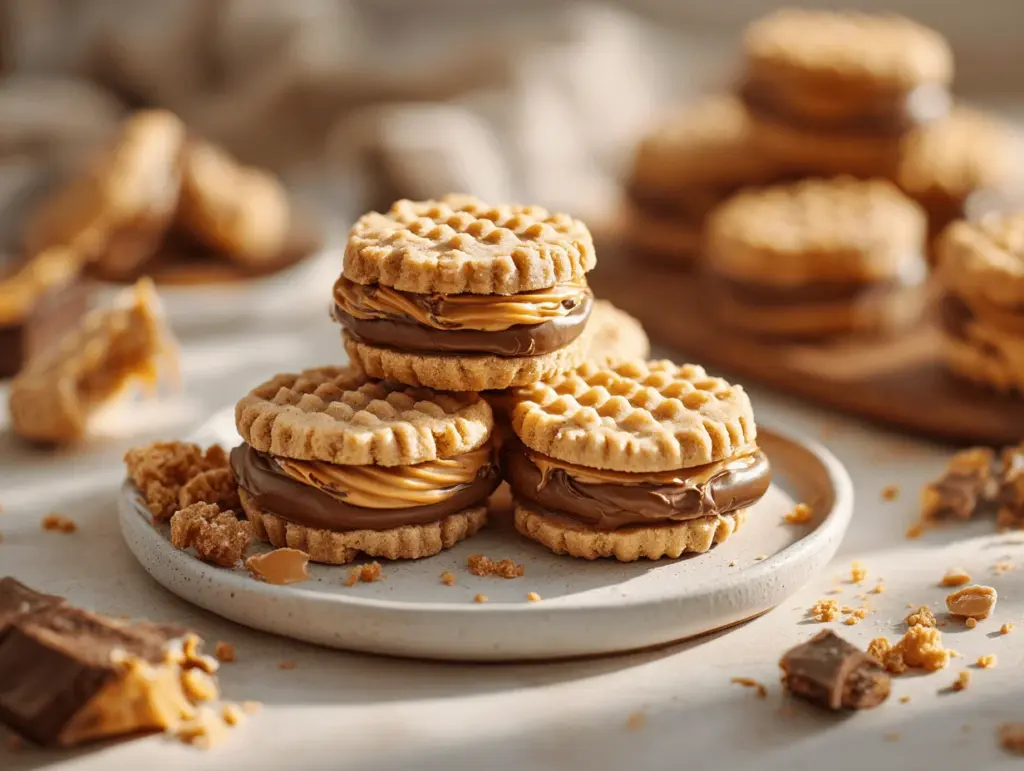
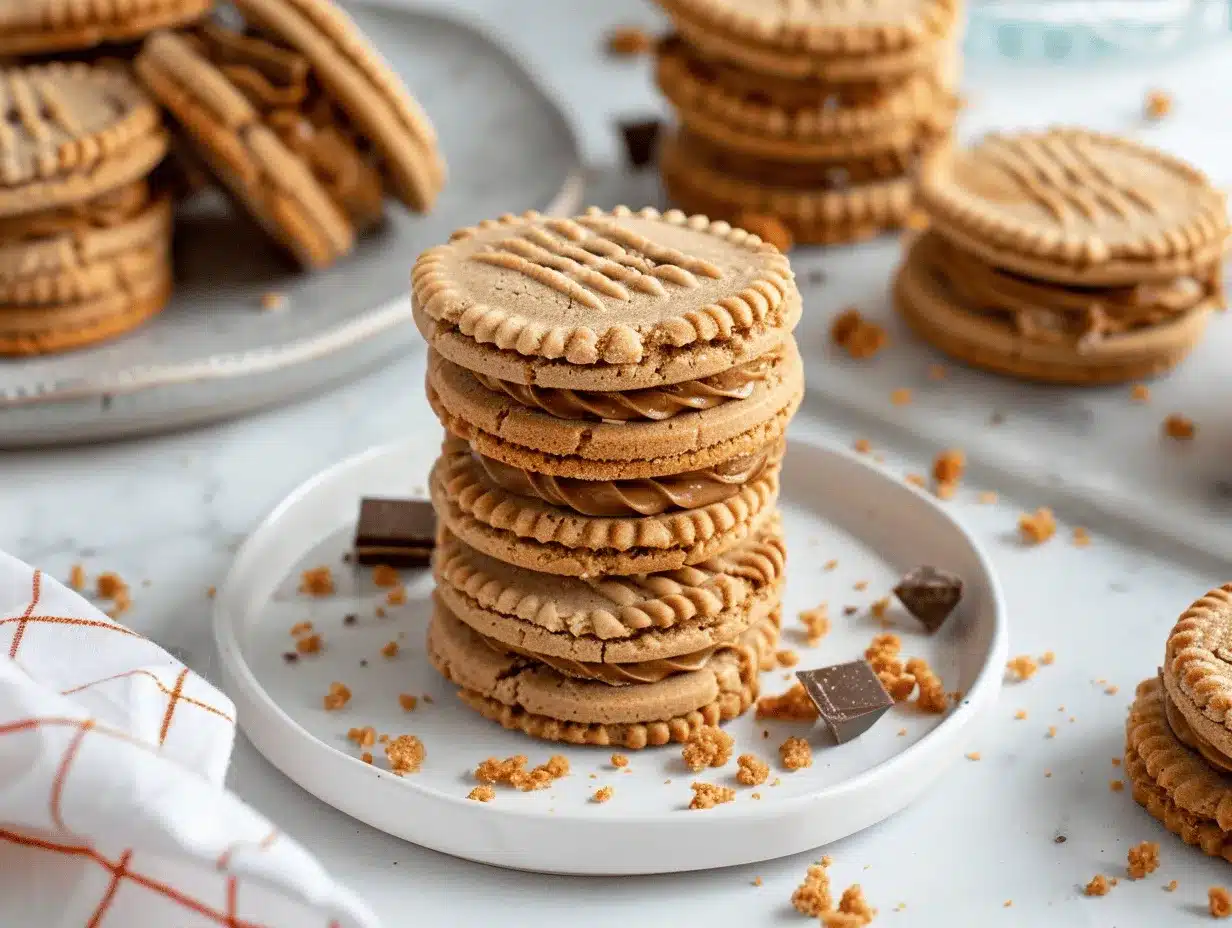
The first time I bit into a homemade peanut butter cup Nutter Butter sandwich cookie, my eyes just about rolled back. Imagine this: creamy peanut butter filling, a thick layer of chopped peanut butter cups, and two crisp, classic Nutter Butter cookies—pressed together in one over-the-top, hand-held treat. The salty-sweet aroma hits you before the first bite, and, honestly, it’s impossible to stop at just one of these dreamy sandwich cookies.
I stumbled onto this peanut butter cup Nutter Butter cookies recipe during a late-night craving spree. You know those moments when you want something easy, nostalgic, and just a little bit outrageous? That’s exactly how these cookies were born—out of pure cookie madness and a love for all things peanut butter. I’d grown up on Nutter Butters, but adding a creamy filling and chunks of real peanut butter cups totally transforms them into something new. Friends and family were obsessed after the first test batch (I barely got a taste myself!).
The best thing about these cookies? They’re ridiculously easy. You don’t have to bake a thing, and you probably have most of the ingredients on hand already. They’re perfect for bringing to potlucks, packing in lunchboxes, or whipping up when you want a treat that’s both nostalgic and over-the-top. If you’ve ever wished for a peanut butter cup in cookie form, this recipe nails it. And after testing these peanut butter cup Nutter Butter cookies at least ten times, I can safely say: you’re in for a seriously addictive treat.
Why You’ll Love These Peanut Butter Cup Nutter Butter Cookies
Every time I make these, someone asks for the recipe. That’s when you know it’s a keeper. Here’s why you’ll fall for them:
- Quick & Easy: No baking, no complicated prep. You can have a plateful ready in under 30 minutes. Seriously, these are perfect for last-minute guests or sudden sweet cravings.
- Simple Ingredients: You’re likely to have everything you need right in your pantry. No need for fancy or hard-to-find stuff—just classic Nutter Butters, peanut butter cups, and a handful of baking basics.
- Perfect for All Occasions: Whether it’s game night, a bake sale, a birthday party, or just a Tuesday afternoon, these cookies never feel out of place. They have “crowd-pleaser” written all over them.
- Kid-Friendly and Adult-Approved: Adults go wild for the nostalgia factor, and kids just love the gooey, chocolatey filling. Trust me, there are never leftovers.
- Seriously Delicious: The combination of creamy peanut butter filling, melt-in-your-mouth chocolate, and that signature Nutter Butter crunch is just unbeatable. It’s the kind of treat that makes you close your eyes and savor it.
What sets my peanut butter cup Nutter Butter cookies apart is the double-layered filling: smooth peanut butter cream and chunks of real peanut butter cups. Blending chopped peanut butter cups into the filling isn’t just a gimmick—it adds a fudgy, candy-bar richness that’s totally next-level. I’ve tried plenty of versions, but this one’s a definite winner. Plus, there’s no waiting for dough to chill or bake. Just assemble, chill, and devour.
Honestly, this recipe is about more than just taste. It’s about bringing back warm food memories, sharing a laugh over dessert, and having a little fun in the kitchen—no stress, just sweet satisfaction. If you want a treat that’s quick, easy, and guaranteed to impress, these peanut butter cup Nutter Butter cookies are your golden ticket.
What Ingredients You Will Need
This peanut butter cup Nutter Butter cookies recipe keeps things simple, but every ingredient plays a starring role. Here’s what you’ll need:
- Nutter Butter Cookies (24 cookies, about one standard package)—These are the crunchy, peanut-shaped sandwich cookies that make the perfect base. You’ll need enough for 12 sandwiches. I always grab the classic Nabisco brand, but any good peanut butter sandwich cookie will work.
- Peanut Butter Cups (6 standard-size, chopped)—Go for Reese’s or your favorite brand. Chopped into small pieces, they melt into the filling and add those irresistible chocolatey pockets.
- Creamy Peanut Butter (1/2 cup / 130g)—I recommend a classic, no-stir peanut butter like Jif or Skippy for the smoothest texture. If you prefer natural peanut butter, just be sure it’s well-mixed and not too oily.
- Powdered Sugar (3/4 cup / 90g)—This sweetens and thickens the filling. Sift it first for the creamiest result.
- Butter (2 tablespoons / 28g, softened)—Adds richness to the filling. Unsalted is best, but salted works in a pinch (just skip the extra pinch of salt below).
- Vanilla Extract (1 teaspoon)—A dash of vanilla brings out the best in both the peanut butter and chocolate.
- Pinch of Salt (optional)—If using unsalted butter, a little salt balances the sweetness and amps up the peanut flavor.
- Optional Add-Ins:
- Mini chocolate chips (for extra texture)
- Chopped peanuts (for crunch and a salty twist)
- Sprinkles (for a festive touch—especially fun for parties or holidays!)
If you need a gluten-free option, try swapping in gluten-free peanut butter sandwich cookies and check your candy labels—there are some decent alternatives out there. For dairy-free, use a dairy-free butter substitute and suitable peanut butter cups. The best part? You can totally tweak the filling to your taste—add a little more or less sugar, a touch of cocoa powder, or even a swirl of Nutella for a chocolate-hazelnut riff.
One quick tip: If you’re making these in summer or a warm kitchen, keep the peanut butter cups chilled before chopping. It’ll help them hold their shape in the filling and keep your fingers (mostly) clean.
Equipment Needed
- Mixing Bowl—A medium bowl works for mixing up the filling; I use my trusty old Pyrex.
- Electric Hand Mixer or Stand Mixer—You can mix by hand in a pinch, but an electric mixer makes the filling extra smooth and fluffy.
- Rubber Spatula—For scraping down the sides and spreading the filling evenly.
- Small Knife or Food Chopper—To chop the peanut butter cups without squishing them to bits.
- Measuring Cups & Spoons—Accurate measuring is key for the perfect filling consistency.
- Baking Sheet or Tray—For assembling and chilling the finished cookies. Lining it with parchment makes cleanup a breeze.
- Plastic Wrap or Airtight Container—To store the cookies or keep them fresh if you’re making them ahead.
If you don’t have an electric mixer, you can use a sturdy whisk and some elbow grease—it just takes a little longer. For chopping, a small serrated knife works wonders on peanut butter cups. When I’m making a big batch, I pull out my mini food processor to speed things up. And if you’re short on trays, any large plate will do for chilling the sandwiches. Just don’t skip this step—it helps set the filling and keeps the cookies from sliding apart!
Quick maintenance note: Wash your mixer beaters and spatula right after using, before the peanut butter has a chance to set. It saves a lot of scrubbing later, trust me.
How to Make Peanut Butter Cup Nutter Butter Sandwich Cookies
- Prep Your Ingredients (5 minutes): Gather all your ingredients and equipment. Chop your peanut butter cups into small pieces—about 1/4-inch chunks work well. If your butter isn’t softened, microwave it in 5-second bursts until just pliable but not melted.
- Mix the Peanut Butter Filling (5 minutes): In a medium mixing bowl, combine 1/2 cup (130g) creamy peanut butter, 3/4 cup (90g) powdered sugar, 2 tablespoons (28g) softened butter, 1 teaspoon vanilla extract, and a pinch of salt if using. Beat with an electric mixer on medium speed until smooth and fluffy—about 2 minutes. The filling should be thick but easily spreadable. If it seems too stiff, add a teaspoon of milk or more peanut butter; if too soft, add a bit more powdered sugar.
- Fold in Peanut Butter Cups (2 minutes): Gently fold in the chopped peanut butter cups using a spatula. Reserve a few pieces for topping if you want your cookies to look extra tempting.
- Assemble the Sandwiches (10 minutes): Lay out 12 Nutter Butter cookies flat-side up on a tray. Spoon about 1 heaping tablespoon of filling onto each. Use a spatula or butter knife to spread the filling almost to the edges. Top each with another Nutter Butter, flat-side down, and press gently to sandwich them together. If you like, press a few extra peanut butter cup pieces onto the exposed filling at the edges.
- Chill to Set (10 minutes): Place the assembled cookies on a parchment-lined tray. Chill in the fridge for at least 10-15 minutes, or until the filling is firm to the touch. This keeps them neat and easy to handle (especially on warm days).
- Serve and Enjoy: Enjoy straight from the fridge for a firmer bite, or let them sit at room temperature for 5-10 minutes for a softer, gooier texture.
Troubleshooting: If your filling is too runny, add more powdered sugar. If cookies slide apart, chill longer or use a bit less filling per sandwich. Don’t worry if some filling oozes out—just call it “rustic” and sneak a taste! For extra pizzazz, roll the edges in mini chocolate chips, sprinkles, or chopped nuts before chilling.
Pro tip: If you’re prepping ahead for a party, these hold up well in the fridge for up to three days. Just bring them out 10 minutes before serving so the filling softens up a bit.
Cooking Tips & Techniques
- Don’t Rush the Chilling: Skipping the fridge step is tempting, but trust me, the cookies will slide all over the place. Chilling helps the filling set and makes the sandwiches easier to eat.
- Use the Right Peanut Butter: Natural peanut butters can separate and make the filling oily. Go for a classic, no-stir variety for the best texture. If you only have natural peanut butter, stir it really well and maybe add an extra tablespoon of powdered sugar.
- Spread Evenly: Use a small offset spatula or butter knife to get the filling right to the edges—this not only looks great but ensures every bite is packed with flavor.
- Chop Peanut Butter Cups Cold: Warm peanut butter cups get melty and messy fast. Pop them in the fridge for 10 minutes before chopping to keep nice, clean pieces.
- Batch Assembly: Line up your cookies, fill them all at once, then top and press. It’s way faster and you get more even sandwiches. I learned this the hard way after making a dozen one-by-one and feeling like I was running a cookie assembly marathon!
- Customization: Add-ins like mini chocolate chips or sprinkles should be pressed into the edges right after assembling, before chilling. They stick better while the filling is soft.
Common mistake? Overfilling! It’s tempting to pile on the filling, but too much makes the cookies hard to eat and even harder to store. Stick to about 1 tablespoon per sandwich for the best results. If you want bigger cookies, just warn your taste testers to grab lots of napkins!
And hey, if you’re multitasking (like making dinner while prepping dessert), the filling can chill in the fridge for up to 24 hours before assembly. Just let it sit at room temp for a bit so it’s spreadable again.
Variations & Adaptations
- Gluten-Free Peanut Butter Sandwiches: Use gluten-free peanut butter sandwich cookies and gluten-free peanut butter cups. Some specialty brands make really good versions—just check the label for cross-contamination if you’re sensitive.
- Chocolate Lovers’ Twist: Add 1 tablespoon of cocoa powder to the filling and use chocolate-dipped Nutter Butters (or dip half the finished sandwich in melted chocolate and let set). For a mocha vibe, a tiny dash of instant espresso powder is wild.
- Nut-Free Option: Sub in sunflower seed butter and allergy-friendly chocolate cups. While you won’t get the exact peanutty flavor, it’s still a delicious treat for those with nut allergies.
- Seasonal Flavors: Swap in holiday-themed peanut butter cups (think white chocolate, dark chocolate, or even pumpkin spice) for a fun, festive twist. Around Halloween, orange and black sprinkles make these a party hit.
- Chunky Crunch: Add 2 tablespoons of chopped salted peanuts or pretzel pieces to the filling for extra crunch and a salty bite.
One of my favorite spins? Mixing in a tablespoon of mini marshmallows and a sprinkle of sea salt for a “fluffernutter” vibe—kids go crazy for it. If you’re gifting, wrap each sandwich in parchment and tie it with twine for a sweet homemade touch.
Serving & Storage Suggestions
These peanut butter cup Nutter Butter cookies are best served slightly chilled or at cool room temperature. The filling stays firm, but the cookies are still easy to bite into. For a party platter, arrange them in neat rows on a rustic wood board or a pretty plate—add a few extra chopped peanut butter cups and some mini pretzels or strawberries for color.
Pairing Ideas: Serve alongside a cold glass of milk, chocolate milk, or a strong cup of coffee for adults. They’re also fantastic with a scoop of vanilla or chocolate ice cream if you want to go all out.
Storing: Place leftover cookies in an airtight container, layered between sheets of parchment or wax paper. They’ll keep for up to 3 days in the refrigerator. For longer storage, freeze for up to 2 months—just thaw in the fridge before serving.
To reheat (if you want a gooey, warm filling), microwave cookies for just 5-7 seconds. Don’t overdo it or they’ll get too soft! Over time, the cookies soften slightly from the filling, which some people (myself included) love. If you prefer a crisper bite, fill and serve the same day.
Nutritional Information & Benefits
Each peanut butter cup Nutter Butter sandwich cookie contains roughly:
- Calories: 240
- Fat: 13g
- Carbohydrates: 28g
- Sugar: 18g
- Protein: 4g
While these cookies are definitely a treat, they do offer a little protein from the peanut butter and a touch of calcium from the chocolate cups. If you use reduced-sugar peanut butter or a sugar substitute in the filling, you can cut back on the sweetness. They’re naturally vegetarian, and you can easily adapt them for gluten-free or nut-free diets with the swaps mentioned above.
Allergens include peanuts, wheat, dairy, and soy (depending on your cookie and candy choices). For a lighter snack, try using thin-style peanut butter cookies or halving the filling amount per sandwich. Personally, I see these as a “joy food”—something to savor, share, and enjoy in moderation as part of a balanced approach to eating.
Conclusion
If you’re looking for a cookie recipe that’s equal parts nostalgic, decadent, and ridiculously easy, peanut butter cup Nutter Butter cookies are it. They’re the kind of treat that gets people talking—and asking for seconds! I love how adaptable they are, whether you’re playing with flavors, going gluten-free, or just piling on more chocolate.
Give yourself permission to play—try a new add-in, make them smaller (or bigger!), or turn them into a party platter. That’s the beauty of this recipe: it’s just as fun to make as it is to eat. Every batch takes me back to childhood, but with a grown-up twist that’s impossible to resist. If you try them, don’t be shy—drop a comment, share a photo, or let me know your favorite variation.
Now, go grab those Nutter Butters and peanut butter cups. You deserve a treat that’s this much fun!
Frequently Asked Questions
Can I make peanut butter cup Nutter Butter cookies ahead of time?
Absolutely! You can assemble them up to 3 days in advance. Just keep them in an airtight container in the fridge and bring them out 10 minutes before serving for the best texture.
What’s the best way to chop peanut butter cups without melting them?
Chill the peanut butter cups in the fridge for about 10 minutes first. Use a small, sharp knife and work quickly to keep the pieces neat and your fingers clean.
Can I use crunchy peanut butter instead of creamy?
Yes! Crunchy peanut butter adds extra texture to the filling. Just be sure to mix it well so it spreads evenly.
How do I make these cookies gluten-free?
Swap in gluten-free peanut butter sandwich cookies and check your peanut butter cups for gluten. There are many allergy-friendly options available in most grocery stores.
Can I freeze peanut butter cup Nutter Butter cookies?
Definitely. Store them in a freezer-safe container, separated by parchment. Thaw in the refrigerator before serving. They taste great straight from the fridge, too!
PrintPeanut Butter Cup Nutter Butter Cookies
These easy, no-bake sandwich cookies combine classic Nutter Butter cookies with a creamy peanut butter filling and chunks of real peanut butter cups for an over-the-top, nostalgic treat. Perfect for parties, potlucks, or satisfying a sweet craving in under 30 minutes.
- Prep Time: 10 minutes
- Cook Time: 0 minutes
- Total Time: 25 minutes
- Yield: 12 sandwich cookies 1x
- Category: Dessert
- Cuisine: American
Ingredients
- 24 Nutter Butter cookies (about 1 standard package)
- 6 standard-size peanut butter cups, chopped
- 1/2 cup creamy peanut butter
- 3/4 cup powdered sugar
- 2 tablespoons unsalted butter, softened
- 1 teaspoon vanilla extract
- Pinch of salt (optional, if using unsalted butter)
- Optional: mini chocolate chips (for extra texture)
- Optional: chopped peanuts (for crunch)
- Optional: sprinkles (for decoration)
Instructions
- Prep your ingredients: Gather all ingredients and equipment. Chop peanut butter cups into 1/4-inch pieces. Soften butter if needed.
- Mix the peanut butter filling: In a medium mixing bowl, combine peanut butter, powdered sugar, softened butter, vanilla extract, and salt (if using). Beat with an electric mixer on medium speed until smooth and fluffy, about 2 minutes. Adjust consistency with a teaspoon of milk or more powdered sugar if needed.
- Fold in peanut butter cups: Gently fold in chopped peanut butter cups with a spatula, reserving a few pieces for topping if desired.
- Assemble the sandwiches: Lay out 12 Nutter Butter cookies flat-side up. Spoon about 1 heaping tablespoon of filling onto each. Spread filling almost to the edges. Top with another Nutter Butter, flat-side down, and press gently to sandwich. Press extra peanut butter cup pieces or add-ins onto the exposed filling if desired.
- Chill to set: Place assembled cookies on a parchment-lined tray. Chill in the fridge for at least 10-15 minutes, or until the filling is firm.
- Serve and enjoy: Enjoy straight from the fridge for a firmer bite, or let sit at room temperature for 5-10 minutes for a softer texture.
Notes
For best results, chill the cookies before serving to set the filling. Use classic, no-stir peanut butter for the smoothest texture. Customize with mini chocolate chips, sprinkles, or chopped peanuts pressed into the edges. To make gluten-free, use gluten-free peanut butter sandwich cookies and check candy labels. Cookies keep up to 3 days in the fridge or 2 months in the freezer.
Nutrition
- Serving Size: 1 sandwich cookie
- Calories: 240
- Sugar: 18
- Sodium: 140
- Fat: 13
- Saturated Fat: 4
- Carbohydrates: 28
- Fiber: 1
- Protein: 4
Keywords: peanut butter, nutter butter, sandwich cookies, no bake, easy dessert, peanut butter cup, party treat, kid friendly, chocolate, quick dessert


