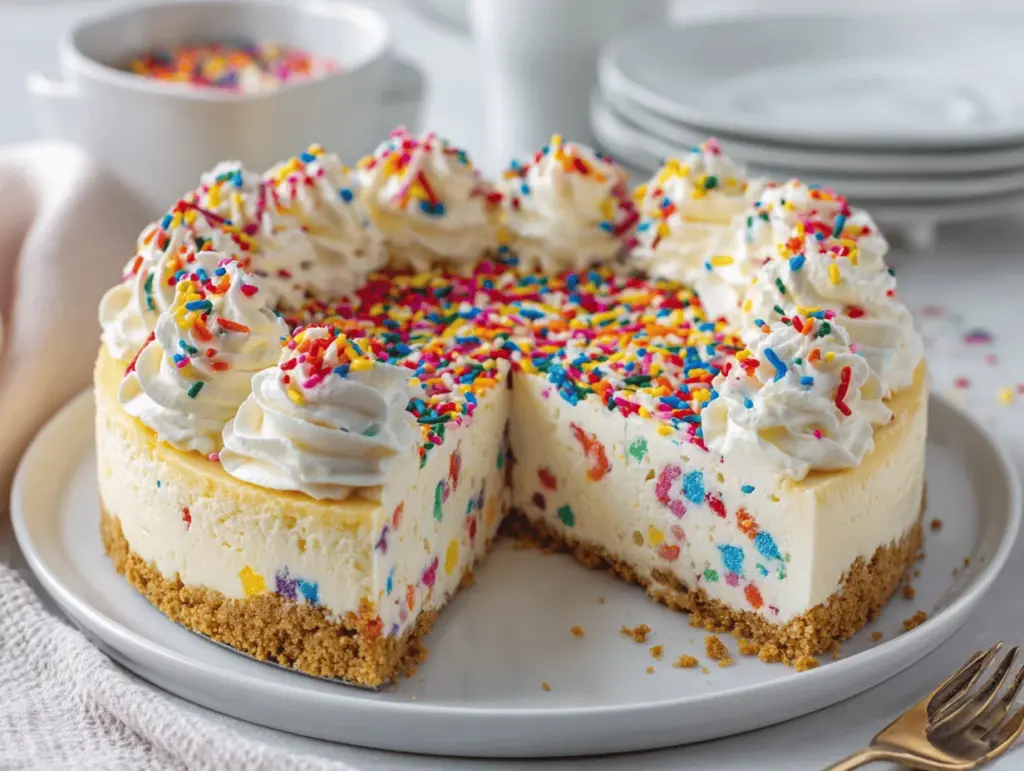
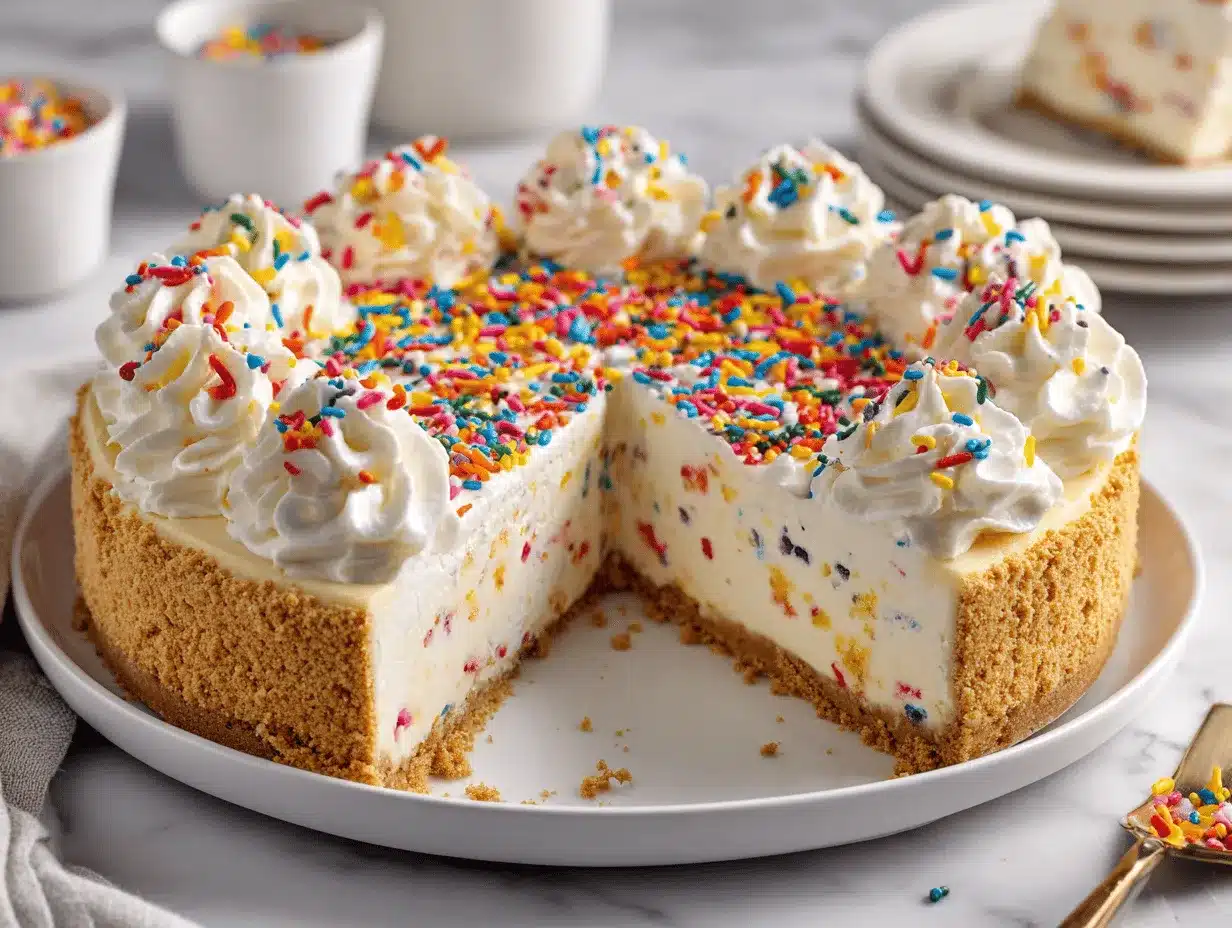
Confetti sprinkles everywhere, creamy cheesecake in every bite—this birthday cheesecake recipe is what dessert dreams are made of. Imagine pulling a vibrant, funfetti-studded cheesecake out of the fridge, the sweet aroma of vanilla and sugar wafting through your kitchen. It’s not just cake—it’s a celebration in every slice. I’ll never forget the first time I made this for my niece’s birthday; her face lit up like, well, a birthday candle! There’s something about those colorful sprinkles against that cloud-like layer of cheesecake that makes anyone (even the grown-ups) grin from ear to ear.
Honestly, I used to think cheesecake was tricky. But after testing this birthday cheesecake recipe more times than I care to admit (the neighbors never complained about leftovers), I promise you—it’s totally doable. The best part? You don’t have to be a pastry chef. You just need a springform pan, a handful of basic ingredients, and a few cheerful sprinkles to make a showstopper that tastes as good as it looks. Whether you’re baking for a milestone birthday or just want to bring extra cheer to a Tuesday, this easy funfetti cake version is guaranteed to make memories.
As someone who’s obsessed with both cheesecake and all things birthday, I’ve played around with lots of versions. This one? It’s the perfect balance: rich, smooth, and not overly sweet, with a buttery graham cracker crust and a playful pop of color in every bite. If you’ve ever wanted to make a birthday cheesecake that’s both festive and fuss-free, you’re in the right place. Let’s get into the good stuff!
Why You’ll Love This Birthday Cheesecake Recipe
There are a million reasons this birthday cheesecake recipe deserves a permanent spot in your celebration lineup. After baking (and eating) more cheesecakes than I can count, I’ve learned what makes a recipe truly special. Here’s why this funfetti-inspired treat is the one to beat:
- Quick & Easy: No water bath, no fancy steps—just straightforward baking. You can have this ready to chill in under 30 minutes of hands-on time.
- Simple Ingredients: Everything you need is probably already in your pantry or fridge. No wild goose chase for obscure items here.
- Perfect for Any Celebration: Whether it’s a birthday, graduation, or just a need for some cheer, this cheesecake brings out the party vibes every time.
- Crowd-Pleaser: Kids go wild for the sprinkles, but adults are just as obsessed. I’ve brought this to potlucks and watched grown friends sneak back for seconds.
- Unbelievably Delicious: The creamy, silky filling, buttery crust, and sweet pops of vanilla make it irresistible. It’s that “close your eyes and savor” kind of good.
What really sets this birthday cheesecake recipe apart? For starters, I blend my cream cheese until it’s ultra-smooth, ensuring a dreamy texture every time. The sprinkles don’t just sit on top—they’re folded right into the batter, so every slice is a confetti surprise. And that buttery graham cracker crust? It’s just thick enough to balance out all the creamy goodness on top.
Honestly, this isn’t just a birthday cheesecake. It’s a shortcut to big smiles, happy memories, and a dessert table that everyone flocks to first. It’s the treat you make when you want to show someone (or yourself!) a little extra love without stress. After years of birthdays, holidays, and “just because” celebrations, this is the cheesecake I keep coming back to—and I think you will, too.
What Ingredients You Will Need
This birthday cheesecake recipe proves you don’t need a million ingredients to create something magical. Most of these are classic baking staples, with a few fun twists for that festive, funfetti vibe. Here’s what you’ll need:
- For the Crust:
- Graham cracker crumbs (about 1 1/2 cups / 150g) – Classic, buttery base. I love using Honey Maid or any plain variety.
- Unsalted butter, melted (6 tbsp / 85g) – Binds the crumbs and adds richness.
- Granulated sugar (2 tbsp / 25g) – Just enough to sweeten the crust.
- Pinch of salt – Balances the flavors.
- For the Cheesecake Filling:
- Cream cheese, full-fat and room temp (24 oz / 680g; about 3 blocks) – Philadelphia is my go-to for the best texture.
- Granulated sugar (1 cup / 200g) – Sweetens the filling perfectly.
- Sour cream, room temp (3/4 cup / 180g) – Adds tang and creaminess. Can sub with Greek yogurt for a lighter touch.
- Heavy cream (1/3 cup / 80ml) – Makes the filling luxuriously smooth.
- Large eggs, room temp (3) – Helps set the cheesecake without making it dense.
- Pure vanilla extract (2 tsp / 10ml) – For that classic birthday cake flavor. If you have clear vanilla, even better for a whiter cake.
- Rainbow sprinkles (1/2 cup / 80g) – Use the “jimmies” style, not nonpareils, to avoid color bleeding.
- Pinch of salt – Just a little to round out the flavors.
- For the Topping (Optional but awesome):
- Whipped cream (homemade or store-bought) – Makes it extra festive.
- More rainbow sprinkles – For that final celebratory touch.
- White chocolate shavings or birthday candles (optional) – Go wild if you feel like it!
A few ingredient tips: Always use room temperature cream cheese and eggs for the smoothest batter—it really does make a difference. If you’re out of graham crackers, try vanilla wafers or digestive biscuits. Need a gluten-free option? Swap in gluten-free graham crackers. And for a dairy-free version, plant-based cream cheese and yogurt work surprisingly well (I’ve tried Kite Hill and was happily surprised).
Sprinkles note: Stick with the long, rod-shaped “jimmies” for the batter. Nonpareils (the tiny balls) will bleed and muddy the color. I’ve learned this the hard way—trust me!
Equipment Needed
- 9-inch (23cm) springform pan – Essential for easy cheesecake release. If you don’t have one, a deep pie dish works in a pinch, but serving is trickier.
- Large mixing bowls – For both crust and filling. I like glass bowls since you can see if anything’s unmixed at the bottom.
- Electric hand mixer or stand mixer – For creamy, lump-free filling. A sturdy whisk works if you’re up for an arm workout.
- Measuring cups and spoons – Accuracy matters, especially for the crust and filling.
- Rubber spatula – For scraping every last bit of batter (and folding in those sprinkles gently).
- Baking sheet – Place the springform pan on this to catch any butter drips.
- Offset spatula or butter knife – Helpful for smoothing the top and releasing the sides after baking.
If you’re working with a tight budget, you can often find springform pans at thrift stores or online secondhand. For the mixer, I’ve even used a sturdy fork in a pinch—just takes a bit longer. As for keeping your springform pan in good shape, always hand wash it and avoid metal utensils to prevent scratches. It’ll last for years!
Preparation Method
-
Preheat & Prepare:
Preheat your oven to 325°F (163°C). Lightly grease a 9-inch (23cm) springform pan and line the bottom with parchment for easy removal.
Tip: If your oven runs hot or cool, use an oven thermometer for accuracy. -
Make the Crust:
In a medium bowl, combine 1 1/2 cups (150g) graham cracker crumbs, 6 tbsp (85g) melted butter, 2 tbsp (25g) sugar, and a pinch of salt. Stir until the mixture resembles wet sand.
Press the mixture firmly into the bottom of your prepared pan, using the bottom of a glass to pack it down evenly.
Chill the crust in the freezer for 10 minutes while you prepare the filling. This helps prevent sogginess. -
Prepare the Cheesecake Filling:
In a large mixing bowl, beat 24 oz (680g) cream cheese until smooth and creamy, about 2-3 minutes. Scrape down the sides as needed.
Add 1 cup (200g) sugar and a pinch of salt. Beat again until well combined and fluffy.
Mix in 3/4 cup (180g) sour cream and 1/3 cup (80ml) heavy cream until silky.
Add 3 eggs, one at a time, mixing on low and scraping after each addition. Don’t overmix—just until incorporated.
Stir in 2 tsp (10ml) vanilla extract.
Warning: Overmixing adds air, which can cause cracks. Keep it gentle here! -
Fold in the Sprinkles:
Gently fold in 1/2 cup (80g) rainbow sprinkles with a rubber spatula. Use a light hand to avoid streaking colors.
If you see the color starting to bleed, stop folding immediately. -
Assemble and Bake:
Pour the cheesecake batter over the chilled crust. Smooth the top with an offset spatula.
Tap the pan gently on the counter to release any air bubbles.
Bake on the center rack (with the springform pan set on a baking sheet) for 55-65 minutes, or until the edges are set but the center is still slightly jiggly.
If the top starts to brown, loosely tent with foil around the 45-minute mark. -
Cool Gradually:
Turn off the oven and crack the door open. Let the cheesecake cool inside for 1 hour (this helps prevent cracks).
Remove and run a knife around the edge to loosen.
Cool at room temperature for another hour. -
Chill for Best Texture:
Cover and refrigerate for at least 4 hours, preferably overnight. The wait is worth it—the texture turns magical! -
Decorate and Serve:
Just before serving, top with whipped cream and extra sprinkles.
Slice with a warm, clean knife for best results. Enjoy!
If your cheesecake cracks, don’t stress! Just cover with a thick layer of whipped cream and extra sprinkles. No one will ever know (except you, and you’ll be too busy eating to care).
Cooking Tips & Techniques
After many cheesecakes—some perfect, some “rustic”—I’ve picked up a few tricks for success every time:
- Room Temperature Ingredients: Always use room temp cream cheese, eggs, and sour cream. Cold ingredients lead to a lumpy batter.
- Gentle Mixing: Overbeating adds air, which can cause cracks. Mix just until smooth and combined—especially after adding eggs.
- Bake Low and Slow: A lower oven temp (325°F/163°C) gives you a creamy texture without browning the top too fast. Don’t rush it!
- Gradual Cooling: Sudden temp changes = cracks. Letting the cheesecake cool in the oven with the door cracked is a game-changer.
- Sprinkle Smarts: Only use “jimmies” style sprinkles in the batter. Nonpareils will bleed and turn your cheesecake grayish (learned that the hard way!).
- Crust Compression: Use a flat-bottomed glass to press the crust evenly. This keeps it from crumbling when you slice.
- Knife Cleaning: Dip your knife in hot water and wipe between cuts for clean, beautiful slices.
If you do end up with a crack or two, don’t panic. A thick layer of whipped cream and extra sprinkles will cover a multitude of sins. And honestly? No one’s going to care when they taste that creamy goodness.
Timing-wise, I like to make the crust while the oven preheats, then the filling while the crust chills. It keeps things moving. And if you’re ever short on time, you can even make the crust a day ahead. The best lesson? Patience. Chill the cheesecake overnight if you can. The texture is so much better!
Variations & Adaptations
One of the best things about this birthday cheesecake recipe is how easy it is to customize. Here are a few of my favorite twists:
- Gluten-Free Birthday Cheesecake: Swap in gluten-free graham crackers for the crust. I’ve used Pamela’s brand with great results. Everything else stays the same!
- Dairy-Free & Vegan Option: Use plant-based cream cheese and sour cream (like Kite Hill or Tofutti) and a dairy-free butter for the crust. Sub in a flax egg (1 tbsp flaxseed + 2.5 tbsp water per egg) if going vegan. The texture is a bit softer but still delicious.
- Chocolate Funfetti Cheesecake: Add 1/2 cup (85g) mini chocolate chips to the batter or swap the graham crust for chocolate cookie crumbs.
- Fruit Swirl: Dollop small spoonfuls of raspberry or strawberry jam on top of the filling before baking and use a toothpick to swirl. Adds a tart, colorful pop.
- Flavored Extracts: Try almond or cake batter extract for an extra birthday cake flavor. Just replace half the vanilla with your choice.
Allergen tip: If you need nut-free, double-check your sprinkles and graham crackers—some brands process with nuts. I once made a peanut butter swirl version (using peanut butter chips and a few spoonfuls of creamy PB in the batter), and it was a massive hit at a family reunion!
Serving & Storage Suggestions
This birthday cheesecake recipe is best served chilled, straight from the fridge. I love topping each slice with a swirl of whipped cream and a big handful of extra sprinkles for maximum party vibes. If you want to get fancy, add a few white chocolate curls or even edible glitter.
Pair it with a big scoop of vanilla ice cream or a glass of cold milk for the ultimate birthday treat. Coffee or hot chocolate also works great, especially for grown-up celebrations.
- Refrigerator: Store leftovers tightly covered for up to 5 days. The flavor actually gets better after a day or two!
- Freezer: Freeze individual slices (wrapped tightly in plastic and foil) for up to 2 months. Thaw overnight in the fridge before serving.
- Reheating: Cheesecake is best cold, but you can let slices sit at room temp for 15 minutes if you prefer a softer texture. Avoid the microwave—it can make it rubbery.
One little secret: I think this cake tastes even better on day two, after the flavors have had time to mingle. If you’re planning ahead, make it the night before and thank yourself later!
Nutritional Information & Benefits
Each slice of this birthday cheesecake recipe (assuming 12 slices) comes in at about 420 calories, with 28g fat, 35g carbs, and 6g protein. Not exactly health food, but hey—it’s a celebration!
On the plus side, cream cheese and eggs add a bit of protein and calcium, and if you sub in Greek yogurt for sour cream, you’ll sneak in a little extra nutrition. For those watching gluten, it’s easy to make this gluten-free.
Potential allergens include dairy, eggs, and gluten (unless using substitutions). From a wellness perspective, I always say: birthdays are about joy, and a little cheesecake now and then is good for the soul. Just savor every bite!
Conclusion
If you’re searching for a birthday cheesecake recipe that’s guaranteed to wow, you’ve just found it. This funfetti-inspired creation is festive, creamy, and so darn easy—anyone can pull it off, no matter your baking experience.
I love how you can make it your own, whether you change up the flavors, decorate with wild abandon, or sneak a slice for breakfast the next morning (guilty). To me, this recipe is all about sharing happiness—one colorful, creamy bite at a time.
Ready to make your next celebration extra special? Give this easy funfetti cake a try, and don’t forget to leave a comment below with your favorite twist or to share a photo of your birthday masterpiece. Happy baking, my friends—and happiest birthdays to you and yours!
Frequently Asked Questions
Can I make this birthday cheesecake recipe ahead of time?
Absolutely! In fact, this cheesecake tastes even better after chilling overnight. Make it up to two days in advance for the best texture and flavor.
What kind of sprinkles are best for funfetti cheesecake?
Use the long, rod-shaped “jimmies” sprinkles. Nonpareils (the tiny round ones) tend to bleed into the batter and can turn your cheesecake grayish.
Can I freeze leftover cheesecake?
Yes! Slice, wrap tightly in plastic and foil, and freeze for up to 2 months. Thaw slices overnight in the fridge before serving.
How do I prevent cracks in my cheesecake?
Use room temperature ingredients, avoid overmixing, bake at a low temperature, and let the cheesecake cool gradually in the oven with the door cracked. But if it cracks, just cover with whipped cream and sprinkles!
Is it possible to make this cheesecake gluten-free or dairy-free?
Definitely. Use gluten-free graham crackers for the crust, and substitute plant-based cream cheese, sour cream, and butter for a dairy-free version. The flavor and texture will still be delicious!
Pin This Recipe!
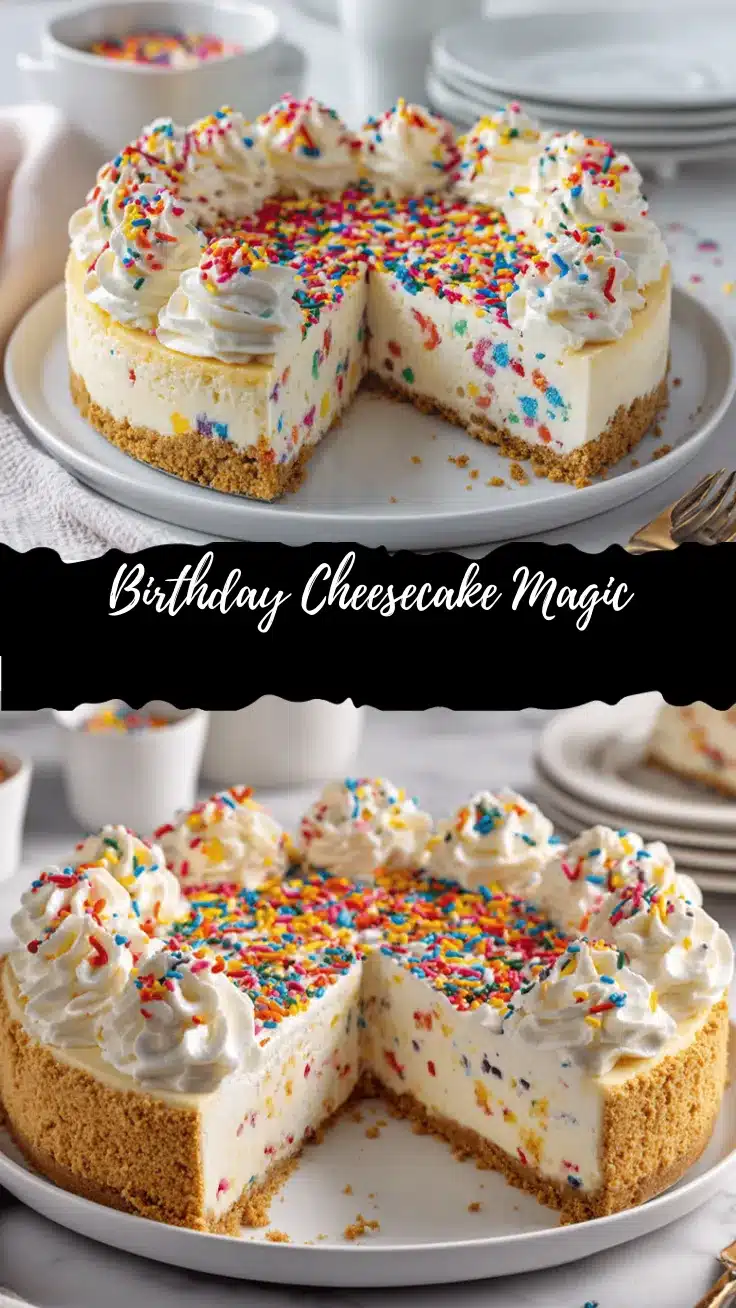
Birthday Cheesecake Recipe: Easy Funfetti Cake You’ll Love
This festive birthday cheesecake features a creamy, vanilla-infused filling studded with colorful funfetti sprinkles and a buttery graham cracker crust. It’s easy to make, perfect for celebrations, and guaranteed to bring smiles to every party.
- Prep Time: 25 minutes
- Cook Time: 60 minutes
- Total Time: 6 hours 30 minutes (includes chilling)
- Yield: 12 servings 1x
- Category: Dessert
- Cuisine: American
Ingredients
- 1 1/2 cups graham cracker crumbs
- 6 tablespoons unsalted butter, melted
- 2 tablespoons granulated sugar
- Pinch of salt
- 24 ounces cream cheese, full-fat and room temperature (about 3 blocks)
- 1 cup granulated sugar
- 3/4 cup sour cream, room temperature (or Greek yogurt)
- 1/3 cup heavy cream
- 3 large eggs, room temperature
- 2 teaspoons pure vanilla extract
- 1/2 cup rainbow sprinkles (jimmies style)
- Pinch of salt
- Whipped cream (for topping, optional)
- Extra rainbow sprinkles (for topping, optional)
- White chocolate shavings or birthday candles (optional)
Instructions
- Preheat oven to 325°F (163°C). Lightly grease a 9-inch springform pan and line the bottom with parchment paper.
- In a medium bowl, combine graham cracker crumbs, melted butter, sugar, and a pinch of salt. Stir until mixture resembles wet sand.
- Press mixture firmly into the bottom of the prepared pan. Chill crust in the freezer for 10 minutes.
- In a large mixing bowl, beat cream cheese until smooth and creamy, about 2-3 minutes. Scrape down sides as needed.
- Add sugar and a pinch of salt. Beat until well combined and fluffy.
- Mix in sour cream and heavy cream until silky.
- Add eggs one at a time, mixing on low and scraping after each addition. Mix just until incorporated.
- Stir in vanilla extract.
- Gently fold in rainbow sprinkles with a rubber spatula.
- Pour cheesecake batter over chilled crust. Smooth the top with an offset spatula and tap pan gently to release air bubbles.
- Bake on center rack (springform pan set on a baking sheet) for 55-65 minutes, or until edges are set but center is slightly jiggly. Tent with foil if top starts to brown.
- Turn off oven and crack door open. Let cheesecake cool inside for 1 hour.
- Remove and run a knife around the edge to loosen. Cool at room temperature for another hour.
- Cover and refrigerate for at least 4 hours, preferably overnight.
- Before serving, top with whipped cream and extra sprinkles. Slice with a warm, clean knife and enjoy!
Notes
Use room temperature ingredients for a smooth batter. Only use ‘jimmies’ style sprinkles to avoid color bleeding. If cracks appear, cover with whipped cream and extra sprinkles. For gluten-free, use gluten-free graham crackers. For dairy-free, substitute plant-based cream cheese, sour cream, and butter. Chill overnight for best texture.
Nutrition
- Serving Size: 1 slice (1/12 of cake)
- Calories: 420
- Sugar: 27
- Sodium: 320
- Fat: 28
- Saturated Fat: 16
- Carbohydrates: 35
- Protein: 6
Keywords: birthday cheesecake, funfetti cheesecake, easy cheesecake, celebration dessert, party cake, creamy cheesecake, sprinkles cake, kid-friendly dessert


