There’s just something magical about that first bite into a creamy, coffee-infused tiramisu truffle—the kind of treat where chocolate gives way to a soft, dreamy center and your taste buds do a little happy dance. I’ll never forget the first time I whipped up a batch of tiramisu truffles: the air smelled like espresso and cocoa, my hands got messy (in the best way), and I couldn’t stop sneaking “just one more” from the fridge. If you love tiramisu but want something a little less fussy (and way more portable), this tiramisu truffles recipe is about to become your new obsession.
Honestly, these Italian dessert balls blend everything I adore about classic tiramisu—coffee, mascarpone, and a dusting of cocoa—into a bite-sized delight that’s perfect for sharing. Or, you know, hoarding for yourself with a cup of afternoon coffee. Over the years, I’ve played with endless versions, but this is my go-to for parties, potlucks, or just a quiet night when I crave something sweet and a little fancy.
What really surprised me the first time was how easy these tiramisu truffles are to make. No baking, no tricky layers—just simple steps and a handful of ingredients. If you’ve got 30 minutes, you can have a tray of these beauties chilling in your fridge. They’re also ideal for impressing friends, winning over picky eaters, or treating yourself after a long day. Trust me: once you make these tiramisu truffles, you’ll understand why I keep a stash in my freezer at all times!
Why You’ll Love This Tiramisu Truffles Recipe
- Quick & Simple: You can whip up these tiramisu truffles in under 30 minutes (plus a little chill time). No oven, no stand mixer—just a bowl, a spoon, and a love of sweets!
- Minimal Ingredients: Everything you need is probably in your pantry or a quick grocery trip away. No fancy liqueurs required (though you can add them if you want a grown-up twist).
- Perfect for Any Occasion: These Italian dessert balls are fabulous for holiday platters, baby showers, date nights, or just treating yourself on a random Tuesday.
- Always a Hit: I’ve served these at everything from family game nights to fancy dinners. Even folks who claim they “don’t like coffee” end up reaching for seconds.
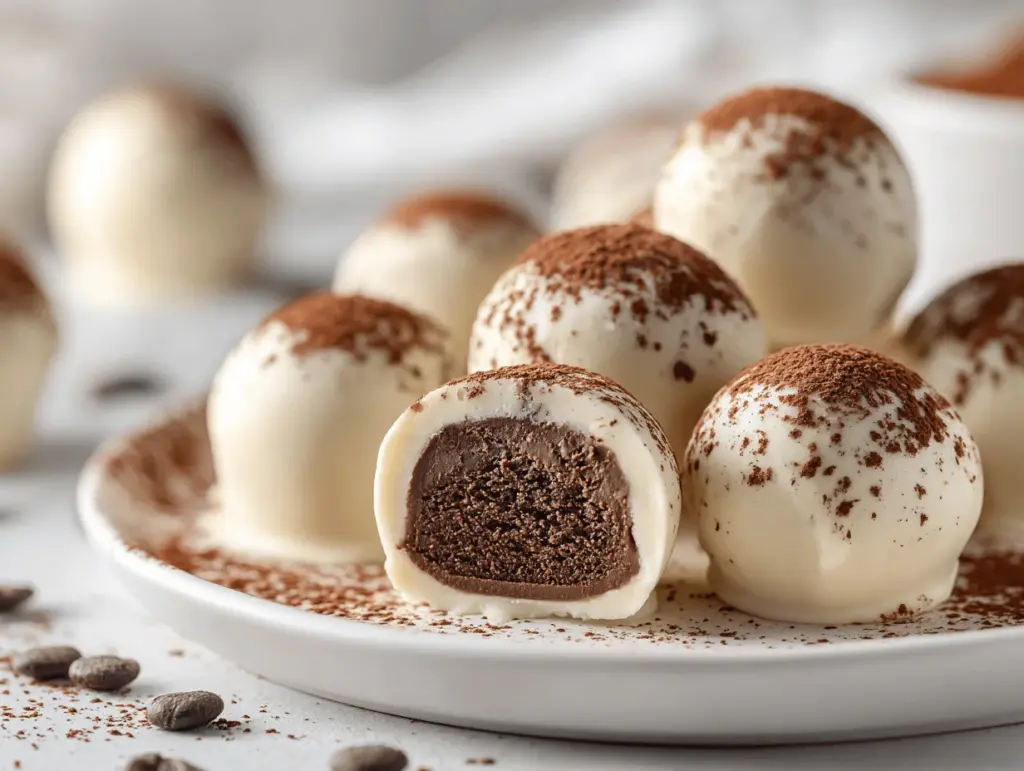
- Decadent and Dreamy: The rich mascarpone filling, coffee-soaked cookies, and chocolate shell combine for a treat that tastes like a little bite of Italy.
What sets my tiramisu truffles apart from others? I blend the ladyfingers to just the right texture—not too fine, so you get a bit of bite. The mascarpone stays creamy but holds together beautifully, and I use a quick dip in high-quality dark chocolate for a shell that cracks perfectly with each bite. A sprinkle of cocoa on top seals the deal. It’s comfort food, but with a touch of class.
This isn’t just another truffle recipe. It’s a love letter to tiramisu that fits in your hand, made for people who want all the flavor without the fuss. You’ll find yourself making these for friends, but don’t be surprised if you end up keeping them all for yourself!
What Ingredients You Will Need
This tiramisu truffles recipe relies on a handful of classic, easy-to-find ingredients that really pack a punch. Each one pulls its weight—so don’t skimp on the good stuff if you can help it!
- Ladyfingers (Savoiardi), crushed (about 5.3 oz/150g): These are the backbone of the truffle. I prefer Italian brands for their texture, but any will do. If you can’t find ladyfingers, vanilla wafers or even graham crackers work in a pinch.
- Mascarpone cheese (8 oz/225g), cold: The creamy heart of tiramisu. Make sure it’s fresh—no one likes a watery filling. If you can’t get mascarpone, cream cheese is a decent stand-in (but the flavor’s a bit tangier).
- Powdered sugar (1/2 cup/60g): Gives just enough sweetness without any grittiness. Don’t swap for granulated, or you’ll get a crunchy texture.
- Instant espresso powder (2 teaspoons): For that classic tiramisu kick. Feel free to use strong instant coffee if espresso powder is hard to find. You can also dissolve it in a bit of water for extra punch.
- Vanilla extract (1 teaspoon): Rounds everything out. I like pure vanilla for depth, but use what you have.
- Dark chocolate, chopped or chips (7 oz/200g): For dipping the truffles. I go for 60–70% cocoa for a not-too-sweet shell, but milk chocolate works if you prefer something milder.
- Unsweetened cocoa powder, for dusting: That final tiramisu flourish. Dutch-process is my go-to for a deep color and mellow flavor.
- Optional: Coffee liqueur (1 tablespoon): If you want a boozy grown-up twist. Kahlúa or Tia Maria are perfect.
Substitutions and notes:
- Gluten-free: Use gluten-free ladyfingers or vanilla wafers. The rest of the recipe is naturally gluten-free!
- Dairy-free: Try vegan cream cheese and coconut cream instead of mascarpone, but expect a slightly different texture.
- Sugar-free: Powdered erythritol or monk fruit sweetener will do the trick.
Honestly, don’t stress if you need to make a swap here or there. The beauty of this recipe is how forgiving it is. Just make sure everything tastes good to you as you go!
Equipment Needed
- Food processor or large zip-top bag & rolling pin: For crushing the ladyfingers. I’ve used both methods—food processor is faster, but a bag and rolling pin is oddly satisfying.
- Mixing bowl: Big enough to combine everything without making a mess.
- Rubber spatula or wooden spoon: For mixing the mascarpone blend. A sturdy spoon works in a pinch, but I love my flexible spatula for scraping every last bit.
- Small cookie scoop or tablespoon measure: For portioning the truffles. If you don’t have one, just use your hands and eyeball it.
- Baking sheet lined with parchment paper: Keeps everything tidy and makes cleanup a breeze.
- Microwave-safe bowl or double boiler: For melting chocolate. I’ve used a heatproof glass bowl over a pot of simmering water when my microwave was on the fritz.
- Fork or dipping tool: Helps coat the truffles in chocolate. A regular dinner fork works fine.
If you’re on a budget, you can skip the fancy truffle tools and just roll with your hands. Just be sure to wash up well—they get sticky! And parchment paper is a lifesaver when it comes to cleanup. If you’re making these often, invest in a good silicone baking mat—it’ll last forever and is so easy to rinse clean.
Preparation Method
- Crush the Ladyfingers: Place 5.3 oz (150g) ladyfingers in a food processor and pulse until you get fine crumbs. No processor? Pop them in a zip-top bag and bash with a rolling pin. You want sand-like crumbs with a few bigger bits (for texture). This takes about 2-3 minutes.
- Mix Mascarpone Filling: In a large mixing bowl, combine 8 oz (225g) mascarpone, 1/2 cup (60g) powdered sugar, 2 teaspoons instant espresso powder, and 1 teaspoon vanilla extract. If using, add 1 tablespoon coffee liqueur now. Use a spatula or spoon to gently mix until smooth and creamy—don’t overmix or the mascarpone can get runny. This step takes 2 minutes.
- Add Ladyfinger Crumbs: Stir in the ladyfinger crumbs until everything is evenly combined. The mixture should be soft but moldable. If it’s too wet, add a tablespoon more crumbs. Too dry? A splash of cream or coffee will help. This step is quick—about 1 minute.
- Chill the Mixture: Cover the bowl with plastic wrap and pop it in the fridge for 30–45 minutes. This makes the truffle mix easier to roll and less sticky. If you’re in a hurry, the freezer for 15–20 minutes works too.
- Shape the Truffles: Scoop out tablespoon-sized portions using a cookie scoop or spoon. Roll gently between your hands into balls and set on a parchment-lined baking sheet. You should get about 18–22 truffles, depending on size. If they get too sticky, dust your hands with a little cocoa powder.
- Melt the Chocolate: Place 7 oz (200g) dark chocolate in a microwave-safe bowl. Microwave in 20-second bursts, stirring between each, until just melted and smooth. Or melt over a double boiler. Don’t overheat—burnt chocolate ruins everything (trust me, I’ve done it!). This takes 2–3 minutes.
- Dip the Truffles: Drop each ball into the melted chocolate, using a fork to roll and coat. Lift out, let excess drip off, and return to the parchment. If you want to get fancy, sprinkle with cocoa powder while the chocolate is still wet.
- Chill to Set: Refrigerate the dipped truffles for 15–20 minutes, until the chocolate is firm. If your kitchen is cool, you can let them set at room temp, but the fridge speeds things up.
- Dust and Serve: Once the chocolate is set, dust the tiramisu truffles with a little more cocoa powder. Serve straight from the fridge for best texture.
Tips: If the truffle mixture gets too soft to roll, pop it back in the fridge for 10 minutes. For extra flair, drizzle with white chocolate or top with chocolate shavings. And don’t worry if the chocolate shell isn’t perfectly smooth—rustic is beautiful!
Cooking Tips & Techniques
Over the years, I’ve run into just about every truffle-making mishap you can imagine. Here’s what I’ve learned (sometimes the hard way):
- Keep mascarpone cold: If it gets too warm, your mixture turns soupy. Work quickly and chill between steps if needed.
- Don’t over-process the crumbs: You want a bit of texture, not powder. A few chunky bits are good—they give the centers a lovely bite.
- Use good chocolate: Cheap chocolate can seize or bloom (gets white streaks). I like Ghirardelli or Lindt bars, chopped up.
- Let truffles set on parchment: Nothing worse than gorgeous truffles glued to the tray. Parchment or a silicone mat is a life-saver.
- Work in batches: If your kitchen is warm, keep half the truffles in the fridge while you dip the rest. Less mess this way.
- Multitasking tip: While the mixture is chilling, melt your chocolate and set up your dipping station. Makes things flow smoothly.
- Messy hands? Dust your palms with cocoa powder. It keeps the truffles from sticking to you instead of each other.
The first time I made these, I rushed and ended up with runny filling. Now, patience is my secret ingredient! If you find your chocolate shell looking streaky, don’t stress—it’ll still taste amazing, and a dust of cocoa covers a multitude of sins.
Variations & Adaptations
This tiramisu truffles recipe is the ultimate kitchen chameleon. You can twist it so many ways to suit your tastes, dietary needs, or whatever’s in your pantry:
- Gluten-Free: Swap in gluten-free ladyfingers or vanilla wafers. The rest of the recipe stays the same—easy win!
- Alcohol-Free: Skip the liqueur and use a splash of strong brewed coffee instead. You still get that classic tiramisu flavor.
- Mocha Truffles: Add a tablespoon of unsweetened cocoa powder to the filling for an extra chocolatey kick. I do this when I’m craving something ultra-indulgent.
- Nutty Version: Roll the truffles in finely chopped hazelnuts or almonds before dipping in chocolate. Adds crunch and a Ferrero Rocher vibe.
- Seasonal Touch: Swirl in a little orange zest or pumpkin spice for a holiday twist. I made pumpkin spice tiramisu truffles last fall and they vanished in minutes.
- Dairy-Free Adaptation: Use vegan mascarpone and dairy-free chocolate for a totally plant-based treat. The texture’s a bit softer, but still delicious.
The beauty of these Italian dessert balls is how flexible they are. I once mixed in mini chocolate chips for texture, and another time, I rolled them in espresso sugar for an extra jolt. Go ahead—get creative!
Serving & Storage Suggestions
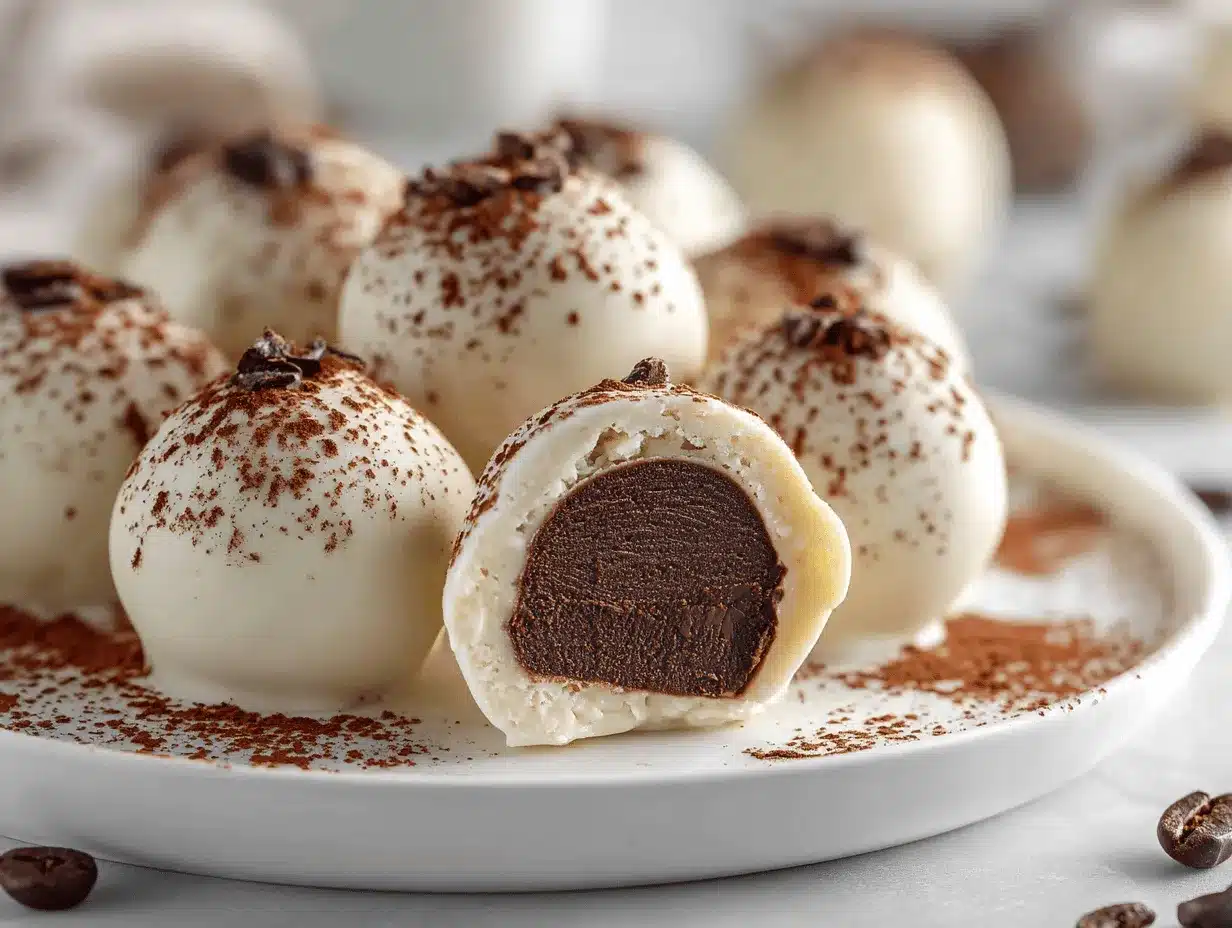
These tiramisu truffles are best served chilled—straight from the fridge is ideal for that creamy center and crisp chocolate shell. Pile them onto a pretty plate for parties, or nestle them in mini cupcake liners for a fancy touch (Pinterest-perfect, if you ask me!).
Pair with espresso, cappuccino, or even a glass of dessert wine for a true Italian-inspired treat. They also go beautifully with fresh berries on the side if you’re feeling extra.
For storage, keep the truffles in an airtight container in the fridge for up to 5 days. If stacking, separate the layers with parchment to prevent sticking. To freeze, arrange in a single layer on a tray, freeze until solid, then transfer to a zip-top bag. They’ll keep for 1–2 months; just let them thaw for 10 minutes before serving. The flavors actually deepen as they sit, so I love making these a day ahead for even more tiramisu magic!
Nutritional Information & Benefits
Each tiramisu truffle (about 18 per batch) contains roughly:
- Calories: 120
- Fat: 7g
- Carbohydrates: 13g
- Sugar: 8g
- Protein: 2g
Mascarpone and dark chocolate provide a little calcium and antioxidants, while instant espresso gives a tiny caffeine kick. These truffles are naturally portion-controlled, gluten-free adaptable, and can be made dairy-free. The biggest allergen to watch is dairy (mascarpone, chocolate), and gluten if you use regular ladyfingers. Personally, I love that these satisfy my sweet tooth without feeling heavy, and a couple go a long way when I want a treat that feels special but not over-the-top.
Conclusion
If you’re looking for an easy, crowd-pleasing treat that tastes like Italy in every bite, this tiramisu truffles recipe is it. They bring together the best of classic tiramisu—espresso, mascarpone, chocolate—in a fun, no-bake package that’s perfect for any occasion.
I love making these for parties and family gatherings, but honestly, they’re just as great for a quiet night in. Feel free to mix things up—add your own twist with nuts, extra chocolate, or a splash of liqueur. That’s half the fun!
Let me know in the comments if you try these irresistible Italian dessert balls, or if you come up with your own creative spin. Share this recipe with fellow tiramisu lovers, and don’t forget to save it for your next sweet craving. Buon appetito, friends—and happy truffle-making!
FAQs About Tiramisu Truffles
Can I make tiramisu truffles ahead of time?
Absolutely! They keep well in the fridge for up to five days, and the flavor actually improves after a day or two.
Do I have to use mascarpone cheese?
Mascarpone gives the most authentic tiramisu flavor, but you can substitute cream cheese in a pinch. The taste will be slightly tangier but still delicious.
What if I don’t have ladyfingers?
No worries! Try vanilla wafers, graham crackers, or another crisp cookie. The flavor will change a bit, but the texture will stay similar.
Can I make these tiramisu truffles gluten-free?
Yes! Just use gluten-free ladyfingers or a gluten-free cookie alternative for the crumbs.
Do tiramisu truffles contain caffeine?
They do contain a small amount, thanks to the espresso powder. If you’re sensitive, you can use decaf espresso powder instead.
Pin This Recipe!
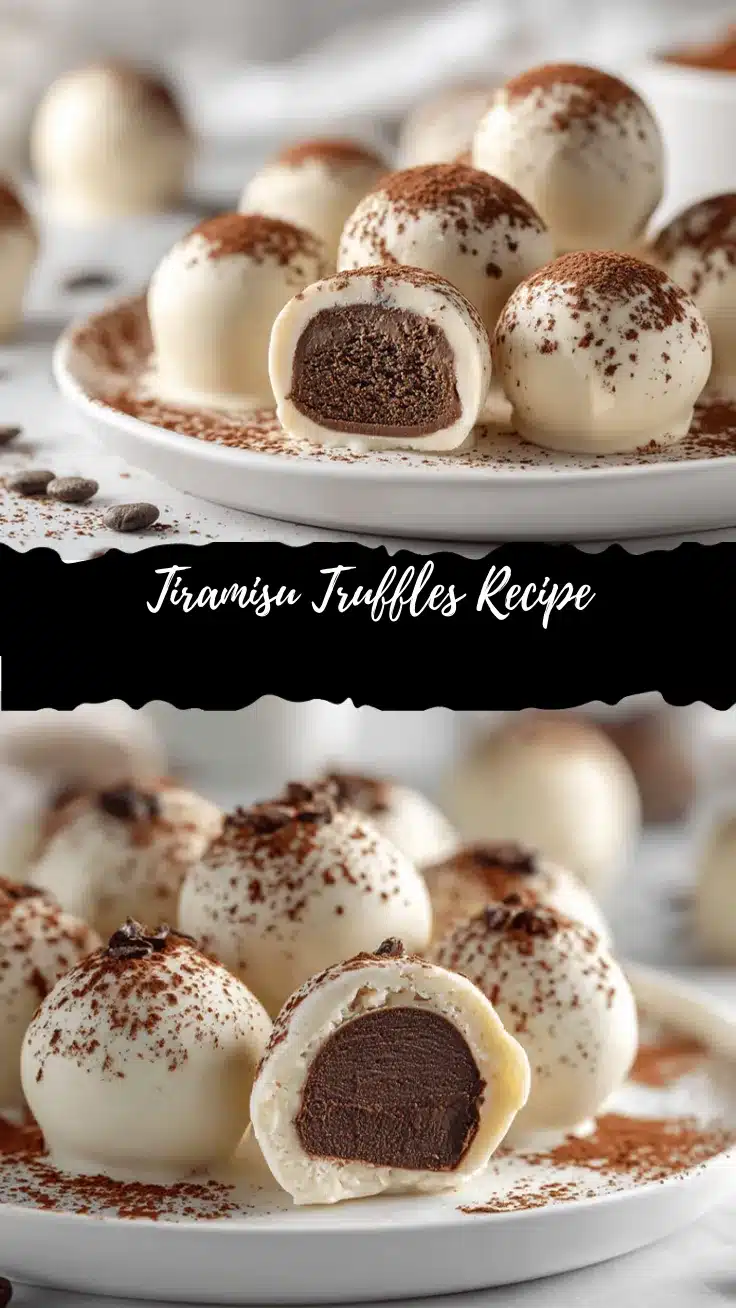
Tiramisu Truffles Recipe: Easy Homemade Italian Dessert Balls

These tiramisu truffles blend all the classic flavors of tiramisu—espresso, mascarpone, and chocolate—into creamy, bite-sized dessert balls. No baking required, and perfect for parties or a sweet treat anytime.
- Prep Time: 15 minutes
- Cook Time: 0 minutes
- Total Time: 45 minutes
- Yield: 18–22 truffles 1x
- Category: Dessert
- Cuisine: Italian
Ingredients
- 5.3 oz (150g) ladyfingers (Savoiardi), crushed (about 20 cookies)
- 8 oz (225g) mascarpone cheese, cold
- 1/2 cup (60g) powdered sugar
- 2 teaspoons instant espresso powder
- 1 teaspoon vanilla extract
- 7 oz (200g) dark chocolate, chopped or chips
- Unsweetened cocoa powder, for dusting
- Optional: 1 tablespoon coffee liqueur (Kahlúa or Tia Maria)
Instructions
- Place ladyfingers in a food processor and pulse until fine crumbs form, leaving a few larger bits for texture. Alternatively, crush in a zip-top bag with a rolling pin (2-3 minutes).
- In a large mixing bowl, combine mascarpone, powdered sugar, instant espresso powder, vanilla extract, and coffee liqueur (if using). Mix gently until smooth and creamy (2 minutes).
- Stir in the ladyfinger crumbs until evenly combined. The mixture should be soft but moldable. Adjust with more crumbs or a splash of cream/coffee if needed (1 minute).
- Cover the bowl and chill the mixture in the fridge for 30–45 minutes (or freezer for 15–20 minutes) until firm enough to roll.
- Scoop tablespoon-sized portions and roll into balls. Place on a parchment-lined baking sheet. You should get about 18–22 truffles.
- Melt dark chocolate in a microwave-safe bowl in 20-second bursts, stirring between each, until smooth (2–3 minutes), or use a double boiler.
- Dip each truffle into melted chocolate using a fork, let excess drip off, and return to parchment. Sprinkle with cocoa powder while chocolate is wet if desired.
- Refrigerate dipped truffles for 15–20 minutes until chocolate is set.
- Dust with additional cocoa powder before serving. Serve chilled for best texture.
Notes
Keep mascarpone cold to prevent runny filling. Don’t over-process ladyfinger crumbs for best texture. Use high-quality chocolate for dipping. If mixture is too soft, chill again before rolling. For gluten-free, use GF ladyfingers. Truffles can be made ahead and stored in the fridge for up to 5 days or frozen for 1–2 months.
Nutrition
- Serving Size: 1 truffle
- Calories: 120
- Sugar: 8
- Fat: 7
- Carbohydrates: 13
- Protein: 2
Keywords: tiramisu truffles, Italian dessert balls, no-bake tiramisu, mascarpone truffles, coffee dessert, party treats, chocolate truffles, easy tiramisu recipe


