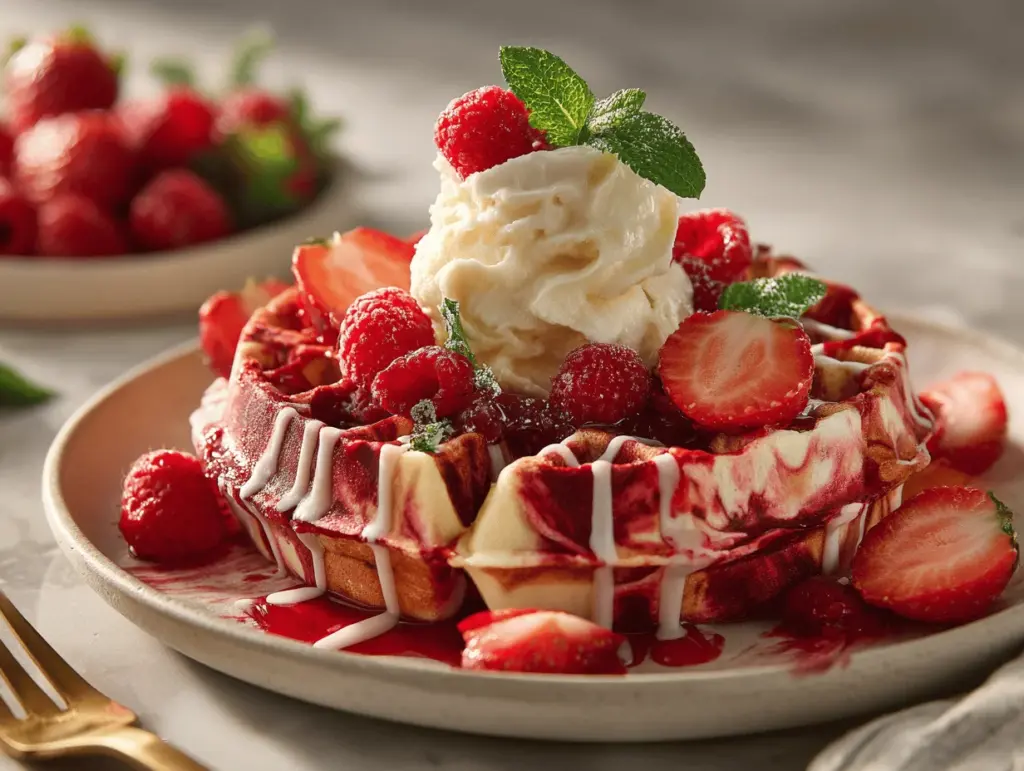
The first time I made red velvet marble waffles, my kitchen smelled like a bakery during Valentine’s week—sweet cocoa, buttery vanilla, and that hint of tang you only get from classic red velvet. Honestly, nothing beats waking up to the sight of swirling red and golden batter sizzling away in the waffle iron. I’d been craving something special for breakfast (you know those mornings when cereal just won’t cut it), so I experimented with my standard waffle recipe and a red velvet twist. That’s how these irresistible red velvet marble waffles came to life—right in my tiny kitchen, with a little mess and a lot of love.
If you’re a fan of brunch, or maybe you just want a breakfast treat that’s a little extra without being complicated, this recipe will totally win you over. There’s something magical about the rich, chocolatey red velvet rippling through fluffy vanilla waffles—it’s like dessert disguised as breakfast! Plus, they’re shockingly easy to make, and you don’t need any fancy ingredients. My kids go nuts for these waffles, and honestly, adults get a little competitive over the last piece too. The best part? You control the swirl. Some mornings, I go for bold, dramatic marbling; other times, it’s more subtle. Either way, these waffles always deliver.
After baking these red velvet marble waffles more times than I can count (especially for birthday breakfasts and cozy weekend mornings), I’ve perfected the mix of flavors and the method. As a self-proclaimed breakfast aficionado, I swear by this recipe for its gorgeous look and downright addictive taste. If you want a breakfast treat that’s as fun to make as it is to eat—and one that’s guaranteed to brighten your morning—you’ve gotta give these a try. Trust me, your waffle game will never be the same!
Why You’ll Love These Red Velvet Marble Waffles
- Quick & Easy: These waffles come together in about 30 minutes, so you can have a special breakfast without losing your whole morning.
- Simple Ingredients: Nothing complicated here—just pantry staples. You probably have everything you need already (no emergency grocery runs required).
- Perfect for Brunch or Celebrations: Whether it’s Mother’s Day, Valentine’s, or just a lazy Sunday, these waffles always add a little sparkle to the table.
- Crowd-Pleaser: Kids love the fun color and swirl, adults rave about the flavor—these waffles never last long in my house!
- Unbelievably Delicious: The mix of cocoa and vanilla is pure comfort food, with a slight tang from buttermilk and a hint of sweetness.
What sets my red velvet marble waffles apart (and why I keep making them) is the swirling technique. Blending a classic vanilla waffle batter with a rich red velvet portion means every bite is a little different—sometimes more chocolate, sometimes more vanilla. I always use Dutch-process cocoa for that deep, true red velvet flavor (and that signature color), but you can get creative with your cocoa powder too.
After plenty of trial and error, I figured out how to keep the marbling distinct without overmixing (it’s a real thing—trust me, I’ve made a few pink waffles by accident). The balance of flavors is just right: not too sweet, not too rich, and always fluffy. This recipe isn’t just another waffle recipe—it’s the one my family requests most. It’s for anyone who wants breakfast to feel like a celebration, no matter the day.
Red velvet marble waffles are comfort food, but with a playful twist. They’re perfect for those moments when you want a little bit of joy with your morning coffee—or when you need to impress overnight guests without stress. Plus, you can dress them up with cream cheese glaze, fresh berries, or just a dusting of powdered sugar. It’s the kind of breakfast that makes you close your eyes after the first bite and just enjoy.
What Ingredients You Will Need
This recipe uses simple, wholesome ingredients to deliver bold flavor and that classic red velvet look. Most are pantry staples, but I’ll add a few notes for what makes each one matter. You can swap or adjust a few things if you need, but here’s what I use every time for irresistible red velvet marble waffles:
- All-purpose flour (240g / 2 cups) – The base for fluffy, tender waffles. I’ve used King Arthur and Gold Medal; both work great.
- Granulated sugar (50g / 1/4 cup) – Adds just enough sweetness without overpowering.
- Baking powder (2 tsp / 8g) – Gives your waffles that beautiful lift and lightness.
- Baking soda (1/2 tsp / 2g) – Adds extra rise and balances the buttermilk’s acidity.
- Salt (1/2 tsp / 3g) – Just a pinch to round out flavors.
- Eggs (2 large, room temperature) – For structure and a rich texture.
- Buttermilk (360ml / 1 1/2 cups) – The key to classic red velvet flavor and tender crumb. You can use a mix of milk + lemon juice if you don’t have buttermilk.
- Unsalted butter (60g / 4 tbsp, melted and cooled) – Richness and a crisp edge. I’ve also swapped in coconut oil for a dairy-free option.
- Vanilla extract (2 tsp / 10ml) – For that cozy aroma.
- Dutch-process cocoa powder (2 tbsp / 12g) – Deep, smooth red velvet flavor. Hershey’s Special Dark is my go-to.
- Red food coloring (1 1/2 tbsp / 22ml, liquid or gel) – For that signature look. If you prefer natural, try beet juice—though the color will be softer.
- White vinegar (1 tsp / 5ml) – Helps develop that tang and reacts with baking soda for extra lift.
- Cream cheese glaze ingredients (optional):
- Cream cheese (60g / 2 oz, softened)
- Powdered sugar (60g / 1/2 cup)
- Milk (1-2 tbsp / 15-30ml, to thin)
- Vanilla extract (1/2 tsp / 2.5ml)
If you need gluten-free red velvet marble waffles, swap the flour for a 1:1 gluten-free blend—Bob’s Red Mill works well. For dairy-free, use almond milk with a splash of lemon juice and vegan butter. I’ve tried oat milk too, but almond keeps the waffles light.
For cocoa powder, go for Dutch-process if you can—it’s smoother and gives the waffles that classic red velvet flavor. If you only have natural cocoa, it’ll work, but the color will be a little lighter. The food coloring can be adjusted for deeper or softer color. If you’re skipping artificial dyes, beet juice is a decent sub (just expect a slightly earthier taste).
Honestly, you can make these waffles your own. Sometimes I add a pinch of cinnamon for warmth, or swap vanilla for almond extract for a twist. But the base recipe delivers every time—whether it’s a holiday, a birthday, or just a regular Saturday morning.
Equipment Needed
- Waffle iron – Standard or Belgian works. I’ve used both a classic nonstick and cast iron. If you don’t have a waffle iron, you can use a grill pan for “waffle pancakes”—just press gently with a spatula.
- Large mixing bowls – You’ll need two (one for the base batter, one for the red velvet portion).
- Whisk – For mixing wet and dry ingredients. A fork works in a pinch (been there!).
- Measuring cups and spoons – For accuracy; I use a digital scale for flour and sugar but cups are fine.
- Rubber spatula – For swirling the batter and scraping bowls.
- Small bowl – For mixing the cocoa and food coloring.
- Cooling rack – Keeps waffles crisp after cooking, especially if you’re making a big batch.
If you’re new to waffle irons, stick to nonstick for easy cleanup. I maintain mine by wiping with a damp cloth after each use (no soap—just warmth and patience). If your iron tends to stick, brush with a little melted butter before adding batter.
Budget tip: I started with a $20 waffle iron from Target, and it still works. You don’t need anything fancy for red velvet marble waffles—just something that gets hot and stays even!
How to Make Red Velvet Marble Waffles
- Prep your waffle iron: Preheat according to manufacturer’s instructions. On my classic iron, it takes about 5 minutes. Lightly oil or butter the plates if needed (especially for older models).
- Mix dry ingredients: In a large bowl, whisk together 2 cups (240g) flour, 1/4 cup (50g) sugar, 2 tsp (8g) baking powder, 1/2 tsp (2g) baking soda, and 1/2 tsp (3g) salt. The mixture should look uniform and airy.
- Combine wet ingredients: In a separate bowl, whisk 2 large eggs, 1 1/2 cups (360ml) buttermilk, 4 tbsp (60g) melted butter, and 2 tsp (10ml) vanilla extract. Mix until smooth and pale yellow.
- Make the batter: Pour the wet ingredients into the dry. Whisk gently until just combined (don’t overmix—some lumps are okay). The batter will be thick and pourable.
- Prepare red velvet mix: In a small bowl, whisk together 2 tbsp (12g) Dutch-process cocoa, 1 1/2 tbsp (22ml) red food coloring, and 1 tsp (5ml) white vinegar. Stir in about 1/3 of your main batter, mixing until fully blended and red.
- Marble the batters: Pour half the plain batter into your preheated waffle iron. Dollop a few spoonfuls of red velvet batter on top. Use a spatula or knife to swirl gently—don’t overdo it, or you’ll lose the marbling effect.
- Cook the waffles: Close the waffle iron and cook for 4-5 minutes (or until waffles are golden, crisp, and cooked through). Every iron is a little different, so check early to avoid burning.
- Repeat: Continue swirling and cooking the remaining batter. Transfer finished waffles to a cooling rack to stay crisp while you make the rest.
- Make cream cheese glaze (optional): Beat 2 oz (60g) cream cheese with 1/2 cup (60g) powdered sugar, 1/2 tsp (2.5ml) vanilla, and 1-2 tbsp (15-30ml) milk until smooth and pourable. Drizzle over warm waffles.
- Serve: Plate waffles while warm, topping with glaze, berries, or just a dusting of powdered sugar.
Preparation Notes:
- If your batter seems dry, add a splash more buttermilk.
- If waffles stick, up the butter or oil on the plates next batch.
- Watch for steam—when it slows, waffles are usually done.
- Swirl gently; too much mixing will blend the colors.
Personal tip: I make the red velvet portion in a bigger bowl than you’d think—it gets messy fast. And always taste the batter; if it’s not chocolatey enough, add another teaspoon of cocoa. For speed, make the two batters at the same time (I use two whisks). It’s a little chaos, but the results are worth it!
Red Velvet Marble Waffle Cooking Tips & Techniques
Making red velvet marble waffles is easier than it looks, but a few tricks make all the difference. Here’s what I’ve learned after plenty of waffle mishaps (and triumphs):
- Don’t overmix: After adding wet to dry, a few lumps are fine—overmixing will make waffles tough.
- Swirl, don’t blend: Use a spatula or butter knife to gently swirl the batters. If you blend too much, you’ll get pink waffles instead of marbled!
- Preheat the iron: A hot iron gives crisp edges and keeps waffles from sticking. I wait until the ready light is solid before starting.
- If waffles stick: Brush the plates with melted butter between batches, especially if your iron isn’t nonstick anymore.
- Time matters: Most waffle irons need 4-5 minutes. Peek after 4—if there’s a lot of steam, they’re still cooking. When the steam slows, they’re usually done.
- Batch strategy: If you’re making lots, keep finished waffles on a wire rack in a warm oven (200°F / 93°C) so they stay crisp.
- Consistency: If your batter is too thick, add a splash of buttermilk. Too thin? Toss in a tablespoon of flour.
I’ve definitely burned a few waffles by getting distracted—set a timer if you’re multitasking! And if you ever forget to swirl the batter, don’t stress—the flavor is still delicious, just a little less dramatic. For perfect marbling, I dollop the red velvet in three spots and swirl in a loose figure-eight (not scientific, but it works).
Variations & Adaptations
Red velvet marble waffles are the kind of recipe you can tweak for any taste, diet, or occasion. Here are a few of my favorite variations:
- Gluten-Free: Use a 1:1 gluten-free flour blend. Bob’s Red Mill is my favorite, and the texture stays fluffy.
- Dairy-Free: Swap buttermilk for almond milk + 1 tbsp lemon juice, and use vegan butter or coconut oil. The waffles are lighter but still delicious.
- Holiday Twist: Add a teaspoon of cinnamon and a pinch of nutmeg for a festive flavor, or swirl in green food coloring for Christmas-themed waffles.
- Chocolate Lover’s: Increase cocoa powder to 3 tbsp for extra depth, or toss in mini chocolate chips before swirling.
- Nutty Crunch: Stir in chopped pecans or walnuts to the batter for texture.
- Vegan Option: Use flaxseed “eggs” (2 tbsp ground flax + 5 tbsp water) and plant-based milk.
- Allergen Notes: For nut allergies, make sure your cocoa is processed in a nut-free facility.
Personally, I love adding orange zest to the vanilla batter for a bright, citrusy note (it’s a hit every spring). You can also switch up the glaze—try lemon or maple instead of cream cheese for something different. If you want dramatic swirls, use gel food coloring; for softer marbling, stick with liquid or natural dyes.
Serving & Storage Suggestions
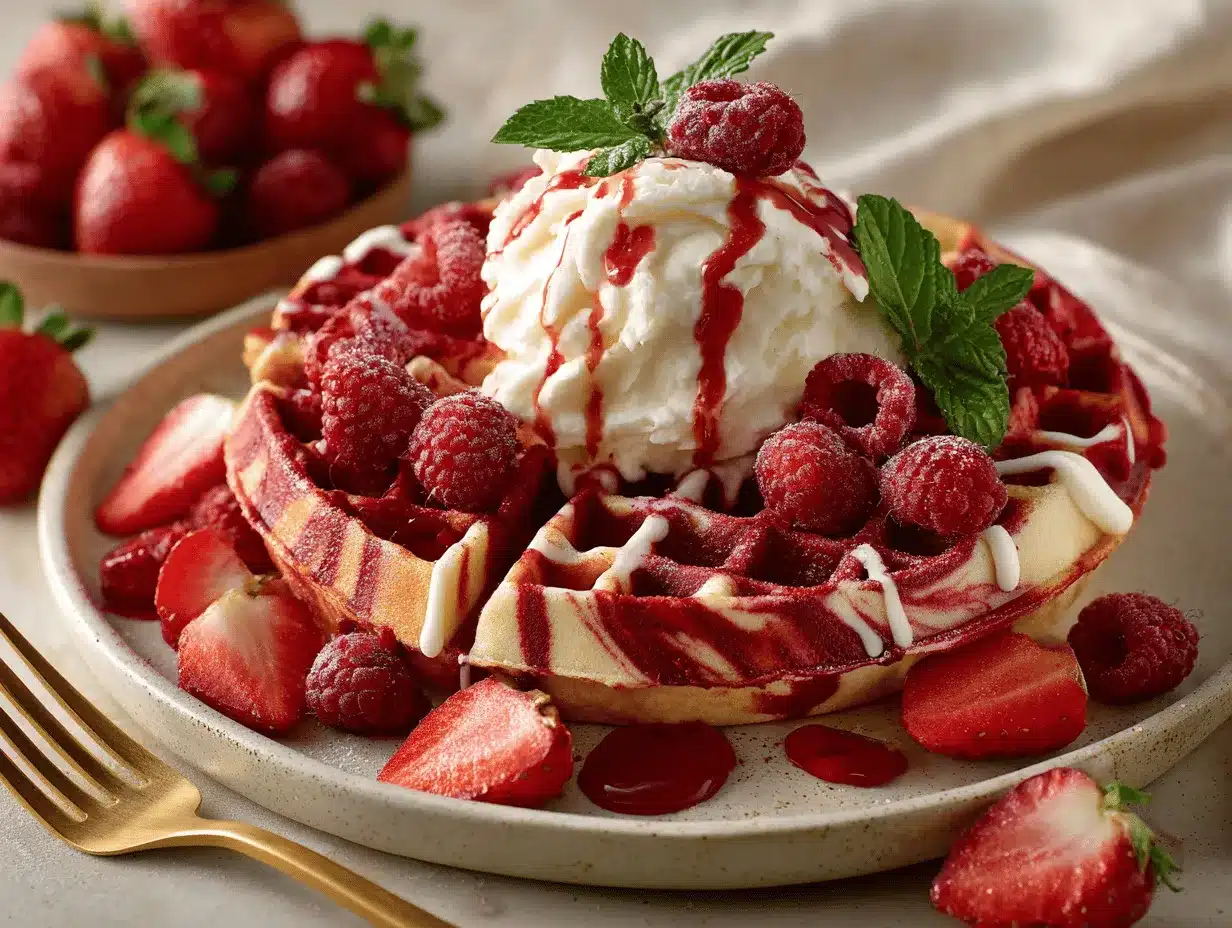
Red velvet marble waffles are best served hot and fresh, straight from the iron. The marbling pops, and the texture is crispy outside, tender inside—seriously irresistible!
- Serving temperature: Warm is best, but you can reheat leftovers in a toaster for that just-made crispness.
- Presentation: Stack waffles on a pretty platter, drizzle with cream cheese glaze, and scatter fresh berries or a dusting of powdered sugar.
- Pairings: They go perfectly with coffee, chai, or a glass of cold milk. For brunch, add scrambled eggs or a fruit salad.
- Storage: Store cooled waffles in an airtight container in the fridge for up to 3 days. For longer storage, freeze in a single layer, then transfer to a freezer bag for up to 2 months.
- Reheating: Toast waffles straight from the fridge or freezer—no need to thaw. They crisp up beautifully in the toaster or oven (350°F / 175°C for 5 minutes).
- Flavor notes: The red velvet flavor deepens after a day, so leftovers are even better!
If you’re serving a crowd, keep waffles warm in the oven until ready to plate. For breakfast boards, cut waffles into quarters and pile them with toppings. Honestly, they’re perfect for breakfast, dessert, or even a midnight snack.
Nutritional Information & Benefits
Each serving (one waffle) is approximately:
- Calories: 220
- Protein: 6g
- Fat: 9g
- Carbohydrates: 29g
- Sugar: 7g
Red velvet marble waffles offer a good balance of carbs and protein thanks to eggs and buttermilk. Cocoa powder adds antioxidants, and you can boost fiber by using whole wheat flour (though the texture will change a bit). For gluten-free and dairy-free diets, simple swaps keep the recipe accessible. Eggs and dairy are the main allergens—swap as needed for your household.
From a personal wellness perspective, I love that these waffles don’t feel heavy or overly sweet. They’re a treat you can enjoy without a sugar crash, and the protein helps keep you full. For kids, I use less sugar and add fresh berries on top—always a hit and a little healthier.
Conclusion
If you’re looking for a breakfast treat that’s easy to make, gorgeous on the plate, and absolutely delicious, these red velvet marble waffles are it. The marbling is fun, the flavor is classic, and you can change things up to fit any mood or occasion. I love this recipe because it turns an ordinary morning into something special—without a ton of effort.
Don’t be afraid to add your own twist or swap ingredients to fit your family’s needs. That’s how the best recipes are born! Every time I make these, I remember how much joy a simple breakfast can bring. So go ahead—make them for brunch, birthdays, or just because. And if you do, let me know how your swirls turn out! Drop a comment, share with friends, or post your own marble creations. Waffle mornings are meant to be shared.
Here’s to more breakfasts that feel like a celebration—one bite at a time.
Frequently Asked Questions
Can I make red velvet marble waffles ahead of time?
Yes! Cook and cool the waffles, then store them in the fridge for up to 3 days or freeze for up to 2 months. Reheat in the toaster for best texture.
What if I don’t have buttermilk?
No problem. Mix 1 1/2 cups (360ml) milk with 1 1/2 tbsp (22ml) lemon juice or vinegar. Let it sit for 5 minutes, then use as buttermilk.
How do I keep waffles crisp?
Place finished waffles on a wire rack, not a plate, while you make the rest. If serving later, keep them warm in a 200°F (93°C) oven.
Can I use natural food coloring?
Absolutely. Beet juice or natural red powders work, though the color will be softer. The flavor may change slightly, but it’s still delicious.
Is this recipe good for kids?
Definitely! Kids love the color and swirl. For less sugar, just skip the glaze and add fresh fruit instead.
Pin This Recipe!
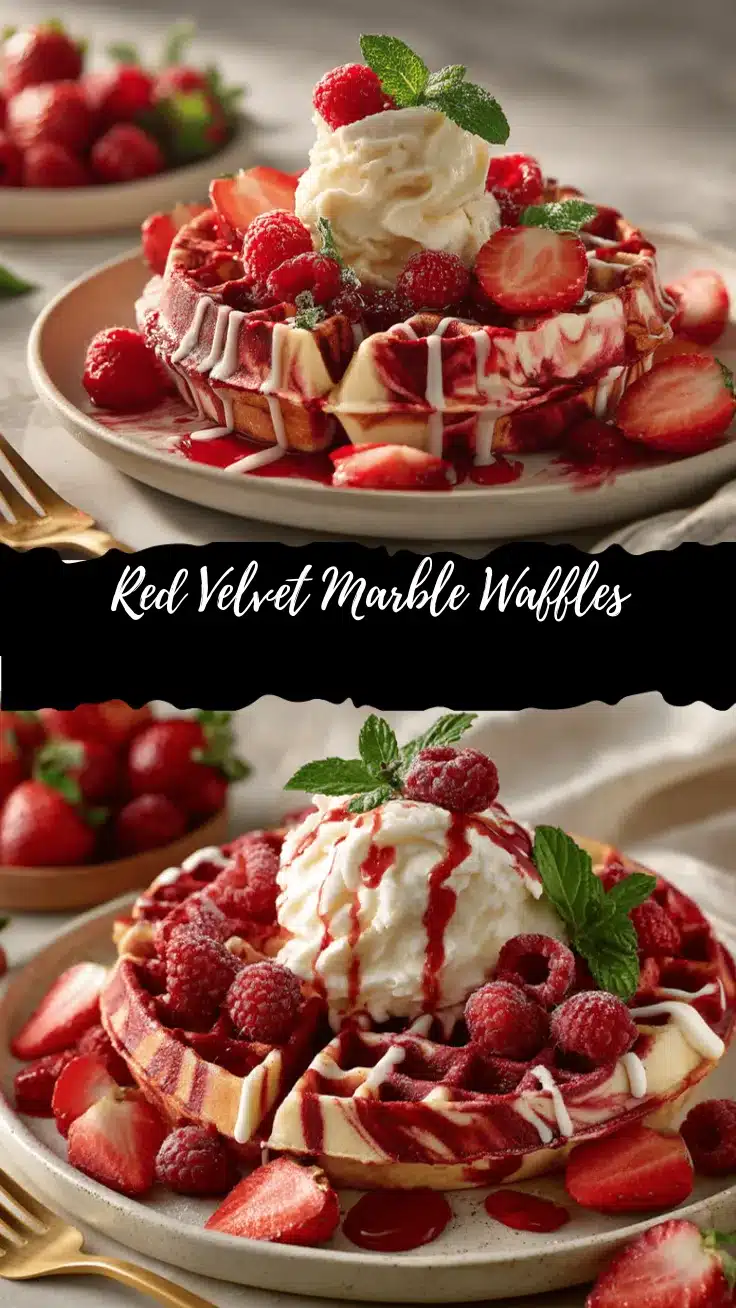
Red Velvet Marble Waffles

These easy homemade red velvet marble waffles combine classic vanilla and rich cocoa batters for a beautiful, marbled breakfast treat. Perfect for brunch, celebrations, or any morning that deserves something special.
- Prep Time: 15 minutes
- Cook Time: 15 minutes
- Total Time: 30 minutes
- Yield: 6 waffles 1x
- Category: Breakfast
- Cuisine: American
Ingredients
- 2 cups all-purpose flour
- 1/4 cup granulated sugar
- 2 teaspoons baking powder
- 1/2 teaspoon baking soda
- 1/2 teaspoon salt
- 2 large eggs, room temperature
- 1 1/2 cups buttermilk
- 4 tablespoons unsalted butter, melted and cooled
- 2 teaspoons vanilla extract
- 2 tablespoons Dutch-process cocoa powder
- 1 1/2 tablespoons red food coloring (liquid or gel)
- 1 teaspoon white vinegar
- Optional cream cheese glaze:
- 2 ounces cream cheese, softened
- 1/2 cup powdered sugar
- 1–2 tablespoons milk
- 1/2 teaspoon vanilla extract
Instructions
- Preheat your waffle iron according to manufacturer’s instructions (about 5 minutes). Lightly oil or butter the plates if needed.
- In a large bowl, whisk together flour, sugar, baking powder, baking soda, and salt.
- In a separate bowl, whisk eggs, buttermilk, melted butter, and vanilla extract until smooth.
- Pour wet ingredients into dry ingredients and whisk gently until just combined; some lumps are okay.
- In a small bowl, whisk together cocoa powder, red food coloring, and vinegar. Stir in about 1/3 of the main batter until fully blended and red.
- Pour half the plain batter into the preheated waffle iron. Dollop spoonfuls of red velvet batter on top and gently swirl with a spatula or knife for a marbled effect.
- Close the waffle iron and cook for 4-5 minutes, or until waffles are golden, crisp, and cooked through.
- Repeat swirling and cooking with remaining batter. Transfer finished waffles to a cooling rack to stay crisp.
- For cream cheese glaze (optional): Beat cream cheese, powdered sugar, vanilla, and milk until smooth and pourable. Drizzle over warm waffles.
- Serve waffles warm, topped with glaze, berries, or powdered sugar.
Notes
Don’t overmix the batter to keep waffles fluffy. Swirl gently for distinct marbling. If batter is too thick, add a splash of buttermilk; if too thin, add a tablespoon of flour. Keep finished waffles warm in a 200°F oven on a wire rack for crispness. For gluten-free or dairy-free, use a 1:1 gluten-free flour blend and almond milk with lemon juice, plus vegan butter.
Nutrition
- Serving Size: 1 waffle
- Calories: 220
- Sugar: 7
- Sodium: 320
- Fat: 9
- Saturated Fat: 5
- Carbohydrates: 29
- Fiber: 1
- Protein: 6
Keywords: red velvet waffles, marble waffles, breakfast, brunch, easy waffles, homemade waffles, cream cheese glaze, Valentine’s breakfast, kids breakfast, chocolate waffles


