There’s something absolutely magical about the smell of cheesy garlic bread wafting through the kitchen, especially when it’s loaded with gooey cheese and spicy pepperoni. Honestly, the first time I made these Cheesy Garlic Bread Pizza Bombs with Pepperoni, my family hovered nearby like hungry cartoon characters drawn by the scent alone. You know those days when you crave pizza, but you want something snackable and a bit more playful? That’s when this recipe shines. I stumbled upon the idea while trying to whip up a snack for a game night — I had leftover pizza ingredients and a tube of biscuit dough, and the rest is tasty history.
These cheesy garlic bread pizza bombs are the ultimate comfort food mashup. They combine the best parts of pizza and garlic bread into bite-sized, pull-apart bombs that are perfect for sharing. If you’re a fan of quick recipes that don’t skimp on flavor, you’re going to love this one. It’s become my go-to for parties, family movie nights, and those unexpected cravings when you want something indulgent but not fussy. Plus, they’re a hit with kids and adults alike (trust me, they disappear fast!).
After making these pizza bombs more times than I can count, I’ve tweaked the recipe for the perfect balance of melty cheese, garlicky butter, and pepperoni kick. As a home cook who’s obsessed with bold flavors and easy snacks, I swear by this cheesy garlic bread pizza bombs recipe. It’s not just about taste, either — it’s about the smiles, the laughter, and the moments you get to savor with people you love. So, if you’re in need of a crowd-pleasing, easy pepperoni snack, grab your apron and let’s get rolling!
Why You’ll Love This Recipe
- Quick & Easy: You can whip up these cheesy garlic bread pizza bombs in under 30 minutes. Perfect for last-minute gatherings or a speedy after-school snack.
- Simple Ingredients: Nothing fancy here. You probably have everything you need in your fridge or pantry—think biscuit dough, cheese, pepperoni, and a few basic flavor boosters.
- Perfect for Any Occasion: Whether it’s a family movie night, a game day get-together, or a cozy weekend lunch, these pizza bombs fit right in. They’re especially great for parties since everyone loves finger food!
- Crowd-Pleaser: Kids beg for seconds, and adults sneak extras when they think no one’s looking. They’re cheesy, garlicky, and just a little bit salty from the pepperoni—hard to resist.
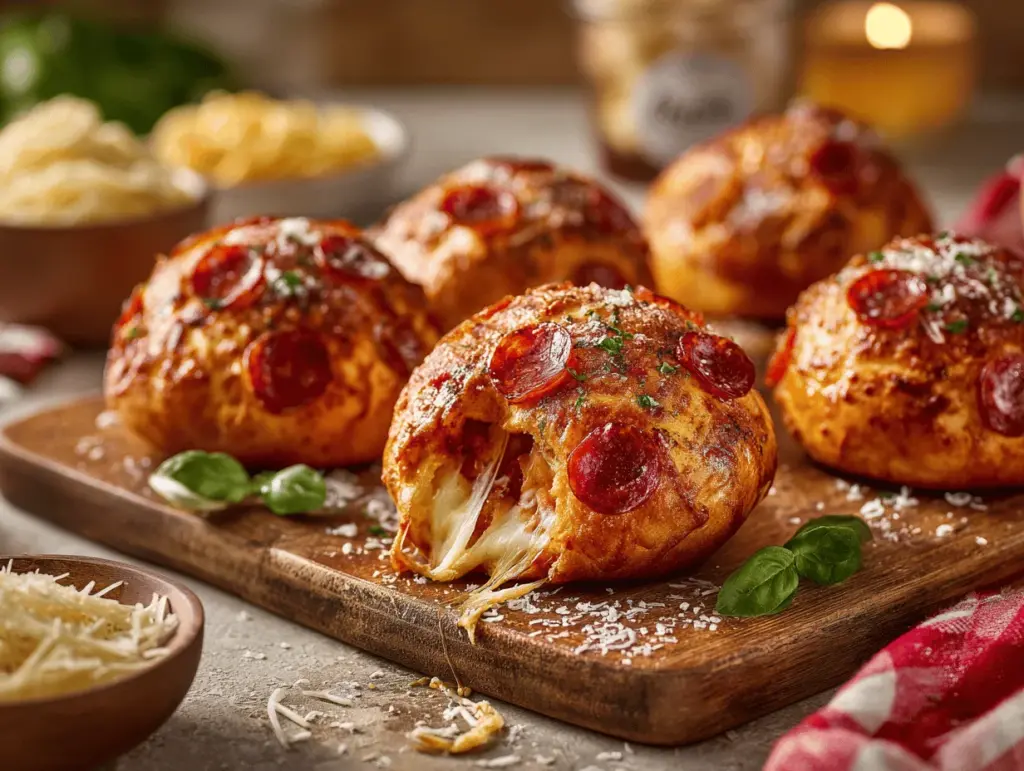
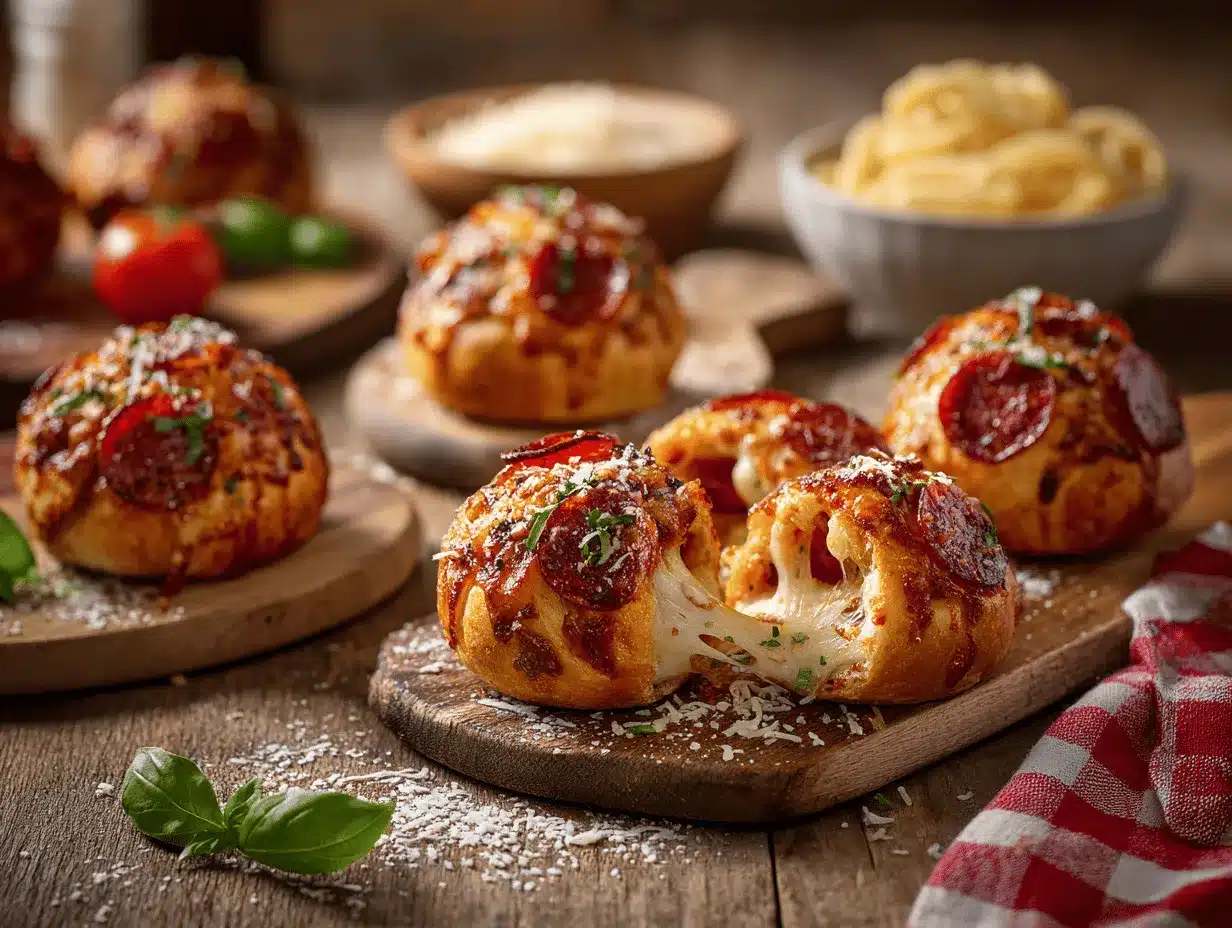
- Unbelievably Delicious: Imagine biting into a soft, buttery garlic bread exterior and hitting a pocket of gooey cheese and spicy pepperoni. It’s like pizza and garlic bread had a seriously tasty baby.
What sets this cheesy garlic bread pizza bombs recipe apart? I always blend a little extra garlic powder into the melted butter, and I use both mozzarella and provolone cheese for the ultimate gooey pull. Sometimes I sneak in a sprinkle of Italian seasoning for an extra flavor punch. The secret, honestly, is a generous brush of garlicky butter before baking—don’t be shy!
There’s something super satisfying about making these with your hands, too. I love seeing the dough puff up and turn golden, and the way the cheese oozes out just a bit (seriously, the crispy cheese edges are the best part!). This isn’t just another pizza snack—it’s the kind that makes people pause, smile, and ask, “What’s in these?!” Every bite is comfort food at its finest, and you can customize them for picky eaters, spice lovers, or anyone who just loves cheese.
If you’re after a cheesy, garlicky, pepperoni-packed snack that feels homemade but is shockingly easy, these pizza bombs are your answer. Forget complicated recipes—this one is all about flavor, fun, and sharing something truly irresistible.
What Ingredients You Will Need
This cheesy garlic bread pizza bombs recipe uses a handful of everyday ingredients, making it a breeze to shop for or throw together with what’s already in your kitchen. Each ingredient plays its part in creating that crave-worthy cheesy, garlicky, pepperoni-packed flavor and texture.
- For the Bombs:
- Refrigerated biscuit dough (1 standard tube, 16 oz/450 g) – Use homestyle or buttermilk biscuits; I’ve tried both and they work great.
- Mozzarella cheese (1 cup/120 g, shredded) – For that classic pizza stretch. I like to use whole milk mozzarella for extra gooeyness.
- Provolone cheese (½ cup/60 g, shredded) – Adds depth and a little tang. If you can’t find provolone, substitute with more mozzarella or mild cheddar.
- Pepperoni slices (24 slices, about 2 oz/60 g) – Regular or turkey pepperoni works; quartered if you want smaller bits in each bomb.
- Pizza sauce (⅓ cup/80 ml) – Optional, but I love tucking a little inside each bomb. Use your favorite brand or homemade.
- For the Garlic Butter:
- Unsalted butter (¼ cup/60 g, melted) – Salted works too; just adjust seasoning.
- Garlic powder (1½ teaspoons) – Adds that irresistible garlic kick.
- Italian seasoning (½ teaspoon) – For a herby finish (I use McCormick’s blend).
- Fresh parsley (2 tablespoons, chopped) – For color and a fresh flavor pop. Optional, but worth it!
- Grated Parmesan cheese (2 tablespoons/14 g) – For a salty, savory topping.
- For Serving:
- Extra pizza sauce (for dipping) – Warmed up for extra yum.
Ingredient Tips: If you want to make these cheesy garlic bread pizza bombs gluten-free, swap the biscuit dough for a gluten-free refrigerated dough like Wholly Gluten Free. For dairy-free, use plant-based cheese (Violife is a good one) and vegan butter. You can also use sliced salami or cooked crumbled sausage instead of pepperoni if that’s what you have on hand.
I love using small-curd mozzarella for a more even melt and spreading the pizza sauce thinly so it doesn’t leak. And don’t worry if you’re missing fresh herbs—dried parsley works in a pinch. These ingredients are flexible, so play around with what you love!
Equipment Needed
- Mixing bowl: For combining the cheeses and prepping the garlic butter. Any medium bowl will do.
- Baking sheet or oven-safe skillet: A standard rimmed baking sheet (half-sheet size) works best. You can also use a cast iron skillet for crispier edges—just grease it well.
- Parchment paper: Optional, but makes cleanup easier and prevents sticking. I’ve baked directly on greased sheets too and had good results.
- Pastry brush: For brushing garlic butter on the dough. If you don’t have one, the back of a spoon or clean fingers also work.
- Sharp knife or kitchen shears: For quartering pepperoni or cutting biscuit dough if needed.
- Small spoon: For adding sauce and cheese into each dough piece.
- Measuring cups & spoons: Precise measurements give the best results.
If you don’t have parchment paper, just grease your pan well with butter or oil. I’ve used silicone mats for easy cleanup too. For the mixing bowl, any size that fits your ingredients will work, and you don’t need a fancy pastry brush—seriously, I’ve used my fingers plenty of times!
Keep your baking sheet in good shape by washing it right after use—melted cheese can be stubborn. Budget-wise, store-brand parchment and utensils get the job done. No need for expensive tools here.
Preparation Method
- Preheat the oven: Set your oven to 375°F (190°C). Line a baking sheet with parchment paper or lightly grease it for easy cleanup. (This step takes about 5 minutes.)
- Prepare garlic butter: Melt ¼ cup (60 g) butter in a microwave-safe bowl. Stir in 1½ teaspoons garlic powder, ½ teaspoon Italian seasoning, and half the chopped parsley. Set aside. (2 minutes)
- Mix cheese filling: In a medium bowl, combine 1 cup (120 g) shredded mozzarella and ½ cup (60 g) shredded provolone. Toss in 2 tablespoons (14 g) grated Parmesan if you want extra richness. (2 minutes)
- Portion the dough: Open your biscuit dough tube and separate into 8 pieces (or cut larger biscuits in half for 16 smaller bombs). Flatten each round into a 3-inch (7.5 cm) circle using your hands or a rolling pin. (5 minutes)
- Fill the bombs: Place a scant teaspoon of pizza sauce in the center of each dough circle. Top with 1-2 pepperoni slices and a generous spoonful of the cheese mixture. (Tip: Don’t overfill or they’ll burst while baking!)
- Seal the bombs: Gather the edges of the dough up around the filling and pinch tightly to seal. Roll gently between your palms to form a ball. (If the dough tears, patch it with a little extra dough.) Place seam side down on the baking sheet. (8 minutes)
- Brush with garlic butter: Using your pastry brush (or fingers), coat each bomb with garlic butter. Sprinkle the tops with remaining Parmesan and a pinch of parsley for color. (2 minutes)
- Bake: Place the baking sheet in the oven and bake for 16-20 minutes, or until golden brown and bubbling. (Watch closely after 15 minutes; some ovens run hot and you don’t want burnt bottoms!)
- Cool & serve: Let the pizza bombs cool for 5 minutes before moving to a plate—they’re molten inside! Serve warm with extra pizza sauce for dipping.
Preparation Notes: If your dough feels sticky, dust your hands with a little flour. If cheese leaks out during baking, don’t worry—the crispy bits are delicious! Sometimes, I pop a toothpick in each bomb for easy serving, especially for parties.
Troubleshooting: If the bombs split open, check that your dough is well-sealed and not overfilled. If bottoms brown too fast, move the pan up a rack. And if your cheese doesn’t melt fully, try smaller shreds next time—they melt more evenly.
Personal Tip: I always make a double batch because these go so fast. Prep everything ahead, then assemble and bake right before serving for maximum gooeyness!
Cooking Tips & Techniques
Making cheesy garlic bread pizza bombs isn’t rocket science, but a few tricks turn good into awesome. Here’s what I’ve learned after plenty of kitchen experiments (and some “learning moments”):
- Dough Handling: Don’t stretch the dough too thin or it’ll tear. Thick enough to hold the filling, but not so thick it stays doughy inside.
- Cheese Choice: Use fresh, whole milk mozzarella if you can—it gives you that perfect pizza pull. I tried pre-shredded cheese once and, honestly, it didn’t melt as smoothly.
- Sealing the Bombs: Pinch the seams well and roll gently to seal. If you’re in a hurry (or distracted by a toddler like I was once), you might end up with a cheese explosion, but those crispy bits are a happy accident.
- Butter Brushing: Brush half the garlic butter before baking and the rest right after they come out. It gives you golden color and extra flavor. Don’t skip the finishing brush—it’s the secret!
- Timing the Bake: Check at 15 minutes. If the tops are golden but the bottoms are pale, move the pan down a rack. If you’re baking a double batch, rotate the sheet halfway for even browning.
- Multitasking: While the bombs bake, warm your dipping sauce and set out plates. It makes serving seamless and keeps things hot and fresh.
- Consistency: Use the same amount of filling in every bomb. I use a small cookie scoop for accuracy. It helps everything cook evenly and makes serving a breeze.
One time, I got distracted and let the bombs bake five minutes too long—still delicious, but a little crunchier than planned! If that happens, just serve them with extra sauce for dipping. And if you’re prepping ahead, assemble the bombs and keep them chilled until ready to bake. They come out just as tasty!
Variations & Adaptations
What’s great about these cheesy garlic bread pizza bombs is how easy they are to customize. Whether you’re working around allergies, preferences, or just want something a little different, there’s a version for everyone.
- Vegetarian: Skip the pepperoni and fill with sautéed mushrooms, bell peppers, or spinach. I’ve made a batch loaded with chopped olives and extra cheese—major hit with veggie lovers.
- Gluten-Free: Use a gluten-free biscuit dough or pizza dough (Wholly Gluten Free and Schär are solid choices). The texture is slightly different, but the flavor is still on point.
- Spicy Variation: Add a pinch of red pepper flakes to the cheese mix or use spicy pepperoni. My husband loves it with jalapeño slices tucked inside for a fiery kick.
- Dairy-Free: Use plant-based cheese and vegan butter. Violife mozzarella melts nicely, and Earth Balance is great for the garlic butter.
- Alternative Cooking Methods: Air fryer fans, rejoice! Place the bombs in your air fryer basket (don’t overcrowd) and cook at 350°F (180°C) for 8-10 minutes. The results: super crisp outsides and melty insides.
Personally, I love swapping the pepperoni for cooked crumbled sausage and adding a sprinkle of smoked paprika to the butter. It gives the bombs a smoky, savory edge. You can even make mini bombs using smaller biscuit pieces—perfect for appetizer spreads or lunchboxes!
Don’t be afraid to play around. This cheesy garlic bread pizza bombs recipe is all about mixing, matching, and making it yours!
Serving & Storage Suggestions
For best results, serve these cheesy garlic bread pizza bombs warm, straight from the oven. The cheese is perfectly gooey, and the garlic butter aroma is irresistible. I love piling them onto a big plate with a bowl of pizza sauce for dipping—bonus points if you sprinkle extra parsley or Parmesan on top for color.
These pizza bombs pair well with a crisp salad (think Caesar or simple greens) and ice-cold lemonade or soda. For parties, serve with a platter of veggies and ranch dip—it balances out the richness.
If you have leftovers (rare, but it happens!), store them in an airtight container in the fridge for up to 3 days. To reheat, pop them in a 350°F (180°C) oven for 8-10 minutes, or microwave for 20-30 seconds until warmed through. They freeze surprisingly well: wrap tightly and freeze for up to 2 months. Reheat straight from frozen in the oven—just add a few extra minutes to the bake time.
The flavor deepens after a day in the fridge, and the garlic butter really soaks into the dough. If you like a little crunch, reheat uncovered so the tops crisp up again. Trust me, they’re just as dreamy on day two!
Nutritional Information & Benefits
Each cheesy garlic bread pizza bomb is estimated to have about 160 calories, 8g fat, 14g carbohydrates, and 6g protein. The cheese offers a good punch of calcium and protein, while pepperoni adds a little iron and flavor.
If you use whole milk cheese and turkey pepperoni, you’ll cut down on saturated fat and sodium. For gluten-free or dairy-free versions, adjust the nutrition accordingly. This recipe contains gluten (unless adapted), dairy, and pork (with pepperoni).
From a wellness perspective, I like that these pizza bombs are portion-controlled—perfect for snacking or pairing with a salad for a balanced meal. The homemade garlic butter beats store-bought for flavor, and you can sneak in veggies for extra goodness. Just remember, they’re meant for sharing and enjoying—no guilt, just good times!
Conclusion
If you’ve been chasing the ultimate cheesy garlic bread pizza bombs recipe, this is the one to try. It’s easy, packed with flavor, and guaranteed to spark smiles (and maybe a happy dance or two). Customize it for your family, change up the fillings, or go classic—there’s no wrong way to enjoy these delicious pepperoni snacks.
I make these every time I want comfort food without the fuss. The combo of buttery garlic bread, melty cheese, and savory pepperoni is just unbeatable. Whether you’re feeding a crowd or treating yourself, these pizza bombs deliver satisfaction in every bite.
Give them a go, and let me know how you make them your own! Drop a comment below, share your favorite fillings, or tag me with your pizza bomb creations. Happy snacking, and never underestimate the power of a good cheesy bomb!
FAQs
Can I make cheesy garlic bread pizza bombs ahead of time?
Yes! You can assemble them, cover tightly, and refrigerate for up to 24 hours before baking. Bake straight from the fridge, adding 2-3 extra minutes to the bake time.
What’s the best cheese to use for pizza bombs?
Mozzarella is classic for stretch and melt, but provolone and cheddar work well too. Mix and match for your favorite flavor combo.
Can I freeze pizza bombs?
Absolutely. After baking, let cool, then wrap tightly and freeze for up to 2 months. Reheat in the oven at 350°F (180°C) until hot and crispy.
Are these pizza bombs gluten-free?
Not as written, but you can use gluten-free biscuit or pizza dough for a GF version. Adjust baking time as needed.
How do I keep the cheese from leaking out?
Make sure to pinch the dough edges tightly and avoid overfilling. A thicker dough helps seal in the cheese better.
PrintCheesy Garlic Bread Pizza Bombs

These Cheesy Garlic Bread Pizza Bombs combine the best of pizza and garlic bread in a bite-sized, pull-apart snack loaded with gooey cheese and spicy pepperoni. Perfect for parties, game nights, or family movie nights, they’re quick, easy, and always a crowd-pleaser.
- Prep Time: 15 minutes
- Cook Time: 20 minutes
- Total Time: 35 minutes
- Yield: 8-16 pizza bombs (serves 4-8 as a snack or appetizer) 1x
- Category: Appetizer
- Cuisine: American
Ingredients
- 1 (16 oz) tube refrigerated biscuit dough (homestyle or buttermilk)
- 1 cup shredded mozzarella cheese
- 1/2 cup shredded provolone cheese
- 24 slices pepperoni (about 2 oz), quartered if desired
- 1/3 cup pizza sauce (plus more for serving)
- 1/4 cup unsalted butter, melted
- 1 1/2 teaspoons garlic powder
- 1/2 teaspoon Italian seasoning
- 2 tablespoons fresh parsley, chopped (optional)
- 2 tablespoons grated Parmesan cheese
- Extra pizza sauce, for dipping
Instructions
- Preheat oven to 375°F (190°C). Line a baking sheet with parchment paper or lightly grease it.
- Melt butter in a microwave-safe bowl. Stir in garlic powder, Italian seasoning, and half the chopped parsley. Set aside.
- In a medium bowl, combine mozzarella, provolone, and 2 tablespoons Parmesan cheese.
- Open biscuit dough and separate into 8 pieces (or cut larger biscuits in half for 16 smaller bombs). Flatten each round into a 3-inch circle.
- Place a scant teaspoon of pizza sauce in the center of each dough circle. Top with 1-2 pepperoni slices and a generous spoonful of the cheese mixture.
- Gather the edges of the dough around the filling and pinch tightly to seal. Roll gently to form a ball. Place seam side down on the baking sheet.
- Brush each bomb with garlic butter. Sprinkle tops with remaining Parmesan and a pinch of parsley.
- Bake for 16-20 minutes, or until golden brown and bubbling. Watch closely after 15 minutes.
- Let cool for 5 minutes before serving. Serve warm with extra pizza sauce for dipping.
Notes
For gluten-free, use gluten-free biscuit dough. For dairy-free, use plant-based cheese and vegan butter. Don’t overfill the bombs to prevent bursting. Brush with garlic butter before and after baking for extra flavor. Air fryer option: cook at 350°F for 8-10 minutes. Store leftovers in an airtight container in the fridge for up to 3 days or freeze for up to 2 months.
Nutrition
- Serving Size: 1 pizza bomb
- Calories: 160
- Sugar: 2
- Sodium: 350
- Fat: 8
- Saturated Fat: 4
- Carbohydrates: 14
- Fiber: 1
- Protein: 6
Keywords: cheesy garlic bread, pizza bombs, pepperoni snack, easy appetizer, party food, kid-friendly, pull-apart bread, game day snack


