
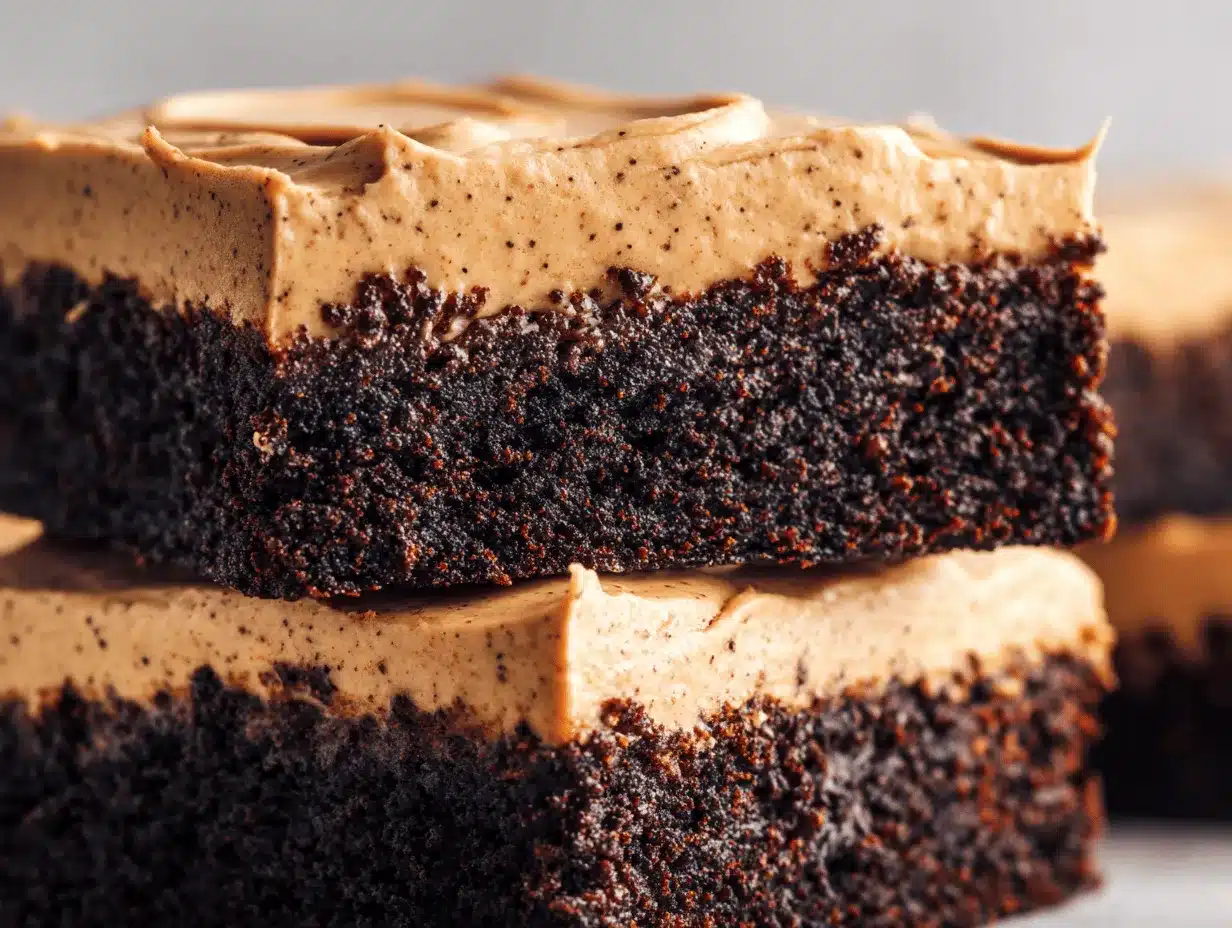
The first bite is a revelation—rich, chewy brownie, a jolt of real coffee, and a velvety frosting that makes you go, “Wait, why haven’t I made these before?” These frosted coffee brownies are the dessert bars I turn to when I want something that feels both nostalgic and a little bit grown-up. I first whipped up this recipe on a chilly Saturday when I was craving something chocolatey but had half a cup of strong coffee left from my morning brew. What started as an experiment quickly turned into a family favorite—now, I’m practically required to bring these to every get-together!
Let’s face it: brownies are already a crowd-pleaser, but infusing them with coffee takes things to a whole new level. The coffee deepens the chocolate flavor, giving the brownies a complex, almost mocha-like richness. And don’t even get me started on the frosting! It’s creamy, just sweet enough, and carries a subtle coffee kick that leaves everyone reaching for seconds (and thirds). As someone who’s tested more brownie recipes than I care to admit, I can say these are the ones that get requested most often—by friends, family, and even my picky neighbor down the street.
If you love classic brownies but want something a little “extra,” these frosted coffee brownies are for you. They’re perfect for busy parents, college students needing a study break snack, or anyone who thinks coffee and chocolate are a match made in dessert heaven. Honestly, after making these at least a dozen times (with a few tweaks along the way), I can promise you: this recipe is reliable, easy, and absolutely unforgettable. Let’s get baking—you’re going to love every crumb!
Why You’ll Love This Recipe
- Quick & Easy: You don’t need fancy skills or equipment—these frosted coffee brownies come together in under an hour, so you can whip them up for last-minute cravings or special occasions without breaking a sweat.
- Simple Ingredients: The recipe uses pantry staples like cocoa powder, flour, and eggs. No obscure items or multiple grocery trips required (you probably have everything already!).
- Perfect for Any Occasion: Whether you’re making dessert for a cozy family dinner, a bake sale, or a holiday brunch, these brownies fit the bill. They dress up beautifully for celebrations but are also low-maintenance enough for everyday snacking.
- Crowd-Pleaser: Kids love the chocolatey goodness, adults appreciate the coffee depth, and everyone fights over the last piece. I’ve never brought home leftovers.
- Unbelievably Delicious: The combination of fudgy brownie, real brewed coffee, and creamy frosting is pure comfort food. Every bite is rich, moist, and just the right amount of sweet.
What really sets these apart? A couple of things. First, I blend in cooled, strong coffee right into the batter, which intensifies the chocolate and adds that “something special” you can’t quite put your finger on. Then, I top it with a luscious coffee-infused frosting—no dry, crumbly brownies here! You get a moist, decadent bar that tastes like a bakery treat but is totally doable at home. Over years of baking (and more than a few failed batches), I’ve found this technique gives you the perfect texture: dense but not heavy, glossy on top, and never dry.
I honestly think these brownies are the kind you remember long after the last bite—from the aroma in your kitchen to that moment when the frosting melts on your tongue. They’re not just dessert—they’re a memory-maker. You don’t need to be a professional baker to get great results, and you can make them your own with simple tweaks. If you’re looking for an easy, best-ever dessert bar, these frosted coffee brownies will not disappoint!
What Ingredients You Will Need
This recipe brings together simple, trusty ingredients to deliver bold chocolate and coffee flavors with minimal fuss. Most of what you need is probably already in your kitchen, but I’ll walk you through my favorite brands and a few tips for substitution success.
- For the Brownies:
- Unsalted butter, melted (1/2 cup / 115g) – Adds richness and keeps the brownies moist. I love using Kerrygold for extra flavor.
- Granulated sugar (1 cup / 200g) – Classic sweetness and helps create that shiny, crinkly top.
- Brown sugar (1/4 cup / 50g) – Adds a hint of caramel flavor and extra chewiness.
- Large eggs (2, room temperature) – Bind everything together and give structure.
- Vanilla extract (2 tsp / 10ml) – Don’t skip this; it rounds out all the flavors. Nielsen-Massey is my go-to.
- Strong brewed coffee, cooled (1/4 cup / 60ml) – This is where the magic happens! Use your favorite dark roast. Decaf works, too.
- All-purpose flour (3/4 cup / 95g) – Keeps the brownies tender but sturdy enough to hold up under frosting.
- Unsweetened cocoa powder (1/2 cup / 50g) – Dutch-process or natural both work, but I prefer Ghirardelli or Hershey’s Special Dark for an intense chocolate flavor.
- Salt (1/2 tsp / 3g) – Balances the sweetness and makes all the other flavors pop.
- Chocolate chips (1/2 cup / 85g, optional) – For extra gooey chocolate pockets. Totally optional, but highly recommended!
- For the Coffee Frosting:
- Unsalted butter, softened (1/4 cup / 55g) – The base of your creamy frosting.
- Powdered sugar (1 1/2 cups / 180g) – Sifts in easily for a lump-free finish.
- Strong brewed coffee, cooled (2 tbsp / 30ml) – Use what’s left from the brownie batter for a consistent flavor.
- Vanilla extract (1/2 tsp / 2.5ml) – Adds warmth and rounds out the coffee notes.
- Pinch of salt – Just a touch to keep the sweetness balanced.
Substitution Tips:
- Gluten-Free: Swap the all-purpose flour for a 1:1 gluten-free baking blend—Bob’s Red Mill makes a reliable one.
- Dairy-Free: Use a plant-based butter and double-check your chocolate chips (Enjoy Life is my favorite dairy-free brand).
- Egg-Free: Try two flax eggs (2 tbsp ground flaxseed + 5 tbsp water, mixed and rested for 5 minutes) if you’re out of eggs or baking for someone with allergies.
- No coffee? Substitute with milk or a non-dairy alternative for a classic brownie, or use espresso powder dissolved in water.
In summer, I sometimes stir in chopped nuts or top the finished bars with a sprinkle of flaky sea salt. You can also double the frosting if you’re feeling extra indulgent (I won’t judge!).
Equipment Needed
- 8×8-inch (20x20cm) baking pan: The ideal size for thick, chewy brownies. If you only have a 9×9 pan, reduce baking time a little.
- Parchment paper: Makes it so much easier to lift the brownies out for neat slicing. If you’re out, a good greasing with butter works in a pinch.
- Mixing bowls: One large for the batter, one medium for the frosting.
- Whisk and spatula: A whisk for combining wet and dry ingredients, and a spatula for scraping every last bit of batter.
- Hand mixer or stand mixer: Optional, but super handy for whipping up a fluffy frosting. You can use a sturdy whisk and some elbow grease if you’re feeling old-school.
- Measuring cups and spoons: Accuracy is key for brownies, so level off your flour and cocoa powder.
- Wire cooling rack: For cooling the brownies evenly (but I’ll admit I sometimes skip this when I’m impatient).
- Sharp knife: For those clean, Pinterest-worthy slices.
If you’re just starting out, don’t feel like you need the fanciest gadgets. I’ve made these with nothing but a bowl, spoon, and a lot of determination, and they turned out just fine! For maintenance, keep your mixer attachments clean and dry, and line your pan to protect it from sticky batter. I’ve even used thrifted pans with great results—brownies are forgiving like that.
How to Make Frosted Coffee Brownies
-
Prep your pan: Line an 8×8-inch (20x20cm) baking pan with parchment paper, leaving an overhang for easy removal. Lightly grease the sides. Preheat your oven to 350°F (175°C).
Note: This helps prevent sticking and gives you perfect brownie edges for frosting later. -
Melt the butter: In a large microwave-safe bowl, melt 1/2 cup (115g) unsalted butter. Let it cool for 2-3 minutes—you want it warm, not hot.
Tip: If the butter is too hot, it can scramble the eggs in the next step! -
Mix sugars and eggs: Whisk 1 cup (200g) granulated sugar and 1/4 cup (50g) brown sugar into the melted butter. Add 2 large eggs (room temperature) and 2 tsp (10ml) vanilla extract. Whisk until smooth and slightly lighter in color, about 1-2 minutes.
Look for a glossy, thick texture—this gives your brownies that signature chew. -
Add the coffee: Pour in 1/4 cup (60ml) strong brewed coffee (cooled). Whisk until fully combined.
The batter should smell rich and inviting—like the best mocha you’ve ever had. -
Sift in dry ingredients: Sift in 3/4 cup (95g) all-purpose flour, 1/2 cup (50g) unsweetened cocoa powder, and 1/2 tsp (3g) salt. Fold together gently with a spatula until just combined (don’t overmix).
Batter will be thick and fudgy. Overmixing leads to tough brownies—so stop as soon as you don’t see streaks of flour. -
Stir in chocolate chips: Fold in 1/2 cup (85g) chocolate chips, if using.
They’ll melt into gooey pockets after baking—my favorite part! -
Bake: Spread batter evenly in the prepared pan. Bake for 25–30 minutes, or until a toothpick inserted in the center comes out with a few moist crumbs (not wet batter).
If your oven runs hot, start checking at 23 minutes. Brownies keep cooking a bit as they cool. -
Cool completely: Set the pan on a wire rack and let brownies cool completely before frosting—about 1 hour. (If you’re impatient, pop them in the fridge after 20 minutes.)
Frosting will melt if brownies are still warm. Trust me, I’ve rushed and regretted it. -
Make the frosting: In a medium bowl, beat 1/4 cup (55g) softened butter until creamy. Gradually add 1 1/2 cups (180g) powdered sugar, 2 tbsp (30ml) cooled brewed coffee, 1/2 tsp (2.5ml) vanilla, and a pinch of salt. Beat until smooth and fluffy—about 2 minutes.
If too thick, add a splash of coffee; if too thin, add more powdered sugar. -
Frost and slice: Spread frosting evenly over cooled brownies. Lift brownies out of the pan using parchment handles, and slice into 16 bars for classic servings (or 9 for jumbo squares).
For picture-perfect edges, wipe your knife between cuts!
Personal tip: I sometimes sprinkle a little cocoa powder or instant espresso on top for extra flair. If something goes wrong, like overbaked edges, just trim them off and enjoy the gooey centers—you know, the best part!
Cooking Tips & Techniques
Over the years, I’ve found a few tricks that make these frosted coffee brownies truly foolproof. Here are my best tips so you get perfect results every time:
- Don’t Overbake: The biggest mistake is baking until the center looks dry—brownies set as they cool. Pull them out when the middle is just barely set and a toothpick comes out with a few damp crumbs. If you wait for a clean toothpick, they’ll be dry.
- Use Good Coffee: Brew it strong! The better your coffee, the deeper the chocolate flavor. Leftover morning coffee works, but I’ve even used espresso for an extra jolt—just reduce the amount to avoid overpowering.
- Cool Before Frosting: I’ve rushed this before and ended up with frosting that slid right off. Patience pays off—wait until brownies are fully cool for the best texture and looks.
- Level the Batter: Use a spatula to smooth the top before baking. This gives you a uniform surface for frosting (and prettier photos, if you’re into that!).
- Room Temperature Ingredients: This helps everything mix smoothly and prevents curdling. If you forget to take out the eggs, let them sit in warm water for 10 minutes.
I’ve made the mistake of using hot coffee straight from the pot—don’t! It can melt your butter or scramble the eggs, giving your batter a weird texture. Multitasking is your friend: while brownies bake, make your frosting and clean up, so you’re ready to go when they’re cool. For consistent results, stick to the recipe the first time, then play around with tweaks once you’re comfortable.
Variations & Adaptations
One of the best things about frosted coffee brownies is how easy they are to customize. Here are some fun ideas to try:
- Mocha Swirl: Drop spoonfuls of sweetened cream cheese on top of brownie batter before baking, and swirl with a knife for a cheesecake twist. It’s amazing (and looks fancy with barely any effort)!
- Vegan Version: Use vegan butter and flax eggs, plus dairy-free chocolate chips. Swap coffee with a non-dairy milk for the frosting, and you’ve got a plant-based treat the whole gang can enjoy.
- Nutty Espresso: Stir in 1/2 cup (60g) chopped walnuts or pecans to the batter for crunch and extra richness. I especially love this around the holidays—it feels a bit more festive.
- Holiday Spice: Add 1/2 tsp cinnamon and a pinch of cardamom to the batter for a cozy, spiced flavor that pairs beautifully with coffee.
- Allergen Substitutions: For nut allergies, skip the add-ins and double-check your chocolate chips. For gluten-free, use a 1:1 baking blend—just keep an eye on baking time, as they may bake a little faster.
Personally, my favorite tweak is to add a splash of Kahlúa or coffee liqueur to the frosting for an adults-only version. Just a little goes a long way! You can also bake these in a 9×13 pan for thinner brownies—reduce baking time to about 20-22 minutes. Play around and find your perfect combo!
Serving & Storage Suggestions
I love serving these frosted coffee brownies slightly chilled—the frosting sets up perfectly, and the flavors meld beautifully. For a fun presentation, dust with cocoa powder or instant espresso, or top with chocolate curls for a bit of drama.
- Pairings: Serve with a hot cup of coffee, a glass of cold milk, or even a scoop of vanilla ice cream for a decadent dessert. They also make a great addition to brunch buffets or dessert platters.
- Storage: Store brownies in an airtight container at room temperature for up to 2 days, or in the fridge for up to 5 days. The frosting stays creamy, and the brownies don’t dry out.
- Freezing: These freeze surprisingly well! Slice and wrap individual bars in plastic wrap, then store in a freezer bag for up to 2 months. Thaw overnight in the fridge or at room temperature for a quick treat.
- Reheating: If you like your brownies warm, zap them in the microwave on low for 10–15 seconds (just be careful not to melt the frosting completely).
Honestly, the flavor gets even better after a day—the coffee and chocolate have time to mingle, and the frosting stays dreamy. If you’re making them ahead for a party, you’re in luck!
Nutritional Information & Benefits
Let’s be real—these frosted coffee brownies are a sweet treat, but you can still feel good about what’s inside. Here’s the lowdown for one bar (1 of 16):
- Calories: ~210
- Fat: 9g (mainly from butter—richness and flavor!)
- Carbohydrates: 32g
- Protein: 2g
- Sugar: 22g
Key Benefits: The antioxidants in cocoa and coffee offer a little wellness boost (plus, they make you happy!). This recipe is easily adaptable for gluten-free or dairy-free diets, and you can lighten it up by using less frosting or swapping in a sugar substitute if needed. Keep in mind, eggs and dairy are present, so watch out for allergies—I always label these when sharing at events.
Personally, I see these as an occasional treat that brings a little joy—and sometimes, that’s the best nutritional benefit of all.
Conclusion
There’s a reason these frosted coffee brownies are my most-requested dessert—they’re easy, delicious, and just a bit out of the ordinary. The coffee brings out the best in the chocolate, and the creamy frosting is pure magic. Whether you’re a coffee lover or just a brownie fan, this recipe is the ultimate sweet treat that never disappoints.
I hope you give these a try and make them your own! Swap in your favorite add-ins, play with the frosting, or double the batch for a party—there’s no wrong way to enjoy them. Personally, I love how these brownies always bring people together (and spark a few recipe requests!).
If you make these, let me know in the comments how they turned out, or snap a photo and tag me—I’d love to see your creations! Happy baking, friends—here’s to many moments of chocolatey, coffee-kissed bliss.
Frequently Asked Questions
Can I make these frosted coffee brownies without coffee?
Absolutely! Just swap the coffee in both the batter and frosting for milk or a non-dairy alternative. You’ll still get rich, chocolatey brownies—just without the coffee kick.
How do I get clean slices for serving?
Let the brownies cool completely, then use a sharp knife wiped clean between each cut. For extra neat edges, chill the brownies in the fridge before slicing.
Can I double this recipe for a bigger crowd?
Yes—just bake in a 9×13-inch pan and increase the baking time to 30–35 minutes. Check for doneness at the 30-minute mark to avoid overbaking.
What’s the best way to store frosted brownies?
Store them in an airtight container at room temperature for up to 2 days or refrigerate for up to 5 days. For longer storage, freeze individual bars and thaw as needed.
Can I use espresso powder instead of brewed coffee?
Definitely! Dissolve 1–2 tsp espresso powder in 1/4 cup hot water to use in the batter, and use the same trick for the frosting. You’ll get an even more intense coffee flavor!
Pin This Recipe!
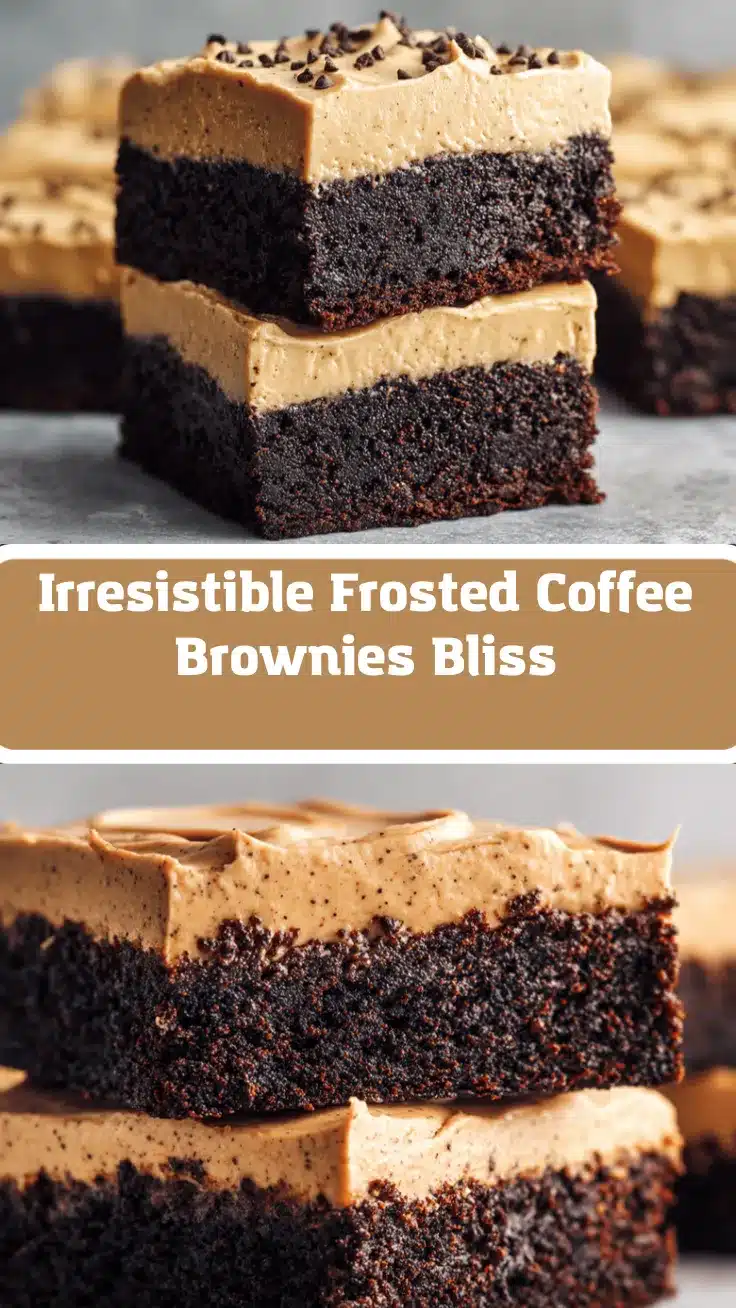
Frosted Coffee Brownies
These frosted coffee brownies are rich, chewy, and infused with real coffee for a mocha-like depth, topped with a creamy coffee frosting. Perfect for any occasion, they’re easy to make and guaranteed to be a crowd-pleaser.
- Prep Time: 20 minutes
- Cook Time: 25 minutes
- Total Time: 1 hour 20 minutes
- Yield: 16 bars 1x
- Category: Dessert
- Cuisine: American
Ingredients
- 1/2 cup (115g) unsalted butter, melted
- 1 cup (200g) granulated sugar
- 1/4 cup (50g) brown sugar
- 2 large eggs, room temperature
- 2 teaspoons vanilla extract
- 1/4 cup (60ml) strong brewed coffee, cooled
- 3/4 cup (95g) all-purpose flour
- 1/2 cup (50g) unsweetened cocoa powder
- 1/2 teaspoon salt
- 1/2 cup (85g) chocolate chips (optional)
- For the Coffee Frosting:
- 1/4 cup (55g) unsalted butter, softened
- 1 1/2 cups (180g) powdered sugar
- 2 tablespoons (30ml) strong brewed coffee, cooled
- 1/2 teaspoon vanilla extract
- Pinch of salt
Instructions
- Line an 8×8-inch (20x20cm) baking pan with parchment paper, leaving an overhang for easy removal. Lightly grease the sides. Preheat oven to 350°F (175°C).
- In a large microwave-safe bowl, melt 1/2 cup unsalted butter. Let cool for 2-3 minutes.
- Whisk in 1 cup granulated sugar and 1/4 cup brown sugar. Add 2 large eggs and 2 teaspoons vanilla extract. Whisk until smooth and slightly lighter in color, about 1-2 minutes.
- Pour in 1/4 cup strong brewed coffee (cooled) and whisk until fully combined.
- Sift in 3/4 cup all-purpose flour, 1/2 cup unsweetened cocoa powder, and 1/2 teaspoon salt. Fold together gently with a spatula until just combined.
- Fold in 1/2 cup chocolate chips, if using.
- Spread batter evenly in the prepared pan. Bake for 25–30 minutes, or until a toothpick inserted in the center comes out with a few moist crumbs.
- Set the pan on a wire rack and let brownies cool completely before frosting—about 1 hour.
- For the frosting: In a medium bowl, beat 1/4 cup softened butter until creamy. Gradually add 1 1/2 cups powdered sugar, 2 tablespoons cooled brewed coffee, 1/2 teaspoon vanilla, and a pinch of salt. Beat until smooth and fluffy—about 2 minutes.
- Spread frosting evenly over cooled brownies. Lift brownies out of the pan using parchment handles, and slice into 16 bars.
Notes
For gluten-free brownies, use a 1:1 gluten-free flour blend. For dairy-free, use plant-based butter and dairy-free chocolate chips. Let brownies cool completely before frosting for best results. Store in an airtight container at room temperature for up to 2 days or refrigerate for up to 5 days. Brownies freeze well for up to 2 months.
Nutrition
- Serving Size: 1 bar (1/16 of recipe)
- Calories: 210
- Sugar: 22
- Sodium: 90
- Fat: 9
- Saturated Fat: 5
- Carbohydrates: 32
- Fiber: 2
- Protein: 2
Keywords: coffee brownies, frosted brownies, mocha brownies, easy dessert bars, chocolate coffee dessert, homemade brownies, coffee frosting, best brownies, party dessert, chocolate bars


