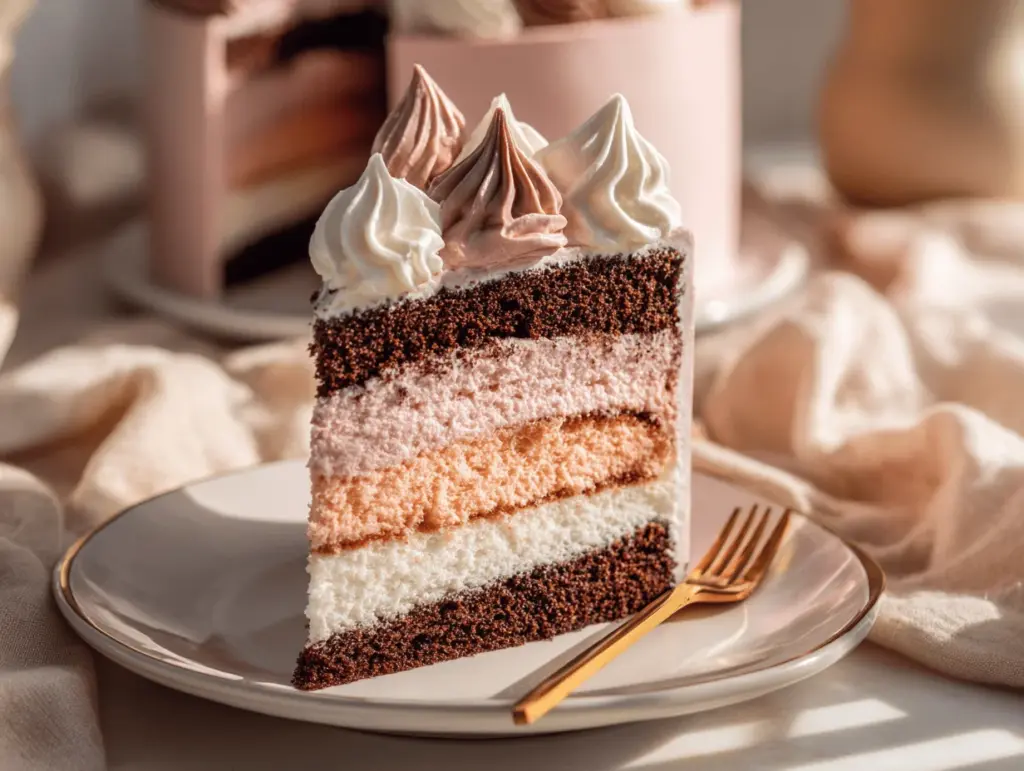
Three layers, three colors, and honestly, three times the fun—this Neapolitan cake recipe is like a party in every slice. I can still remember the first time I sliced into a homemade Neapolitan cake: the pink, brown, and white stripes looked almost too pretty to eat (almost being the key word here). The combination of chocolate, strawberry, and vanilla flavors just brings back those classic ice cream parlor vibes—except in cake form, it’s somehow even more special.
Maybe you grew up loving Neapolitan ice cream, or maybe, like me, you just can’t resist a dessert that looks as good as it tastes. Either way, this Neapolitan cake recipe is about to become your new go-to for birthdays, anniversaries, or any celebration that deserves a little extra flair. I’ve tested this cake for family birthdays and even a baby shower, and every single time, it gets those “wow” reactions before anyone’s even taken a bite. The best part? It’s surprisingly easy for how fancy it turns out—no professional cake decorating skills required.
If you’re looking for a cake that’s big on nostalgia but also feels modern and elegant, this one definitely fits the bill. The layers bake up beautifully, the flavors are perfectly balanced, and the buttercream ties everything together. Whether you’re a seasoned baker or just taking your first crack at layer cakes, this Neapolitan cake recipe is forgiving, stunning, and always crowd-pleasing. Let’s just say: if you bring this to the table, don’t expect leftovers.
Why You’ll Love This Neapolitan Cake Recipe
Whenever I bake this Neapolitan cake, I know I’m in for a treat—and so are my guests. If you’re still on the fence, here are just a few reasons why this recipe stands out among all the layer cakes out there:
- Quick & Easy: You can prep all three cake layers without cleaning the bowl in between—seriously, it’s a time-saver. The batter comes together in under 20 minutes, and assembly is surprisingly simple, even if you’re new to layered cakes.
- Simple Ingredients: No hard-to-find items here. Most of what you need is already in your pantry or fridge, and you can use regular grocery store brands without sacrificing flavor.
- Perfect for Special Occasions: This cake just screams celebration. It’s a classic pick for birthdays, family gatherings, bridal showers, or anytime you want to impress without stress.
- Crowd-Pleaser: There’s a flavor for everyone—chocolate, strawberry, and vanilla all in one! I’ve never met a kid (or adult) who said “no” to a slice of this cake.
- Unbelievably Delicious: The layers stay moist, the flavors are balanced, and the buttercream is silky-smooth. Each bite is a symphony of classic tastes—comforting, but with a touch of elegance.
What really sets my Neapolitan cake recipe apart is the method: I’ve streamlined the process so you don’t need three separate batters. You start with one base, then divide and flavor—it’s way less intimidating than it looks! Plus, I add a touch of sour cream for extra moistness, and I always use freeze-dried strawberries for a vibrant, real strawberry flavor without any artificial aftertaste.
This recipe is the definition of “effortless wow.” It’s the kind of dessert that makes even everyday moments feel special, and it’s forgiving enough that you can experiment with flavor swaps or decorations. Honestly, it’s the cake I wish I’d had at every birthday growing up—and now, I’m making up for lost time.
What Ingredients You Will Need
This Neapolitan cake recipe uses a handful of familiar ingredients, but each one plays a key role in achieving those classic layers and flavors. Here’s what you’ll need to whip up this showstopper:
- For the Cake Batter:
- 2 ½ cups (315g) all-purpose flour
- 2 teaspoons baking powder
- ½ teaspoon baking soda
- ½ teaspoon salt
- 1 cup (225g) unsalted butter, room temperature (adds richness and helps create a tender crumb)
- 1 ½ cups (300g) granulated sugar
- 4 large eggs, room temperature
- 2 teaspoons vanilla extract (for pure vanilla flavor that stands out)
- 1 cup (240ml) whole milk, room temperature
- ½ cup (120g) sour cream, room temperature (makes the cake extra moist and soft—don’t skip!)
- For the Chocolate Layer:
- ¼ cup (25g) unsweetened cocoa powder (Dutch-process or natural; I personally love Ghirardelli for the deep chocolate flavor)
- 2 tablespoons (30ml) milk
- For the Strawberry Layer:
- ½ cup (7g) freeze-dried strawberries, ground into powder (use a food processor or crush in a zip-top bag)
- 2-3 drops pink or red gel food coloring (optional, just for that classic Neapolitan look)
- For the Vanilla Buttercream:
- 1 ½ cups (340g) unsalted butter, room temperature
- 5 cups (600g) powdered sugar, sifted
- 2 teaspoons vanilla extract
- ¼ cup (60ml) milk or heavy cream (adjust for desired consistency)
- Pinch of salt
- Optional Garnishes:
- Chocolate shavings or mini chips
- Fresh strawberries, sliced
- Sprinkles (because why not?)
Ingredient Notes & Substitutions:
- If you need a gluten-free cake, swap the all-purpose flour for a 1:1 gluten-free blend (I’ve had good results with King Arthur’s blend).
- Dairy-free? Use vegan butter and plant-based milk—just make sure both are unsweetened.
- If you don’t have freeze-dried strawberries, you can use 2 tablespoons strawberry jam, but the flavor and color won’t be as vibrant.
- No sour cream? Full-fat Greek yogurt works in a pinch.
- The cocoa powder can be Dutch-process or natural; the Dutch-process gives a slightly richer taste.
It’s always worth using room temperature ingredients—they blend better and make for a fluffier cake. Trust me, I’ve learned the hard way that cold eggs make the batter lumpy!
Equipment Needed
You don’t need a professional kitchen to pull off this Neapolitan cake recipe. Here’s what you’ll need (and what you can swap in if you’re missing anything):
- Three 8-inch (20cm) cake pans (You can use 9-inch pans, but your layers will be thinner. If you only have two pans, bake in batches and reuse once cooled.)
- Parchment paper circles (Highly recommended for easy removal—nothing sadder than a stuck cake layer.)
- Stand mixer or hand mixer (A stand mixer makes quick work of the batter and buttercream, but a hand mixer works just fine. I’ve made this cake plenty of times with a $20 hand mixer.)
- Mixing bowls (At least two, so you can divide the batter easily.)
- Measuring cups and spoons
- Rubber spatula and wooden spoon
- Offset spatula or butter knife (For smoothing the buttercream—if you don’t have one, the back of a spoon works in a pinch.)
- Wire cooling racks
- Food processor or blender (For grinding freeze-dried strawberries. If you don’t have one, a rolling pin and a zip-top bag work too—just takes a bit more elbow grease!)
Quick tip: To keep your pans in good shape, always hand wash and dry them thoroughly. If you use non-stick pans, avoid metal utensils—trust me, a scratched pan leads to more stuck cakes and uneven bakes down the road.
Preparation Method
- Preheat and Prep: Preheat your oven to 350°F (175°C). Grease three 8-inch (20cm) cake pans and line the bottoms with parchment rounds. Lightly dust with flour, tapping out the excess. (Trust me, this extra step saves you from cake disasters.)
- Mix Dry Ingredients: In a medium bowl, whisk together 2 ½ cups (315g) all-purpose flour, 2 teaspoons baking powder, ½ teaspoon baking soda, and ½ teaspoon salt. Set aside.
- Cream Butter and Sugar: In a large bowl or stand mixer, beat 1 cup (225g) unsalted butter and 1 ½ cups (300g) sugar on medium speed until light and fluffy, about 3-4 minutes. It should look pale and airy—don’t rush this step!
- Add Eggs and Vanilla: Add 4 large eggs, one at a time, beating well after each addition. Scrape down the sides as needed. Mix in 2 teaspoons vanilla extract.
- Combine Wet Ingredients: In a measuring cup, whisk together 1 cup (240ml) milk and ½ cup (120g) sour cream.
- Alternate Wet and Dry: With the mixer on low, add the dry ingredients in three additions, alternating with the milk/sour cream mixture. Begin and end with dry ingredients. Mix until just combined—don’t overmix, or your cake may turn out dense.
- Divide the Batter: Evenly divide the batter into three bowls (about 2 cups or 400g per bowl).
- Flavor the Layers:
- Chocolate: Stir ¼ cup (25g) cocoa powder and 2 tablespoons (30ml) milk into one bowl. Mix until smooth and fully combined.
- Strawberry: Stir in ½ cup (7g) freeze-dried strawberry powder and a few drops of pink/red gel coloring (if using) into the second bowl. Mix until the color is even—add more powder or color for a deeper hue.
- Vanilla: Leave the third bowl as-is for the classic vanilla layer.
- Bake: Pour each batter into its prepared pan. Smooth the tops with a spatula. Bake for 22–26 minutes, rotating pans halfway through. The cakes are done when a toothpick inserted in the center comes out clean, or with just a few moist crumbs.
- Cool: Let cakes cool in the pans for 10 minutes. Run a knife around the edge, then carefully invert onto wire racks. Peel off the parchment and let cool completely (at least 1 hour—don’t rush or your buttercream will melt).
- Make the Buttercream: In a stand mixer, beat 1 ½ cups (340g) unsalted butter until creamy, about 2 minutes. Gradually add 5 cups (600g) sifted powdered sugar, 2 teaspoons vanilla, and a pinch of salt. Slowly beat in ¼ cup (60ml) milk or cream, a tablespoon at a time, until it’s fluffy but spreadable. If it’s too thick, add a splash more milk; if too thin, add a bit more sugar.
- Assemble the Cake: Place the chocolate layer on a serving plate. Top with ¾ cup buttercream, spreading evenly. Add the strawberry layer, repeat with buttercream, then finish with the vanilla layer. Spread a thin coat (crumb coat) over the entire cake and chill for 20 minutes.
- Final Frosting and Decorate: Use the remaining buttercream to frost the cake smoothly. Decorate with chocolate shavings, fresh strawberries, or sprinkles as desired. (Don’t stress about perfection—imperfections just mean it’s homemade!)
Troubleshooting: If your cakes dome, trim the tops with a serrated knife for even stacking. If your buttercream looks curdled, keep beating—it usually comes together with a bit more time. And don’t worry if your layers aren’t perfectly even; once sliced, it still looks gorgeous.
Cooking Tips & Techniques
Layer cakes can seem intimidating, but after baking dozens, I’ve picked up a few tricks (and learned from more than a few mistakes):
- Room Temperature Ingredients: Always use room temp butter, eggs, and milk. Cold ingredients don’t blend properly and can lead to dense or uneven layers. (Once, I forgot to warm the eggs—my chocolate layer turned out oddly flat. Lesson learned!)
- Measuring Flour: Spoon your flour into the measuring cup and level off with a knife. Scooping packs it down and makes the cake heavy.
- Don’t Overmix: Stop mixing as soon as the batter is smooth, especially after adding flour. Overmixing develops gluten, which makes the cake tough rather than tender.
- Even Batter Distribution: If you want perfectly even layers, weigh your bowls of batter on a kitchen scale. I didn’t do this the first time and ended up with a monster chocolate layer and a skimpy vanilla one!
- Leveling Layers: Use a serrated knife to gently level off domed cakes. Save the scraps for snacking or cake pops.
- Crumb Coat: A thin layer of buttercream locks in crumbs and makes the final coating neater. Chill for 20 minutes before the final frosting.
- Slicing the Cake: Dip your knife in hot water and wipe between slices for those clean, photo-worthy cuts.
- Multitasking: While the cakes cool, whip up the buttercream and prep your garnishes. This saves time and keeps things moving smoothly.
Consistency comes from practice, but these little habits make all the difference. And remember, even if your cake looks rustic, it’s still going to taste amazing!
Variations & Adaptations
One of the best things about this Neapolitan cake recipe is how flexible it is. Here are some fun ways to mix it up and make it your own:
- Gluten-Free Version: Swap the all-purpose flour for a gluten-free 1:1 blend. I’ve tried this with Cup4Cup and it still bakes up beautifully—just keep an eye on baking time as it may be a few minutes shorter.
- Dairy-Free Twist: Use plant-based butter, dairy-free milk, and coconut yogurt instead of sour cream. The flavors hold up, and the cake stays moist (I’ve made this for a friend with dairy allergies, and it disappeared just as fast as the original!).
- Seasonal Flavors: In spring, try swapping the strawberry layer for raspberry or even blueberry powder. For fall, add a touch of cinnamon or espresso powder to the chocolate layer for a cozy twist.
- Frosting Fun: Instead of classic vanilla buttercream, use cream cheese frosting or even a light whipped chocolate ganache for a richer finish.
- Allergen Swaps: For egg-free, use flax eggs (1 tablespoon ground flaxseed + 3 tablespoons water per egg) and reduce baking time by a couple minutes.
- Personal Favorite: I once layered in a thin spread of strawberry jam between the cake and buttercream for extra berry flavor—highly recommend if you’re a fruit lover!
Don’t be afraid to play around—this cake is forgiving, and you can easily adapt it to suit dietary needs or personal cravings.
Serving & Storage Suggestions
I love serving this Neapolitan cake slightly chilled—the layers hold together better, and the flavors really pop. Slice with a sharp, hot knife for the prettiest presentation, and garnish with a few fresh strawberries or chocolate curls on top for that wow factor.
This cake pairs beautifully with a glass of milk, a mug of coffee, or even a scoop of vanilla ice cream if you’re feeling extra indulgent. For brunch, it’s lovely with a pot of herbal tea or a mimosa.
Storage: Store leftovers in an airtight container at room temperature for 1 day, or refrigerate for up to 5 days. If you want to make it ahead, the cake layers freeze well—just wrap tightly in plastic and foil for up to 2 months. Thaw at room temp before assembling and frosting.
Pro tip: The flavors actually meld and deepen after a day in the fridge, so it’s a great make-ahead dessert for parties and holidays!
Nutritional Information & Benefits
Let’s be honest: this Neapolitan cake recipe is a treat, not a health food. But it does have a few redeeming qualities! Each slice (based on 12 servings) has roughly:
- Calories: 485
- Fat: 24g
- Saturated Fat: 14g
- Carbs: 62g
- Protein: 5g
- Sugar: 44g
Freeze-dried strawberries add a boost of vitamin C and real fruit flavor, while the eggs and milk provide a little protein and calcium. You can always lighten things up by using Greek yogurt and reducing the sugar in the buttercream (though the classic version is, well, classic for a reason!).
Allergens: Contains wheat, eggs, and dairy. See the variations section for allergy-friendly options. For me, enjoying a slice is all about balance—special occasions deserve a cake that feels special!
Conclusion
There’s just something magical about slicing into a Neapolitan cake and seeing those beautiful, distinct layers. This recipe brings together everything I love about classic desserts: nostalgia, color, and a perfect mix of flavors. It’s a cake that turns any day into a celebration and makes you feel like a kid again (in the best way possible).
Don’t be afraid to make this cake your own—switch up the flavors, play with the decorations, or try a new filling. That’s half the fun! Personally, I come back to this recipe again and again because it never fails to surprise and delight both me and my guests.
If you give this Neapolitan cake recipe a try, I’d love to hear how it goes! Leave a comment below, share your photos, or let me know what fun twists you tried. Here’s to many more sweet celebrations—big or small!
Frequently Asked Questions
Can I make Neapolitan cake ahead of time?
Absolutely! You can bake the cake layers up to 2 days ahead, wrap and refrigerate them, or freeze for up to 2 months. Assemble and frost the day you plan to serve for best freshness.
Do I have to use freeze-dried strawberries for the pink layer?
Freeze-dried strawberries give the best color and real fruit flavor, but you can use 2 tablespoons of strawberry jam in a pinch. The color and flavor will be softer.
Can I use different pan sizes?
Yes! You can use 9-inch pans; just reduce the baking time by a few minutes. The layers will be slightly thinner but just as tasty.
How do I keep my cake layers from sticking to the pan?
Always grease the pans well and line with parchment paper circles. Let the cakes cool for 10 minutes in the pan before turning out for best results.
What’s the best way to get even, straight cake layers?
Weigh your batter to divide it evenly between pans, and trim any domed tops with a serrated knife after baking. A crumb coat of frosting also helps everything look tidy!
Pin This Recipe!

Neapolitan Cake Recipe: Easy 3-Layer Dessert for Special Occasions

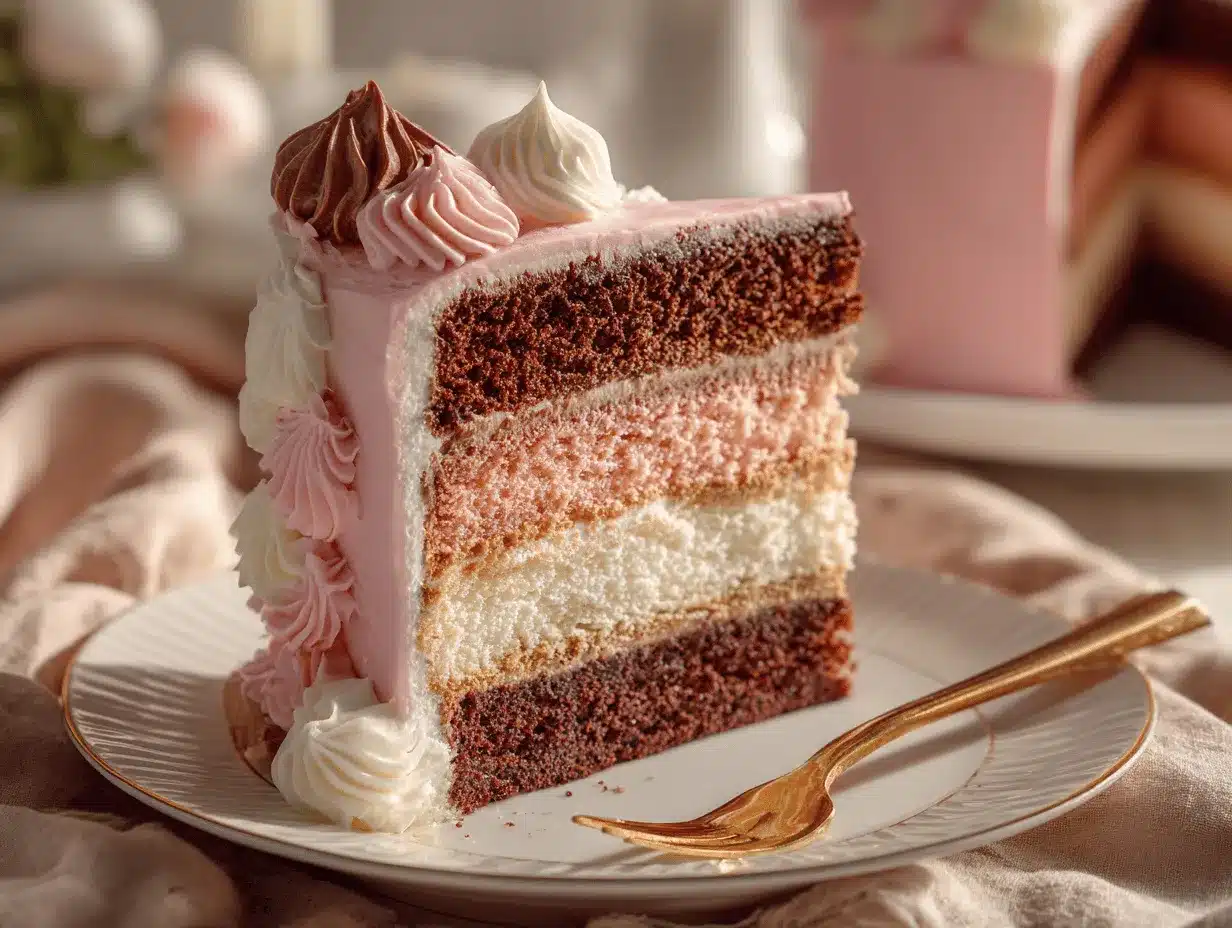
This Neapolitan cake features three colorful layers—chocolate, strawberry, and vanilla—tied together with silky vanilla buttercream. It’s a nostalgic, crowd-pleasing dessert that’s surprisingly easy to make and perfect for birthdays, parties, or any special occasion.
- Prep Time: 20 minutes
- Cook Time: 25 minutes
- Total Time: 1 hour 45 minutes
- Yield: 12 servings 1x
- Category: Dessert
- Cuisine: American
Ingredients
- 2 1/2 cups (315g) all-purpose flour
- 2 teaspoons baking powder
- 1/2 teaspoon baking soda
- 1/2 teaspoon salt
- 1 cup (225g) unsalted butter, room temperature
- 1 1/2 cups (300g) granulated sugar
- 4 large eggs, room temperature
- 2 teaspoons vanilla extract
- 1 cup (240ml) whole milk, room temperature
- 1/2 cup (120g) sour cream, room temperature
- 1/4 cup (25g) unsweetened cocoa powder
- 2 tablespoons (30ml) milk (for chocolate layer)
- 1/2 cup (7g) freeze-dried strawberries, ground into powder
- 2–3 drops pink or red gel food coloring (optional)
- 1 1/2 cups (340g) unsalted butter, room temperature (for buttercream)
- 5 cups (600g) powdered sugar, sifted
- 2 teaspoons vanilla extract (for buttercream)
- 1/4 cup (60ml) milk or heavy cream (for buttercream)
- Pinch of salt (for buttercream)
- Chocolate shavings or mini chips (optional garnish)
- Fresh strawberries, sliced (optional garnish)
- Sprinkles (optional garnish)
Instructions
- Preheat your oven to 350°F (175°C). Grease three 8-inch cake pans and line the bottoms with parchment rounds. Lightly dust with flour, tapping out the excess.
- In a medium bowl, whisk together flour, baking powder, baking soda, and salt. Set aside.
- In a large bowl or stand mixer, beat butter and sugar on medium speed until light and fluffy, about 3-4 minutes.
- Add eggs one at a time, beating well after each addition. Mix in vanilla extract.
- In a measuring cup, whisk together milk and sour cream.
- With the mixer on low, add the dry ingredients in three additions, alternating with the milk/sour cream mixture. Begin and end with dry ingredients. Mix until just combined.
- Evenly divide the batter into three bowls (about 2 cups per bowl).
- For the chocolate layer: Stir cocoa powder and 2 tablespoons milk into one bowl until smooth.
- For the strawberry layer: Stir in freeze-dried strawberry powder and a few drops of pink/red gel coloring (if using) into the second bowl. Mix until color is even.
- Leave the third bowl as-is for the vanilla layer.
- Pour each batter into its prepared pan. Smooth the tops with a spatula.
- Bake for 22–26 minutes, rotating pans halfway through. Cakes are done when a toothpick inserted in the center comes out clean or with a few moist crumbs.
- Let cakes cool in the pans for 10 minutes. Run a knife around the edge, then carefully invert onto wire racks. Peel off parchment and let cool completely (at least 1 hour).
- For the buttercream: In a stand mixer, beat butter until creamy, about 2 minutes. Gradually add powdered sugar, vanilla, and a pinch of salt. Slowly beat in milk or cream, a tablespoon at a time, until fluffy but spreadable.
- To assemble: Place the chocolate layer on a serving plate. Top with 3/4 cup buttercream, spreading evenly. Add the strawberry layer, repeat with buttercream, then finish with the vanilla layer.
- Spread a thin coat (crumb coat) over the entire cake and chill for 20 minutes.
- Use the remaining buttercream to frost the cake smoothly. Decorate with chocolate shavings, fresh strawberries, or sprinkles as desired.
Notes
For best results, use room temperature ingredients. Weigh your batter for even layers. If cakes dome, trim tops with a serrated knife. The cake layers can be made ahead and frozen. For gluten-free or dairy-free adaptations, see ingredient notes. The cake is best served slightly chilled and can be decorated with your favorite garnishes.
Nutrition
- Serving Size: 1 slice (1/12 of cake)
- Calories: 485
- Sugar: 44
- Fat: 24
- Saturated Fat: 14
- Carbohydrates: 62
- Protein: 5
Keywords: Neapolitan cake, layer cake, chocolate strawberry vanilla cake, birthday cake, celebration dessert, easy cake recipe, homemade cake, party cake, classic dessert


