Introduction
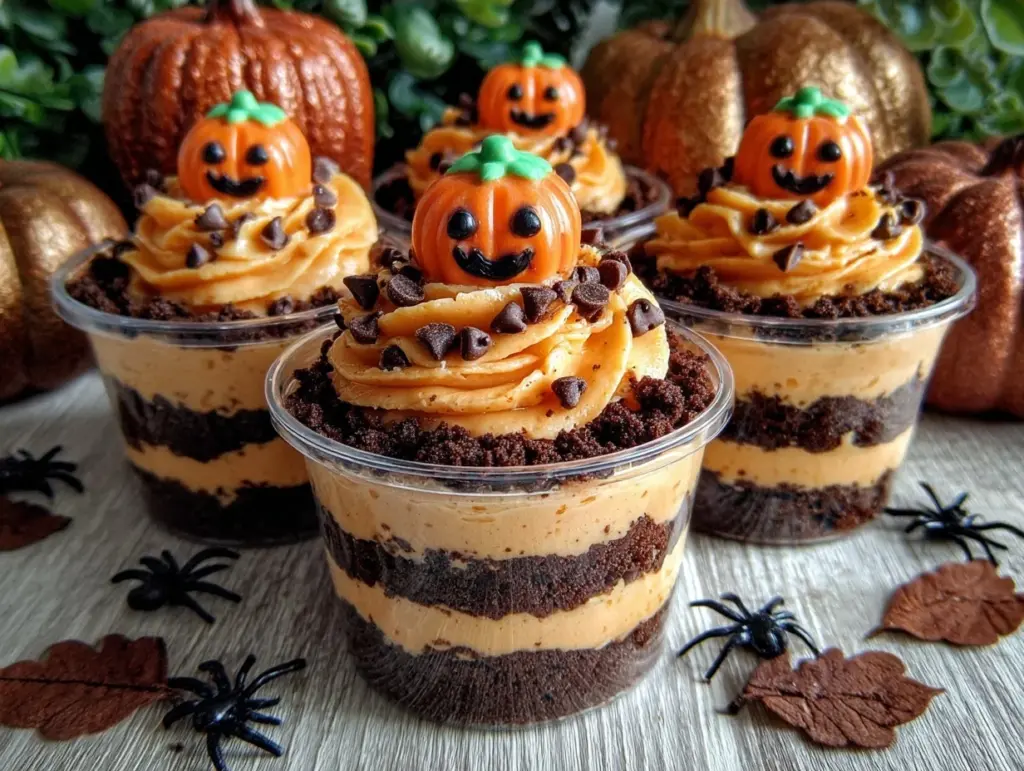
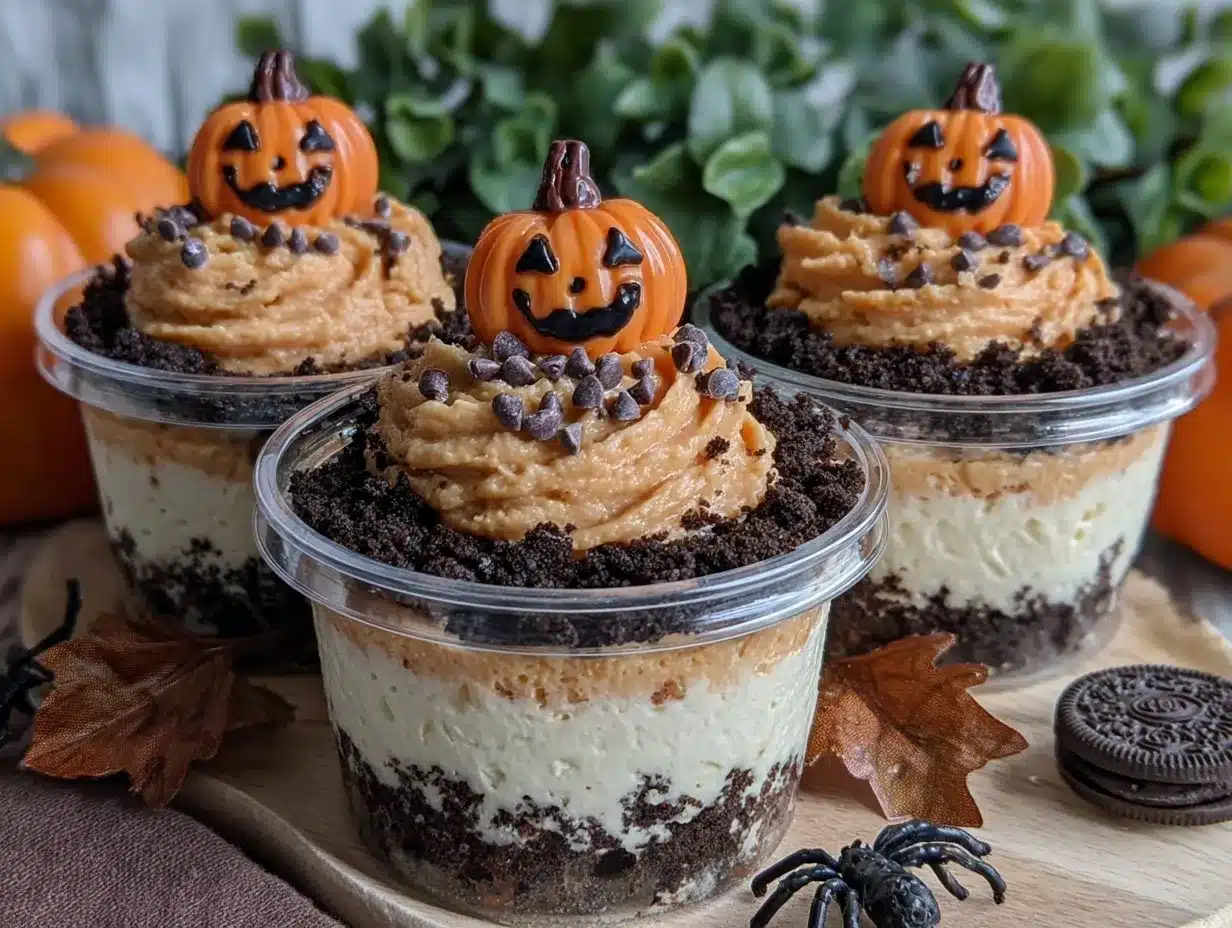
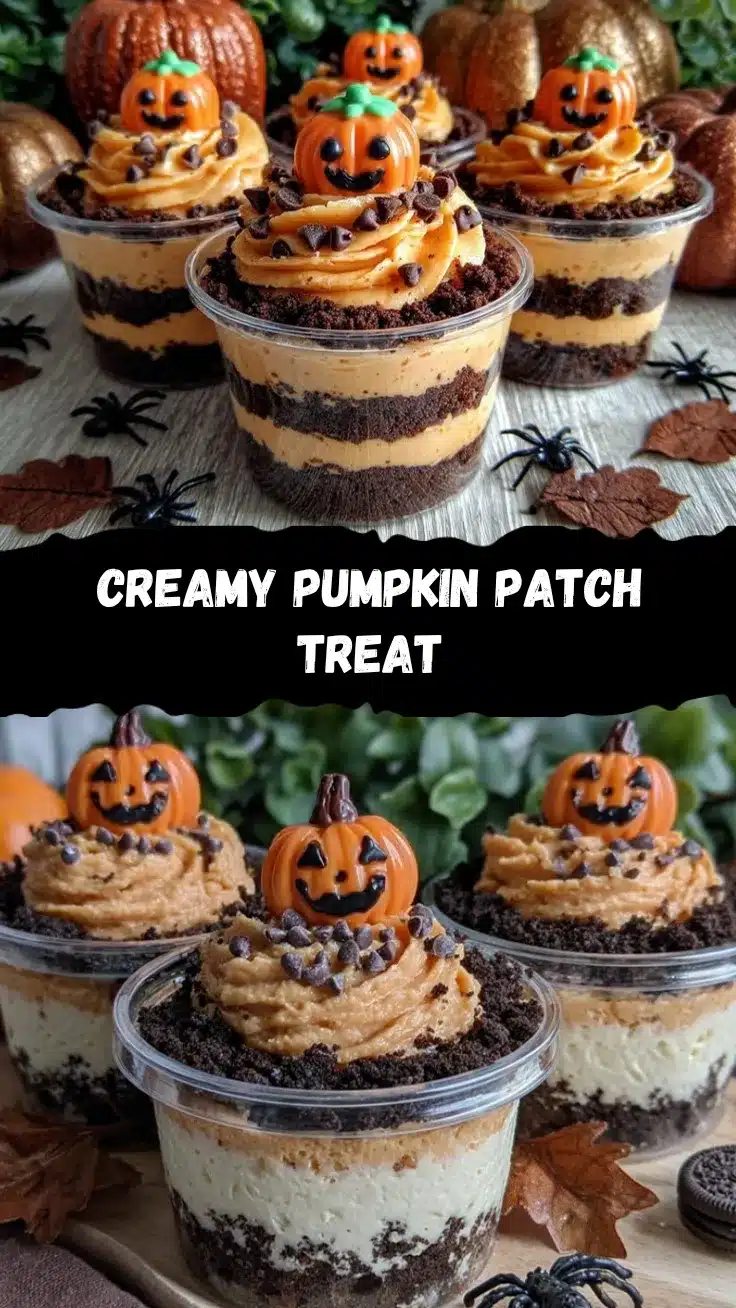
When it comes to Halloween treats, there’s nothing quite as whimsical and delightful as Festive Pumpkin Patch Dirt Cups. Picture layers of rich, chocolatey pudding, crushed cookies that look just like soil, and adorable candy pumpkins nestled on top—doesn’t that sound like the perfect spooky, sweet treat? These cups are not just fun to make, but they’re also a hit with kids and adults alike at Halloween parties.
I first stumbled upon the idea for dirt cups as a kid when my mom whipped up a batch for a school Halloween party. There’s something about digging into a cup of “dirt” and finding gummy worms hidden inside that just screams Halloween fun. Over the years, I’ve added my own festive twist by transforming them into mini pumpkin patches, complete with candy pumpkins and edible decorations.
Whether you’re hosting a Halloween bash or just looking for a festive way to celebrate the spooky season, these Pumpkin Patch Dirt Cups are the perfect way to indulge your sweet tooth and get into the Halloween spirit. Plus, they’re so easy to make that even little ones can join in on the fun!
Why You’ll Love This Recipe
- Quick and Easy: These dirt cups come together in under 30 minutes, making them perfect for last-minute party prep.
- No-Bake Delight: No need to turn on the oven! This recipe is completely no-bake, keeping things simple and stress-free.
- Festive and Fun: The candy pumpkins and “dirt” layers make these cups the perfect Halloween centerpiece. Guests will love the creativity—and the taste!
- Kid-Friendly: This is a great recipe to make with kids. They’ll love crushing cookies and decorating their own pumpkin patches.
- Customizable: You can easily swap out ingredients for dietary needs or flavor preferences. Gluten-free cookies? Vegan pudding? No problem!
What makes this recipe extra special is the combination of textures and flavors. The creamy pudding, crunchy cookie crumbs, and sweet candies create a dessert that’s both fun and delicious. Plus, it’s so much more than just a treat—it’s a Halloween activity that brings out everyone’s creativity.
Whether you’re hosting a spooky soirée or just want to surprise your family with a festive dessert, these Pumpkin Patch Dirt Cups are sure to be a crowd-pleaser. Trust me, you’ll be making these every Halloween once you see how easy and fun they are!
Ingredients You Will Need
This recipe uses simple, store-bought ingredients that come together to create a festive, flavorful dessert. Here’s what you’ll need:
- Chocolate pudding mix: You can use instant pudding for quick preparation or make pudding from scratch for a homemade touch.
- Milk: Regular or plant-based milk works fine; just follow the pudding mix instructions.
- Chocolate sandwich cookies: Crushed into crumbs to resemble dirt. Oreo cookies are a classic choice!
- Candy pumpkins: The star of the show! Pick the cutest ones you can find for that perfect pumpkin patch look.
- Gummy worms: Optional, but they add a playful touch and kids love them!
- Whipped cream: For a creamy layer and added sweetness.
- Green frosting or shredded coconut: Use these to mimic grass for a realistic pumpkin patch effect.
- Mini chocolate chips or sprinkles: For extra texture and decoration.
These ingredients are easy to find at any grocery store, and you can tweak them to suit your taste or dietary needs. For example, if you’re gluten-free, opt for GF chocolate cookies and pudding mix. If you’re vegan, use plant-based milk and dairy-free pudding and whipped cream.
Equipment Needed
- Mixing bowls: For preparing the chocolate pudding.
- Whisk: To ensure your pudding is smooth and lump-free.
- Plastic or glass cups: Clear cups work best to show off the layered effect.
- Rolling pin or food processor: For crushing cookies into fine crumbs. If you don’t have these, use a sturdy zip-top bag and a heavy object like a can.
- Spoons: For layering the ingredients and for serving.
If you don’t have clear cups, small mason jars or bowls can work just as well. And don’t worry about fancy tools—a simple whisk and a zip-top bag for crushing cookies are all you really need!
Preparation Method
- Prepare the pudding: In a mixing bowl, whisk together the chocolate pudding mix and milk according to the package instructions. Let the pudding set in the fridge for about 5 minutes.
- Crush the cookies: Place the chocolate sandwich cookies in a zip-top bag. Use a rolling pin or heavy object to crush them into fine crumbs that resemble dirt.
- Prepare the “grass”: If using shredded coconut, mix it with a few drops of green food coloring until evenly coated. If using green frosting, set it aside for decorating.
- Assemble the dirt cups: Start layering by adding a spoonful of chocolate pudding to the bottom of each clear cup. Smooth it out with the back of a spoon.
- Layer the “dirt”: Sprinkle a generous amount of cookie crumbs on top of the pudding layer.
- Add whipped cream: Spoon a layer of whipped cream over the cookie crumbs for a creamy contrast.
- Repeat layers: Continue layering pudding, cookie crumbs, and whipped cream until the cup is full, finishing with a final layer of cookie crumbs on top.
- Decorate the pumpkin patch: Place candy pumpkins on top of the “dirt” and add gummy worms for a playful touch. Use green frosting or colored coconut to mimic grass around the pumpkins.
- Serve: Chill the dirt cups in the fridge for at least 15 minutes before serving. This helps the layers settle and makes the dessert even more delicious!
Pro tip: Don’t overfill the cups—leave some space at the top for the decorations to sit comfortably without spilling.
Cooking Tips & Techniques
- Crush cookies evenly: To get that perfect “dirt” texture, use a food processor or roll out the cookies in a zip-top bag until they’re finely crushed. A few small cookie chunks are okay for added texture!
- Chill the pudding: Make sure your pudding is fully set before assembling. If it’s too runny, your layers might mix together.
- Layer carefully: Use the back of a spoon to gently spread the puddings and whipped cream. This will ensure clean, defined layers.
- Get creative: Add edible decorations like candy eyes or use a toothpick to draw little faces on the candy pumpkins for added Halloween flair.
- Keep it chilled: Refrigerate the dirt cups until ready to serve. This keeps the pudding firm and the decorations looking fresh.
Remember, don’t worry if your layers aren’t perfect—it’s all part of the charm! The best thing about these dirt cups is that they’re supposed to look fun and rustic.
Variations & Adaptations
- Gluten-Free Version: Use gluten-free chocolate sandwich cookies and pudding mix to accommodate dietary restrictions.
- Vegan Adaptation: Swap out dairy pudding and whipped cream for plant-based alternatives. Almond or oat milk works great for the pudding, and coconut whipped cream is a tasty substitute.
- Make it spooky: Add candy googly eyes, chocolate spiders, or bat-shaped sprinkles for an extra Halloween vibe.
- Healthy twist: Use Greek yogurt instead of pudding for a protein-packed alternative and add granola as the “dirt.”
- Holiday swap: Change the decorations to fit other holidays! You can use candy eggs and edible flowers for a spring garden theme.
Feel free to mix and match decorations and flavors to suit your family’s preferences. I once added caramel sauce between the layers, and let me tell you—it was a game-changer!
Serving & Storage Suggestions
Serve these dirt cups chilled straight out of the fridge for the best texture and flavor. They’re perfect as individual desserts for a Halloween party or a cozy movie night.
For presentation, try topping each cup with a sprig of fresh mint to represent greenery in your pumpkin patch. Pair these cups with hot apple cider or pumpkin spice lattes for the ultimate seasonal treat.
If you have leftovers, cover each cup tightly with plastic wrap and store them in the refrigerator for up to 2 days. The cookie crumbs might soften slightly, but the flavors will meld together beautifully. To enjoy them again, simply grab a spoon and dig in!
Nutritional Information & Benefits
While these Festive Pumpkin Patch Dirt Cups are more about fun than nutrition, they’re surprisingly versatile depending on your ingredient choices.
- Calories: Approximately 250-350 per cup (varies based on ingredients).
- Low-fat option: Use low-fat pudding mix and skim milk to reduce the calorie count.
- Key nutrients: Pumpkin candies are just for decoration, but the milk and pudding provide calcium and protein.
- Dietary considerations: Easily adaptable for gluten-free or vegan diets.
For a slightly healthier twist, try adding a layer of fresh fruit, like chopped strawberries or bananas, for natural sweetness and additional fiber.
Conclusion
If you’re looking for a playful and delicious way to celebrate Halloween, these Festive Pumpkin Patch Dirt Cups are the answer. They’re easy to make, fun to decorate, and guaranteed to bring smiles to everyone’s faces. Plus, they’re a great excuse to get creative and spend quality time in the kitchen with your family.
So, what are you waiting for? Grab your ingredients, whip up a batch, and get ready to wow your guests this Halloween. Don’t forget to share your creations in the comments below or tag me on social media—I’d love to see your spooky pumpkin patches!
FAQs
Can I make these dirt cups ahead of time?
Absolutely! You can prepare and refrigerate them the night before your event. Just save the decorations for right before serving to keep everything looking fresh.
Can I use homemade pudding instead of instant?
Yes, homemade pudding works perfectly! Just make sure it’s fully cooled and set before layering.
What’s the best way to crush the cookies?
You can use a food processor for fine crumbs or crush them in a zip-top bag using a rolling pin for a chunkier texture.
Can I freeze the dirt cups?
Freezing is not recommended as the texture of the pudding and whipped cream may change, but you can freeze the cookie crumbs separately to save time for future batches.
Are there other candies I can use for decoration?
Definitely! Try using candy corn, chocolate-covered peanuts, or even small chocolate truffles to create a unique pumpkin patch look.
Pin This Recipe!
Festive Pumpkin Patch Dirt Cups Recipe for Halloween Fun
A whimsical and delightful Halloween treat featuring layers of chocolate pudding, crushed cookies resembling soil, and candy pumpkins for a festive pumpkin patch look.
- Prep Time: 15 minutes
- Cook Time: 0 minutes
- Total Time: 30 minutes
- Yield: 6 servings 1x
- Category: Dessert
- Cuisine: American
Ingredients
- 1 package chocolate pudding mix
- 2 cups milk (regular or plant-based)
- 15 chocolate sandwich cookies, crushed
- Candy pumpkins
- Gummy worms (optional)
- 1 cup whipped cream
- Green frosting or shredded coconut
- Mini chocolate chips or sprinkles
Instructions
- Prepare the pudding: In a mixing bowl, whisk together the chocolate pudding mix and milk according to the package instructions. Let the pudding set in the fridge for about 5 minutes.
- Crush the cookies: Place the chocolate sandwich cookies in a zip-top bag. Use a rolling pin or heavy object to crush them into fine crumbs that resemble dirt.
- Prepare the ‘grass’: If using shredded coconut, mix it with a few drops of green food coloring until evenly coated. If using green frosting, set it aside for decorating.
- Assemble the dirt cups: Start layering by adding a spoonful of chocolate pudding to the bottom of each clear cup. Smooth it out with the back of a spoon.
- Layer the ‘dirt’: Sprinkle a generous amount of cookie crumbs on top of the pudding layer.
- Add whipped cream: Spoon a layer of whipped cream over the cookie crumbs for a creamy contrast.
- Repeat layers: Continue layering pudding, cookie crumbs, and whipped cream until the cup is full, finishing with a final layer of cookie crumbs on top.
- Decorate the pumpkin patch: Place candy pumpkins on top of the ‘dirt’ and add gummy worms for a playful touch. Use green frosting or colored coconut to mimic grass around the pumpkins.
- Serve: Chill the dirt cups in the fridge for at least 15 minutes before serving. This helps the layers settle and makes the dessert even more delicious!
Notes
[‘Crush cookies evenly using a food processor or zip-top bag with a rolling pin.’, ‘Ensure pudding is fully set before assembling to maintain clean layers.’, ‘Refrigerate the dirt cups until ready to serve for the best texture and flavor.’, ‘Get creative with decorations like candy eyes or chocolate spiders for added Halloween flair.’]
Nutrition
- Serving Size: 1 cup
- Calories: 250350
- Sugar: 25
- Sodium: 200
- Fat: 10
- Saturated Fat: 5
- Carbohydrates: 40
- Fiber: 2
- Protein: 4
Keywords: Halloween, dessert, no-bake, pumpkin patch, dirt cups, chocolate pudding, festive treat


