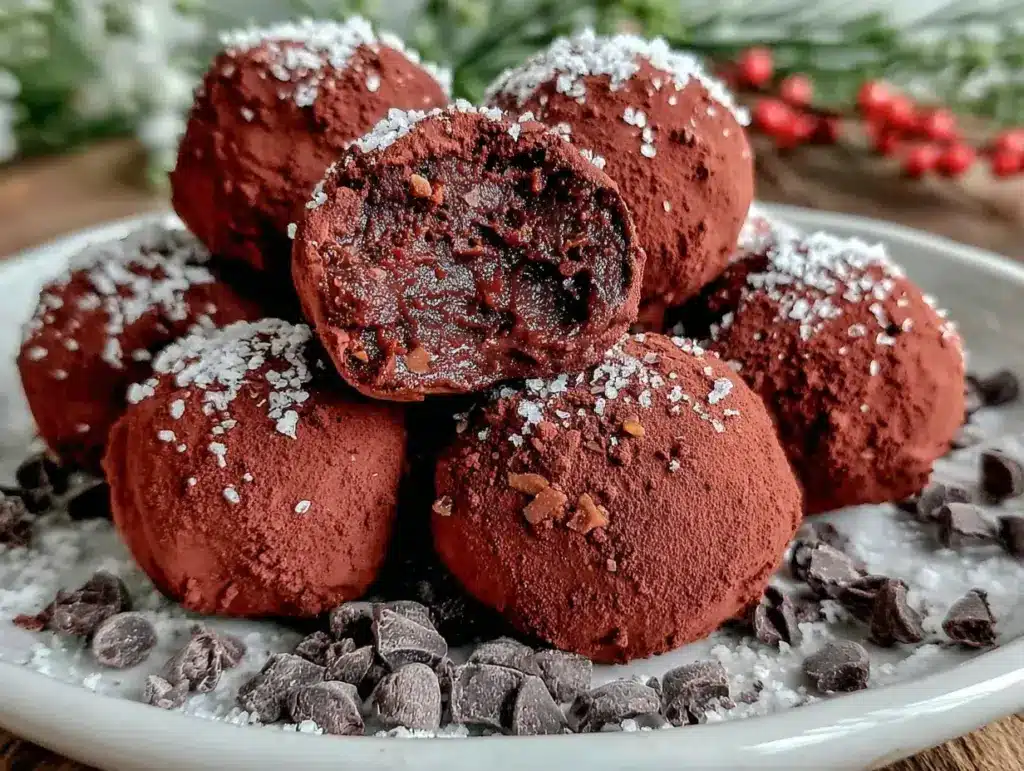
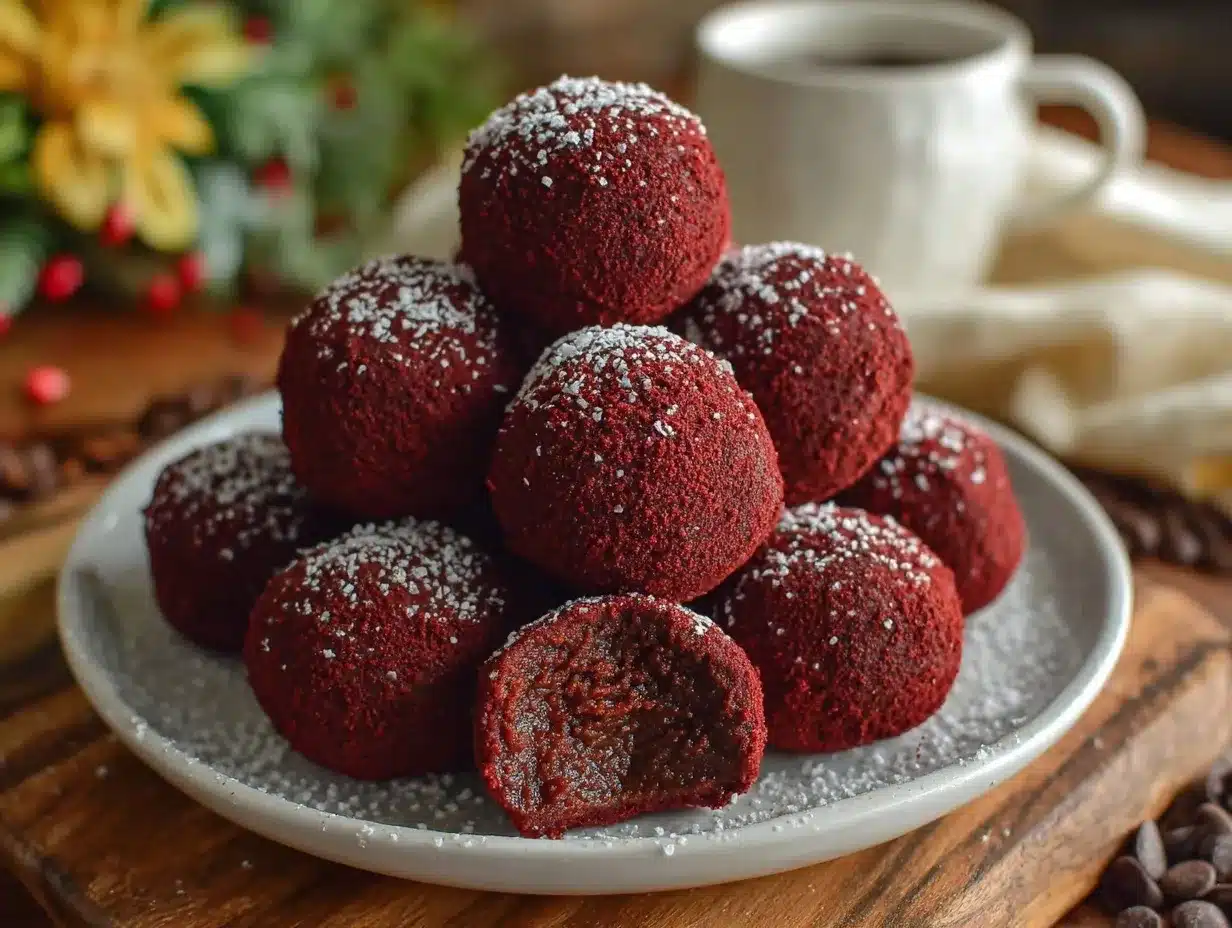
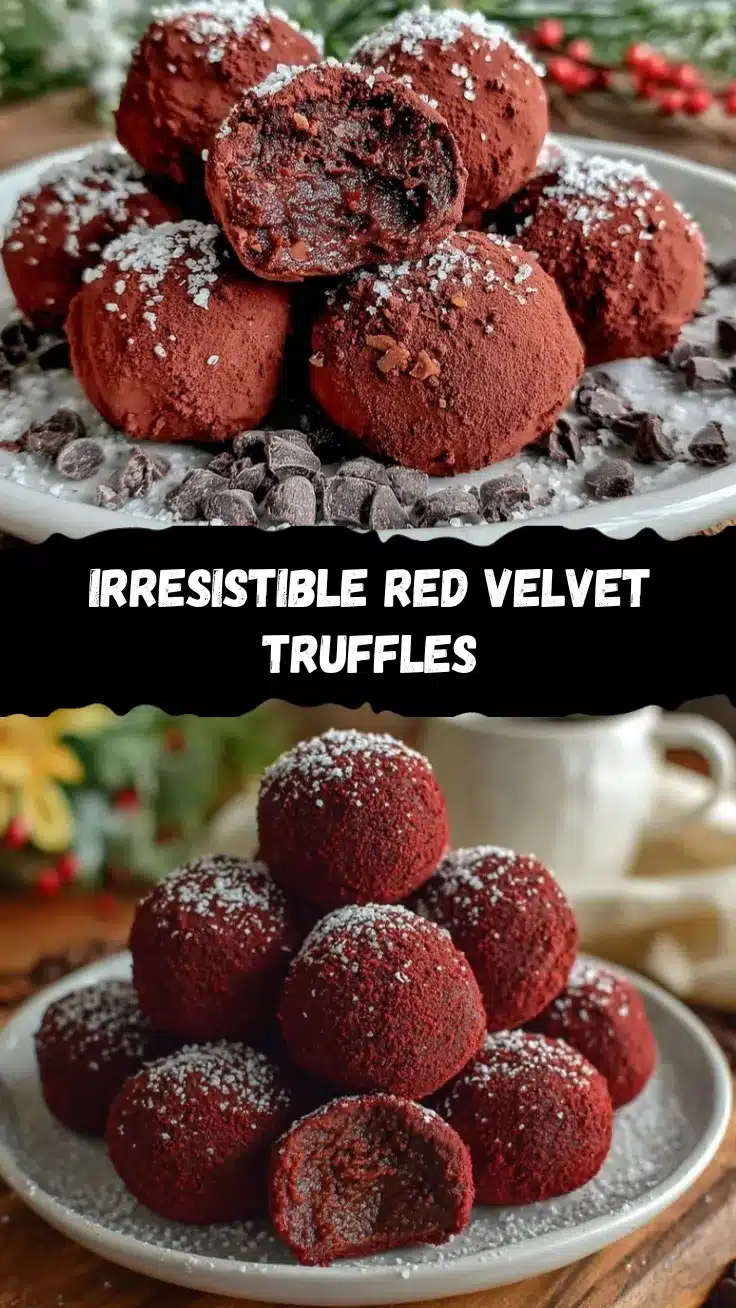
The rich, velvety flavor of red velvet paired with a creamy center and a decadent chocolate coating—these irresistible red velvet truffles are the ultimate sweet treat. Whether you’re celebrating a special occasion or just indulging your sweet tooth, this recipe is perfect for creating bite-sized delights that are as beautiful as they are delicious. Trust me, once you make them, you’ll wonder why you ever bought store-bought truffles!
I’ve been making these red velvet truffles for years, and they’re always a crowd favorite. They’re not only visually stunning but also incredibly easy to make. It’s a fun and creative project that even the kids will enjoy helping with. Plus, you can customize them to match your style with different toppings or colors. Let’s get started on this sweet adventure!
Why You’ll Love This Recipe
- Perfectly Decadent: These red velvet truffles are rich, creamy, and coated with smooth chocolate. They’re indulgence at its finest.
- Easy to Make: You don’t need to be a professional baker to whip up these sweet treats. The steps are simple, and the process is fun!
- Impressive Presentation: Whether you’re hosting a party or gifting these truffles, they look like they came straight out of a fancy chocolate shop.
- Customizable: You can switch up the toppings, try different coatings, or even add a personal touch with colorful sprinkles, crushed nuts, or drizzle.
- Kid-Approved: These are a favorite for little ones and grown-ups alike. The creamy center and chocolate coating are irresistible!
What sets this recipe apart is the combination of red velvet cake crumbs and cream cheese, which gives the truffles a melt-in-your-mouth texture. The outer chocolate shell adds a satisfying crunch, while the vibrant red hue makes them almost too pretty to eat (almost!). They also make for a great holiday treat, especially Valentine’s Day or Christmas.
What Ingredients You Will Need
This recipe uses simple ingredients you may already have in your pantry. If not, they’re easy to find at your local grocery store.
- Red velvet cake: You can bake one from scratch or use a boxed mix for convenience. Make sure it’s fully cooled before crumbling. (If you’re short on time, store-bought cake works too!)
- Cream cheese: Softened cream cheese is the key to the creamy filling. Full-fat cream cheese works best for that rich flavor.
- White chocolate chips: For melting and coating the truffles. You can also use candy melts for a smoother finish.
- Semisweet chocolate: Optional for a darker chocolate coating. (Use good-quality chocolate for the best results.)
- Sprinkles or toppings: Add a festive touch with colored sprinkles, crushed nuts, or even a drizzle of contrasting chocolate.
If you’re feeling adventurous, try adding a pinch of cinnamon or a splash of vanilla extract to the cream cheese mixture for extra depth of flavor. Don’t have white chocolate? Dark chocolate works just as well—it’ll give you a more bittersweet contrast to the red velvet.
Equipment Needed
You don’t need much to make these red velvet truffles. Here’s what I recommend:
- Baking sheet: For chilling the truffles. If you don’t have one, a large plate or flat tray works too.
- Mixing bowls: You’ll need a couple for mixing the cake crumbs and melting the chocolate.
- Forks or dipping tools: For coating the truffles evenly in chocolate.
- Double boiler: Great for melting chocolate evenly without burning it. If you don’t have one, use a heatproof bowl over a pot of simmering water.
- Electric mixer: Optional, but handy for combining the cake crumbs and cream cheese together.
If you don’t have a double boiler, a microwave will work for melting chocolate—just be sure to use short bursts and stir frequently to prevent scorching. And if you’re working with kids, a sturdy plastic mixing bowl and spoons are your best bet to keep things safe and fun.
How to Make Irresistible Red Velvet Truffles
- Bake the red velvet cake: If you’re starting from scratch, follow your favorite red velvet cake recipe or use a boxed mix. Bake according to the instructions and allow it to cool completely. This is crucial—warm cake will make the truffles too gooey.
- Crumble the cake: Once cooled, crumble the cake into fine crumbs in a large mixing bowl. You can use your hands or a fork to break it down.
- Mix the filling: Add softened cream cheese to the cake crumbs. Start with 4 oz (115 g) and mix thoroughly using your hands or an electric mixer. The mixture should be moist and hold together when pressed. If needed, add more cream cheese a little at a time.
- Shape the truffles: Roll the mixture into small balls, about 1 inch (2.5 cm) in diameter. Place them onto a baking sheet lined with parchment paper. Refrigerate for at least 2 hours or freeze for 30 minutes to firm up.
- Melt the chocolate: Use a double boiler or microwave to melt the white chocolate chips and/or semisweet chocolate. Stir until smooth. If the chocolate is too thick, add 1–2 teaspoons of coconut oil to thin it out.
- Dip the truffles: Using a fork or dipping tool, dunk each chilled truffle into the melted chocolate, ensuring it’s fully coated. Let the excess chocolate drip off before placing it back onto the parchment-lined baking sheet.
- Add toppings: While the chocolate is still wet, sprinkle your chosen toppings over the truffles. Be quick—chocolate hardens fast!
- Chill and serve: Refrigerate the coated truffles for at least 30 minutes, or until the chocolate sets completely. Serve chilled or at room temperature.
If you notice the chocolate starting to thicken while you’re dipping, reheat it gently to keep it smooth. And don’t worry if your first few truffles look messy—practice makes perfect, and even the imperfect ones taste amazing!
Cooking Tips & Techniques
Want to make sure your red velvet truffles turn out perfectly every time? Here are some tips I’ve learned along the way:
- Chill the filling: Don’t skip the chilling step after shaping the truffles. It makes them easier to coat and prevents them from falling apart.
- Use good-quality chocolate: The chocolate coating is a big part of the flavor, so invest in high-quality chocolate for the best results.
- Thin the chocolate: If your melted chocolate is too thick, add a small amount of coconut oil or vegetable shortening to thin it out for easier coating.
- Avoid overmixing: When combining the cake crumbs and cream cheese, mix only until combined. Overmixing can make the texture too soft.
- Work in batches: If you’re making a large batch, keep some of the truffles in the fridge while you coat others. This keeps them firm and easy to work with.
- Experiment with toppings: Crushed candies, shredded coconut, or even edible glitter can take these truffles to the next level!
And here’s a little secret: if you end up with leftover melted chocolate, drizzle it over the finished truffles for an elegant touch!
Variations & Adaptations
One of the best things about this red velvet truffles recipe is how customizable it is. Here are some fun ways to mix things up:
- Gluten-Free: Use a gluten-free red velvet cake mix or make your own gluten-free version from scratch.
- Vegan Option: Swap the cream cheese for a dairy-free alternative, like vegan cream cheese, and use dairy-free chocolate for the coating.
- Flavored Truffles: Add a splash of peppermint extract to the cream cheese for a holiday twist or orange extract for a citrusy zing.
- Seasonal Toppings: Use crushed candy canes for a festive Christmas vibe or heart-shaped sprinkles for Valentine’s Day.
- Alternative Coatings: Roll the truffles in cocoa powder, powdered sugar, or crushed freeze-dried strawberries instead of using melted chocolate.
Last year, I tried adding chopped walnuts to the cream cheese mixture for a nutty crunch. It was a hit, and my family has been asking for it ever since!
Serving & Storage Suggestions
These red velvet truffles are best served chilled or at room temperature. Arrange them on a decorative plate or tiered serving tray for a stunning presentation at parties or events. They pair beautifully with a cup of coffee, tea, or even a glass of red wine for an elegant dessert.
For storage, keep the truffles in an airtight container in the refrigerator for up to 5 days. If you need to store them longer, freeze them for up to 2 months. Just be sure to thaw them in the refrigerator for a few hours before serving.
To reheat, you can leave them out at room temperature for about 15 minutes to soften slightly. The flavors actually intensify after a day or two, making them even more delicious!
Nutritional Information & Benefits
While red velvet truffles are definitely an indulgent treat, they’re perfect for satisfying a sweet craving in moderation. Each truffle contains approximately:
- Calories: 120–150 (depending on size and toppings)
- Total Fat: 7–9 g
- Carbohydrates: 14–18 g
- Protein: 1–2 g
The cream cheese provides a small amount of protein and calcium, while the chocolate offers antioxidants. For those with dietary concerns, you can make adjustments like using sugar-free chocolate or alternative flours for the cake.
Conclusion
There’s a reason these irresistible red velvet truffles are a favorite in my home. They’re easy to make, look stunning, and taste absolutely divine. Whether you’re a seasoned baker or a newbie in the kitchen, this recipe is one you’ll keep coming back to. Plus, with all the options for customization, you can make them your own every time!
If you try this recipe, I’d love to hear how it goes! Share your creations in the comments below or tag me on social media—I can’t wait to see your red velvet truffle masterpieces.
So grab your apron, turn on your favorite playlist, and get ready to make some magic in the kitchen. These truffles are waiting!
FAQs
Can I use store-bought red velvet cake for this recipe?
Absolutely! Store-bought red velvet cake works just as well. Just make sure it’s fresh and crumbly for the best results.
What if I don’t have white chocolate?
No problem! You can use milk chocolate, dark chocolate, or even a mix of both. Each gives a slightly different flavor, so it’s up to your taste!
Can I make these truffles ahead of time?
Yes! These truffles store nicely in the fridge for up to 5 days or in the freezer for up to 2 months. Just thaw before serving.
Are these truffles gluten-free?
They can be! Simply use a gluten-free red velvet cake mix, and ensure your other ingredients are gluten-free as well.
How do I fix a runny filling?
If your cream cheese mixture feels too soft, add a bit more cake crumbs to firm it up. Chill the mixture longer before shaping into truffles.
Pin This Recipe!
Irresistible Red Velvet Truffles Recipe – Easy Homemade Treats
Rich red velvet flavor paired with a creamy center and decadent chocolate coating, these truffles are perfect for any occasion and easy to make.
- Prep Time: 30 minutes
- Cook Time: 30 minutes
- Total Time: 1 hour
- Yield: 24 truffles 1x
- Category: Dessert
- Cuisine: American
Ingredients
- 1 red velvet cake (baked and cooled, from scratch or boxed mix)
- 4 oz (115 g) softened cream cheese, more if needed
- 1 cup white chocolate chips
- Optional: semisweet chocolate for darker coating
- Optional: sprinkles, crushed nuts, or contrasting chocolate drizzle
Instructions
- Bake the red velvet cake according to your recipe or boxed mix instructions. Allow it to cool completely.
- Crumble the cooled cake into fine crumbs in a large mixing bowl.
- Add softened cream cheese to the cake crumbs and mix thoroughly until the mixture holds together when pressed. Add more cream cheese if needed.
- Roll the mixture into small balls, about 1 inch in diameter, and place them on a parchment-lined baking sheet. Refrigerate for at least 2 hours or freeze for 30 minutes.
- Melt the white chocolate chips and/or semisweet chocolate using a double boiler or microwave. Stir until smooth. Add 1–2 teaspoons of coconut oil if the chocolate is too thick.
- Dip each chilled truffle into the melted chocolate using a fork or dipping tool, ensuring it is fully coated. Let excess chocolate drip off before placing back onto the parchment-lined baking sheet.
- Sprinkle your chosen toppings over the truffles while the chocolate is still wet.
- Refrigerate the coated truffles for at least 30 minutes or until the chocolate sets completely. Serve chilled or at room temperature.
Notes
[‘Chill the filling before coating to make it easier to work with.’, ‘Use high-quality chocolate for the best flavor.’, “Thin melted chocolate with coconut oil or vegetable shortening if it’s too thick.”, ‘Experiment with toppings like crushed candies, shredded coconut, or edible glitter.’, ‘Leftover melted chocolate can be drizzled over finished truffles for decoration.’]
Nutrition
- Serving Size: 1 truffle
- Calories: 120150
- Fat: 79
- Carbohydrates: 1418
- Protein: 12
Keywords: Red Velvet, Truffles, Chocolate, Dessert, Easy Recipe, Homemade Treats, Valentine's Day, Christmas, Party Dessert


