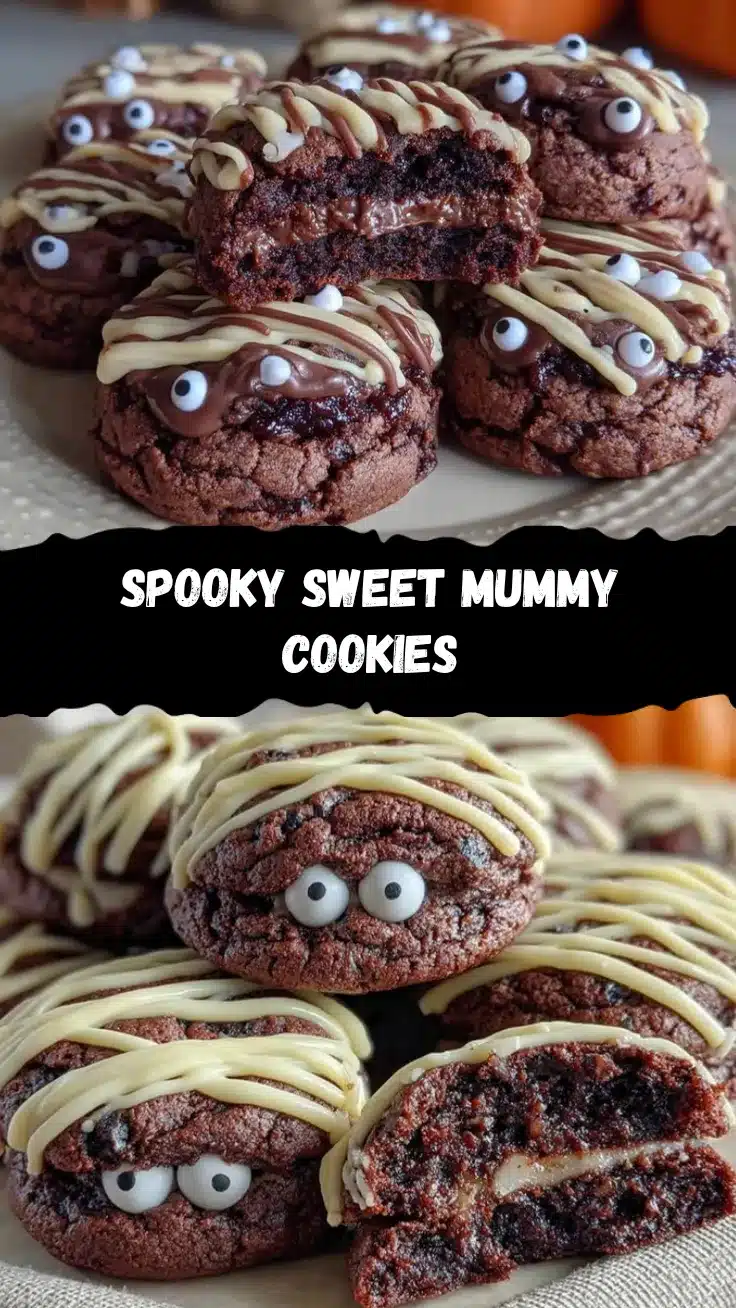
The chill in the October air, the glow of jack-o’-lanterns, and the excitement of eerie costumes—Halloween is truly magical! And what better way to add to that magic than baking Spooky Mummy Cookies with your kids? These adorable treats are fun to make, delicious to eat, and the perfect addition to your Halloween festivities. The best part? You don’t need fancy skills to whip these up; they’re simple, festive, and guaranteed to cause squeals of delight!
I first made these mummy cookies a few years back when I wanted an easy but spooky treat for a neighborhood Halloween party. They were a hit with kids and adults alike! I’ve tweaked the recipe since then to make the process even easier, and honestly, they’ve become an annual tradition in our house. If you’re looking for a recipe that’s equal parts fun and delicious, you’ve come to the right place. Let’s make some spooky magic happen!
Why You’ll Love This Recipe
- Quick & Easy: These mummy cookies come together in under an hour, perfect for a last-minute Halloween treat!
- Kid-Friendly: The recipe is simple enough for little hands to help, whether it’s rolling out dough or decorating the mummies.
- No Fancy Ingredients: You probably already have everything you need in your pantry. No special trips to the store required!
- Perfect for Halloween Parties: These cookies make a fantastic addition to your spooky spread, and they’re guaranteed to impress.
- Cute & Spooky: The mummy design is super fun and easy to achieve, even if you’re not a professional baker.
- Foolproof: I’ve tested this recipe multiple times, and it’s always a crowd-pleaser. Even if your mummies are a little “messy,” they’ll still look adorable!
What makes these mummy cookies extra special is the combination of buttery sugar cookie goodness and the spooky, playful design. They’re not just cookies—they’re a Halloween activity that will have everyone grinning from ear to ear. Whether you’re hosting a kids’ Halloween party or just looking for a festive treat to enjoy with your family, this is the recipe to try!
What Ingredients You Will Need
This Spooky Mummy Cookies recipe uses simple, accessible ingredients to create a delicious treat that’s as fun to make as it is to eat.
- Unsalted butter, softened: For a rich and buttery taste.
- Granulated sugar: To sweeten the cookies perfectly.
- Egg: Helps bind the dough together.
- Vanilla extract: Adds a warm, comforting flavor to the cookies.
- All-purpose flour: The base of your cookie dough. You can use gluten-free flour as a substitute if needed.
- Baking powder: Gives the cookies a little lift for a soft yet sturdy texture.
- Salt: Balances the sweetness and enhances the flavor.
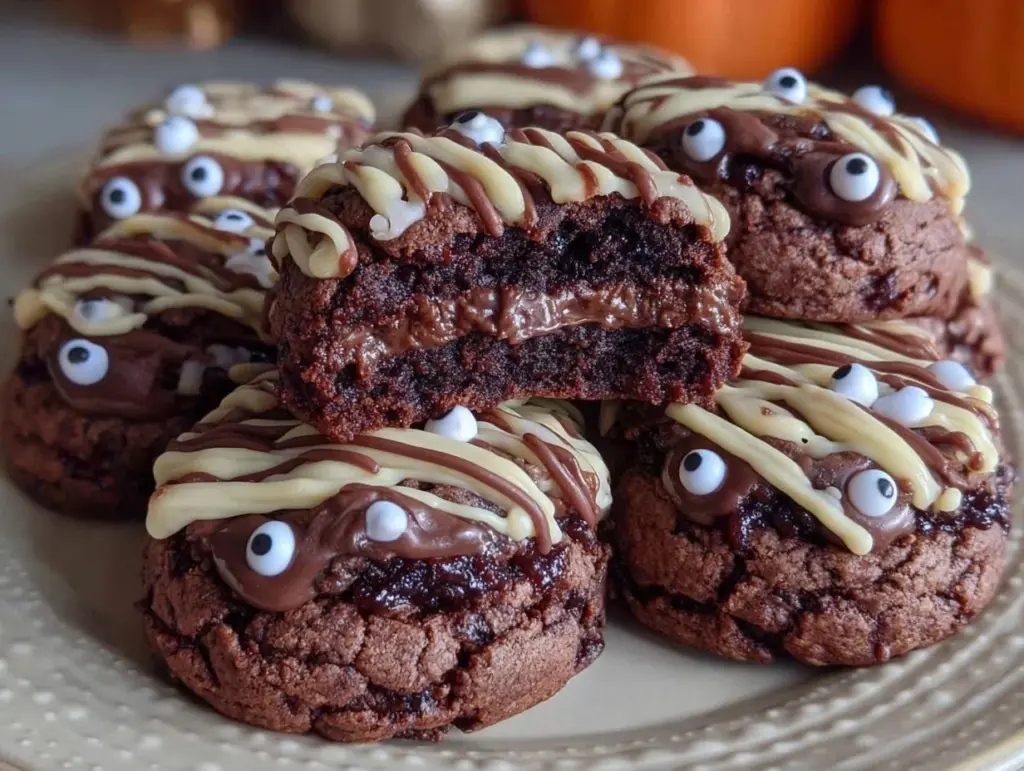
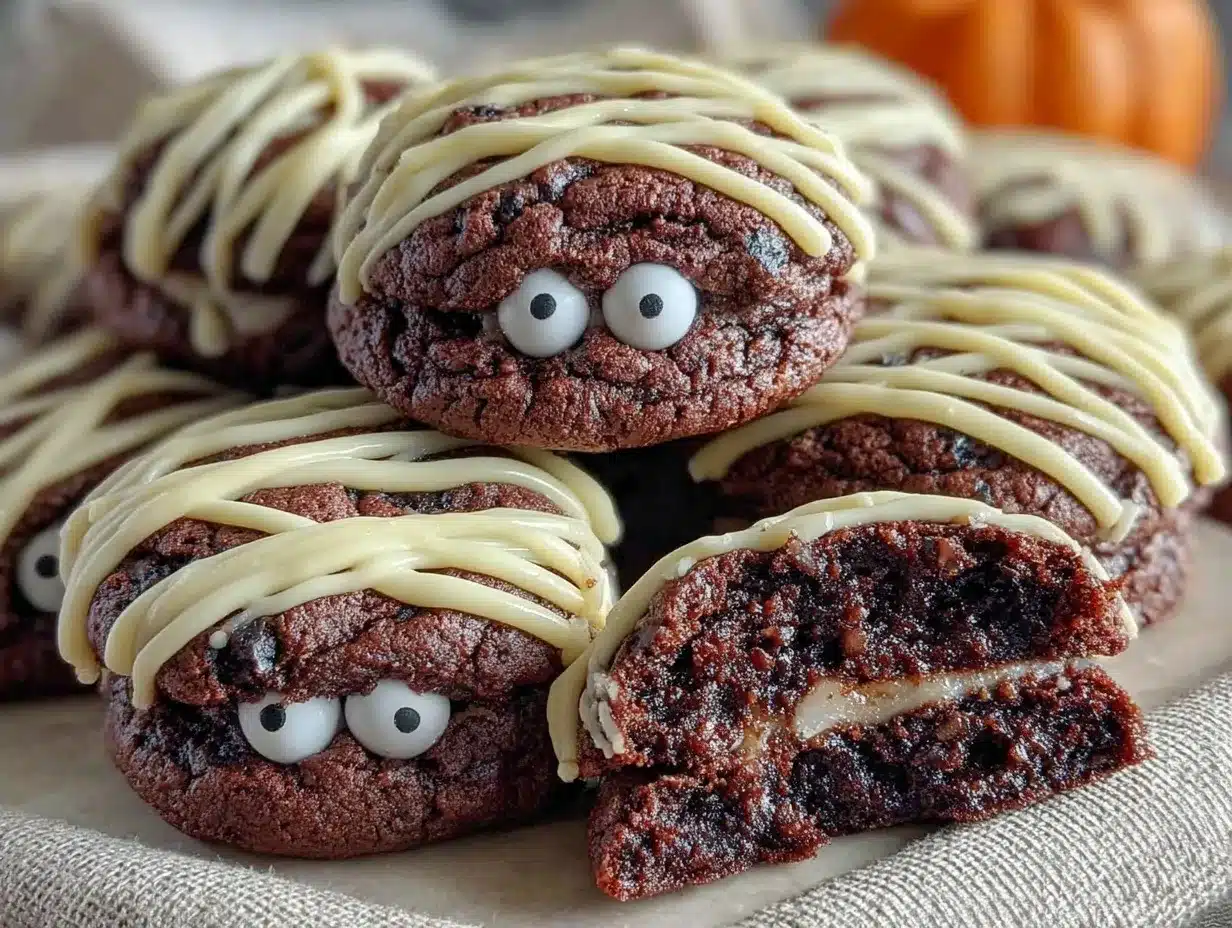
- White candy melts: For the “bandages” that give the cookies their mummy look.
- Mini chocolate chips: Perfect for the mummy’s eyes. You can substitute with black icing or edible pearls.
If you’re feeling creative, you can add a pinch of cinnamon or nutmeg for a hint of fall spice. And for a healthier twist, swap out half of the all-purpose flour with whole wheat flour. No matter how you tweak it, you’ll end up with a spooky snack that everyone will love!
Equipment Needed
- Mixing bowls: One for dry ingredients and one for wet ingredients.
- Hand mixer or stand mixer: Makes combining the butter and sugar a breeze.
- Rolling pin: To flatten your cookie dough evenly.
- Cookie cutters: A simple round cookie cutter works perfectly for this recipe.
- Baking sheet: Line it with parchment paper for easy cleanup.
- Cooling rack: Helps cool your cookies evenly after baking.
- Piping bag or Ziploc bag: You’ll need this to pipe the white candy melts for the mummy bandages.
If you don’t have a piping bag, don’t worry! A sturdy Ziploc bag with the corner snipped off works just as well. And if you don’t have cookie cutters, simply use a small glass to cut out round shapes from the dough.
Preparation Method
- Preheat the oven: Set your oven to 350°F (175°C) and line your baking sheets with parchment paper to prevent sticking.
- Mix wet ingredients: In a large mixing bowl, cream together 1 cup (230g) softened unsalted butter and 1 cup (200g) granulated sugar until smooth and fluffy. Add 1 large egg and 1 teaspoon vanilla extract and mix again until combined.
- Combine dry ingredients: In a separate bowl, whisk together 2 ½ cups (310g) all-purpose flour, 1 teaspoon baking powder, and ¼ teaspoon salt.
- Make the dough: Gradually add the dry ingredients into the wet ingredients, mixing until a soft dough forms. If the dough feels sticky, add a little more flour (1 tablespoon at a time).
- Chill the dough: Wrap the dough in plastic wrap and chill in the refrigerator for at least 30 minutes. This step makes rolling out the dough much easier.
- Roll and cut: Once chilled, roll out the dough on a lightly floured surface to about ¼-inch thickness. Use a round cookie cutter (or a small glass) to cut out your cookies.
- Bake: Place the cookies on the prepared baking sheet and bake for 8-10 minutes, or until the edges are just starting to turn golden. Allow them to cool completely on a wire rack.
- Prepare candy melts: Melt 1 cup of white candy melts according to the package instructions. Let it cool slightly before piping.
- Decorate: Transfer the melted candy into a piping bag or Ziploc bag with a small hole cut in the corner. Pipe zigzag lines across the cookies to create the mummy bandages.
- Add the eyes: Place mini chocolate chips or edible pearls onto the cookies for eyes while the candy melt is still wet.
- Let them set: Allow the cookies to sit at room temperature until the candy melt hardens. Store in an airtight container or enjoy immediately!
Cooking Tips & Techniques
Want to ensure your Spooky Mummy Cookies turn out perfectly? Here are a few tips:
- Chill the dough: Don’t skip this step! Chilling helps the cookies hold their shape during baking.
- Even rolling: Roll out the dough evenly to ensure all your cookies bake at the same rate. Using rolling pin guides can help achieve a uniform thickness.
- Don’t overbake: Keep an eye on the cookies—once the edges turn golden, they’re done. Overbaking can make them too crispy for decorating.
- Choose the right candy melts: Use good-quality candy melts for smooth piping. If the melts are too thick, add a teaspoon of vegetable oil to thin them out.
- Get creative with the design: Let your kids make their own mummy patterns—there’s no wrong way to do it!
These tips will help you avoid common pitfalls and make the cookie-decorating process even more enjoyable. Plus, the imperfections in your mummy bandages are what give them their spooky charm!
Variations & Adaptations
The beauty of Spooky Mummy Cookies is how customizable they are! Here are a few fun ways to switch things up:
- Chocolate Mummy Cookies: Add ¼ cup unsweetened cocoa powder to the dough for a rich chocolate flavor.
- Gluten-Free Option: Swap out the all-purpose flour for a gluten-free flour blend. Make sure your candy melts and chocolate chips are also gluten-free.
- Vegan Mummy Cookies: Use dairy-free butter, flax egg (1 tablespoon flaxseed meal + 2 ½ tablespoons water), and vegan chocolate chips for a plant-based version.
- Spooky Colors: Add food coloring to the candy melts for colorful mummy bandages. Try orange, green, or purple for extra Halloween vibes.
- Flavored Dough: Mix in a teaspoon of pumpkin spice or almond extract for a unique twist.
I once tried making these with dark chocolate bandages instead of white candy melts—instant hit! Feel free to experiment and make them your own.
Serving & Storage Suggestions
These Spooky Mummy Cookies are best served fresh, but here’s how to enjoy them at their best:
- Serving: Serve the cookies at room temperature for the best texture. Pair them with warm apple cider or hot chocolate for the ultimate Halloween treat.
- Presentation: Arrange the cookies on a Halloween-themed platter or use a spooky tablecloth to make them stand out.
- Storage: Store the cookies in an airtight container at room temperature for up to 5 days. For longer storage, freeze them for up to 2 months. Be sure to thaw at room temperature before serving.
- Reheating: If you prefer warm cookies, microwave them for 10-15 seconds for a fresh-out-of-the-oven feel.
Pro tip: The flavors actually deepen a bit after a day or two, making them even tastier!
Nutritional Information & Benefits
While these Spooky Mummy Cookies are a treat, they’re made with simple ingredients, so you don’t have to feel guilty indulging in one or two!
- Calories: Approximately 120 calories per cookie.
- Fat: Contains healthy fats from butter, which helps keep the cookies rich and satisfying.
- Sugar: They’re sweet but not overly so, making them perfect for kids.
- Dietary Considerations: Can easily be adapted to gluten-free, vegan, or low-sugar diets.
- Allergens: Contains dairy, gluten, and eggs, but substitutions are available if needed.
These cookies are all about balance—they’re a fun, festive treat, but they can be adapted to fit many dietary needs.
Conclusion
Spooky Mummy Cookies aren’t just another Halloween treat—they’re an experience. From rolling out the dough to piping the bandages, this recipe is a great way to spend time with your kids while making memories. The cookies are cute, delicious, and guaranteed to be the star of any Halloween gathering.
Try them out, put your own spin on the decorations, and let me know how they turn out in the comments! I love seeing your creations, so feel free to share your spooky mummy cookies on social media and tag me!
Happy Halloween baking, and remember—these cookies may look spooky, but they’re filled with sweet, buttery magic!
FAQs
Can I use store-bought cookie dough?
Yes! Store-bought sugar cookie dough works perfectly for this recipe if you’re short on time.
What can I use instead of candy melts?
You can use white chocolate chips melted with a teaspoon of coconut oil as an alternative to candy melts.
Do I need to chill the dough?
Chilling the dough helps it firm up and makes it easier to roll and cut into shapes. Don’t skip this step!
Can I make these cookies ahead of time?
Absolutely! These cookies can be made a day or two ahead and stored in an airtight container until you’re ready to serve.
What’s the best way to involve kids in this recipe?
Kids love rolling out the dough and decorating the cookies! Supervise them while handling melted candy for safety.
Pin This Recipe!
Spooky Mummy Cookies Recipe for Kids Perfect for Halloween

These adorable mummy cookies are fun to make, delicious to eat, and the perfect addition to your Halloween festivities. Simple, festive, and guaranteed to delight kids and adults alike!
- Prep Time: 40 minutes
- Cook Time: 10 minutes
- Total Time: 50 minutes
- Yield: 24 cookies 1x
- Category: Dessert
- Cuisine: American
Ingredients
- 1 cup (230g) unsalted butter, softened
- 1 cup (200g) granulated sugar
- 1 large egg
- 1 teaspoon vanilla extract
- 2 ½ cups (310g) all-purpose flour
- 1 teaspoon baking powder
- ¼ teaspoon salt
- 1 cup white candy melts
- Mini chocolate chips or edible pearls for decoration
Instructions
- Preheat the oven to 350°F (175°C) and line baking sheets with parchment paper.
- In a large mixing bowl, cream together softened butter and granulated sugar until smooth and fluffy. Add the egg and vanilla extract, mixing until combined.
- In a separate bowl, whisk together all-purpose flour, baking powder, and salt.
- Gradually add the dry ingredients to the wet ingredients, mixing until a soft dough forms. If the dough feels sticky, add more flour (1 tablespoon at a time).
- Wrap the dough in plastic wrap and chill in the refrigerator for at least 30 minutes.
- Roll out the chilled dough on a lightly floured surface to about ¼-inch thickness. Use a round cookie cutter or small glass to cut out cookies.
- Place the cookies on the prepared baking sheet and bake for 8-10 minutes, or until the edges are just starting to turn golden. Cool completely on a wire rack.
- Melt the white candy melts according to package instructions and let cool slightly.
- Transfer the melted candy into a piping bag or Ziploc bag with a small hole cut in the corner. Pipe zigzag lines across the cookies to create mummy bandages.
- Place mini chocolate chips or edible pearls onto the cookies for eyes while the candy melt is still wet.
- Allow the cookies to sit at room temperature until the candy melt hardens. Store in an airtight container or enjoy immediately.
Notes
[‘Chill the dough to help it hold its shape during baking.’, ‘Roll out the dough evenly for consistent baking.’, ‘Use good-quality candy melts for smooth piping; thin with vegetable oil if needed.’, ‘Let kids get creative with their mummy designs for added fun.’]
Nutrition
- Serving Size: 1 cookie
- Calories: 120
- Sugar: 8
- Sodium: 50
- Fat: 6
- Saturated Fat: 4
- Carbohydrates: 15
- Protein: 1
Keywords: Halloween, Mummy Cookies, Kids Recipe, Sugar Cookies, Spooky Treats, Halloween Party, Easy Baking, Fun Activity


