
Introduction
The crunch of pickled vegetables, with their tangy, slightly sweet bite, is a flavor experience that’s hard to beat. Honestly, fridge pickling is one of the easiest ways to preserve your garden bounty or enjoy your favorite veggies with an added zing. I remember the first time I tried making refrigerator pickles—it was during a weekend of experimenting with ways to spice up my salads, and let me tell you, these pickled veggies stole the show.
This recipe for easy refrigerator pickled vegetables is not just fast, but it’s also incredibly versatile. Whether you’re looking to jazz up your sandwiches, add a pop of flavor to your charcuterie boards, or simply snack on something addictive, this recipe has you covered. It’s perfect for when you want a burst of flavor without the hassle of traditional canning.
Plus, if you’re a fan of DIY food projects (or just love knowing what’s in your food), you’ll appreciate how simple and satisfying this process is. Grab some jars and your favorite veggies—you’re about to discover the joy of homemade refrigerator pickles!
Why You’ll Love This Recipe
There are so many reasons to fall in love with this refrigerator pickled vegetable recipe. Here’s why it’s bound to become a staple in your kitchen:
- Quick & Easy: No special canning equipment or techniques required—it’s ready in just 15 minutes of prep time.
- Customizable: Mix and match your favorite vegetables for endless flavor combinations.
- Perfect for Any Occasion: Add these pickles to BBQ platters, sandwiches, tacos, or even salads.
- Healthy and Fresh: Packed with veggies and a light brine, this recipe is a low-calorie snack option.
- Flavor Explosion: The perfect balance of tangy, sweet, and salty makes every bite irresistible.
This recipe is ideal for anyone who enjoys fresh flavors and loves having a jar of homemade goodness ready to go in the fridge. Once you try it, you’ll be hooked!
Ingredients You Will Need
This recipe uses simple ingredients that you likely already have at home or can easily find at your local grocery store. Here’s what you’ll need:
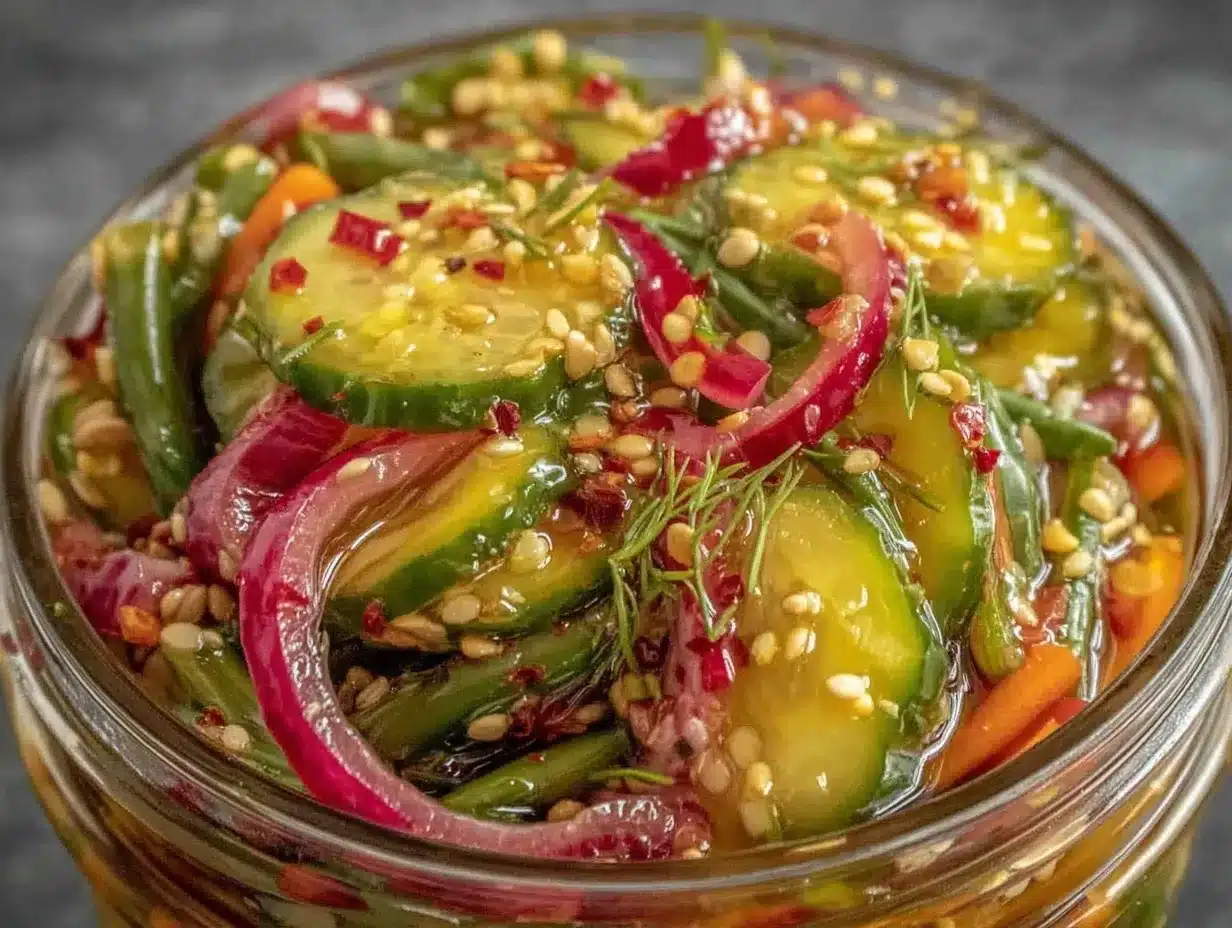
- Vegetables: Carrots (peeled and julienned), cucumbers (sliced into rounds or spears), radishes (thinly sliced), bell peppers (cut into strips), and green beans (trimmed).
- Garlic: Peeled and slightly smashed for added flavor.
- Fresh Herbs: Dill (for a classic pickled flavor) or cilantro for a unique twist.
- Spices: Whole black peppercorns, mustard seeds, and red pepper flakes (adjust to your spice preference).
- Water: Filtered water for the brine.
- Vinegar: White vinegar (or apple cider vinegar for a slightly sweeter taste).
- Sugar: Granulated sugar to balance the tanginess.
- Salt: Kosher salt or sea salt (avoid iodized salt, as it can cloud the brine).
Feel free to get creative with your veggie selection! Cauliflower, zucchini, or even asparagus work wonderfully, too.
Equipment Needed
You don’t need a lot to make these pickles, which is part of the charm of refrigerator pickling. Here’s all you’ll need:
- Glass Jars: Mason jars or any clean glass jars with tight-fitting lids.
- Knife: A sharp knife for slicing vegetables evenly.
- Cutting Board: For prepping your veggies.
- Measuring Cups and Spoons: To ensure your brine is just right.
- Medium Saucepan: For preparing the pickling brine.
If you don’t have mason jars, repurpose clean jars from store-bought sauces or jams—just make sure they’re sanitized before use.
Preparation Method
- Prepare the Vegetables: Wash and dry your chosen vegetables thoroughly. Peel and cut them into desired shapes—thin slices, spears, or bite-sized pieces.
- Sanitize the Jars: Wash your glass jars in hot, soapy water, then rinse and dry completely.
- Pack the Jars: Fill each jar with your prepared vegetables, adding fresh herbs, garlic cloves, and spices as you layer them.
- Make the Brine: In a medium saucepan, combine 1 cup (240 ml) water, 1 cup (240 ml) vinegar, 2 tablespoons (30 g) sugar, and 1 tablespoon (15 g) kosher salt. Heat over medium heat until the sugar and salt dissolve, stirring occasionally.
- Pour the Brine: Carefully pour the hot brine over the vegetables in each jar, leaving about 1/2 inch (1.3 cm) of headspace at the top.
- Seal and Refrigerate: Close the lids tightly and let the jars cool to room temperature before transferring them to the refrigerator.
- Let Them Pickle: Allow the pickles to sit for at least 24 hours before enjoying. The longer they sit, the more flavorful they’ll become!
Once you taste your homemade pickles, you’ll understand why they’re so addictive!
Cooking Tips & Techniques
- Don’t Overfill: Leave enough space in the jars to ensure the brine can fully cover the veggies.
- Use Fresh Ingredients: Choose the freshest vegetables and herbs for the best flavor.
- Adjust the Spice: If you prefer milder pickles, skip the red pepper flakes or reduce the amount.
- Brine Temperature: Let the brine cool slightly before pouring it over delicate vegetables, like cucumbers, to prevent them from softening too much.
- Experiment with Flavors: Add a slice of ginger or a sprinkle of turmeric for unique variations.
Pay attention to the brine ratio—too much vinegar can overwhelm the flavors, while too little won’t preserve the vegetables properly.
Variations & Adaptations
- Low-Sugar Option: Reduce or omit the sugar for a tangier pickle.
- Seasonal Twist: Use seasonal vegetables like asparagus in spring or squash in fall.
- Herb Choices: Swap dill for thyme, rosemary, or even mint for a unique flavor profile.
- Spicy Pickles: Add sliced jalapeños or extra chili flakes for a fiery kick.
- Dietary Adjustments: Use apple cider vinegar for a slightly sweeter, healthier alternative.
I once added fresh lemon zest and fennel seeds to my brine—it was a surprising hit with everyone who tried it!
Serving & Storage Suggestions
These pickled vegetables are best served chilled. Here are some serving ideas:
- Pair them with burgers, sandwiches, or tacos for a crunchy, tangy addition.
- Add them to salads for extra flavor and texture.
- Serve them as a side dish or snack alongside your favorite dips.
Storage: Keep the jars refrigerated and sealed tightly. These pickles will stay fresh for up to 3 weeks. If the brine turns cloudy or the veggies lose their crunch, it’s time to discard them.
Reheating Tips: These are meant to be eaten cold, but if you prefer a warm pickle for certain dishes, briefly heat them on low in a skillet with a splash of the brine.
Nutritional Information & Benefits
These refrigerator pickled vegetables are as healthy as they are tasty:
- Low-Calorie: Each serving is low in calories, making it a guilt-free snack.
- Rich in Nutrients: Packed with vitamins, minerals, and antioxidants from the vegetables.
- Gut-Friendly: Vinegar in the brine supports digestion and gut health.
- Dietary Considerations: Naturally gluten-free, dairy-free, and vegan.
Be cautious if you’re sensitive to salt; you might want to reduce the amount in the brine to suit your dietary needs.
Conclusion
This easy refrigerator pickled vegetables recipe is a game-changer for anyone who loves bold, fresh flavors. It’s quick, customizable, and perfect for elevating everyday meals or snacks. Whether you’re a seasoned pickler or a first-timer, this recipe makes it simple to enjoy homemade pickles without the fuss of traditional methods.
Give it a try, and let your creativity shine with your choice of vegetables and spices. I’d love to hear how you make this recipe your own—leave a comment below with your favorite veggie and spice combo!
So grab some jars, whip up a batch, and enjoy the magic of refrigerator pickling. Happy pickling!
FAQs
Can I use frozen vegetables for this recipe?
Fresh vegetables are best, as frozen ones may turn mushy when pickled.
How long do the pickled vegetables need to sit before eating?
At least 24 hours for the flavors to develop, but they’re even better after 2-3 days.
Can I reuse the brine for another batch?
Yes, you can reuse the brine once, but the flavor may be slightly weaker. Boil it again before using.
What’s the best vinegar for pickling?
White vinegar is standard, but apple cider vinegar adds a sweeter, more complex flavor.
Do I need to sterilize the jars?
While sterilizing isn’t necessary for refrigerator pickles, always use clean jars to prevent spoilage.
Pin This Recipe!

Easy Refrigerator Pickled Vegetables Recipe You’ll Love

This quick and versatile refrigerator pickled vegetables recipe is perfect for adding a tangy, flavorful crunch to your meals without the hassle of traditional canning.
- Prep Time: 15 minutes
- Cook Time: 5 minutes
- Total Time: 20 minutes
- Yield: 4 jars 1x
- Category: Side Dish
- Cuisine: American
Ingredients
- Carrots (peeled and julienned)
- Cucumbers (sliced into rounds or spears)
- Radishes (thinly sliced)
- Bell peppers (cut into strips)
- Green beans (trimmed)
- Garlic (peeled and slightly smashed)
- Fresh dill or cilantro
- Whole black peppercorns
- Mustard seeds
- Red pepper flakes
- 1 cup filtered water
- 1 cup white vinegar or apple cider vinegar
- 2 tablespoons granulated sugar
- 1 tablespoon kosher salt or sea salt
Instructions
- Wash and dry your chosen vegetables thoroughly. Peel and cut them into desired shapes—thin slices, spears, or bite-sized pieces.
- Wash your glass jars in hot, soapy water, then rinse and dry completely.
- Fill each jar with your prepared vegetables, adding fresh herbs, garlic cloves, and spices as you layer them.
- In a medium saucepan, combine 1 cup water, 1 cup vinegar, 2 tablespoons sugar, and 1 tablespoon kosher salt. Heat over medium heat until the sugar and salt dissolve, stirring occasionally.
- Carefully pour the hot brine over the vegetables in each jar, leaving about 1/2 inch of headspace at the top.
- Close the lids tightly and let the jars cool to room temperature before transferring them to the refrigerator.
- Allow the pickles to sit for at least 24 hours before enjoying. The longer they sit, the more flavorful they’ll become.
Notes
[‘Leave enough space in the jars to ensure the brine can fully cover the veggies.’, ‘Choose the freshest vegetables and herbs for the best flavor.’, ‘If you prefer milder pickles, skip the red pepper flakes or reduce the amount.’, ‘Let the brine cool slightly before pouring it over delicate vegetables to prevent them from softening too much.’, ‘Experiment with flavors by adding ginger, turmeric, or lemon zest.’]
Nutrition
- Serving Size: 1/4 jar
- Calories: 15
- Sugar: 2
- Sodium: 300
- Carbohydrates: 3
- Fiber: 1
Keywords: pickled vegetables, refrigerator pickles, easy pickling recipe, homemade pickles, quick pickling, healthy snack, vegan pickles, gluten-free pickles


