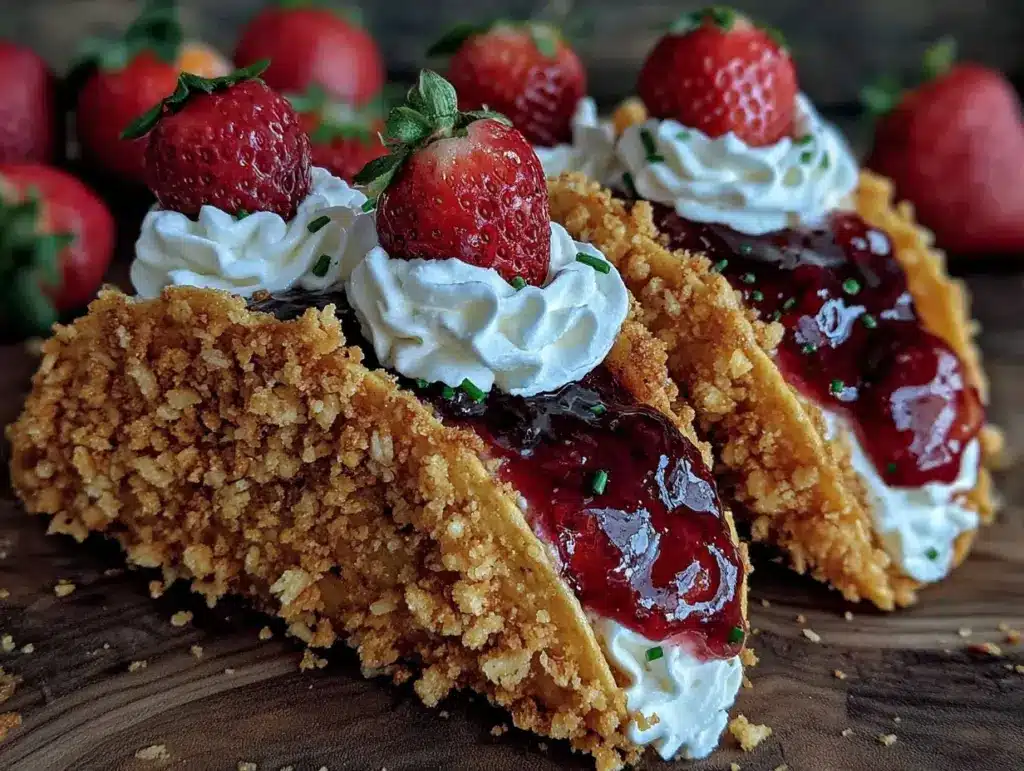
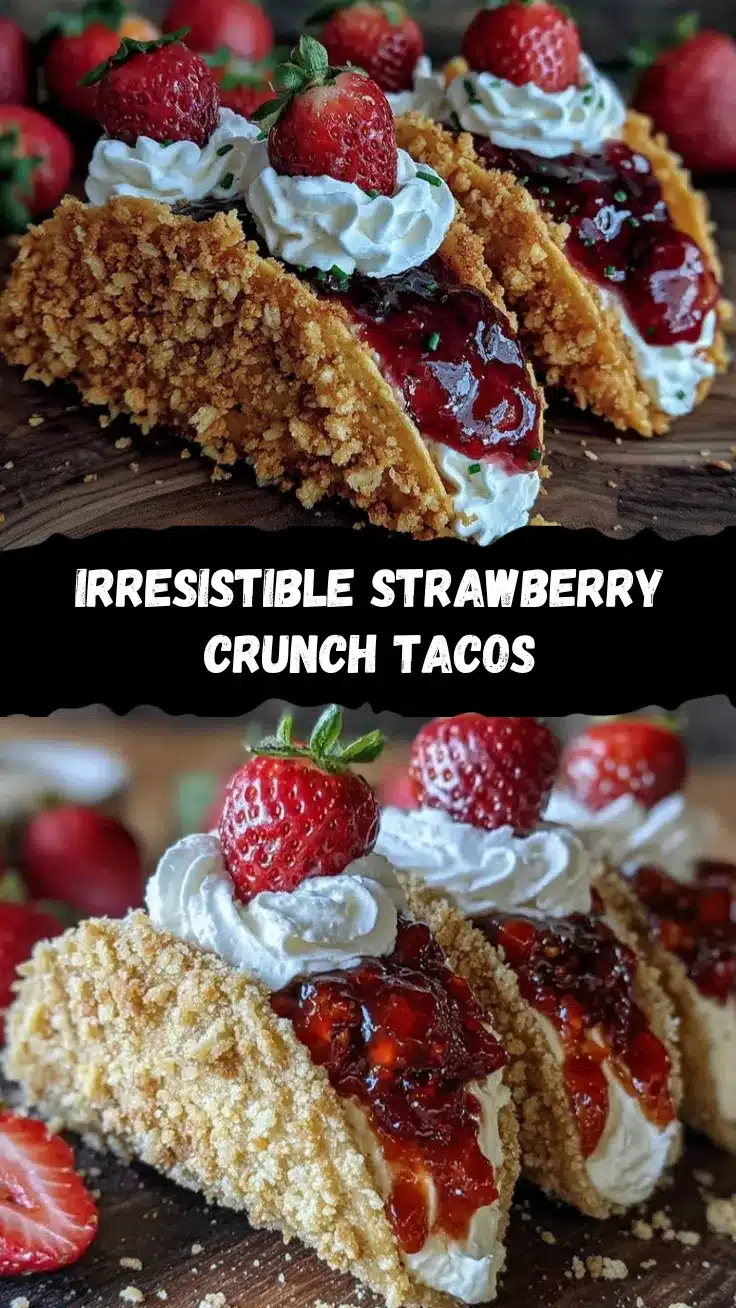
The combination of creamy cheesecake filling, crunchy strawberry coating, and a crispy taco shell is pure magic. Imagine biting into a sweet taco that’s loaded with velvety cheesecake, topped with strawberry crunch, and finished with a drizzle of glaze or whipped cream—it’s the dessert you didn’t know you needed! These Strawberry Crunch Cheesecake Tacos are easy to make, ridiculously fun to eat, and perfect for impressing anyone who loves dessert with a twist.
I first tried these during a summer BBQ when I wanted something unique but not overly complicated. Let me tell you, they were the hit of the party! Whether you’re making them for a birthday, brunch, or just because, this recipe is an absolute showstopper.
The best part? You don’t need fancy equipment or hard-to-find ingredients. Plus, they’re customizable for dietary preferences. Let’s dive into this irresistible recipe for Strawberry Crunch Cheesecake Tacos!
Why You’ll Love This Recipe
- Quick & Easy: These tacos come together in less than 30 minutes, making them perfect for last-minute dessert cravings.
- Fun and Unique: Who doesn’t love a playful dessert like cheesecake tacos? They’re guaranteed to be a conversation starter.
- Simple Ingredients: You probably have most of the ingredients in your pantry or fridge already—no specialty shopping trips required.
- Perfect for Any Occasion: Great for parties, holidays, or even a cozy night in with family.
- Customizable: Adjust the flavors, toppings, or crunch coating to suit your tastes or dietary needs.
- Unbelievably Delicious: The creamy cheesecake filling paired with the strawberry crunch is a flavor explosion you’ll dream about.
This recipe is also kid-approved—my little ones love assembling their own tacos and adding their favorite toppings! It’s truly a dessert that brings people together, whether you’re hosting a gathering or enjoying some solo indulgence.
What Ingredients You Will Need
These Strawberry Crunch Cheesecake Tacos use simple, everyday ingredients to create a dessert that feels gourmet. Here’s what you’ll need:
- For the taco shells:
- Soft flour tortillas (small size, taco-style)
- Unsalted butter (melted, for brushing)
- Granulated sugar (for coating)
- For the cheesecake filling:
- Cream cheese (room temperature)
- Heavy cream
- Powdered sugar
- Vanilla extract
- For the strawberry crunch:
- Golden Oreos (crushed into crumbs)
- Freeze-dried strawberries (crushed)
- Unsalted butter (melted, to bind the crunch)
- Optional toppings:
- Whipped cream
- Fresh strawberries (sliced)
- Strawberry glaze or syrup
Pro Tip: You can swap freeze-dried strawberries for strawberry-flavored cereal if you’re in a pinch, and use dairy-free cream cheese and butter for a vegan-friendly version.
Equipment Needed
- Baking sheet
- Rolling pin (optional, for shaping tortillas)
- Mixing bowls
- Electric mixer or whisk
- Measuring cups and spoons
- Plastic bag (for crushing Oreos and strawberries)
- Small spatula or spoon (for assembling tacos)
If you don’t have a rolling pin, a clean bottle works just as well for shaping your tortillas. And if you’d rather skip baking, you can use store-bought dessert taco shells as a shortcut!
Detailed Preparation Method

- Prepare the taco shells: Preheat your oven to 350°F (175°C). Brush both sides of the tortillas with melted butter and sprinkle them with granulated sugar. Drape each tortilla over an oven rack or taco shell mold to create a taco shape. Bake for 10-12 minutes, or until crispy. Let them cool completely.
- Make the cheesecake filling: In a mixing bowl, beat the cream cheese until smooth and fluffy. Add powdered sugar and vanilla extract, mixing until combined. Slowly pour in the heavy cream and whip until the mixture is thick and creamy.
- Prepare the strawberry crunch: Crush the Golden Oreos and freeze-dried strawberries in a plastic bag using a rolling pin. Mix the crumbs with melted butter until combined. Spread the crunch mixture onto a plate or shallow dish.
- Assemble the tacos: Once the shells are cooled, fill each one with the cheesecake mixture using a spoon or piping bag. Dip the edges of the taco into the strawberry crunch mixture to coat the filling. Add optional toppings like whipped cream, sliced strawberries, or a drizzle of strawberry glaze.
- Serve and enjoy: Arrange the tacos on a serving platter and serve immediately. These are best eaten fresh for maximum crunch and creaminess!
If your cheesecake filling feels too runny, chill it in the fridge for 10-15 minutes to firm up before assembling. And don’t worry if your taco shells crack a little—just call it rustic charm!
Cooking Tips & Techniques
- Use room temperature cream cheese: This ensures a smooth and creamy filling without lumps.
- Don’t skip chilling the shells: Let your taco shells cool completely before adding the filling. Warm shells can cause the cheesecake to melt.
- Customize your crunch: Add a pinch of salt to the crunch mixture for a sweet-salty combo, or mix in chopped nuts for extra texture.
- Make ahead: Prepare the cheesecake filling and crunch mixture in advance. Store them separately and assemble the tacos just before serving.
- Experiment with shapes: If you don’t want traditional taco shells, try folding tortillas into cups or cones for a different look.
Trust me, once you’ve mastered these tips, you’ll want to make cheesecake tacos for every occasion!
Variations & Adaptations
- Chocolate Lovers: Swap the Golden Oreos for chocolate sandwich cookies and drizzle the tacos with chocolate syrup instead of strawberry glaze.
- Low-Carb Option: Use almond flour tortillas and sugar-free sweeteners in the cheesecake filling and crunch mixture.
- Seasonal Twist: Replace the strawberries with other fruits like blueberries, raspberries, or peaches to suit the season.
- Vegan Adaptation: Use dairy-free cream cheese, coconut cream, and vegan butter for a plant-based version.
- Nutty Crunch: Add crushed peanuts or almonds to your crunch mixture for a nutty flavor boost.
I’ve tried the chocolate version myself, and it’s a decadent alternative that’s equally crowd-pleasing!
Serving & Storage Suggestions
These tacos are best served fresh, but here are some tips for storing and reheating:
- Serving: Serve the tacos chilled or at room temperature. Pair them with a refreshing drink like lemonade or iced tea for a perfect summer dessert.
- Storage: Store assembled tacos in the refrigerator for up to 24 hours. Keep them covered to prevent the shells from getting soggy.
- Reheating: If your shells lose their crunch, pop them in the oven for a few minutes to crisp them back up.
- Make-ahead: Store the cheesecake filling and crunch mixture separately in airtight containers for up to 3 days. Assemble tacos just before serving.
The flavors meld beautifully over time, so even a slightly chilled taco will still taste amazing!
Nutritional Information & Benefits
While these tacos are definitely a treat, here’s a rough breakdown of their nutritional profile:
- Calories: Approximately 300-350 per taco
- Protein: About 4-6g (thanks to the cream cheese)
- Key Benefits: Strawberries are rich in Vitamin C and antioxidants, while cream cheese provides calcium and a creamy texture without heavy sugar.
- Dietary Considerations: Gluten-free and vegan adaptations are easy to make for this recipe.
While not an everyday dessert, these tacos are perfect for a special occasion or indulgence!
Conclusion
If you’re ready to try a dessert that’s as fun as it is delicious, Strawberry Crunch Cheesecake Tacos are the recipe for you. Their unique combination of crispy shells, creamy filling, and crunchy topping is simply irresistible. Plus, they’re easy to customize, so you can make them truly your own.
I personally love how these tacos bring a sense of whimsy to dessert time. Whether you’re hosting a party or treating yourself, these tacos are guaranteed to make your day sweeter. Don’t forget to share your creations in the comments—I’d love to hear how you made them your own!
Now, grab your ingredients and let’s get started—you’re just minutes away from dessert bliss!
FAQs
Can I use store-bought taco shells?
Yes! Pre-made dessert taco shells work perfectly if you want to save time.
What can I use instead of freeze-dried strawberries?
Strawberry-flavored cereal or fresh strawberries can work as substitutes.
How do I prevent the shells from cracking?
Brush them generously with butter before baking, and avoid overbaking to keep them pliable.
Can I make these ahead of time?
Yes, you can prep the filling and crunch mixture in advance. Assemble the tacos right before serving for maximum freshness.
Are these tacos gluten-free?
Not as written, but you can use gluten-free tortillas and cookies for the crunch mixture to make them safe for gluten-free diets.
Pin This Recipe!
Strawberry Crunch Cheesecake Tacos

A unique dessert combining creamy cheesecake filling, crunchy strawberry coating, and crispy taco shells. Perfect for parties or indulgent treats.
- Prep Time: 15 minutes
- Cook Time: 12 minutes
- Total Time: 27 minutes
- Yield: 6 servings
- Category: Dessert
- Cuisine: American
Ingredients
- Soft flour tortillas (small size, taco-style)
- Unsalted butter (melted, for brushing)
- Granulated sugar (for coating)
- Cream cheese (room temperature)
- Heavy cream
- Powdered sugar
- Vanilla extract
- Golden Oreos (crushed into crumbs)
- Freeze-dried strawberries (crushed)
- Unsalted butter (melted, to bind the crunch)
- Whipped cream (optional)
- Fresh strawberries (sliced, optional)
- Strawberry glaze or syrup (optional)
Instructions
- Preheat your oven to 350°F (175°C). Brush both sides of the tortillas with melted butter and sprinkle them with granulated sugar. Drape each tortilla over an oven rack or taco shell mold to create a taco shape. Bake for 10-12 minutes, or until crispy. Let them cool completely.
- In a mixing bowl, beat the cream cheese until smooth and fluffy. Add powdered sugar and vanilla extract, mixing until combined. Slowly pour in the heavy cream and whip until the mixture is thick and creamy.
- Crush the Golden Oreos and freeze-dried strawberries in a plastic bag using a rolling pin. Mix the crumbs with melted butter until combined. Spread the crunch mixture onto a plate or shallow dish.
- Once the shells are cooled, fill each one with the cheesecake mixture using a spoon or piping bag. Dip the edges of the taco into the strawberry crunch mixture to coat the filling. Add optional toppings like whipped cream, sliced strawberries, or a drizzle of strawberry glaze.
- Arrange the tacos on a serving platter and serve immediately. These are best eaten fresh for maximum crunch and creaminess.
Notes
[‘Use room temperature cream cheese for a smooth filling.’, ‘Let taco shells cool completely before adding the filling to prevent melting.’, ‘Customize the crunch mixture with salt or chopped nuts for extra flavor.’, ‘Prepare the cheesecake filling and crunch mixture ahead of time and assemble tacos just before serving.’, ‘Experiment with different shapes like cups or cones for variety.’]
Nutrition
- Serving Size: 1 taco
- Calories: 300350
- Sugar: 18
- Sodium: 150
- Fat: 20
- Saturated Fat: 12
- Carbohydrates: 30
- Fiber: 2
- Protein: 5
Keywords: Strawberry Crunch Cheesecake Tacos, dessert tacos, cheesecake tacos, strawberry dessert, easy dessert recipe


