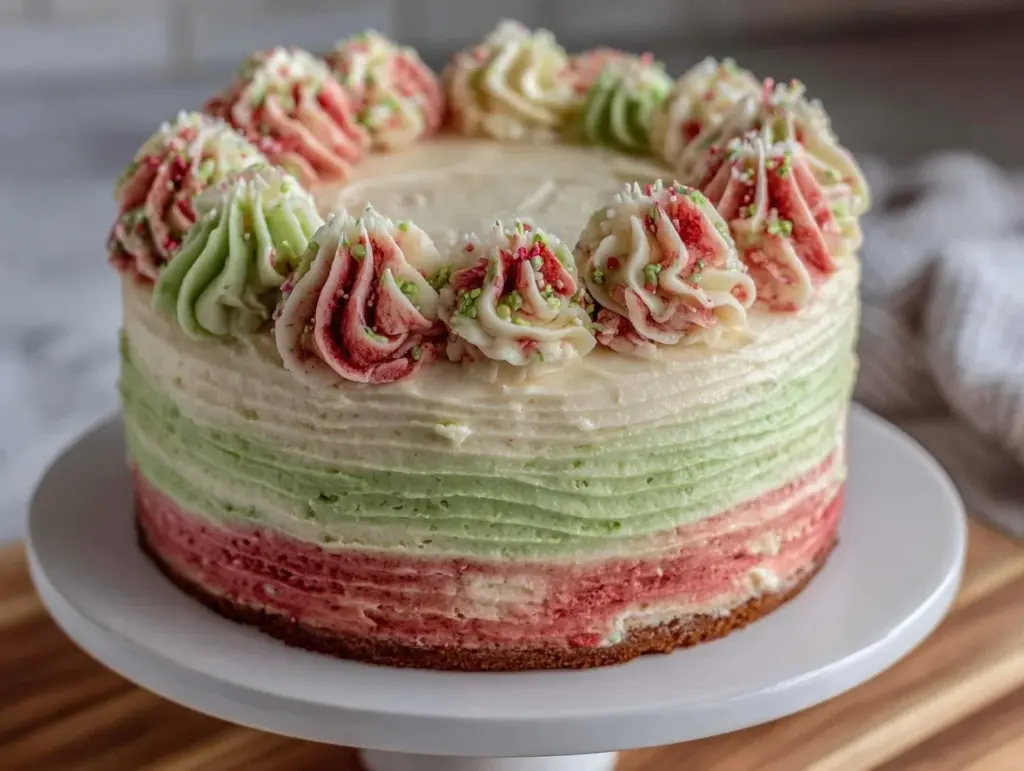
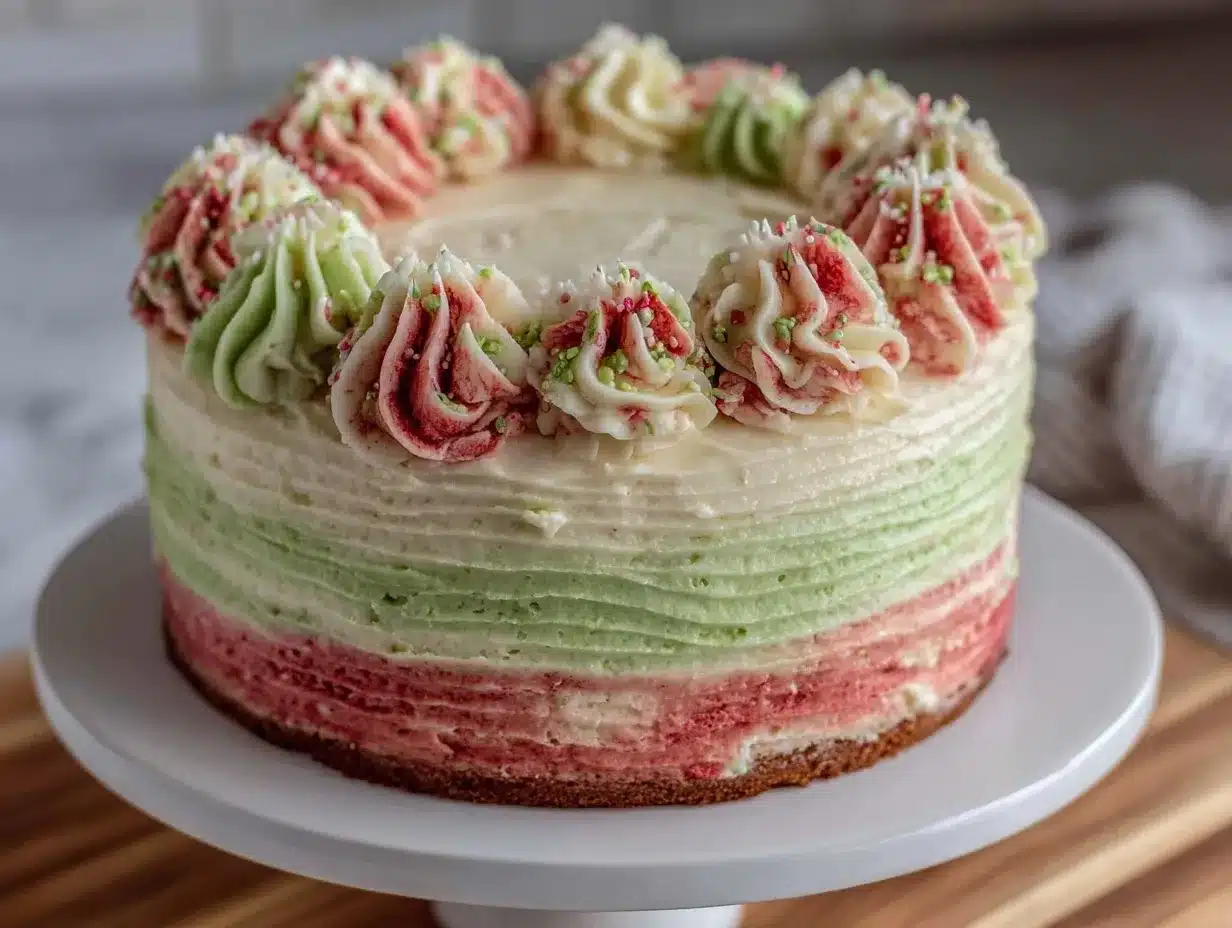
The sight of a Stunning Pink and Green Ombre Wicked Birthday Cake just immediately lifts your spirits, doesn’t it? I still remember the first time I baked this cake — the excitement of blending those vibrant colors and watching the ombre effect come to life was honestly magical. It made me realize how baking can be an art form, and this Wicked Birthday Cake is one of those creations that truly stands out.
What I love most about this recipe is how approachable it is, despite the fancy look. If you’ve ever felt intimidated by multi-colored cakes or intricate designs, trust me, this one’s got your back. The pink and green tones aren’t just pretty; they add a playful, fresh vibe that’s perfect for any celebration — especially birthdays that call for a wow factor.
As someone who’s baked this cake several times for friends and family, I’ve fine-tuned the process to balance ease and style. The layers bake evenly, and the frosting holds those wicked drips perfectly without a fuss. Whether you’re a seasoned baker or just getting your feet wet, this Stunning Pink and Green Ombre Wicked Birthday Cake recipe is the kind of showstopper that’ll also make your kitchen smell like a dream.
Why You’ll Love This Recipe
- Quick & Easy: This cake comes together in about 1.5 hours, perfect for last-minute party plans or weekend baking sprees.
- Simple Ingredients: You won’t need anything exotic; just pantry staples and a couple of food coloring shades.
- Perfect for Celebrations: Whether it’s a birthday bash, a fun get-together, or just because, this cake brings the festive vibe.
- Crowd-Pleaser: Kids and adults alike can’t seem to get enough of the sweet vanilla layers paired with that luscious buttercream.
- Unbelievably Delicious: It’s not just about looks — the moist crumb and silky frosting make every bite a treat.
What sets this cake apart? It’s that wicked drip effect, which I perfected after a couple of trial runs. The frosting has just the right consistency so the drips look dramatic but don’t run wild. Plus, the ombre layers are smooth and vibrant, thanks to blending the food coloring carefully. Honestly, this isn’t your average birthday cake — it’s the kind that makes guests pause and ask, “Where did you get this?”
And there’s a little secret: this cake feels like a celebration in every slice. It’s the kind of recipe that turns a simple birthday into a memorable moment without stress.
What Ingredients You Will Need
This Stunning Pink and Green Ombre Wicked Birthday Cake uses straightforward ingredients that work in harmony to deliver both flavor and eye-catching appeal. The ingredients are mostly staples, so you probably have most of them right in your pantry or fridge.
- For the Cake Batter:
- All-purpose flour – 2 ¾ cups (345g)
- Baking powder – 2 ½ teaspoons
- Salt – ½ teaspoon
- Unsalted butter – 1 cup (227g), softened (I like using Kerrygold for creaminess)
- Granulated sugar – 2 cups (400g)
- Large eggs – 4, at room temperature
- Whole milk – 1 cup (240ml), room temperature
- Pure vanilla extract – 2 teaspoons
- Pink gel food coloring – adjust to desired shade (I recommend AmeriColor for vibrant hues)
- Green gel food coloring – adjust to desired shade (same brand works well here)
- For the Buttercream Frosting:
- Unsalted butter – 1 ½ cups (340g), softened
- Powdered sugar – 5 cups (600g), sifted
- Heavy cream – 3-4 tablespoons (45-60ml)
- Pure vanilla extract – 1 teaspoon
- Pink gel food coloring – as needed
- Green gel food coloring – as needed
- Dark chocolate or candy melts (for the wicked drip) – ½ cup (90g)
- Heavy cream (for drip) – ¼ cup (60ml)
If you want a dairy-free option, swap butter for vegan margarine and use coconut cream instead of heavy cream. For a gluten-free twist, almond flour isn’t ideal here, but a 1:1 gluten-free flour blend works beautifully. Just keep an eye on baking times since they might shift slightly.
Equipment Needed
- Two 8-inch (20cm) round cake pans (non-stick preferred)
- Mixing bowls (medium and large sizes)
- Electric mixer or stand mixer (hand mixers work too, but stand mixer saves your arms!)
- Spatulas (silicone ones are great for scraping bowls)
- Measuring cups and spoons
- Cooling racks for cakes
- Offset spatula for frosting application
- Piping bags (optional, but helpful for neat frosting layers)
- Serrated knife for leveling cakes
- Small saucepan or microwave-safe bowl for melting chocolate
If you don’t have two cake pans, you can bake the layers one at a time, just remember to adjust your timing. For frosting, a bench scraper can be handy to get those smooth sides, but a clean spatula works fine too. Maintaining your mixer by cleaning immediately after use keeps it happy and performing well for recipes like this.
Detailed Preparation Method
- Preheat and Prep: Preheat your oven to 350°F (175°C). Grease the two 8-inch pans and line the bottoms with parchment paper for easy removal. This step makes a big difference in clean layers.
- Mix Dry Ingredients: In a medium bowl, whisk together 2 ¾ cups (345g) all-purpose flour, 2 ½ teaspoons baking powder, and ½ teaspoon salt. Set aside.
- Cream Butter and Sugar: Using your mixer, beat 1 cup (227g) softened unsalted butter and 2 cups (400g) granulated sugar on medium speed until light and fluffy — about 3-4 minutes. This creates that tender crumb we’re after.
- Add Eggs: Crack in 4 large eggs one at a time, mixing well after each addition. If the batter looks like it’s about to separate, add 1 tablespoon of flour to bring it back together.
- Incorporate Dry and Wet: Alternately add the flour mixture and 1 cup (240ml) whole milk to the butter mixture, starting and ending with the flour. Mix on low speed until just combined; overmixing can toughen the cake.
- Add Vanilla: Stir in 2 teaspoons pure vanilla extract for that comforting aroma.
- Divide and Color Batter: Divide the batter evenly into two bowls. Add pink gel food coloring to one, green to the other. Start small—you can always add more for a bolder color.
- Pour and Layer: Pour the pink batter into one pan and the green into the other. Smooth the tops with a spatula. Bake for about 30-35 minutes or until a toothpick inserted comes out clean. Rotate pans halfway through for even baking.
- Cool Completely: Let cakes cool in pans for 10 minutes, then transfer to wire racks. Cooling completely is key for neat frosting.
- Prepare Buttercream: Beat 1 ½ cups (340g) softened butter until creamy (around 2 minutes). Gradually add 5 cups (600g) powdered sugar, alternating with 3-4 tablespoons (45-60ml) heavy cream, mixing on low until combined. Stir in 1 teaspoon vanilla extract. Adjust consistency with more cream or sugar as needed.
- Color Frosting: Separate frosting into three portions: one keep white, tint one with pink, the other with green. This will help create the ombre effect on the outside.
- Assemble Cake: Level the cake layers with a serrated knife if domed. Place one layer on your serving plate. Spread a thin layer of white frosting on top. Add the second layer, then frost the entire cake with the white buttercream base.
- Create Ombre Effect: Apply the pink frosting to the top half of the cake and green to the bottom half in patches. Use an offset spatula or bench scraper to gently blend where the colors meet, creating that smooth ombre transition.
- Make Wicked Drip: Melt ½ cup (90g) dark chocolate or candy melts with ¼ cup (60ml) heavy cream in a saucepan over low heat, stirring constantly. Let cool slightly until thick but pourable.
- Drip Application: Using a spoon or squeeze bottle, carefully drip chocolate over the edges of the cake. The drips should be uneven for that wicked look but controlled enough not to flood the sides.
- Final Touches: Add any extra decorations you like — sprinkles, edible glitter, or fresh flowers work nicely. Chill the cake for 30 minutes to set the drip before serving.
Cooking Tips & Techniques
One trick I learned early on is to really beat the butter and sugar well. Your cake texture depends a lot on this aeration step. Also, don’t rush folding in the flour — gentle but thorough mixing avoids a dense cake.
When coloring, gel food colors are your friend. Liquid ones can thin the batter and affect baking. Start with a small amount and build up—colors look different baked than in batter.
Applying the frosting ombre style takes patience. Apply dabs of each color and then smooth gently, rather than mixing the colors completely. It’s okay if it’s not perfect; the charm is in that subtle gradient.
For the drip, temperature is everything. Too hot and your chocolate runs to the bottom; too cool and it won’t drip nicely. Test on the side of a bowl before applying to the cake.
Lastly, if your cake layers domed too much, slice the tops off carefully with a serrated knife before frosting. This helps your layers stack evenly and look professional.
Variations & Adaptations
- Flavor Variations: Swap vanilla extract for almond or lemon for a fresh twist. You could also add a teaspoon of matcha powder to the green batter for a natural color and earthy flavor.
- Dietary Adjustments: Use a gluten-free flour blend and dairy-free butter to make this cake allergy-friendly. Coconut cream works well in the frosting for a dairy-free option.
- Seasonal Touches: Add edible flowers on top for springtime birthday vibes, or sprinkle crushed peppermint candy for a festive winter look.
- Method Adaptations: For a quicker version, bake the batter in cupcakes and frost individually, keeping the ombre effect by piping colored frosting in layers.
- Personal Twist: I sometimes add a thin layer of raspberry jam between the layers for a tart contrast that pairs beautifully with the sweet frosting.
Serving & Storage Suggestions
This cake is best served at room temperature so the buttercream is soft and luscious. I like to slice it with a sharp serrated knife, wiping the blade between slices for clean edges. Serve it alongside a cup of tea or a cold glass of milk—trust me, it’s a perfect combo.
To store, keep the cake covered in the fridge if you’re not eating it right away. It holds well for up to 4 days. If you want to freeze, wrap tightly in plastic wrap and foil; thaw overnight in the fridge before serving.
Reheating? Just let slices sit at room temperature for about 30 minutes. The flavors mellow and the frosting softens, making each bite even better than fresh.
Nutritional Information & Benefits
Per slice (based on 12 servings): approximately 350 calories, 18g fat, 45g carbs, 3g protein.
This cake isn’t just about looks — using real butter and whole milk adds richness and satiety, while vanilla extract offers a comforting aroma without added sugar. If you choose to add matcha or fresh fruit toppings, you’re sneaking in antioxidants and vitamins.
Note that this recipe contains gluten, dairy, and eggs, so it’s not suitable for all diets unless you make the suggested substitutions. For a special occasion treat, it fits nicely into a balanced lifestyle, bringing joy and a splash of color to the table.
Conclusion
The Stunning Pink and Green Ombre Wicked Birthday Cake really is a crowd-pleaser that’s surprisingly doable. I love how it combines bold looks with classic flavors, making it a favorite in my baking repertoire. You can tweak the colors, flavors, and decorations to make it your own — and honestly, that’s half the fun.
If you try this recipe, I’d love to hear how your cake turned out or any creative spins you put on it. Drop a comment below or share photos if you feel like showing off your handiwork. Baking should be joyful, and this cake certainly brings a bit of wicked magic to the party.
So grab your mixing bowls, pick your favorite pink and green shades, and get ready to impress. Happy baking!
FAQs
How do I get the perfect ombre effect on my cake?
Apply the colored frosting in patches and gently smooth where the colors meet with a spatula or bench scraper. Don’t mix too much — the gradient happens with light blending.
Can I make this cake ahead of time?
Yes! Bake the layers a day ahead and store wrapped tightly. Assemble and frost on the day you plan to serve for best freshness.
What if I don’t have gel food coloring?
You can use liquid food coloring, but start with less and be aware it may thin your batter or frosting slightly. Gel colors give more vibrant shades without thinning.
How do I prevent my cake layers from doming?
Use room temperature ingredients, don’t overmix, and bake at the right temperature. If doming happens, level the tops with a serrated knife once cooled.
Can I make the drip without chocolate?
Absolutely! You can use colored candy melts or even a simple glaze made from powdered sugar and milk tinted with food coloring for a different look.
Pin This Recipe!
Stunning Pink and Green Ombre Wicked Birthday Cake
A vibrant and playful ombre birthday cake featuring pink and green layers with a luscious buttercream frosting and a dramatic wicked chocolate drip. Perfect for celebrations and easy enough for bakers of all levels.
- Prep Time: 30 minutes
- Cook Time: 35 minutes
- Total Time: 1 hour 30 minutes
- Yield: 12 servings 1x
- Category: Dessert
- Cuisine: American
Ingredients
- 2 ¾ cups (345g) all-purpose flour
- 2 ½ teaspoons baking powder
- ½ teaspoon salt
- 1 cup (227g) unsalted butter, softened
- 2 cups (400g) granulated sugar
- 4 large eggs, at room temperature
- 1 cup (240ml) whole milk, room temperature
- 2 teaspoons pure vanilla extract
- Pink gel food coloring, adjust to desired shade
- Green gel food coloring, adjust to desired shade
- 1 ½ cups (340g) unsalted butter, softened (for frosting)
- 5 cups (600g) powdered sugar, sifted
- 3–4 tablespoons (45-60ml) heavy cream
- 1 teaspoon pure vanilla extract (for frosting)
- Pink gel food coloring (for frosting)
- Green gel food coloring (for frosting)
- ½ cup (90g) dark chocolate or candy melts (for wicked drip)
- ¼ cup (60ml) heavy cream (for drip)
Instructions
- Preheat oven to 350°F (175°C). Grease two 8-inch round cake pans and line bottoms with parchment paper.
- In a medium bowl, whisk together flour, baking powder, and salt. Set aside.
- Using a mixer, beat 1 cup softened unsalted butter and granulated sugar on medium speed until light and fluffy, about 3-4 minutes.
- Add eggs one at a time, mixing well after each addition. If batter looks like it will separate, add 1 tablespoon flour to bring it back together.
- Alternately add flour mixture and milk to butter mixture, starting and ending with flour. Mix on low speed until just combined.
- Stir in vanilla extract.
- Divide batter evenly into two bowls. Add pink gel food coloring to one and green gel food coloring to the other, adjusting to desired shade.
- Pour pink batter into one pan and green batter into the other. Smooth tops with spatula.
- Bake for 30-35 minutes or until a toothpick inserted comes out clean. Rotate pans halfway through baking.
- Cool cakes in pans for 10 minutes, then transfer to wire racks to cool completely.
- For frosting, beat 1 ½ cups softened butter until creamy, about 2 minutes.
- Gradually add powdered sugar, alternating with heavy cream, mixing on low until combined.
- Stir in vanilla extract. Adjust consistency with more cream or sugar as needed.
- Separate frosting into three portions: keep one white, tint one pink, and one green.
- Level cake layers with serrated knife if domed.
- Place one layer on serving plate and spread a thin layer of white frosting on top.
- Add second layer and frost entire cake with white buttercream base.
- Apply pink frosting to top half and green frosting to bottom half in patches.
- Use offset spatula or bench scraper to gently blend where colors meet for ombre effect.
- Melt dark chocolate or candy melts with heavy cream over low heat, stirring constantly until smooth.
- Let chocolate mixture cool slightly until thick but pourable.
- Drip chocolate over edges of cake using spoon or squeeze bottle, creating uneven but controlled drips.
- Add optional decorations such as sprinkles, edible glitter, or fresh flowers.
- Chill cake for 30 minutes to set the drip before serving.
Notes
Use gel food coloring for vibrant colors without thinning batter. For dairy-free, substitute butter with vegan margarine and heavy cream with coconut cream. For gluten-free, use a 1:1 gluten-free flour blend and adjust baking time. Beat butter and sugar well for tender crumb. Temperature control is key for perfect chocolate drip. Level domed cake layers before frosting for even stacking.
Nutrition
- Serving Size: 1 slice (1/12 of cak
- Calories: 350
- Fat: 18
- Carbohydrates: 45
- Protein: 3
Keywords: birthday cake, ombre cake, pink and green cake, buttercream frosting, chocolate drip, celebration cake, easy cake recipe


