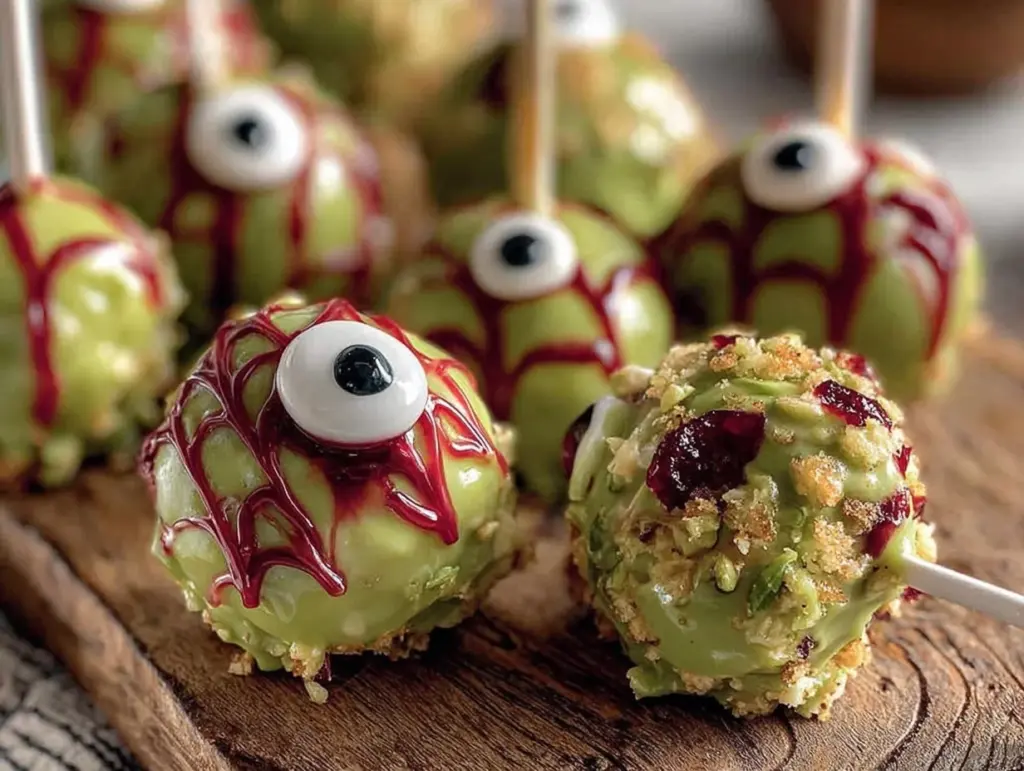
The first time I made spooky monster eyeball cake pops, the whole kitchen smelled like sugary mischief mixed with chocolatey goodness. Honestly, there’s something wildly fun about biting into a little ball of cake disguised as a creepy eyeball, especially when Halloween is just around the corner. These treats aren’t just cute—they bring back memories of childhood Halloween parties where the weirder, the better. I remember testing this recipe several times, tweaking the colors and the gooey “veins” until I got that perfect eerie look that makes everyone do a double take.
Whether you’re hosting a spooky soirée or just want to add some fun to your autumn afternoons, these monster eyeball cake pops are a total winner. They’re easy enough to whip up on a whim but impressive enough to make you feel like the Halloween hero of your neighborhood. Plus, packing a little cake on a stick? That’s just plain clever.
After making these over and over, I can say with confidence that spooky monster eyeball cake pops aren’t your average Halloween treat—they’re a conversation starter, a sugar rush, and a playful challenge all rolled into one. If you love homemade Halloween goodies that bring a little creepy charm and a whole lot of yum, you’ll want to keep reading.
Why You’ll Love This Recipe
I’ve baked and decorated these spooky monster eyeball cake pops more times than I can count, and here’s why they’ve earned a permanent spot in my Halloween lineup:
- Quick & Easy: From baking the cake to decorating the eyeballs, this recipe takes about 1.5 hours total—perfect for last-minute Halloween prep.
- Simple Ingredients: You probably have most of what you need right in your pantry—cake mix, frosting, candy melts, and a few fun decorations.
- Perfect for Parties: These cake pops are the star at any Halloween bash, potluck, or classroom treat day.
- Crowd-Pleaser: Kids and adults alike can’t resist the spooky, sweet, and slightly creepy vibe these eyeballs bring.
- Unbelievably Delicious: Moist cake combined with smooth frosting and a crunchy candy coating creates a texture combo that’s just right.
What sets this recipe apart? It’s all in the details—the way you shape the cake balls for that perfect eyeball roundness, the delicate drizzle of red icing for the “bloodshot” effect, and the glossy candy melts that make each pop look like a tiny monster’s gaze. I like to blend a bit of cream cheese frosting sometimes for extra tang, but the classic buttercream works wonders too.
Honestly, this isn’t just another cake pop recipe. It’s that fun project that gets everyone in the Halloween spirit and tastes so good you’ll want to keep them around long after October 31st.
What Ingredients You Will Need
This recipe uses simple, approachable ingredients to create spooky monster eyeball cake pops that pack a punch in flavor and look. Most of these are pantry staples or easy to find at any grocery store.
- For the Cake Balls:
- 1 box of yellow or white cake mix (plus ingredients listed on the box: usually eggs, oil, water)
- ½ cup (120g) unsalted butter, softened
- 1 cup (120g) powdered sugar
- 2 tablespoons (30ml) milk
- 1 teaspoon vanilla extract
- For the Coating & Decoration:
- 12 ounces (340g) white candy melts (I recommend Wilton brand for smooth melting)
- Black edible gel or black piping gel for pupils
- Red edible gel or red decorating icing for veins
- White candy eyes (optional, for extra creep factor)
- Cake pop sticks or lollipop sticks
If you want to swap things up, you can use a homemade cake instead of the boxed mix or dairy-free candy melts for a vegan-friendly twist. I find using firm white candy melts gives the best glossy, eyeball-like finish. Also, picking a smooth frosting helps the cake balls hold their shape without crumbling. For a seasonal touch, you might add a teaspoon of pumpkin spice to the batter—makes it extra fitting for fall!
Equipment Needed
- Standard 9×13 inch baking pan (or round cake pans if preferred)
- Mixing bowls and electric hand mixer or stand mixer
- Baking sheet lined with parchment paper or silicone mat
- Cake pop sticks (you can find these at craft stores or online)
- Microwave-safe bowls for melting candy melts
- Small paintbrush or toothpicks for decorating veins and pupils
- Styrofoam block or cake pop stand to hold pops upright while drying
If you don’t have cake pop sticks, wooden skewers trimmed to size work in a pinch. I’ve used a silicone mat when parchment wasn’t handy, and it cleans up beautifully. For melting candy melts, a double boiler is nice but a microwave with short bursts works just fine too. Just be patient and stir frequently!
Detailed Preparation Method
- Bake the Cake: Preheat your oven to 350°F (175°C). Prepare your cake mix according to the package instructions (or use your homemade batter). Pour into a greased 9×13 inch pan and bake for 25-30 minutes until a toothpick inserted comes out clean. Let the cake cool completely—this is key for forming the cake balls without crumbling.
- Crumble the Cake: Once cooled, crumble the cake into a large bowl with your hands or a fork until it’s fine and crumbly but not powdery.
- Make the Frosting: In a separate bowl, beat together the softened butter, powdered sugar, milk, and vanilla extract until smooth and creamy. Adjust the milk or sugar slightly if needed to get a thick but spreadable consistency.
- Combine Cake & Frosting: Add ½ cup (120g) of frosting to the cake crumbs and mix thoroughly with a spoon or your hands until the mixture holds together when pressed. If it feels too dry, add frosting a teaspoon at a time; too wet, add a little more cake crumbs.
- Form the Cake Balls: Scoop out tablespoon-sized portions and roll into smooth balls about 1.5 inches (4 cm) in diameter. Place them on a parchment-lined baking sheet. Chill in the fridge for at least 30 minutes to firm up.
- Melt Candy Coating: While the cake balls chill, melt the white candy melts in a microwave-safe bowl in 20-second increments, stirring well between each until smooth and fully melted.
- Assemble Cake Pops: Dip the tip of each cake pop stick into the melted candy, then insert it halfway into the cake ball. This helps the stick stay put. Return pops to the fridge for 10 minutes to set.
- Coat the Cake Pops: Dip each cake pop into the melted candy melts, covering completely. Gently tap off excess coating and stand the pops upright in a styrofoam block to dry. If the coating thickens, reheat gently.
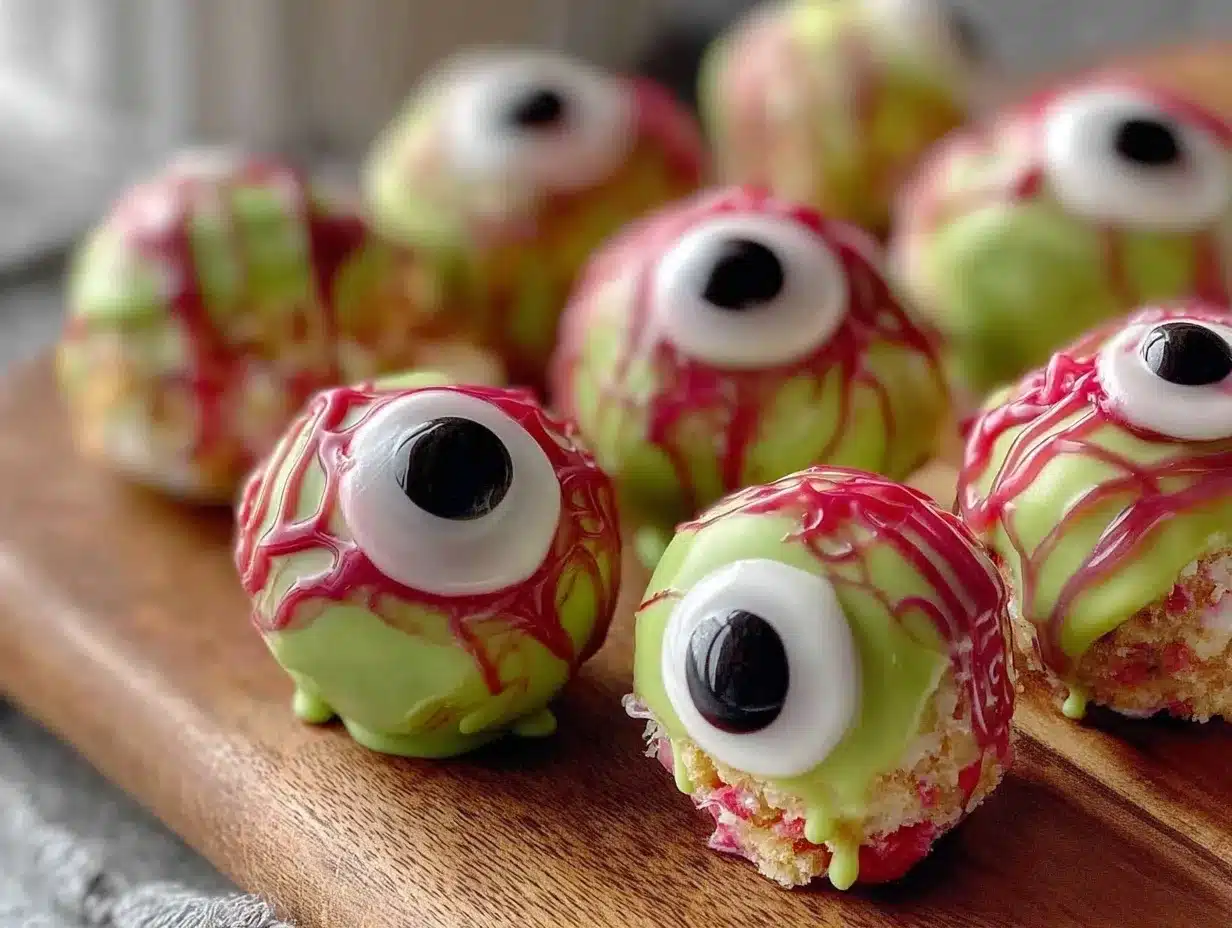
- Decorate the Eyeballs: Before the coating hardens fully, use a small paintbrush or toothpick to add red “veins” with red edible gel or icing. Once dry, add the black pupil in the center with black edible gel. If you like, add white candy eyes for an extra spooky look.
- Let Dry Completely: Allow the cake pops to dry fully at room temperature or in the fridge for about 1 hour before serving.
Pro tip: If your cake balls feel crumbly, chill them longer or add a bit more frosting. Also, warming the candy melts just right makes coating easier and smoother—no one wants clumpy eyeballs!
Cooking Tips & Techniques
Making spooky monster eyeball cake pops is pretty forgiving, but a few tricks make the process smoother:
- Don’t skip chilling: Cake balls need to be firm before dipping. It prevents them from falling apart or getting soggy.
- Use high-quality candy melts: Cheap melts can thicken or clump. Wilton or Merckens brands have reliable melting and shine.
- Be gentle with coating: Dip quickly and tap off excess to avoid thick, uneven shells.
- Work in batches: Candy melts can seize up if overheated. Melt small portions and reheat as needed.
- Decorate swiftly: Add “bloodshot veins” while the coating is still tacky, or they won’t stick well.
- Keep pops cool: Warm rooms can soften cake balls and candy shells—chill between steps if needed.
I once tried rushing the chilling step and ended up with sad, droopy eyeballs. Lesson learned! Also, using a toothpick for fine details gives better control than a brush for the creepy red veins.
Variations & Adaptations
You can easily customize these spooky monster eyeball cake pops for different tastes and needs:
- Flavor swaps: Use chocolate cake instead of yellow for a darker, richer eyeball. Add a teaspoon of peppermint extract for a minty surprise.
- Dietary options: Gluten-free cake mix and dairy-free frosting make this treat allergy-friendly. Use vegan candy melts for a dairy-free version.
- Colorful monsters: Swap white candy melts for colored ones—green, purple, or orange—to create all kinds of monster eyes.
- Baking method: Instead of cake balls, bake mini cupcakes and decorate them with the same eyeball technique for a fun twist.
- Personal favorite: I once added crushed cookies inside the cake ball for extra crunch—totally unexpected and delicious!
Feel free to experiment with different edible decorations like sprinkles or edible glitter to make your monsters truly one-of-a-kind. Halloween is the perfect time to get wild.
Serving & Storage Suggestions
Serve your spooky monster eyeball cake pops chilled or at room temperature for the best texture and flavor. They look fantastic arranged on a Halloween-themed platter or stuck upright in a decorative styrofoam “graveyard.”
These pops pair well with a cold glass of milk, hot chocolate, or even a tangy fruit punch to balance the sweetness. For a party, consider serving alongside other Halloween treats like pumpkin cookies or caramel apples.
Store leftover cake pops in an airtight container in the refrigerator for up to 5 days. To freeze, place them on a baking sheet until firm, then transfer to a freezer-safe container. Thaw in the fridge overnight before serving.
Reheat gently by letting them sit at room temperature for 15 minutes—avoid microwaving, or the candy coating may soften or melt. Over time, the flavors meld, and the cake becomes even more moist, making leftovers surprisingly tasty.
Nutritional Information & Benefits
Each spooky monster eyeball cake pop (about 2 ounces / 56 grams) contains roughly:
| Calories | 220 |
|---|---|
| Fat | 10g |
| Carbohydrates | 30g |
| Sugar | 22g |
| Protein | 2g |
While these are definitely a treat, the cake balls do include butter and eggs, which provide some protein and fat for satiety. Using real vanilla extract and quality ingredients means less artificial flavoring, which I always appreciate.
For those avoiding gluten or dairy, simple swaps make this recipe accessible without sacrificing taste. Just remember the candy melts can contain dairy, so check labels if allergies are a concern.
Honestly, these cake pops are all about fun and celebration rather than health, but making them at home means you know exactly what’s inside—and that’s always a win in my book.
Conclusion
Spooky monster eyeball cake pops are a fun, easy way to bring some Halloween magic to your kitchen. Whether you’re a seasoned baker or just want a playful project, this recipe delivers on both taste and spooky style. Customize the colors, flavors, and decorations to suit your vibe—there’s no wrong way to make monster eyes that delight and surprise.
I love these cake pops because they turn baking into a little Halloween adventure. Plus, seeing the smiles (and a few playful shudders) when people bite into them makes all the effort worth it. Go ahead and give this recipe a try—you might just start a new Halloween tradition.
Don’t forget to share your spooky creations and any fun twists you come up with! I’d love to hear how your monster eyeballs turned out.
FAQs About Spooky Monster Eyeball Cake Pops
How long do spooky monster eyeball cake pops last?
Stored in an airtight container in the fridge, they last up to 5 days. For longer storage, freeze and thaw before serving.
Can I make these cake pops ahead of time?
Absolutely! You can prepare and freeze them a week or two in advance. Just thaw in the fridge overnight.
What if my cake balls fall off the sticks?
Make sure the cake balls are chilled well before dipping, and dip the stick tip in candy melts before inserting to help them stick better.
Can I use homemade cake instead of boxed mix?
Yes, any moist cake works well. Just crumble it finely and adjust frosting amount to get a moldable dough.
How do I make the red “veins” look realistic?
Use a fine-tipped paintbrush or toothpick to drag thin lines of red edible gel from the pupil outward in random directions. Practice makes perfect!
Pin This Recipe!
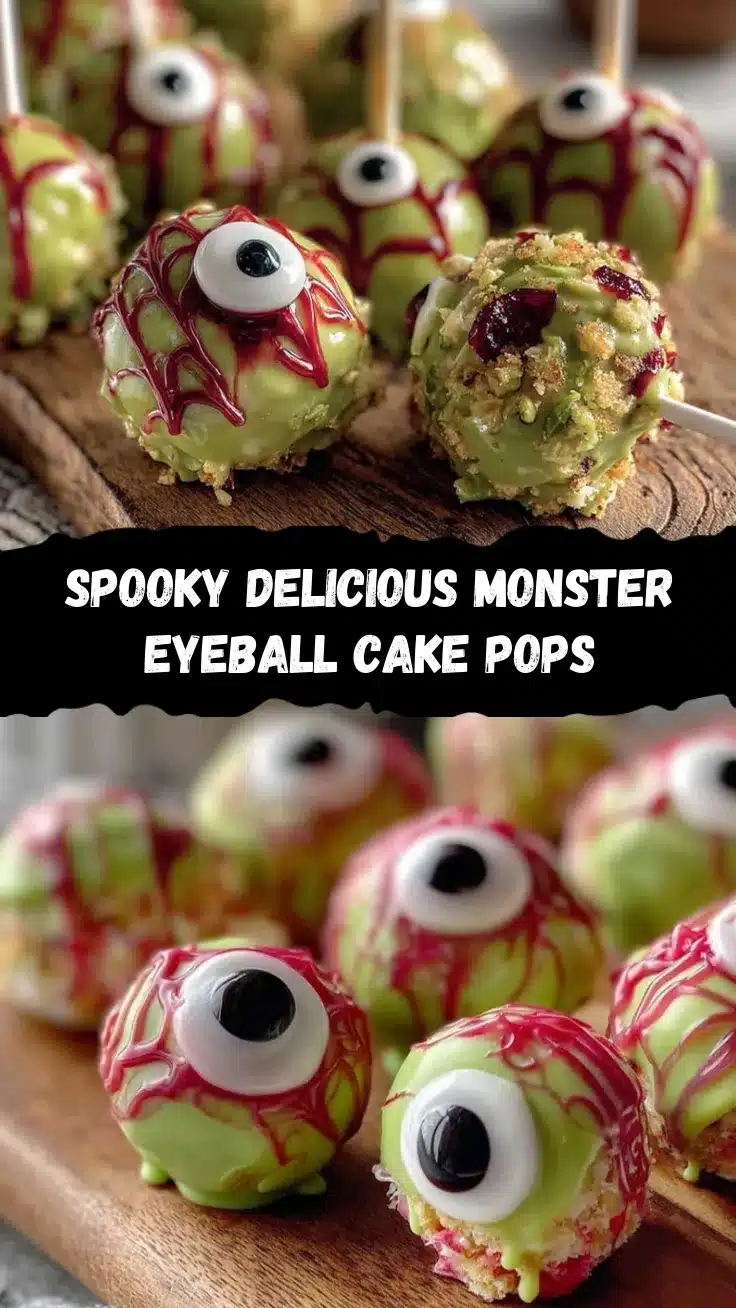
Spooky Monster Eyeball Cake Pops
These spooky monster eyeball cake pops are a fun and easy Halloween treat featuring moist cake balls coated in glossy candy melts and decorated with creepy red veins and pupils.
- Prep Time: 30 minutes
- Cook Time: 30 minutes
- Total Time: 1 hour 30 minutes
- Yield: 24 cake pops 1x
- Category: Dessert
- Cuisine: American
Ingredients
- 1 box yellow or white cake mix (plus ingredients listed on the box: usually eggs, oil, water)
- ½ cup (120g) unsalted butter, softened
- 1 cup (120g) powdered sugar
- 2 tablespoons (30ml) milk
- 1 teaspoon vanilla extract
- 12 ounces (340g) white candy melts
- Black edible gel or black piping gel for pupils
- Red edible gel or red decorating icing for veins
- White candy eyes (optional)
- Cake pop sticks or lollipop sticks
Instructions
- Preheat oven to 350°F (175°C). Prepare cake mix according to package instructions. Pour into greased 9×13 inch pan and bake 25-30 minutes until toothpick comes out clean. Cool completely.
- Crumble cooled cake into a large bowl until fine and crumbly but not powdery.
- In a separate bowl, beat softened butter, powdered sugar, milk, and vanilla extract until smooth and creamy. Adjust milk or sugar for thick but spreadable consistency.
- Add ½ cup (120g) frosting to cake crumbs and mix until mixture holds together when pressed. Adjust with more frosting or crumbs as needed.
- Scoop tablespoon-sized portions and roll into 1.5 inch (4 cm) balls. Place on parchment-lined baking sheet and chill at least 30 minutes.
- Melt white candy melts in microwave-safe bowl in 20-second increments, stirring until smooth.
- Dip tip of each cake pop stick into melted candy, then insert halfway into cake ball. Chill pops 10 minutes to set.
- Dip each cake pop into melted candy melts, covering completely. Tap off excess and stand upright in styrofoam block to dry. Reheat candy melts if thickened.
- Before coating hardens, use small paintbrush or toothpick to add red veins with red edible gel. Once dry, add black pupil with black edible gel. Optionally add white candy eyes.
- Allow cake pops to dry completely at room temperature or in fridge about 1 hour before serving.
Notes
Chill cake balls well before dipping to prevent crumbling. Use high-quality candy melts for smooth coating. Decorate veins while coating is tacky for best adhesion. Work in batches to avoid candy melts seizing. Store in airtight container in fridge up to 5 days or freeze for longer storage.
Nutrition
- Serving Size: 1 cake pop (about 2
- Calories: 220
- Sugar: 22
- Fat: 10
- Carbohydrates: 30
- Protein: 2
Keywords: Halloween, cake pops, spooky treats, monster eyeballs, candy melts, party snacks


