The smell of rich chocolate mingled with the sweet creaminess of pudding always brings a smile to my face, but when you add a spooky twist like these graveyard dirt cake cups, well, that’s just next-level fun. I first whipped up this spooky graveyard dirt cake cups recipe a few Halloweens back when I wanted a dessert that was thrilling for the kids but quick enough to throw together after a long day. Honestly, these little cups turned out to be a crowd-pleaser that had everyone asking for more—adults included!
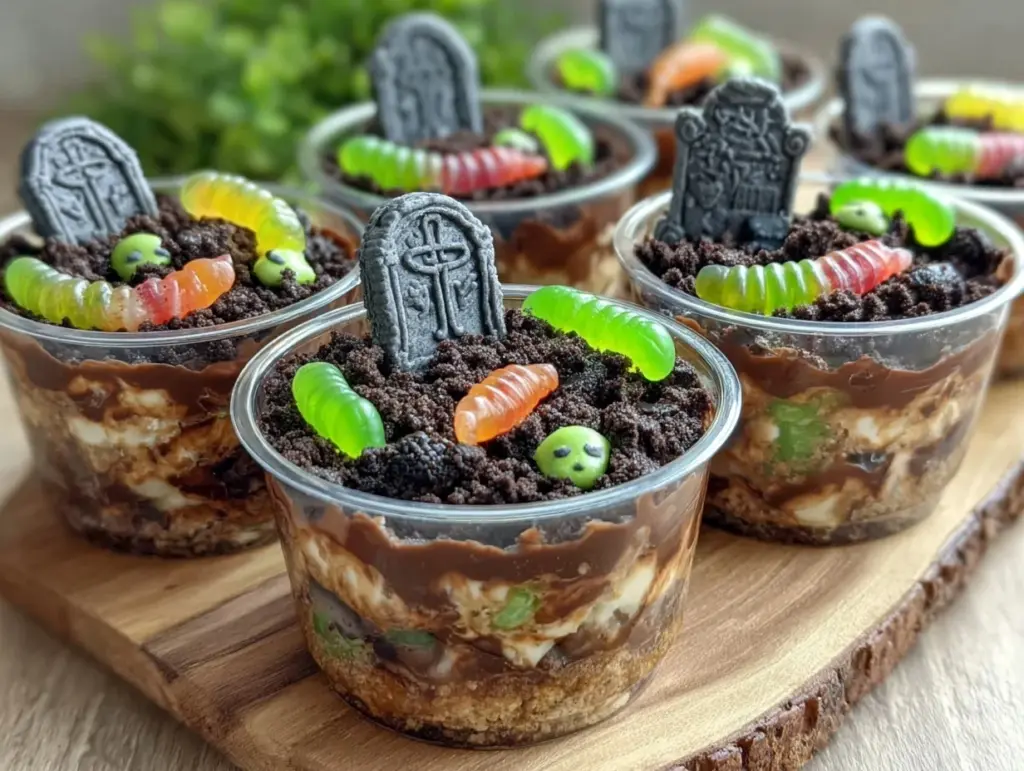
What I love most about these spooky graveyard dirt cake cups is how they balance that playful Halloween vibe with a dessert that’s creamy, chocolatey, and downright addictive. The crushed cookies mimic dirt perfectly, and those little tombstone cookies or candy bones? Pure genius for setting the scene. If you’re hunting for an easy Halloween dessert idea that’s both fun to make and impossible to resist, you’re in the right place.
Over several Halloweens, I’ve tweaked this recipe, testing different pudding flavors and cookie combos, and trust me, this version hits the sweet spot every time. Whether you’re planning a party, prepping for trick-or-treaters, or just craving a festive treat, these graveyard dirt cake cups bring that perfect mix of spooky and sweet. Plus, they’re easy enough for busy families to pull together without a fuss.
Why You’ll Love This Spooky Graveyard Dirt Cake Cups Recipe
After baking and assembling these spooky graveyard dirt cake cups more times than I can count, I’ve nailed down exactly why they’re a Halloween staple in my kitchen. Here’s what makes this recipe stand out:
- Quick & Easy: Ready in under 30 minutes, making it perfect for last-minute Halloween fun or a fun weekend project with kids.
- Simple Ingredients: No hunting for rare stuff here. You’ll likely have everything on hand or can grab it on your routine grocery run.
- Perfect for Halloween Parties: These treats fit right in at spooky-themed gatherings, potlucks, or classroom celebrations.
- Crowd-Pleaser: Kids love the creepy-crawly decorations, and adults appreciate the creamy, chocolatey goodness hidden beneath the “dirt.”
- Unbelievably Delicious: The texture combo of smooth pudding, fluffy whipped cream, and crunchy cookie crumbs is pure comfort food magic.
What really makes this recipe different is the layering technique and the use of crushed chocolate cookies for that perfect “dirt” effect. I also love adding creative toppings like gummy worms and mini tombstones (either homemade or store-bought) to amp up the spooky factor. It’s not just a dessert; it’s a little Halloween scene you can eat! Honestly, after the first bite, you’ll close your eyes and appreciate how fun and tasty this treat is—comfort food with a festive flair.
What Ingredients You Will Need
This spooky graveyard dirt cake cups recipe uses simple, pantry-friendly ingredients that come together without any complicated prep. The magic lies in layering and presentation more than fancy components.
- For the Dirt Cake Base:
- Instant chocolate pudding mix (1 package, about 3.9 oz / 110 g)
- Cold milk (2 cups / 480 ml) – I prefer whole milk for creaminess, but 2% works too
- Whipped topping (1 container, 8 oz / 226 g) – store-bought or homemade, your call!
- Crushed chocolate sandwich cookies (about 2 cups / 200 g) – Oreo or similar, finely crushed for that perfect dirt texture
- For Decoration:
- Gummy worms (a handful, for that creepy crawl vibe)
- Mini tombstone cookies or candy bones (optional but so worth it!)
- Chocolate chips or candy eyes (for extra spooky detail)
For the crushed cookies, I recommend grabbing a brand like Oreo for the classic flavor and texture. If you want to switch things up, chocolate wafer cookies work well too, and in summer, a handful of fresh berries can add a juicy twist. For a dairy-free option, swap the milk and whipped topping with coconut-based alternatives—they blend nicely and don’t compromise the creaminess.
Equipment Needed
- Mixing bowls (medium and large) – glass or stainless steel works best to whisk pudding without sticking
- Electric whisk or hand mixer – to whip the pudding and topping smoothly
- Measuring cups and spoons – accuracy helps with pudding texture
- Spatula – for folding whipped topping into pudding gently
- Small dessert cups or clear plastic cups – to assemble and serve your graveyard dirt cake cups
- Food processor or zip-top bag and rolling pin – for crushing cookies evenly
If you don’t have a food processor, no stress! Just toss the cookies in a zip-top bag, seal it tight, and bash gently with a rolling pin until fine crumbs form. I’ve used both methods and find that manual crushing actually gives a better “dirt” feel with a mix of textures. Also, if you want to get fancy, mini tombstone cookie cutters add a fun homemade touch.
Detailed Preparation Method
- Prepare the Chocolate Pudding: In a large bowl, whisk together the instant chocolate pudding mix and cold milk (2 cups / 480 ml). Whisk vigorously for about 2 minutes until the pudding thickens. Let it set for 5 minutes to firm up.
- Fold in the Whipped Topping: Using a spatula, gently fold in the whipped topping (8 oz / 226 g) until the mixture is smooth and creamy. Don’t overmix—you want it light and airy.
- Crush the Cookies: Place chocolate sandwich cookies in a food processor and pulse until you get fine crumbs, or crush manually in a sealed bag with a rolling pin. Aim for a mix of fine crumbs and small chunks for realistic “dirt.” Set aside about 1 cup (100 g) for topping.
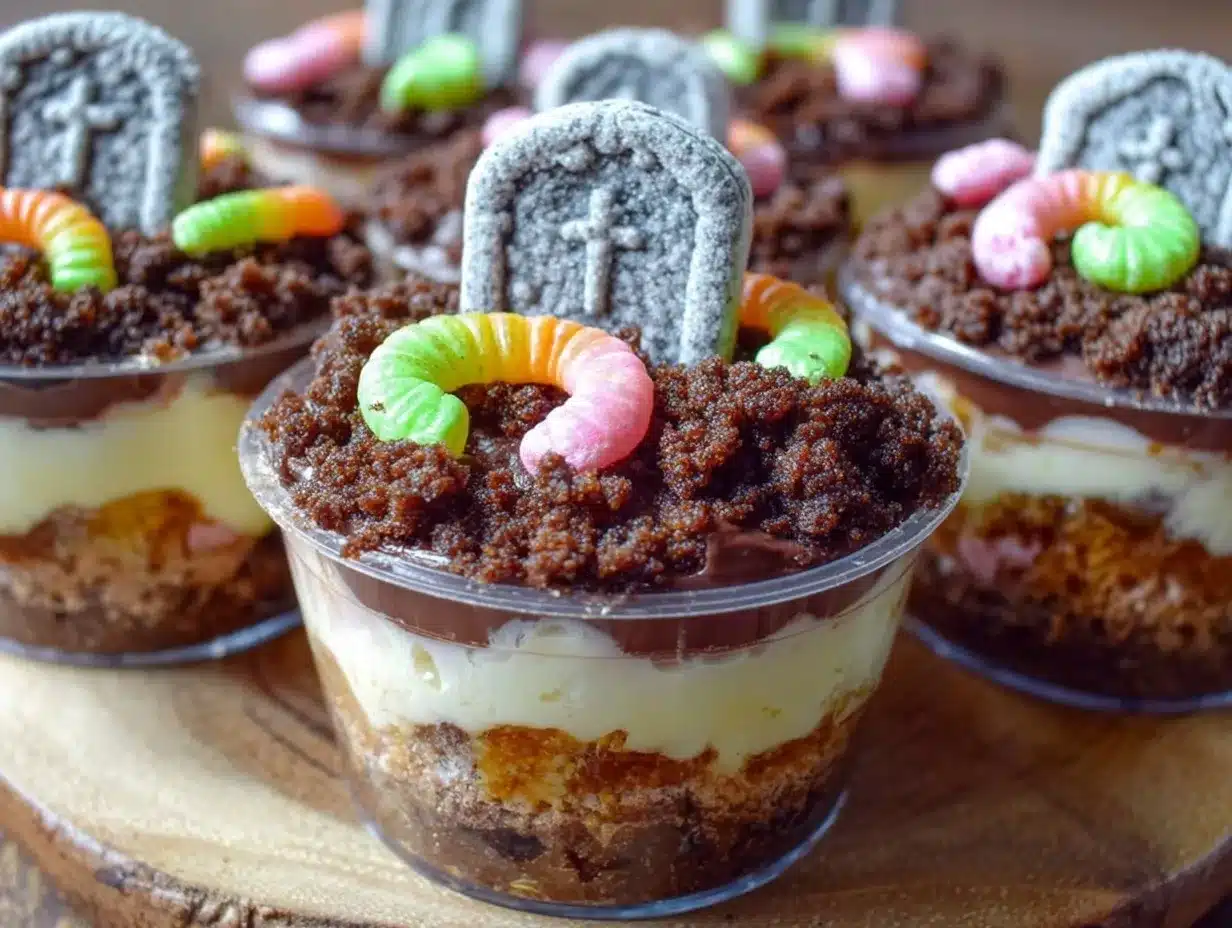
- Layer the Dirt Cake Cups: Spoon a tablespoon of crushed cookie crumbs into the bottom of each dessert cup. Top with 2-3 tablespoons of the pudding mixture, then add another layer of cookie crumbs. Repeat until cups are filled, ending with a cookie crumb topping.
- Add the Spooky Decorations: Nestle gummy worms on top and place mini tombstone cookies or candy bones to create your graveyard scene. Add some chocolate chips or candy eyes for extra creepy fun.
- Chill and Serve: Refrigerate the cups for at least 1 hour before serving to allow the flavors to meld and the pudding to firm up. These can be made a day ahead—just cover with plastic wrap to keep fresh.
Quick tip: If your pudding mixture seems too thick, add a splash of milk (1 tablespoon at a time) and stir gently. When assembling, don’t pack the cookie crumbs too tightly; you want that loose, crumbly dirt effect. Also, for an extra creamy touch, I sometimes add a dollop of cream cheese to the pudding mix—just a personal twist that adds richness.
Cooking Tips & Techniques
When making these spooky graveyard dirt cake cups, timing and technique really matter. Here are some tips I’ve picked up over the years:
- Whip the pudding properly: Use cold milk straight from the fridge and whisk quickly to avoid lumps. Letting it sit a few minutes helps it set perfectly.
- Gentle folding: When folding in the whipped topping, think of it like folding egg whites—you want to keep the airiness for a fluffy texture.
- Cookie crumbs texture: Avoid crushing cookies into powder. Having some chunkier pieces makes the “dirt” look more realistic and adds a nice crunch.
- Chilling matters: Don’t skip chilling. The pudding firms up and the flavors meld, making the dessert taste way better.
- Multitasking: You can crush cookies while the pudding sets to save time. Just don’t crush them too early or they might get soggy if exposed to moisture.
- Decorating: Add gummy worms and tombstones just before serving so they don’t get soggy or lose their shape.
I once forgot to chill the cups and ended up with a runny mess—not fun! Also, if your pudding feels too stiff, a little extra milk smooths it out. These small details make a big difference between a good dirt cake and a knock-out one.
Variations & Adaptations
This spooky graveyard dirt cake cups recipe can easily be tweaked to suit different tastes and dietary needs. Here are some fun variations you might want to try:
- Flavor swaps: Use vanilla or butterscotch instant pudding instead of chocolate for a lighter flavor. Match with corresponding cookie crumbs (like vanilla wafers) for a new twist.
- Gluten-free option: Use gluten-free chocolate sandwich cookies or crushed gluten-free graham crackers. The pudding and whipped topping are naturally gluten-free.
- Dairy-free adaptation: Swap milk and whipped topping for coconut or almond-based alternatives. Use dairy-free pudding mixes available in stores.
- Seasonal touches: Add orange or red food coloring to the pudding for a bloodier look, or top with crushed candy corn for a festive crunch.
- Personal twist: I like adding a layer of peanut butter mousse or cream cheese frosting for a richer dessert. It’s a bit more work but totally worth it.
For cooking methods, while this recipe is no-bake, you could bake mini chocolate cakes as the base instead of cookie crumbs for a more substantial bite. Just crumble the cake in place of cookie crumbs and layer as usual.
Serving & Storage Suggestions
These spooky graveyard dirt cake cups are best served chilled straight from the fridge. They look fantastic in clear cups so your guests can see the layers of “dirt” and creamy pudding, which adds to the fun. For presentation, line a tray with fake spider webs or place mini pumpkins around for a full Halloween vibe.
Pair these cups with a cold glass of milk or a warm cup of spiced cider to balance the sweetness. They also go surprisingly well with sharp cheddar cheese on the side—odd combo, but trust me!
To store, cover the cups tightly with plastic wrap and refrigerate for up to 3 days. The flavors actually deepen after a day, making them even better. If you want to make them ahead for a party, assemble the base layers and store without decorations, then add gummy worms and tombstones just before serving.
If you need to freeze them, it’s possible but not ideal—the texture of the pudding can change. If you do freeze, thaw overnight in the fridge and stir lightly before serving.
Nutritional Information & Benefits
Each spooky graveyard dirt cake cup is a sweet treat that packs roughly 250-300 calories depending on serving size and toppings. The key ingredients like milk and pudding provide calcium and some protein, while the whipped topping adds indulgent creaminess.
Using whole milk and quality chocolate pudding mix means you’re getting a decent dose of calcium and vitamin D, which is always a plus. For a lighter option, you can use low-fat milk and light whipped topping, cutting calories without losing much flavor.
This recipe is gluten-free if you pick the right cookies and dairy-free if you swap in plant-based products, making it flexible for many dietary needs. Be mindful of allergens like dairy, gluten, and gelatin in gummy worms if serving to sensitive eaters.
From my experience, this treat is not just about indulgence—it’s about making memories. Sharing these dessert cups with family and friends adds joy to the spooky season, and that’s a benefit you can’t measure on a nutrition label.
Conclusion
If you’re searching for a Halloween dessert that brings a smile and a little shiver, these spooky graveyard dirt cake cups are exactly what you need. They’re easy, fun to assemble, and downright delicious—the perfect combo for a busy holiday season.
Feel free to tweak the decorations or flavors to match your style, but trust me, this recipe is a winner as-is. I love how it brings out the kid in me while satisfying my sweet tooth. It’s become a Halloween tradition in my house, and I hope it’ll be in yours too!
Give these creepy cups a try, and don’t forget to share your spooky creations and any fun twists you add. I’d love to hear how your graveyard dirt cake cups turn out!
FAQs About Spooky Graveyard Dirt Cake Cups
Can I make these dirt cake cups ahead of time?
Yes! You can assemble the cups up to a day in advance. Just add the gummy worms and decorations right before serving to keep them fresh.
What if I don’t have instant pudding mix?
You can make homemade pudding from scratch, but it will take longer. Instant pudding keeps it quick and easy, perfect for Halloween.
Are there any good cookie substitutes for the “dirt”?
Chocolate wafer cookies or gluten-free chocolate sandwich cookies work well. Just crush them finely for the best texture.
How do I store leftover dirt cake cups?
Cover with plastic wrap and refrigerate for up to 3 days. They’re best eaten chilled and fresh.
Can I add other toppings besides gummy worms?
Absolutely! Try mini marshmallows, candy eyes, or edible glitter to make your graveyard even spookier.
Pin This Recipe!
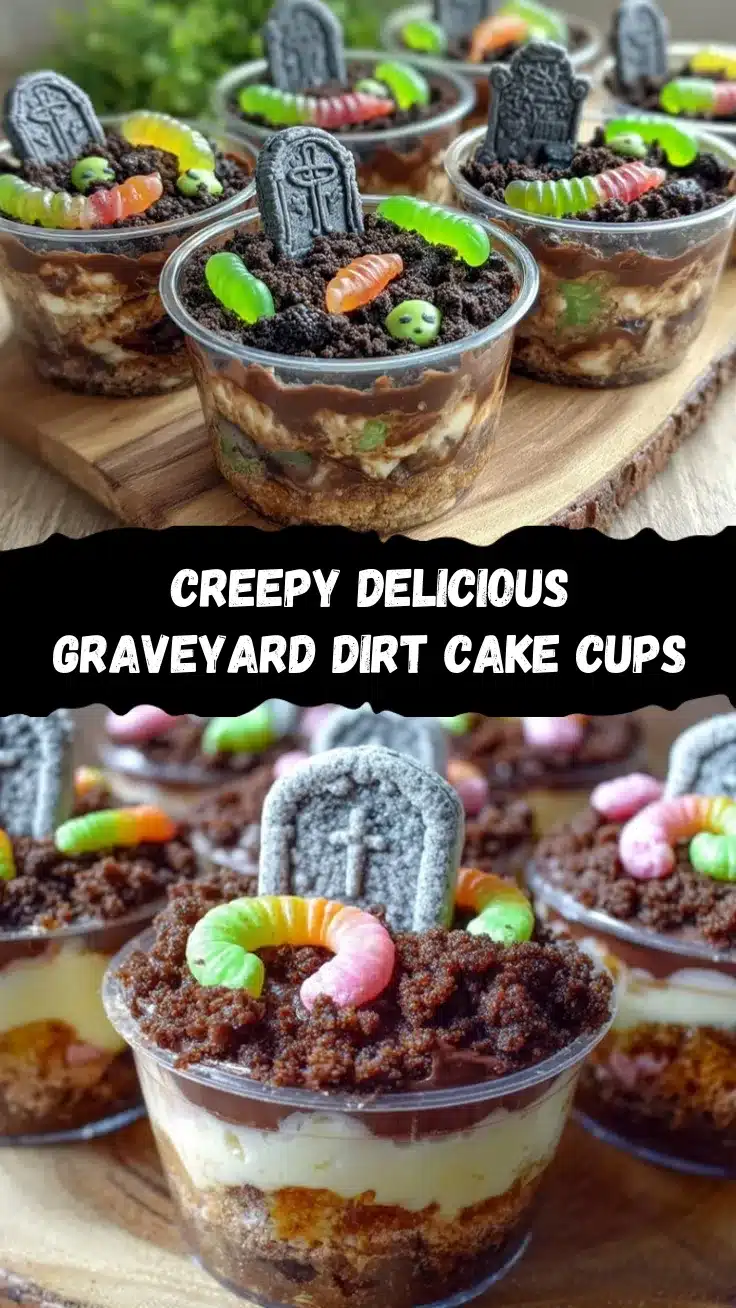
Spooky Graveyard Dirt Cake Cups
A quick and easy Halloween dessert featuring layers of creamy chocolate pudding, whipped topping, and crushed chocolate cookies that mimic dirt, decorated with spooky gummy worms and tombstone cookies.
- Prep Time: 10 minutes
- Cook Time: 0 minutes
- Total Time: 1 hour 10 minutes
- Yield: 8 servings 1x
- Category: Dessert
- Cuisine: American
Ingredients
- 1 package instant chocolate pudding mix (3.9 oz / 110 g)
- 2 cups cold milk (480 ml), whole or 2%
- 1 container whipped topping (8 oz / 226 g), store-bought or homemade
- About 2 cups crushed chocolate sandwich cookies (200 g), Oreo or similar
- Gummy worms (a handful)
- Mini tombstone cookies or candy bones (optional)
- Chocolate chips or candy eyes (for decoration)
Instructions
- In a large bowl, whisk together the instant chocolate pudding mix and cold milk. Whisk vigorously for about 2 minutes until the pudding thickens. Let it set for 5 minutes to firm up.
- Using a spatula, gently fold in the whipped topping until the mixture is smooth and creamy. Do not overmix to keep it light and airy.
- Crush the chocolate sandwich cookies using a food processor or by placing them in a sealed bag and crushing with a rolling pin. Reserve about 1 cup (100 g) for topping.
- Spoon a tablespoon of crushed cookie crumbs into the bottom of each dessert cup. Top with 2-3 tablespoons of the pudding mixture, then add another layer of cookie crumbs. Repeat until cups are filled, ending with a cookie crumb topping.
- Decorate with gummy worms, mini tombstone cookies or candy bones, and chocolate chips or candy eyes to create a spooky graveyard scene.
- Refrigerate the cups for at least 1 hour before serving to allow flavors to meld and pudding to firm up.
Notes
Use cold milk straight from the fridge and whisk quickly to avoid lumps. Fold whipped topping gently to keep airiness. Avoid crushing cookies into powder; keep some chunks for texture. Chill at least 1 hour before serving. Add decorations just before serving to prevent sogginess. For dairy-free, substitute milk and whipped topping with coconut or almond-based alternatives. Gluten-free options available with appropriate cookies.
Nutrition
- Serving Size: 1 cup (about 1 dirt
- Calories: 275
- Sugar: 22
- Sodium: 180
- Fat: 15
- Saturated Fat: 7
- Carbohydrates: 34
- Fiber: 1
- Protein: 3
Keywords: Halloween dessert, dirt cake, pudding cups, spooky dessert, easy Halloween recipe, chocolate pudding, no-bake dessert


