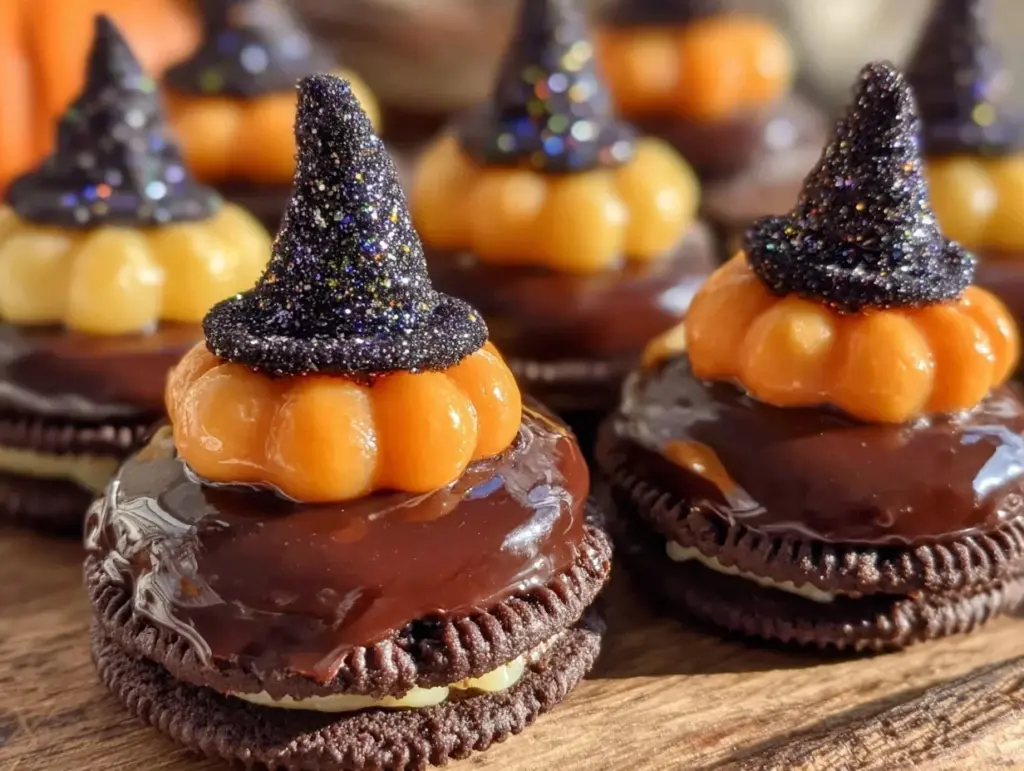
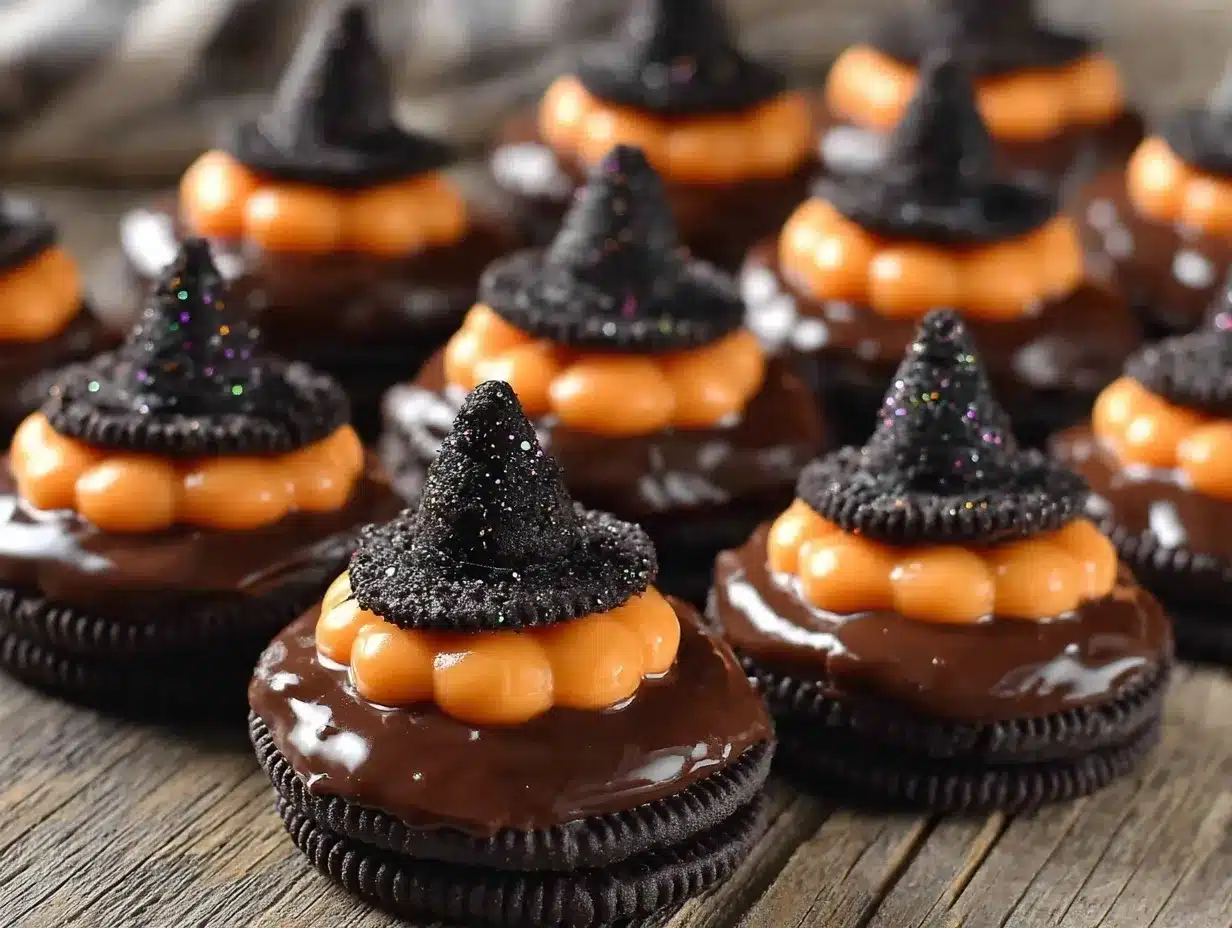
The crackle of the first bite into a Spooky Witch Hat Oreo Cookie Treat instantly brings a smile to my face every Halloween. I remember the first time I whipped up these charming little delights—pure fun and a bit of a mess in the kitchen, but totally worth it! These treats are not just your average Halloween snack; they’re a playful twist on classic Oreos that look so festive, you’ll want to share (or maybe not!). The crisp chocolate wafer, the creamy filling, and that perfect cone hat with a splash of color make these cookies feel like a mini celebration all on their own.
I’ve made these Spooky Witch Hat Oreo Cookie Treats more times than I can count, tweaking the decorations and perfecting the assembly to get just the right balance between spooky and sweet. Honestly, they’re a hit with both kids and adults, and they add a whimsical touch to any Halloween party or just a cozy night with scary movies. Plus, since Oreos are a pantry staple for many, these treats come together with ease, making them a go-to when you want something festive without fuss.
Whether you’re looking for a quick Halloween dessert idea or something that feels a bit more special than a bag of candy, these Witch Hat Oreo treats bring the charm and the crunch. Let’s face it: Halloween is all about the fun, the creepy, and the sweet surprises—and these cookies hit all three in one bite.
Why You’ll Love This Recipe
- Quick & Easy: Ready in about 30 minutes, these treats are perfect for last-minute Halloween prep or a fun weekend project.
- Simple Ingredients: No need for fancy baking skills or weird ingredients—just Oreos, candy melts, and a few decorative touches.
- Perfect for Halloween Parties: These spooky witch hats make an eye-catching centerpiece and a conversation starter for any gathering.
- Crowd-Pleaser: Kids love the fun shape and adults appreciate the classic Oreo flavor with a festive twist.
- Customizable: You can switch up the colors or decorations to match your personal Halloween vibe or party theme.
This recipe stands out because it takes something familiar—Oreos—and turns it into a charming Halloween treat with minimal effort but maximum wow factor. The trick is in the assembly and using candy melts to make the hats stick just right. I’ve tried other versions that got soggy or lost their shape, but this one holds up beautifully. Plus, no oven required! It’s a perfect project even for those who aren’t big bakers.
Honestly, after the first bite, you’ll see why these Spooky Witch Hat Oreo Cookie Treats are a repeat favorite. They’re festive, fun, and bring a little bit of magic to your Halloween spread without a ton of cleanup.
What Ingredients You Will Need
This recipe uses simple, approachable ingredients that combine to create a fun, festive treat. Most of these are pantry staples or easy to find in any grocery store around Halloween.
- Oreos (regular or chocolate sandwich cookies): The base of the treat, providing that classic crunchy and creamy combo.
- Candy Melts (black and orange recommended): These melt smoothly and help “glue” the pieces together while adding a pop of spooky color. I prefer Wilton brand for consistent melting.
- Mini Sugar Cones: The perfect shape for witch hats. Look for small-sized cones that fit nicely on top of the Oreos.
- Sprinkles or Edible Glitter: For decorating the hats—adds sparkle and fun. You can swap for colored sanding sugar if needed.
- Edible Marker or Food Coloring Pens: To add details or faces on the hats, if you want to get extra creative.
Optional:
- Colored Icing or Royal Icing: For additional decoration or “hat bands.”
- Chocolate Chips or Small Candies: To add accents or eyes to the witch hats.
Pro tip: Use firm mini cones to avoid sogginess, and if you want a dairy-free version, look for vegan candy melts and Oreo alternatives that fit your dietary needs.
Equipment Needed
- Microwave-safe bowls: For melting the candy melts. Glass or ceramic works best.
- Baking sheet or tray: To place your assembled treats while the candy melts harden.
- Parchment paper or silicone mat: Prevents sticking and makes cleanup much easier.
- Spoon or small offset spatula: Helpful for spreading melted candy melts and precise decorating.
- Toothpicks or small brushes: For fine detail work and applying decorations.
If you don’t have candy melt-specific tools, no worries! A regular microwave-safe bowl and a spoon will do just fine. I’ve tried plastic bowls before, but they don’t retain heat as well, so glass is my personal choice. For decorating, a simple toothpick can be your best friend for precision.
Detailed Preparation Method
- Melt the Candy Melts: Place about 1 cup (150g) of black candy melts in a microwave-safe bowl. Heat in 30-second intervals, stirring well after each, until smooth and fully melted. This usually takes about 1-2 minutes. Be careful not to overheat or the melts can seize up.
Tip: Stirring between intervals keeps the candy melt smooth and prevents burning. - Prepare the Base: Lay out a baking sheet lined with parchment paper. Place the Oreos flat on the sheet, spacing them out so you have room to work.
- Attach the Mini Cones: Dip the bottom rim of a mini sugar cone into the melted black candy melts and quickly place it on top of an Oreo, pressing gently to secure.
Note: Work quickly before the candy melt hardens, and hold the cone in place for a few seconds if needed. Repeat for all Oreos. - Stabilize and Let Set: Once all hats are attached, place the tray in the fridge for about 10 minutes to allow the candy melts to harden and firmly glue the cone hats to the cookies.
- Decorate the Witch Hats: Melt a small amount of orange candy melts (about 1/2 cup or 75g) in the same way. Use a spoon or small brush to paint a “hat band” around the base of each cone.
Optional: Add sprinkles or edible glitter on the wet candy melt before it sets for some sparkle. - Add Final Details: Use edible markers or food coloring pens to draw spooky faces, stars, or other fun designs on the cones once the candy melts are fully set. You can also use small candies or chocolate chips to embellish further.
- Let Everything Set: Allow your decorated witch hats to rest at room temperature or in the fridge until all candy melts and decorations are firm—about 15-20 minutes.
Troubleshooting: If your candy melts get too thick, add a tiny drop of vegetable oil and stir well. If cones don’t stick well, make sure the candy melts aren’t too cool when attaching.
Cooking Tips & Techniques
One thing I learned the hard way is that temperature control with candy melts is key. They can seize up if overheated or get clumpy if cooled too fast. That’s why heating in short bursts and stirring often makes all the difference. Also, when dipping the cones, make sure the candy melt layer isn’t too thick or it’ll drip messily—thin, even coats look cleaner and set faster.
Another tip: chilling the treats between steps keeps everything stable and prevents the cones from slipping off. It also helps the decorations hold their shape. Timing is important because these little guys set quickly once the candy melts start to harden, so move at a steady but deliberate pace.
Don’t rush the decorating—adding sprinkles or painting the hat bands while the candy melt is still wet gives the best adhesion. And if you’re using edible markers, wait until the surface is completely dry to avoid smearing.
Honestly, the first batch might be a bit wobbly, but after a couple of tries, you’ll get the hang of it. Patience is really the secret sauce here.
Variations & Adaptations
- Vegan or Dairy-Free: Use dairy-free Oreos and vegan candy melts to make these suitable for special diets. I’ve swapped regular candy melts for Enjoy Life brand with great results.
- Different Hat Colors: Instead of classic black and orange, try purple and green candy melts for a whimsical witch vibe. I once used pastel colors for a “cute witch” party theme, and it was a hit!
- Spicy Twist: Add a tiny sprinkle of cayenne or chili powder to the melted candy for an unexpected kick under the sweet exterior—great for adventurous eaters.
- Chocolate Lovers: Use dark or white chocolate melts instead of candy melts for a richer flavor.
- Gluten-Free Option: Swap Oreos for gluten-free sandwich cookies and ensure your candy melts are gluten-free certified.
For cooking methods, these treats don’t require baking, which is great if you want to avoid heating up the kitchen. If you want a crunchy variation, try briefly toasting the sugar cones before assembly—but watch closely to avoid burning.
Serving & Storage Suggestions
Serve these Spooky Witch Hat Oreo Cookie Treats at room temperature for the best texture—crispy cone, crunchy cookie, and smooth candy coating. They look fantastic arranged on a festive platter with some Halloween confetti or alongside pumpkin spice lattes.
If you want to jazz it up, pair them with a scoop of vanilla ice cream or a drizzle of caramel sauce for a dessert that feels extra indulgent. They also make great party favors when wrapped individually in clear bags tied with orange or black ribbon.
Store leftover treats in an airtight container at room temperature for up to 3 days. For longer storage, keep them in the fridge, but bring to room temperature before serving to avoid a hard candy shell. Avoid freezing as the cones might get soggy upon thawing.
Over time, the flavors meld slightly, and the candy coating may soften a bit, making the treats even easier to bite into. Just don’t wait too long, or the cones can lose their crunch.
Nutritional Information & Benefits
While these Spooky Witch Hat Oreo Cookie Treats are definitely a fun indulgence, they do contain sugar and processed ingredients, so they’re best enjoyed in moderation. Each treat roughly contains around 150 calories, mostly from sugars and fats.
The Oreos provide some calcium and iron, and the candy melts add a bit of extra sweetness and color. Choosing mini cones made from simple ingredients can also reduce additives.
These treats are naturally gluten-containing unless you swap for gluten-free options, and they do contain dairy unless you use vegan substitutes. For a balanced Halloween treat, I like to pair these with fresh fruit or nuts to add some nutrients and texture contrast during the party.
Conclusion
These Spooky Witch Hat Oreo Cookie Treats are a delightful way to bring some magic and sweetness to your Halloween celebrations. They’re simple enough for last-minute assembly but special enough to impress kids and adults alike. I love how customizable they are—perfect for getting the whole family involved and making memories along the way.
Give them a try, and don’t hesitate to play with colors or decorations to make them your own. If you make a batch, please share how they turned out or any fun twists you added—I’d love to hear! Remember, Halloween is about having fun, so enjoy every bite and every moment.
FAQs About Spooky Witch Hat Oreo Cookie Treats
Can I use other cookies besides Oreos for this recipe?
Absolutely! Any sandwich cookie with a firm filling works well, but Oreos are ideal due to their size and sturdy texture.
What if I don’t have mini sugar cones?
You can try cutting regular sugar cones into smaller sections or use waffle cone pieces, but mini cones fit best and are easiest to handle.
How long do the treats keep their freshness?
Stored properly in an airtight container at room temperature, they stay fresh for about 3 days.
Can kids help make these treats?
Definitely! Kids will love dipping cones and decorating with sprinkles, though an adult should handle the hot melted candy melts.
What if my candy melts get lumpy or seize?
Add a small drop of vegetable oil and stir vigorously to smooth them out. Also, heat in short bursts and stir frequently to avoid overheating.
Pin This Recipe!
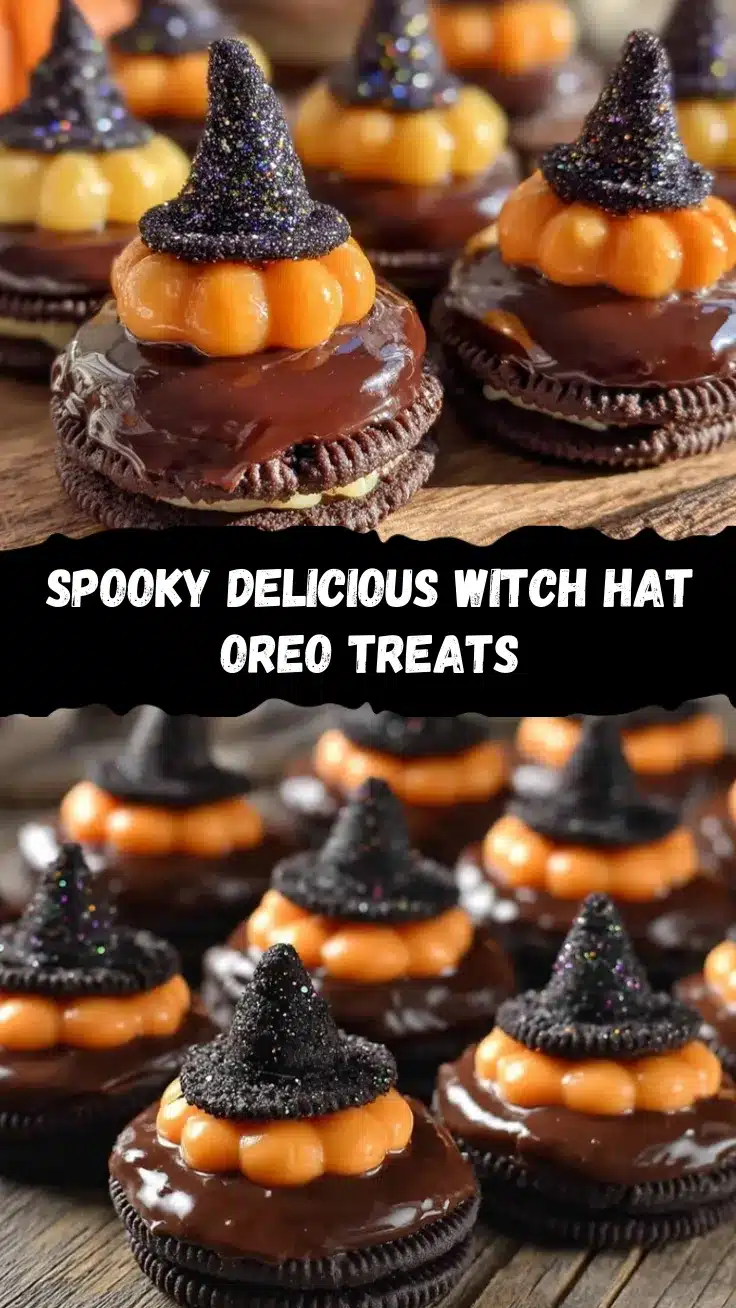
Spooky Witch Hat Oreo Cookie Treats Easy Halloween Dessert Idea
These Spooky Witch Hat Oreo Cookie Treats are a fun and festive Halloween dessert that combines classic Oreos with mini sugar cones decorated as witch hats. Quick and easy to make, they are perfect for parties and a crowd-pleaser for kids and adults alike.
- Prep Time: 10 minutes
- Cook Time: 20 minutes
- Total Time: 30 minutes
- Yield: 12 servings 1x
- Category: Dessert
- Cuisine: American
Ingredients
- Oreos (regular or chocolate sandwich cookies)
- 1 cup (150g) black candy melts
- 1/2 cup (75g) orange candy melts
- Mini sugar cones (small-sized to fit on Oreos)
- Sprinkles or edible glitter (optional)
- Edible marker or food coloring pens (optional)
- Colored icing or royal icing (optional)
- Chocolate chips or small candies (optional)
Instructions
- Melt about 1 cup (150g) of black candy melts in a microwave-safe bowl by heating in 30-second intervals, stirring well after each, until smooth and fully melted.
- Line a baking sheet with parchment paper and place Oreos flat on the sheet, spaced out.
- Dip the bottom rim of a mini sugar cone into the melted black candy melts and quickly place it on top of an Oreo, pressing gently to secure. Repeat for all Oreos.
- Place the tray in the fridge for about 10 minutes to allow the candy melts to harden and firmly glue the cone hats to the cookies.
- Melt about 1/2 cup (75g) of orange candy melts in the same way. Use a spoon or small brush to paint a ‘hat band’ around the base of each cone.
- Optionally, add sprinkles or edible glitter on the wet candy melt before it sets for sparkle.
- Use edible markers or food coloring pens to draw spooky faces, stars, or other designs on the cones once the candy melts are fully set. Add small candies or chocolate chips for embellishments if desired.
- Allow the decorated witch hats to rest at room temperature or in the fridge until all candy melts and decorations are firm, about 15-20 minutes.
Notes
Use firm mini sugar cones to avoid sogginess. Heat candy melts in short bursts and stir frequently to prevent seizing. If candy melts get too thick, add a tiny drop of vegetable oil and stir well. Chill treats between steps to stabilize and prevent cones from slipping. Wait until candy melts are fully set before decorating with edible markers to avoid smearing. Store in an airtight container at room temperature for up to 3 days. Avoid freezing to keep cones crunchy.
Nutrition
- Serving Size: 1 witch hat Oreo tre
- Calories: 150
- Sugar: 16
- Sodium: 90
- Fat: 7
- Saturated Fat: 3
- Carbohydrates: 22
- Fiber: 1
- Protein: 1
Keywords: Halloween dessert, Oreo treats, witch hat cookies, candy melts, easy Halloween recipe, spooky treats, no bake dessert


