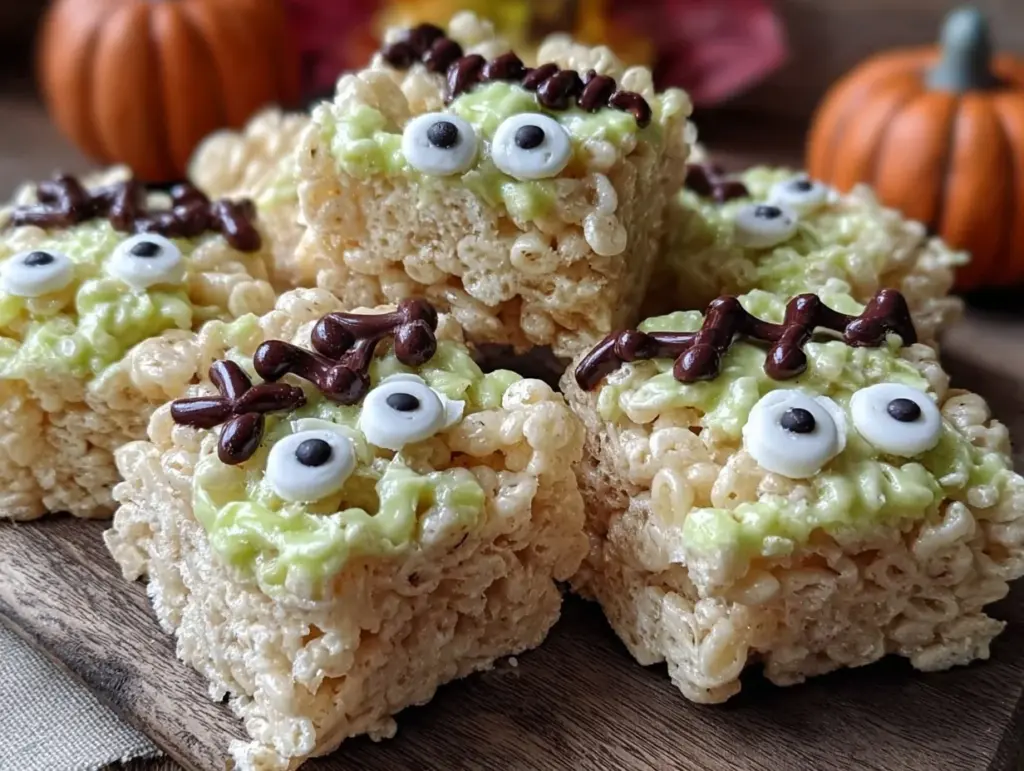
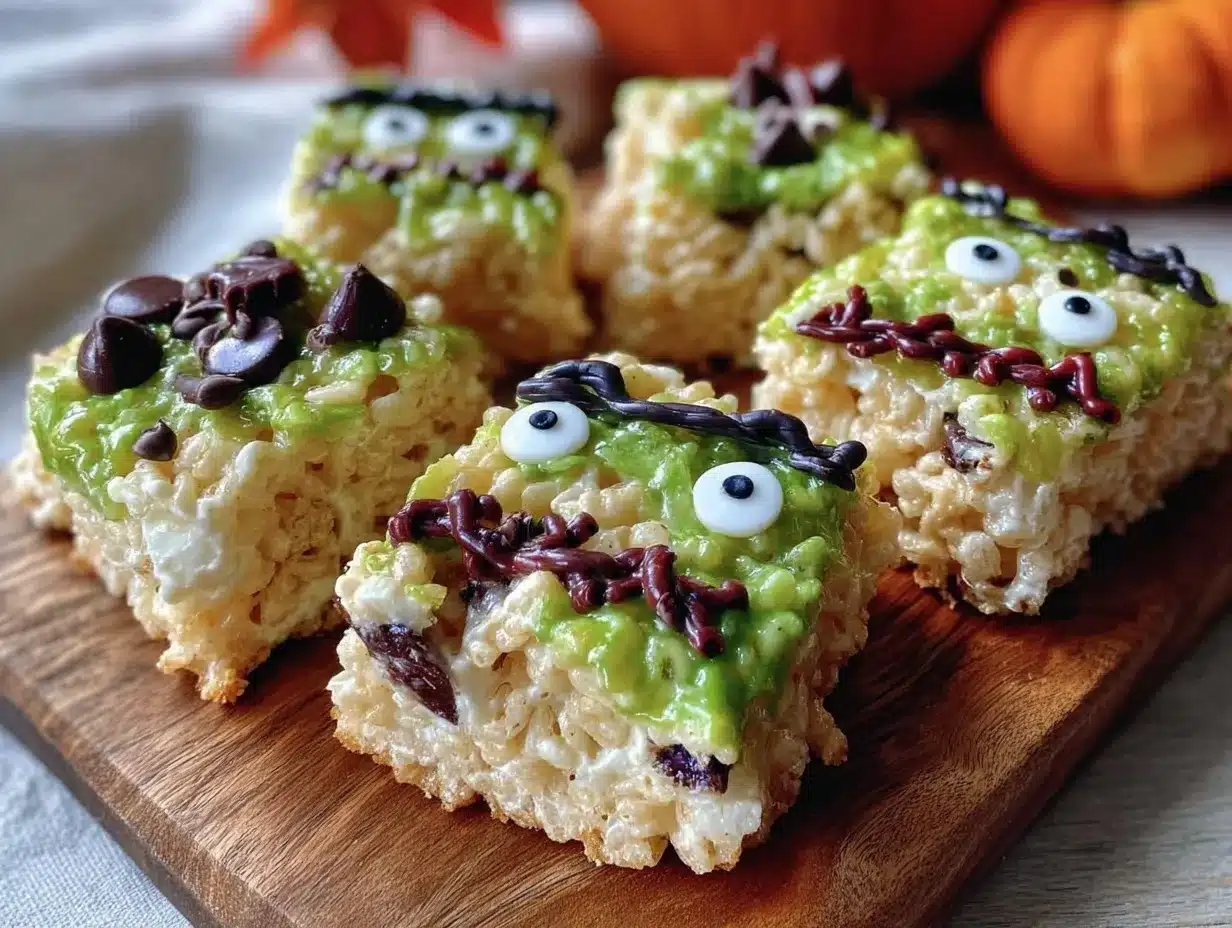
The smell of gooey marshmallows melting into crispy rice cereal instantly takes me back to childhood Halloween parties. But honestly, nothing beats making spooky Frankenstein Rice Krispie treats with a fun twist that brings the whole family together. I first whipped up these festive Frankenstein snacks during a last-minute Halloween bash, and they quickly became the star of the table. The way the bright green coloring contrasts with the chocolate “stitches” and candy details makes them almost too adorable to eat (almost!).
These treats are not just cute—they’re incredibly simple, quick to make, and perfect for any Halloween gathering, whether you’re entertaining a swarm of little goblins or just craving a nostalgic, spooky snack yourself. Over the years, I’ve tested this recipe multiple times, tweaking the textures and colors to get that perfect balance of sweet, crispy, and totally festive. As someone who’s hosted plenty of kid-friendly parties, I can confidently say these Frankenstein Rice Krispie treats bring smiles and sticky fingers every time.
What makes these Spooky Frankenstein Rice Krispie Treats stand out is how they combine classic comfort food with playful Halloween spirit. If you’re looking for a fun, no-fuss recipe that’s both kid-approved and crowd-pleasing, you’re in the right place. Ready to get your hands a little sticky and your kitchen smelling like marshmallow heaven? Let’s jump in!
Why You’ll Love This Recipe
After making these Frankenstein Rice Krispie treats more times than I can count, here’s why they’re a total winner every Halloween season:
- Quick & Easy: From start to finish, these treats come together in about 20 minutes. Perfect for last-minute party prep or a fun afternoon project with the kids.
- Simple Ingredients: You probably have everything you need right in your pantry—rice cereal, marshmallows, butter, and a few candy decorations.
- Perfect for Halloween: The spooky Frankenstein design is festive without being too scary, ideal for all ages and Halloween events like school parties or neighborhood get-togethers.
- Crowd-Pleaser: Kids and adults alike rave about the fun look and classic sweet crunch. They even make great gifts or party favors!
- Unbelievably Delicious: The soft marshmallow coating keeps every bite chewy, while the crispy cereal adds that satisfying snap. Plus, the candy decorations add a pop of color and texture.
What really sets this recipe apart is the little details—the way the green coloring gives the treats a Frankenstein vibe, and how the chocolate “stitches” bring the character to life. I like to blend in a hint of vanilla and a dash of salt to balance the sweetness, making each bite more complex than your average Rice Krispie treat. Honestly, this isn’t just a Halloween snack; it’s a playful tradition that’s become a highlight of my spooky season!
What Ingredients You Will Need
This recipe uses simple, wholesome ingredients to deliver bold flavor and satisfying texture without the fuss. Most of these are pantry staples, and the candy decorations can be swapped out based on what you have on hand or your favorite Halloween colors.
- Rice Cereal: 6 cups (about 150g) of crispy rice cereal – this creates that classic crunch.
- Marshmallows: 10 ounces (about 283g) of mini marshmallows or regular marshmallows chopped into smaller pieces – the gooey binder.
- Unsalted Butter: 3 tablespoons (45g), softened – adds richness and helps melt the marshmallows smoothly.
- Green Food Coloring: Gel or liquid – enough to tint the marshmallow mixture a vibrant Frankenstein green.
- Vanilla Extract: 1 teaspoon – enhances the flavor depth.
- Salt: A pinch – balances the sweetness.
- Chocolate Chips or Melting Chocolate: 1/2 cup (90g) – for drawing the stitches and facial features.
- Black Licorice Strings or Thin Candy Strips: For the “hair” or bolts on Frankenstein’s head (optional but adds great detail).
- Candy Eyes: 12-15 pairs – makes the Frankenstein faces pop with personality.
If you want to swap ingredients, almond butter works well instead of butter for a nutty twist, and you can use dairy-free marshmallows and butter substitutes to make this vegan-friendly. For gluten-free options, just check that your rice cereal is certified gluten-free (I like the Nature’s Path brand for that).
Equipment Needed
- Large Mixing Bowl: You’ll need this to melt and mix the marshmallows and butter.
- Large Saucepan: For melting butter and marshmallows together on the stovetop. A heavy-bottomed pan helps prevent burning.
- Wooden Spoon or Heat-Resistant Spatula: Essential for stirring the sticky marshmallow mixture.
- 9×13-inch Baking Pan: To press and set the treats evenly. Line it with parchment paper or lightly grease to prevent sticking.
- Microwave-Safe Bowl: Optional, for melting chocolate chips if you’re decorating with chocolate.
- Piping Bag or Zip-Top Bag: For piping chocolate “stitches.” Snip the corner for control.
- Measuring Cups and Spoons: For precise ingredient amounts.
If you don’t have a baking pan that size, any shallow dish with straight sides will do. I’ve made these treats in glass and metal pans; just adjust your pressing technique accordingly. For melting chocolate, a double boiler works great if you’re not keen on using the microwave. Personally, I find using a silicone spatula helps scrape every last bit of marshmallow goo from the pan—trust me, you don’t want to waste it!
Detailed Preparation Method
- Prepare Your Pan: Lightly grease a 9×13-inch (23×33 cm) baking pan or line it with parchment paper. This helps the treats release easily later. Set aside.
- Melt Butter: In a large saucepan over low heat, melt 3 tablespoons (45g) of unsalted butter until fully melted (about 2-3 minutes). Stir gently to avoid browning.
- Add Marshmallows: Add 10 ounces (283g) of marshmallows to the melted butter. Stir continuously as the marshmallows melt, about 5-7 minutes. You want a smooth, shiny mixture with no lumps.
- Color the Mixture: Remove the pan from heat once marshmallows are melted. Quickly stir in 1 teaspoon vanilla extract, a pinch of salt, and green food coloring a drop at a time until you get a bright Frankenstein green color. It’s best to start with gel coloring for vibrant results without adding extra liquid.
- Mix with Rice Cereal: Immediately pour 6 cups (150g) of rice cereal into the marshmallow mixture. Fold gently with a wooden spoon or spatula until every bit of cereal is coated. Work quickly, as the mixture will start to set.
- Press into Pan: Transfer the mixture into your prepared pan. Use a buttered spatula or wax paper to press it down evenly and firmly to about a 1-inch (2.5 cm) thickness. Let cool for 20-30 minutes until completely set.
- Cut into Squares: Once set, lift the treats out of the pan using the parchment paper. Cut into 12-15 squares with a sharp knife. Clean the knife between cuts for cleaner edges.
- Decorate Faces: Melt 1/2 cup (90g) chocolate chips in a microwave-safe bowl in 20-second bursts, stirring between until smooth. Transfer melted chocolate to a piping bag or zip-top bag and snip a tiny corner.
- Draw Frankenstein Details: Pipe stitches and mouths onto each square. Add candy eyes by gently pressing them into the treats before the chocolate sets. Use licorice strings or candy strips to create “hair” or bolts on the side of the treats.
- Let Decorations Set: Place decorated treats in the fridge for 10-15 minutes to let the chocolate harden before serving.
Pro Tip: If your marshmallow mixture starts to harden before you mix in the cereal, warm it gently over low heat again—no one wants clumpy treats! Also, pressing the mixture firmly but not too hard keeps the treats nice and chewy, not rock solid.
Cooking Tips & Techniques
Making the perfect Frankenstein Rice Krispie treats is about a few simple tricks I’ve learned over time. First off, low and slow heat is your friend when melting butter and marshmallows. Rushing this step often leads to scorched marshmallows or a grainy texture, which is a total bummer.
When mixing in the rice cereal, fold gently but thoroughly. You want each crisp coated but not crushed. Too much stirring can break the cereal into tiny bits, losing that satisfying crunch. I usually do this part quickly and confidently—there’s no time for hesitation when marshmallows cool fast!
For pressing, I swear by using a buttered spatula covered with parchment paper to smooth the surface without sticking. Press firmly but don’t mash so hard that the treats become dense. The texture should be light, chewy, and airy.
Chocolate decoration can be tricky if the melted chocolate cools too quickly. Keep a small bowl of warm water nearby and place your piping bag in it when not piping to keep the chocolate fluid. Also, if you’re piping freehand, practice on parchment paper first to get comfortable with the pressure and flow.
Lastly, don’t skip the chilling step after decorating. It helps the chocolate set nicely and prevents decorations from smudging when you serve.
Variations & Adaptations
One of the best things about this recipe is how easy it is to customize for different tastes and dietary needs:
- Vegan Version: Use vegan marshmallows and substitute butter with coconut oil or vegan butter. Be sure your rice cereal is vegan-friendly.
- Flavor Twists: Add a teaspoon of mint extract instead of vanilla for a spooky minty twist. Or stir in mini chocolate chips with the cereal for extra chocolatey bites.
- Alternative Decorations: Instead of chocolate, use colored icing or edible markers to draw Frankenstein’s face. You can also swap candy eyes for chocolate chips or colored sprinkles for a different look.
- Gluten-Free Option: Use certified gluten-free rice cereal. Most brands are naturally gluten-free, but always double-check the label.
- Seasonal Swaps: Around Christmas, swap green food coloring for red and use festive sprinkles for a holiday version.
Personally, I’ve tried adding crushed peppermint candies into the mix for a cool crunch, but it can get a little messy. Still, it’s fun to experiment and make this recipe your own spooky creation!
Serving & Storage Suggestions
These Frankenstein Rice Krispie treats taste best fresh out of the fridge or at room temperature. I like to serve them on a festive Halloween platter with some orange and black napkins for easy grabbing. They pair well with cold milk or a warm cup of cocoa – perfect for chilly October evenings.
Store the treats in an airtight container at room temperature for up to 3 days. If you want them a bit firmer, refrigeration works too but may dry them out slightly. For longer storage, wrap individual treats in plastic wrap and freeze in a sealed container for up to a month. Just thaw at room temperature before serving.
Fun fact: the flavors often deepen a little after sitting overnight, and the marshmallow binds soften slightly, making them even more chewy and delightful the next day!
Nutritional Information & Benefits
Each Frankenstein Rice Krispie treat square (about 1/12th of the recipe) contains approximately:
| Calories | 150-170 |
|---|---|
| Fat | 4-6g |
| Carbohydrates | 28-30g |
| Protein | 1-2g |
| Sugar | 15-18g |
While these treats are undeniably sweet, they provide a quick energy boost and satisfy those Halloween cravings without artificial preservatives. The rice cereal delivers some fiber, and the marshmallows, though sugary, are light and airy. For those watching allergens, marshmallows often contain gelatin, so check labels if avoiding animal products.
From a wellness perspective, I enjoy these treats as an occasional fun snack that brings joy and nostalgia without guilt. Making them at home lets you control ingredients and avoid weird additives found in some store-bought Halloween sweets.
Conclusion
These Spooky Frankenstein Rice Krispie Treats are a no-fail way to bring festive fun and sweet smiles to your Halloween celebrations. They’re easy enough to make with kids, impressive enough to wow guests, and downright delicious with every chewy bite. What I love most is how this recipe invites creativity—whether you’re perfecting the chocolate stitches or adding your own candy flair.
Don’t be afraid to make this recipe your own! Swap colors, try new decorations, and share your spooky creations with friends and family. If you give this a go, I’d love to hear how your Frankenstein treats turned out—drop a comment or share your photos!
Happy Halloween, and may your treats be spooky and sweet!
FAQs
Can I make these Frankenstein Rice Krispie treats ahead of time?
Yes! You can make and decorate the treats a day ahead. Store them in an airtight container at room temperature or in the fridge if you prefer them firmer.
What can I use instead of green food coloring?
Spinach or matcha powder can add natural green hues, but they might alter the flavor slightly. Gel food coloring gives the brightest, truest Frankenstein green.
How do I prevent the marshmallow mixture from sticking to my hands?
Lightly butter your hands or use a piece of wax paper when shaping or pressing the mixture. This keeps things less sticky and easier to handle.
Can these treats be gluten-free?
Absolutely! Just be sure to use a certified gluten-free rice cereal. Most plain rice cereals are naturally gluten-free.
What are good substitutions for candy eyes?
You can use mini chocolate chips, colored icing dots, or even draw eyes with melted chocolate or edible markers if you don’t have candy eyes on hand.
Pin This Recipe!
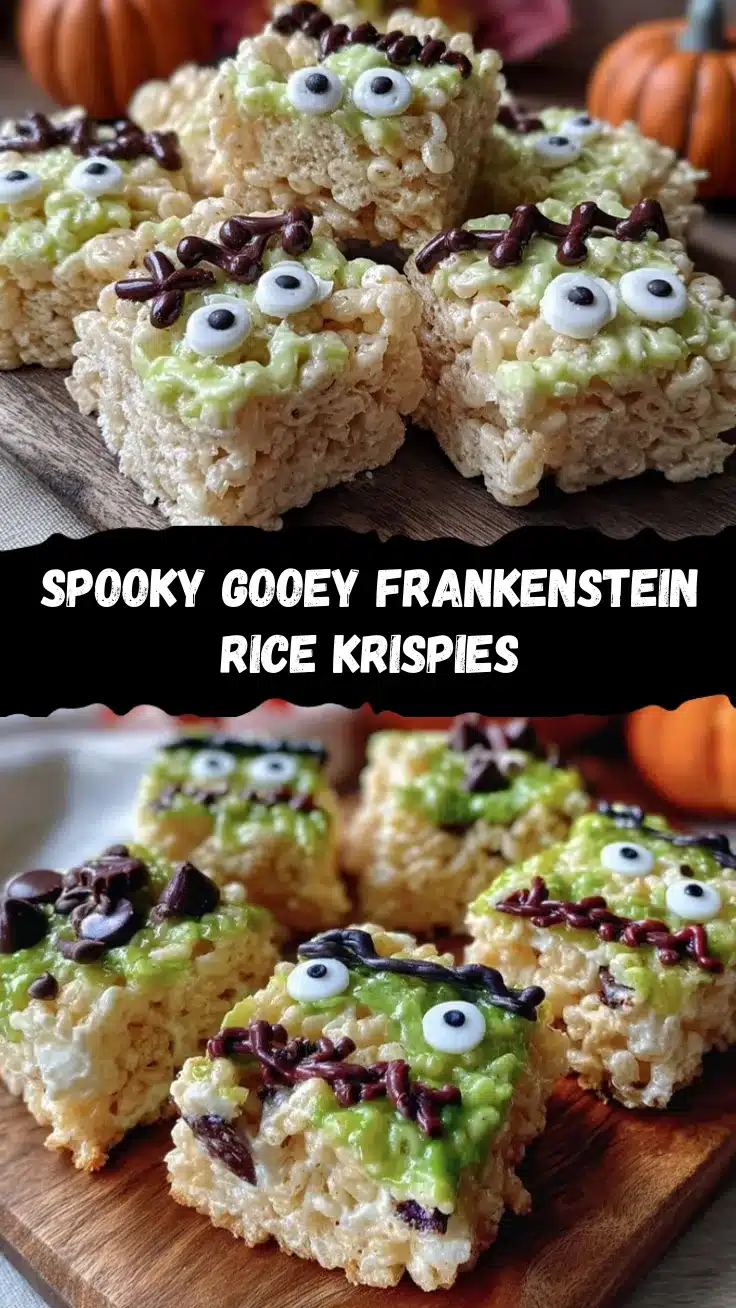
Spooky Frankenstein Rice Krispie Treats
These festive Frankenstein Rice Krispie treats combine classic comfort food with playful Halloween spirit, featuring bright green marshmallow coating and chocolate decorations. Quick and easy to make, they are perfect for Halloween parties and kid-friendly gatherings.
- Prep Time: 10 minutes
- Cook Time: 10 minutes
- Total Time: 20 minutes
- Yield: 12-15 servings 1x
- Category: Snack
- Cuisine: American
Ingredients
- 6 cups (about 150g) crispy rice cereal
- 10 ounces (about 283g) mini marshmallows or regular marshmallows chopped
- 3 tablespoons (45g) unsalted butter, softened
- Green food coloring (gel or liquid), enough to tint marshmallow mixture
- 1 teaspoon vanilla extract
- A pinch of salt
- 1/2 cup (90g) chocolate chips or melting chocolate
- Black licorice strings or thin candy strips (optional, for hair or bolts)
- 12–15 pairs candy eyes
Instructions
- Lightly grease a 9×13-inch baking pan or line it with parchment paper and set aside.
- In a large saucepan over low heat, melt 3 tablespoons of unsalted butter, stirring gently for 2-3 minutes.
- Add 10 ounces of marshmallows to the melted butter and stir continuously until melted and smooth, about 5-7 minutes.
- Remove from heat and quickly stir in 1 teaspoon vanilla extract, a pinch of salt, and green food coloring drop by drop until bright green.
- Immediately pour 6 cups of rice cereal into the marshmallow mixture and fold gently until all cereal is coated.
- Transfer mixture to the prepared pan and press down evenly and firmly to about 1-inch thickness using a buttered spatula or wax paper.
- Let cool for 20-30 minutes until completely set.
- Lift treats out of the pan using parchment paper and cut into 12-15 squares with a sharp knife, cleaning the knife between cuts.
- Melt 1/2 cup chocolate chips in a microwave-safe bowl in 20-second bursts, stirring until smooth.
- Transfer melted chocolate to a piping bag or zip-top bag and snip a tiny corner.
- Pipe stitches and mouths onto each square, press candy eyes into the treats before chocolate sets, and add licorice strings or candy strips for hair or bolts.
- Place decorated treats in the fridge for 10-15 minutes to let chocolate harden before serving.
Notes
Use gel food coloring for the brightest green without adding extra liquid. Press the mixture firmly but not too hard to keep treats chewy. Keep melted chocolate warm by placing piping bag in warm water when not piping. Chill decorated treats to set chocolate. For vegan version, substitute butter with coconut oil or vegan butter and use vegan marshmallows. Use certified gluten-free rice cereal for gluten-free option.
Nutrition
- Serving Size: 1 treat square (1/12
- Calories: 160
- Sugar: 16
- Sodium: 90
- Fat: 5
- Saturated Fat: 3
- Carbohydrates: 29
- Fiber: 1
- Protein: 1.5
Keywords: Halloween, Rice Krispie Treats, Frankenstein, spooky snacks, kids party, easy dessert, marshmallow treats


