The crunch of salty pretzels meets the sweet, eerie charm of Halloween in these Spooky Witch Finger Pretzel Rods. Honestly, the first time I made these, it was a total hit at a last-minute Halloween party — the way those almond “nails” poked out gave everyone goosebumps (in a good way!). I remember sneaking a few bites while setting up and thinking, “This might just be my new favorite spooky snack.”
What’s cool about these witch finger pretzel rods is how they balance fun and flavor without much fuss. They look impressively creepy but come together quickly, which is perfect when you’re juggling costumes, candy, and pumpkin carving. Plus, they’re a sweet-and-salty combo that kids and adults absolutely love.
I’ve tested this recipe multiple times, tweaking the almond placement and chocolate coating thickness to get that perfect crunch and visual “fingernail” effect. As someone who’s thrown countless Halloween gatherings, I can say these pretzel rods have become my go-to chilly weather treat — they’re festive, addictive, and just plain fun to make.
If you want a crunchy, spooky snack that’s both easy and a little bit magical, these Spooky Witch Finger Pretzel Rods are your ticket. They bring that Halloween spirit in a way that’s playful and delicious, making them perfect for parties, classroom treats, or just a cozy night in with a scary movie.
Why You’ll Love This Recipe
- Quick & Easy: Whip these up in about 20 minutes. No baking involved, just dipping and decorating — perfect for last-minute Halloween plans.
- Simple Ingredients: You probably have most of what you need in your pantry already — pretzels, chocolate, and almonds. No fancy or hard-to-find stuff here.
- Perfect for Halloween Parties: These spooky fingers are not just snacks; they’re conversation starters. Great for kids’ parties, office treats, or festive get-togethers.
- Crowd-Pleaser: The salty crunch paired with sweet chocolate coating keeps everyone coming back for more. Plus, the creepy look is always a hit with the little ones.
- Unbelievably Delicious: The texture combo — crunchy pretzel, smooth chocolate, and that little bit of almond “nail” — is just spot-on comfort food with a Halloween twist.
What sets these witch finger pretzel rods apart? It’s the little details — like scoring the chocolate to mimic knuckles and placing almond slivers just right to look like nails. It’s not just a dipped pretzel; it’s a mini edible art piece! And honestly, who doesn’t want to impress guests with something that looks this cool but is so simple to make?
These treats are the kind that make you pause, take a bite, and smile — because they’re festive, crunchy, sweet, and just a little bit spooky. If you want a Halloween recipe that’s more than just candy, this is it.
What Ingredients You Will Need
This recipe uses simple, easy-to-find ingredients that combine to create a spooky and crunchy treat without any fuss. Most of these are pantry staples, and the almond “nails” add just the right creepy finishing touch.
- Pretzel rods – about 20 pieces (I prefer thin rods for a more finger-like look, but thick ones work too)
- White chocolate chips or melting wafers – 12 oz (340 g) (I recommend Ghirardelli or Wilton brand for smooth melting)
- Almond slices – about 40 pieces (two per finger for nails; look for thin, slightly curved ones for a natural effect)
- Red decorating gel or red food coloring – for the “blood” effect around the nails (optional but highly recommended for spooky realism)
- Black or green food coloring – if you want to tint the white chocolate for an extra eerie vibe
- Butter or coconut oil – 1 tbsp (15 ml), to thin out the chocolate for easier dipping (optional)
If you want to switch things up, you can try using dark chocolate instead of white for a more dramatic look, or even add a drop of orange food coloring to match the Halloween palette. The almond slices are key here — they really make the fingers come alive, so don’t skip them!
Equipment Needed
- Microwave-safe bowl or double boiler: for melting the chocolate gently without burning it. I’ve tried both, and a double boiler gives you more control, but the microwave works great if you heat in short bursts.
- Baking sheet lined with parchment paper or a silicone mat: to place your dipped pretzels on while they set. I always prefer silicone mats because they’re reusable and prevent sticking.
- Tweezers or small tongs: handy for placing almond slices precisely without messing up the chocolate.
- Spoon or fork: useful to help coat the pretzels evenly and tap off excess chocolate.
- Cooling rack (optional): if you want to set the pretzels off the parchment for faster, even cooling.
If you’re on a budget, simple bowls and parchment paper work just fine. I’d recommend investing in silicone mats if you make festive treats often — they make cleanup a breeze and are worth every penny. Also, using tweezers might sound fancy, but trust me, it saves a lot of frustration when placing those tiny almond “nails.”
Detailed Preparation Method

- Prepare your workspace: Line a baking sheet with parchment paper or a silicone baking mat. Have your almond slices and decorating gels ready to go — things move fast once the chocolate is melted.
- Melt the chocolate: In a microwave-safe bowl, combine 12 oz (340 g) of white chocolate chips with 1 tbsp (15 ml) of butter or coconut oil. Heat in 30-second intervals, stirring well between each, until smooth and creamy. (Tip: If you prefer, melt the chocolate over a double boiler for better temperature control.)
- Tint the chocolate (optional): Add a few drops of green or black food coloring to the melted chocolate if you want a more witchy hue. Stir until the color is even.
- Dip the pretzel rods: Holding a pretzel rod by one end, dip it into the melted chocolate, covering about 3-4 inches (7.5-10 cm) of the rod. Use a spoon to help coat if needed. Tap gently to remove excess chocolate. (Note: Don’t coat too thickly — you want the “knuckle” details to show.)
- Create knuckle details: Before the chocolate sets, use the back of a small spoon or the tip of a knife to score 2-3 “knuckle” indentations along the chocolate-covered part. This makes the finger look more realistic.
- Place almond nails: Quickly, use tweezers to position two almond slices at the tip of each pretzel rod, curving them slightly to resemble fingernails. Press gently so they stick but don’t break.
- Add the “blood” effect: Using red decorating gel, carefully draw a thin line or dot around the base of each almond nail to mimic blood. Don’t worry about perfection — the messier, the spookier!
- Set the pretzels: Lay the dipped pretzel rods on the prepared sheet and let them set at room temperature for about 30 minutes, or pop them in the fridge for 10-15 minutes to speed things up.
- Final touches: Once set, check the nails and red gel. Add a little more red gel if you want extra creep factor. Store the pretzels in an airtight container at room temperature or refrigerate if your kitchen is warm.
Pro tip: If the chocolate starts to harden while you’re working, reheat it gently to keep it smooth. Also, work quickly with the almond nails and red gel because the chocolate sets fast. I’ve found setting a timer helps keep things moving without rushing.
Cooking Tips & Techniques
When making these witch finger pretzel rods, a few tricks make all the difference. First, melting the chocolate slowly and evenly is key. You don’t want to scorch it, or it’ll get grainy and tough to work with. Stirring often during melting helps keep that silky texture.
Don’t rush the dipping — a thin, even coat looks best and lets you carve those knuckle details easily. I’ve seen too-thick chocolate layers lose the finger shape, which is a bummer when you’re going for that spooky vibe.
Placement of the almond nails is where you can get creative, but precision really helps. Tweezers are your best friend here; using fingers often smudges the chocolate or breaks the almonds.
Also, adding the red gel “blood” around the nails is a little messy but worth it. It gives the pretzels personality. If you’re nervous about piping, a toothpick dipped in gel works for subtle dots and lines.
Last but not least, patience is a virtue. Letting the pretzels set fully before moving or packaging prevents smudges and breakage. I learned this the hard way after trying to rush them for a party — trust me, the wait pays off!
Variations & Adaptations
Feeling adventurous? Here are some fun twists to make these witch finger pretzel rods your own:
- Dark Chocolate Version: Swap white chocolate for dark chocolate for a richer, more gothic finger. It pairs beautifully with the red “blood” and offers a less sweet alternative.
- Gluten-Free Option: Use gluten-free pretzel rods to keep the crunch without gluten. Just double-check your chocolate and gel are gluten-free too!
- Nut-Free Adaptation: Substitute almond slices with small pieces of white chocolate or candy melts shaped like nails if allergies are a concern.
- Seasonal Colors: Tint the white chocolate with orange or purple food coloring for a more festive Halloween palette. You can even add edible glitter for a magical touch.
- Spiced Chocolate: Add a pinch of cinnamon or cayenne to your melted chocolate for a subtle spicy kick that warms up the flavor profile.
Personally, I once tried coating the pretzels in peanut butter before dipping in chocolate for a nutty surprise — it was a winner at a family gathering! Don’t be afraid to get creative with what you have.
Serving & Storage Suggestions
Serve these spooky witch finger pretzel rods at room temperature for the best crunch and flavor. They look fantastic arranged on a platter with other Halloween treats — think candy corn, mini pumpkins, and gummy worms for a full spooky spread.
Pair them with a warm cup of cider or hot chocolate to balance the salty-sweet flavors. They also make great party favors wrapped in cellophane with a festive ribbon.
To store, keep the pretzels in an airtight container at room temperature for up to 3 days. If your kitchen is warm or humid, refrigerate them to prevent the chocolate from melting. When refrigerated, bring them to room temperature before serving to enjoy the full crunch.
These treats actually develop a bit more flavor depth after a day or two, as the chocolate and pretzel meld together. So if you want to prep ahead, they hold up nicely.
Nutritional Information & Benefits
Each spooky witch finger pretzel rod contains roughly 120-150 calories, depending on the size and chocolate thickness. They provide a nice balance of salty and sweet, with the almonds adding a bit of healthy fat and protein.
Using white chocolate means a sweeter treat, but you can adjust by swapping in dark chocolate for less sugar and antioxidants. Pretzels provide some carbs for energy, while almonds contribute fiber and vitamin E.
For those watching allergens, be mindful of nut content due to almonds. Gluten-free pretzel options make this recipe adaptable for different diets.
As a fun, occasional indulgence, these witch finger pretzel rods satisfy sweet cravings with a bit of crunch and a festive flair — making them a worthwhile treat during the Halloween season.
Conclusion
If you’re after a Halloween treat that’s easy, crunchy, and seriously fun to make, these Spooky Witch Finger Pretzel Rods check all the boxes. They bring that perfect mix of spooky and sweet with minimal effort, plus a great opportunity to get creative in the kitchen.
Whether you stick to the classic white chocolate and almond nails or try one of the variations, these pretzel rods are sure to become a seasonal favorite. Honestly, I love how they bring smiles (and a little shiver) to every party.
Give this recipe a go, and don’t forget to share your spooky creations or any cool twists you come up with. I’d love to hear how your witch fingers turn out!
Happy Halloween and happy snacking!
FAQs About Spooky Witch Finger Pretzel Rods
Can I use other nuts instead of almonds for the fingernails?
Yes! You can try thin slices of cashews or even small pieces of white chocolate shaped like nails. Just make sure they’re thin and can stick well to the chocolate coating.
How long do these witch finger pretzels last?
Stored in an airtight container at room temperature, they keep well for about 3 days. Refrigerate if your home is warm, but let them come back to room temp before serving.
Can I make these ahead of time for a party?
Absolutely! You can prepare them a day or two ahead. They actually taste better after a bit of resting as the flavors meld, but avoid making them more than three days ahead to keep the pretzels crunchy.
Is it possible to make these vegan?
Yes! Use dairy-free white chocolate or vegan candy melts and check that your pretzels are vegan-friendly. Almond nails are naturally vegan, so you’re good there.
How do I prevent the chocolate from melting too fast during dipping?
Work in small batches and keep the chocolate warm but not hot. If it cools and thickens, gently reheat in short bursts. Also, dipping in a cool room helps the chocolate set nicely without melting your fingers.
Pin This Recipe!

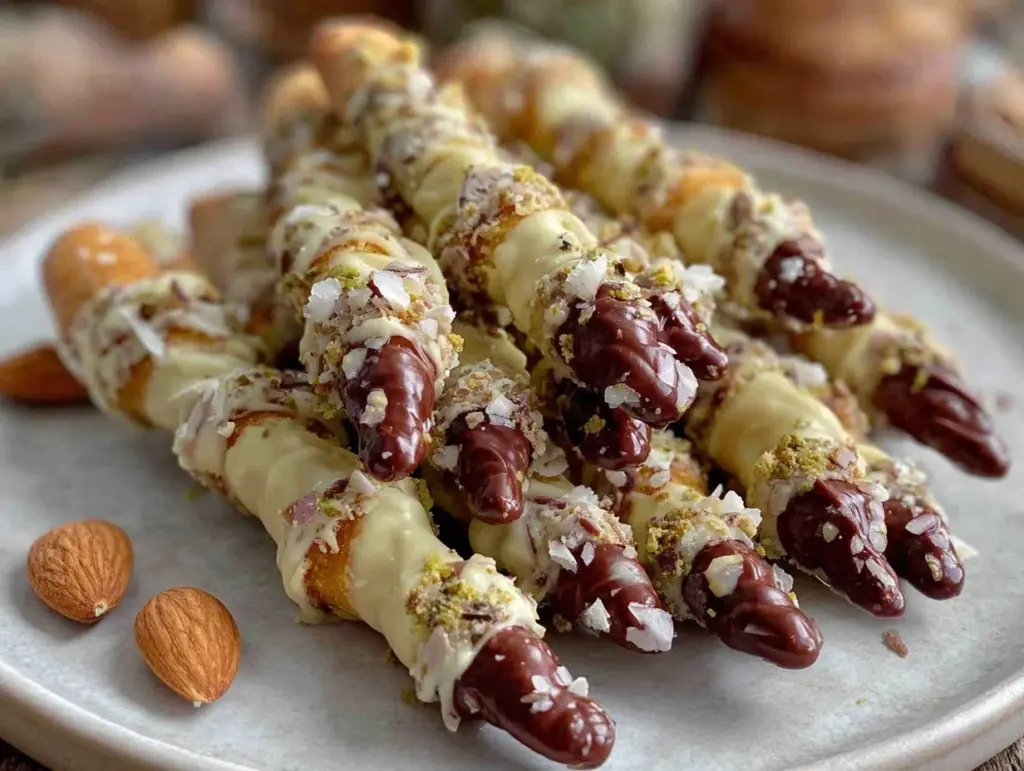
Spooky Witch Finger Pretzel Rods

Crunchy salty pretzels dipped in white chocolate and decorated with almond slices to look like creepy witch fingers, perfect for Halloween parties and treats.
- Prep Time: 10 minutes
- Cook Time: 10 minutes
- Total Time: 20 minutes
- Yield: 20 servings 1x
- Category: Snack
- Cuisine: American
Ingredients
- About 20 pretzel rods (thin preferred for finger-like look)
- 12 oz (340 g) white chocolate chips or melting wafers
- About 40 almond slices (two per finger for nails)
- Red decorating gel or red food coloring (optional, for blood effect)
- Black or green food coloring (optional, to tint white chocolate)
- 1 tbsp (15 ml) butter or coconut oil (optional, to thin chocolate)
Instructions
- Line a baking sheet with parchment paper or a silicone baking mat. Have almond slices and decorating gels ready.
- Melt 12 oz white chocolate chips with 1 tbsp butter or coconut oil in microwave-safe bowl in 30-second intervals, stirring until smooth. Alternatively, melt over double boiler.
- Optional: Add a few drops of black or green food coloring to melted chocolate and stir evenly.
- Dip pretzel rods by holding one end and coating 3-4 inches with melted chocolate. Use a spoon to help coat and tap off excess chocolate.
- Before chocolate sets, score 2-3 knuckle indentations along the chocolate-covered part using back of spoon or knife tip.
- Use tweezers to place two almond slices at the tip of each pretzel rod as fingernails, curving slightly and pressing gently.
- Use red decorating gel to draw thin lines or dots around the base of each almond nail to mimic blood.
- Place dipped pretzels on prepared sheet and let set at room temperature for 30 minutes or refrigerate for 10-15 minutes.
- Once set, add more red gel if desired. Store in airtight container at room temperature or refrigerate if warm.
Notes
Melt chocolate slowly to avoid graininess. Use tweezers for precise almond placement. Work quickly before chocolate sets. Red gel blood effect adds spooky realism. Store in airtight container for up to 3 days. Refrigerate if warm and bring to room temperature before serving.
Nutrition
- Serving Size: 1 pretzel rod
- Calories: 135
- Sugar: 12
- Sodium: 210
- Fat: 7
- Saturated Fat: 4
- Carbohydrates: 17
- Fiber: 1
- Protein: 2
Keywords: Halloween, witch finger, pretzel rods, spooky snack, easy Halloween treat, almond nails, white chocolate, party snack


