The crackle of royal icing on crisp sugar cookies shaped like vampire teeth might sound a bit quirky, but honestly, it’s one of my favorite Halloween traditions now. I first baked these irresistible vampire teeth cookies during a late October weekend when I wanted something fun and festive, but also a little spooky. The smell of vanilla and almond extract mixed with the buttery cookie dough instantly brought back memories of childhood Halloween parties, where the only thing better than candy was homemade treats.
These vampire teeth cookies with royal icing aren’t just cute — they’re downright addictive. I’ve made this recipe over a dozen times for family gatherings, school parties, and those last-minute costume events. The best part? They’re surprisingly easy to whip up, even if you’re not a baking pro. Plus, the royal icing decoration lets you get creative with every single cookie. Whether you’re a seasoned cookie decorator or just want a fun project, you’ll find these treats a delight.
Perfect for witches, ghouls, and kids who want to show off their spooky spirit, these royal icing vampire teeth cookies bring together a crisp texture and sweet, smooth finish that’s just irresistible. If you’re looking to impress guests or add a homemade touch to your Halloween spread, this recipe is your new best friend.
Why You’ll Love This Recipe
- Quick & Easy: These vampire teeth cookies come together in under an hour, making them perfect for last-minute Halloween prep or weekend baking fun.
- Simple Ingredients: No need for fancy or hard-to-find items. Most ingredients are pantry staples, like sugar, butter, and basic spices.
- Perfect for Halloween Parties: These cookies add a fun, spooky vibe to any gathering — whether it’s a kids’ party, office event, or family movie night.
- Crowd-Pleaser: Kids love the playful vampire teeth shape, and adults appreciate the buttery sweetness combined with the crisp royal icing.
- Unbelievably Delicious: The cookie’s buttery base paired with the smooth, slightly tangy royal icing texture is just the right combo of flavor and crunch.
What sets this recipe apart is the royal icing technique. I’ve tested several icing consistencies and found the perfect balance: thick enough to hold sharp edges like fangs, but smooth enough to pipe with ease. Plus, the almond extract in the cookie dough adds a subtle depth that you don’t get in your average sugar cookie.
Honestly, these vampire teeth cookies aren’t just for Halloween — they’re a festive treat that can be customized for any spooky occasion or just a fun baking day with the kids. It’s comfort food with a twist, and I’m pretty sure you’ll be hooked after your first bite.
What Ingredients You Will Need
This recipe uses simple, wholesome ingredients to deliver bold flavor and that satisfying crisp texture without fuss. Most are staples you probably already have, so no extra grocery runs needed!
- For the Cookie Dough:
- 2 ¾ cups (345g) all-purpose flour – sifted for smooth dough
- 1 teaspoon baking powder – helps cookies rise just right
- ½ teaspoon salt – balances sweetness
- 1 cup (227g) unsalted butter, softened – I like using Land O’Lakes for best spreadability
- 1 ½ cups (300g) granulated sugar – classic sweetness
- 1 large egg, room temperature – binds the dough
- 2 teaspoons vanilla extract – gives that warm, inviting aroma
- 1 teaspoon almond extract – adds a subtle, nutty depth
- For the Royal Icing:
- 3 cups (360g) powdered sugar, sifted – for smooth icing
- 2 large egg whites or 4 tablespoons meringue powder mixed with water – for that stiff, glossy finish
- 1 teaspoon lemon juice or vanilla extract – for flavor and to thin icing
- Red gel food coloring – for the “blood” drip effect
- Black gel food coloring (optional) – for added spooky details
If you want gluten-free cookies, sub the all-purpose flour with an equal amount of gluten-free flour blend — just check it contains xanthan gum for structure. For dairy-free, swap butter with coconut oil or vegan butter sticks, but expect a slight texture change.
Equipment Needed
- Mixing bowls (preferably glass or stainless steel) – I swear by heavy-duty bowls to avoid plastic smells
- Electric mixer (handheld or stand) – mixing butter and sugar until fluffy is easier with a mixer
- Rolling pin – a smooth, medium-sized one works best for even thickness
- Vampire teeth cookie cutter – you can find these online or make your own with sturdy cardboard if you’re in a pinch
- Baking sheets lined with parchment paper or silicone mats – prevents sticking and helps with even baking
- Piping bags and small round tips (size #2 or #3) – crucial for those sharp fang details and icing outlines
- Food-safe brushes or toothpicks – handy for smoothing icing or adding tiny accents
If you don’t have a cookie cutter, a sharp knife and a printed template work just as well! Trust me, I’ve made these without cutters plenty of times, and the hand-cut shapes have their own charm. For royal icing, a steady hand and patience go a long way — but don’t worry, practice makes perfect.
Detailed Preparation Method
- Mix Dry Ingredients: In a medium bowl, whisk together 2 ¾ cups (345g) all-purpose flour, 1 teaspoon baking powder, and ½ teaspoon salt. Set aside. This helps ensure even distribution and prevents clumps.
- Cream Butter and Sugar: In a large bowl, use your electric mixer to beat 1 cup (227g) softened unsalted butter with 1 ½ cups (300g) granulated sugar on medium speed. Beat for about 3-4 minutes until the mixture is light and fluffy — this step is key to tender cookies.
- Add Egg and Extracts: Crack in 1 large egg, then mix in 2 teaspoons vanilla and 1 teaspoon almond extract. Beat until just combined, scraping down the sides as needed.
- Combine Wet and Dry: Gradually add the flour mixture to the wet ingredients, mixing on low speed. Don’t overmix here — just until everything comes together into a smooth dough that’s soft but not sticky.
- Chill the Dough: Shape the dough into a flat disk, wrap tightly in plastic, and refrigerate for at least 1 hour or overnight. Chilling helps the dough firm up for easier rolling and keeps cookies from spreading too much.
- Preheat Oven and Prepare Baking Sheets: Set your oven to 350°F (175°C). Line baking sheets with parchment paper or silicone mats to prevent sticking.
- Roll Out Dough: On a lightly floured surface, roll the chilled dough to about ¼ inch (6mm) thickness. If dough feels too soft, pop it back in the fridge for 10 minutes.
- Cut Out Vampire Teeth Shapes: Using your vampire teeth cookie cutter, press firmly to cut shapes. Transfer cookies carefully to the prepared baking sheets, spacing about 1 inch (2.5 cm) apart.
- Bake Cookies: Bake for 8-10 minutes, or until edges just start turning golden. You want the cookies crisp but not browned.
- Cool Completely: Let the cookies cool on the baking sheet for 5 minutes, then transfer to wire racks to cool fully before icing. Patience here is important — warm cookies will melt the royal icing.
- Make Royal Icing: In a clean bowl, beat 3 cups (360g) sifted powdered sugar with 2 large egg whites (or meringue powder mix) and 1 teaspoon lemon juice until stiff peaks form. Aim for a thick but pipeable consistency — if too thick, add a few drops of water; too thin, add more powdered sugar.
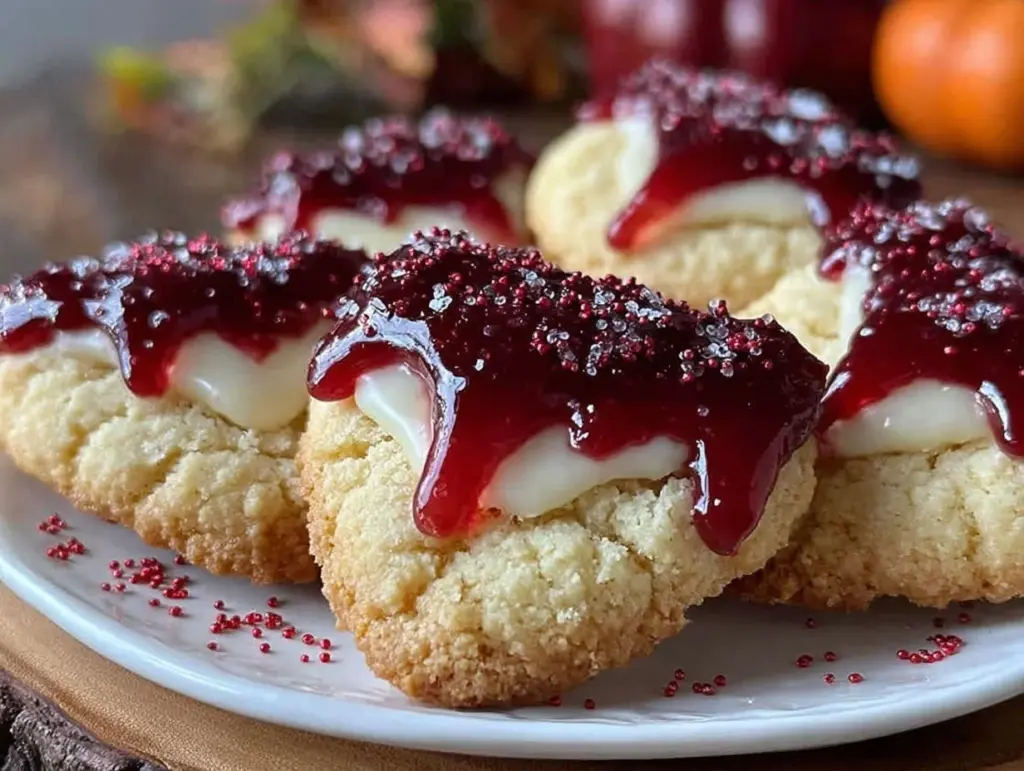
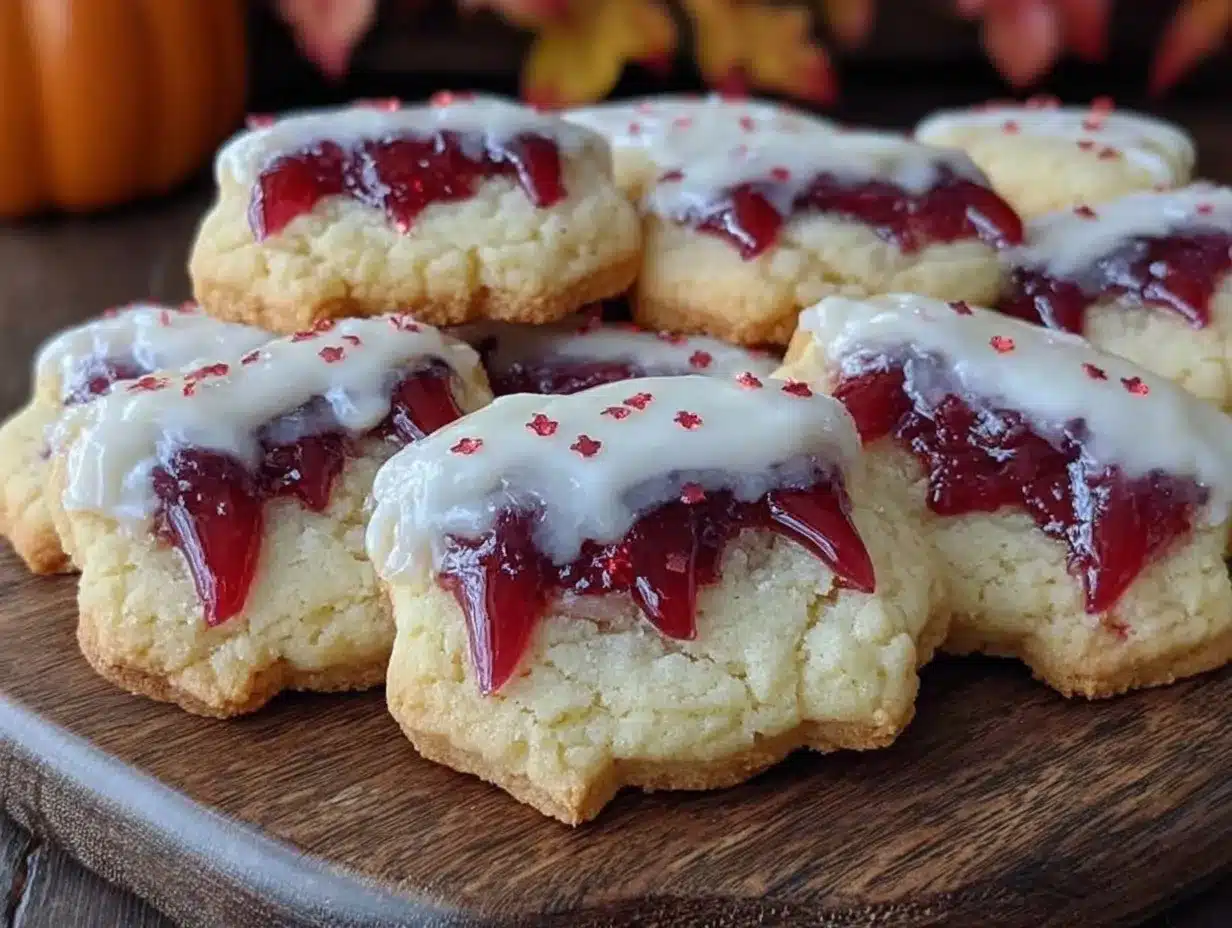
- Decorate Cookies: Fill piping bags fitted with small round tips with white royal icing. Pipe the outline of each vampire tooth, then flood the inside with icing using a toothpick or small spatula. Use red gel food coloring to add “blood” drips at the corners of the mouth for dramatic effect. Black icing can add extra spooky details like gums or cracks.
- Let Icing Set: Allow the decorated cookies to dry at room temperature for at least 4 hours, or overnight if possible. This helps the royal icing harden to a smooth, glossy finish perfect for stacking or gifting.
Quick tip: If your icing cracks while drying, it’s often because it was too thick or dried too fast. Try a thinner consistency next time or cover lightly with a damp cloth during drying to keep moisture in.
Cooking Tips & Techniques
When making these vampire teeth cookies, a few tricks can save you time and headache. First, chilling the dough is non-negotiable. I’ve skipped this step once, and the cookies spread so much they lost their shape — not fun when you want those sharp fangs!
For royal icing, I learned the hard way that adding food coloring too early can mess up consistency. Always tint your icing after you’ve got the perfect thickness. Also, use gel colors instead of liquid; they won’t thin your icing out.
When piping, steady your hand by resting your elbow on the table. It helps with neat outlines and smooth flooding. And don’t rush the drying process — letting the icing set fully ensures no smudges or sticky fingers.
One common mistake is overbaking. Those few extra minutes can turn crisp edges into hard, brittle cookies. Keep an eye around the 8-minute mark, and you’ll get that perfect snap.
If you want consistent cookie sizes, weigh your dough portions before rolling. It’s a little extra work but pays off when cookies bake evenly.
Variations & Adaptations
- Chocolate Vampire Teeth: Add ¼ cup (25g) unsweetened cocoa powder to the dry ingredients for a rich chocolate twist. Use white royal icing to contrast beautifully.
- Gluten-Free Version: Swap the all-purpose flour with a 1:1 gluten-free flour blend. Make sure it has xanthan gum for structure. The texture will be slightly more crumbly but still tasty.
- Vegan Adaptation: Use vegan butter and replace the egg in the dough with a flaxseed egg (1 tablespoon ground flaxseed + 3 tablespoons water). For royal icing, meringue powder works better than egg whites to keep it vegan.
- Spiced Vampire Teeth: Add ½ teaspoon cinnamon and ¼ teaspoon ground cloves to the flour mix for a warm, autumnal flavor.
- Alternative Decorations: Instead of red “blood” drips, try using edible glitter for a magical vampire look, or add tiny candy eyes for a creepy-cute effect.
I once added a hint of orange zest to the dough for a subtle citrus pop — surprisingly delicious and festive! Feel free to play around with flavor combos to make these your own spooky signature treat.
Serving & Storage Suggestions
Serve these vampire teeth cookies at room temperature to enjoy the full crispness of the cookie and the smoothness of the royal icing. They make a fantastic centerpiece on your Halloween dessert table or a fun grab-and-go treat for trick-or-treaters.
Pair them with a glass of cold milk, hot apple cider, or even a dark berry punch to complement the sweet, buttery flavors. For parties, arrange the cookies on a black platter with fake cobwebs for extra spooky vibes.
Store the cookies in an airtight container at room temperature for up to 5 days. If you want to keep them longer, freeze undecorated cookies for up to 3 months and decorate after thawing. Decorated cookies freeze best if the icing is fully hardened and the cookies are well-packed between layers of parchment paper.
Reheat is not recommended as it can soften the royal icing. Instead, just let frozen cookies thaw at room temperature before serving. Over time, the flavors mellow and deepen, making these vampire teeth even more delightful the day after baking.
Nutritional Information & Benefits
Each vampire teeth cookie (about 2.5 inches in size) contains approximately 150-170 calories, with 7 grams of fat, 22 grams of carbohydrates, and 2 grams of protein. These cookies are a treat, so moderation is key, but they’re made with simple, recognizable ingredients without artificial preservatives.
The almond extract adds a tiny boost of antioxidants, and using real butter gives you some vitamin A. The egg whites in the royal icing provide a bit of protein, too. Since these cookies are free from artificial dyes (if you choose natural food coloring), they’re a fun, family-friendly option.
For dietary considerations: this recipe can be adapted gluten-free and vegan, making it accessible for many. Just note the standard recipe contains wheat, dairy, and eggs, so keep allergies in mind.
Conclusion
These irresistible vampire teeth cookies with royal icing are more than just Halloween treats—they’re a fun, festive way to bring a little magic (and mischief) to your baking. Whether you’re making them with kids, hosting a party, or just craving a sweet snack with fang-tastic flair, this recipe delivers every time.
Feel free to tweak the flavors and decorations to fit your style or dietary needs. I love coming back to this recipe year after year because it never gets old—plus, it’s a great excuse to break out the piping bags and get creative!
If you try these vampire teeth cookies, please share your photos and tips in the comments. I’m always excited to see how everyone’s spooky creations turn out! Happy baking and have a fang-tastic Halloween!
FAQs
Can I use powdered sugar instead of granulated sugar in the cookie dough?
Powdered sugar will change the texture and sweetness, making cookies softer and possibly too sweet. Granulated sugar is best for the crisp texture these cookies need.
How long does royal icing take to dry completely?
Royal icing usually takes at least 4 hours to dry to a hard finish at room temperature, but overnight drying is ideal, especially for thicker decorations.
Can I make these vampire teeth cookies ahead of time?
Absolutely! You can bake and decorate them a day or two before your event. Just store them in an airtight container to keep them fresh.
What if I don’t have a vampire teeth cookie cutter?
No worries! You can print a vampire teeth template, place it under parchment paper, and cut the dough with a knife following the outline. It’s a little more work but just as fun.
Is it safe to use raw egg whites in royal icing?
Using raw egg whites can carry a risk of salmonella. For safety, consider using pasteurized egg whites or meringue powder, which is a great alternative and widely used in royal icing recipes.
Pin This Recipe!

Irresistible Vampire Teeth Cookies

Crisp sugar cookies shaped like vampire teeth decorated with royal icing, perfect for Halloween parties and festive occasions. Easy to make with simple ingredients and customizable decorations.
- Prep Time: 20 minutes
- Cook Time: 10 minutes
- Total Time: 1 hour 30 minutes
- Yield: 24 cookies 1x
- Category: Dessert
- Cuisine: American
Ingredients
- 2 ¾ cups (345g) all-purpose flour – sifted for smooth dough
- 1 teaspoon baking powder
- ½ teaspoon salt
- 1 cup (227g) unsalted butter, softened
- 1 ½ cups (300g) granulated sugar
- 1 large egg, room temperature
- 2 teaspoons vanilla extract
- 1 teaspoon almond extract
- 3 cups (360g) powdered sugar, sifted (for royal icing)
- 2 large egg whites or 4 tablespoons meringue powder mixed with water (for royal icing)
- 1 teaspoon lemon juice or vanilla extract (for royal icing)
- Red gel food coloring
- Black gel food coloring (optional)
Instructions
- Mix dry ingredients: whisk together flour, baking powder, and salt in a medium bowl; set aside.
- Cream butter and sugar: beat softened butter with granulated sugar on medium speed for 3-4 minutes until light and fluffy.
- Add egg and extracts: mix in egg, vanilla extract, and almond extract until just combined.
- Combine wet and dry ingredients: gradually add flour mixture to wet ingredients on low speed until smooth dough forms; do not overmix.
- Chill dough: shape dough into a flat disk, wrap in plastic, and refrigerate for at least 1 hour or overnight.
- Preheat oven to 350°F (175°C) and line baking sheets with parchment paper or silicone mats.
- Roll out dough to ¼ inch (6mm) thickness on a lightly floured surface; chill again if dough is too soft.
- Cut out vampire teeth shapes using a cookie cutter or template and transfer to baking sheets, spacing 1 inch apart.
- Bake for 8-10 minutes until edges start turning golden but cookies remain crisp.
- Cool cookies on baking sheet for 5 minutes, then transfer to wire racks to cool completely before icing.
- Make royal icing: beat powdered sugar with egg whites (or meringue powder) and lemon juice until stiff peaks form; adjust consistency as needed.
- Decorate cookies: pipe white royal icing outlines and flood inside; add red gel food coloring for blood drips and optional black details.
- Let icing set at room temperature for at least 4 hours or overnight until hard and glossy.
Notes
Chilling the dough is essential to prevent spreading and maintain sharp fang shapes. Use gel food coloring to avoid thinning royal icing. Let icing dry fully for best results. For safety, use pasteurized egg whites or meringue powder in royal icing.
Nutrition
- Serving Size: 1 cookie (about 2.5
- Calories: 160
- Sugar: 14
- Sodium: 80
- Fat: 7
- Saturated Fat: 4
- Carbohydrates: 22
- Protein: 2
Keywords: Halloween cookies, vampire teeth cookies, royal icing cookies, spooky treats, sugar cookies, easy Halloween recipe


