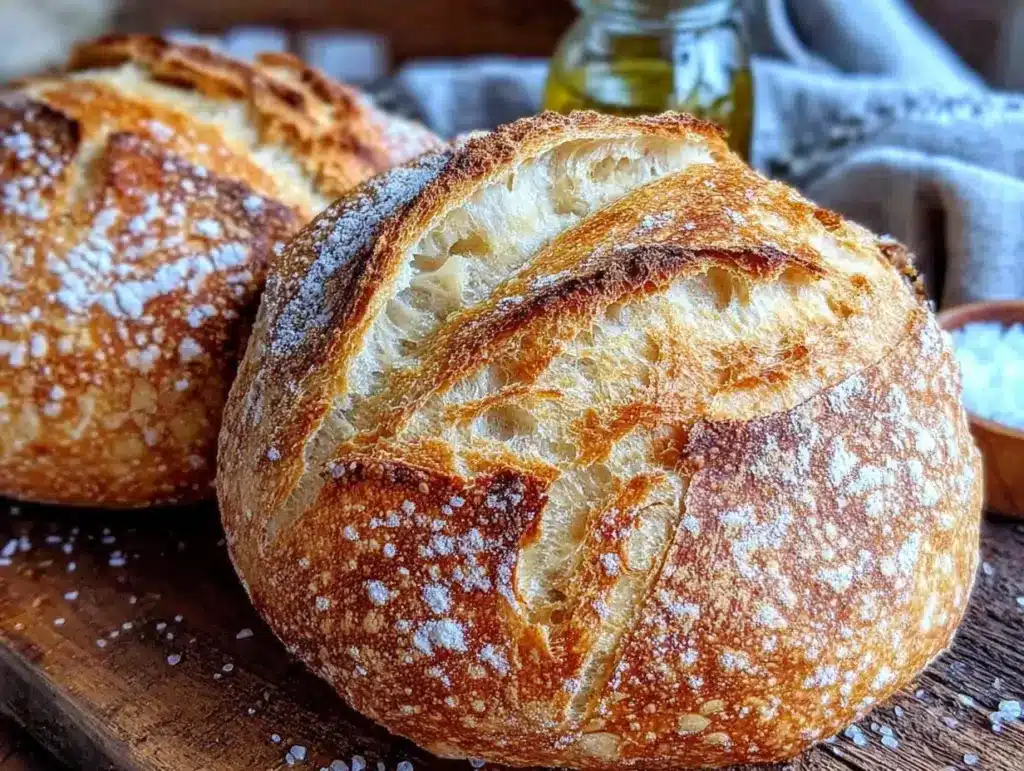
Let me tell you, the scent of freshly baked artisan bread wafting through the kitchen is enough to make anyone’s mouth water. The crust crackling as you slice into it, revealing a soft, airy crumb — honestly, it’s one of those simple pleasures that feels like magic. The first time I baked this easy crispy no-knead artisan bread, I was instantly hooked. It was the kind of moment where you pause, take a deep breath, and just smile because you know you’re onto something truly special.
Years ago, when I was knee-high to a grasshopper, my grandma used to bake bread that smelled like heaven and tasted like comfort itself. But let’s face it, kneading dough and waiting around felt like a lot of fuss. Then, I stumbled upon this no-knead recipe one rainy weekend, and it’s been a staple ever since. My family couldn’t stop sneaking slices off the cooling rack (and I can’t really blame them). It’s dangerously easy, delivers that perfect crispy crust, and brings pure, nostalgic comfort to any table.
You know what makes this recipe shine? It’s perfect for weekend breakfasts, impressing guests without stress, or just a sweet treat to brighten up your Pinterest cookie board (well, in this case, bread board!). After testing it multiple times—in the name of research, of course—it’s now a go-to for family gatherings and gifting. Trust me, this easy crispy no-knead artisan bread recipe feels like a warm hug in every bite, and you’re going to want to bookmark this one.
Why You’ll Love This Recipe
Having spent countless hours in the kitchen experimenting with bread recipes, this easy crispy no-knead artisan bread stands out for so many reasons. It’s not just another homemade loaf—it’s a crowd-pleaser that combines simplicity with that bakery-worthy crust and crumb.
- Quick & Easy: Comes together in under 15 minutes of hands-on prep. Perfect for busy weeknights or last-minute cravings.
- Simple Ingredients: No fancy grocery trips needed; you likely already have everything in your pantry—flour, water, yeast, salt.
- Perfect for Any Occasion: Whether it’s brunch, cozy dinners, or holiday mornings, this loaf fits right in.
- Crowd-Pleaser: Kids and adults alike rave about the crispy crust and soft, flavorful interior.
- Unbelievably Delicious: The secret to that perfect crust lies in slow fermentation and baking in a covered pot—trust me, it’s next-level comfort food.
This isn’t just a no-knead bread recipe; it’s a little bit of kitchen magic—where the simplest technique brings out the boldest flavors. The slow rise develops a depth of flavor you won’t find in rushed loaves. Honestly, once you try this, you’ll never look back to store-bought bread again.
What Ingredients You Will Need
This easy crispy no-knead artisan bread recipe uses simple, wholesome ingredients to deliver bold flavor and satisfying texture without the fuss. Most are pantry staples, and you can easily swap a few to suit your dietary needs.
- All-purpose flour: 3 cups (360g). I recommend King Arthur Flour for consistent results and great texture.
- Active dry yeast: 1/4 teaspoon. A tiny bit goes a long way for that slow, flavorful rise.
- Salt: 1 1/2 teaspoons, fine sea salt preferred (adds depth and enhances flavor).
- Lukewarm water: 1 1/2 cups (350ml), around 75°F (24°C). Warm but not hot—this wakes up the yeast gently.
Optional tweaks:
- Whole wheat flour: Substitute up to 1 cup (120g) for a nuttier, heartier loaf.
- Gluten-free flour blend: Use a 1:1 substitute if you need a gluten-free option; results vary but still tasty.
- Herbs or garlic powder: Add 1-2 teaspoons to the dough for a flavor twist.
Pro tip: Use a high-quality salt and fresh yeast for the best rise and flavor. If you’re baking in summer, slightly cooler water helps keep fermentation in check.
Equipment Needed
- Large mixing bowl: For combining and proofing the dough. Glass or stainless steel works best.
- Dutch oven or heavy oven-safe pot with lid: This is key for that crispy crust—if you don’t have one, a cast iron skillet with a heatproof bowl as a lid can work.
- Wooden spoon or spatula: For mixing sticky dough (no kneading here!).
- Kitchen scale: Optional but highly recommended for precise measurements and consistent results.
- Bench scraper or sharp knife: To score the dough before baking and help with handling.
Honestly, you don’t need any fancy gadgets. I’ve made this bread with just a bowl and a pot, and it always turns out beautifully. If you’re on a budget, you can skip the scale, but eyeballing measurements is less reliable. Also, keep your Dutch oven seasoned and rust-free for baking success every time.
Preparation Method
- Mix the dry ingredients: In your large bowl, stir together 3 cups (360g) all-purpose flour, 1/4 teaspoon active dry yeast, and 1 1/2 teaspoons salt until evenly combined. This step takes about 2 minutes. You’ll want to make sure there are no clumps of yeast or salt.
- Add water and stir: Pour in 1 1/2 cups (350ml) lukewarm water and stir with a wooden spoon or spatula until a shaggy, sticky dough forms. Don’t worry if it looks rough or a bit uneven—that’s exactly how it should be. This step takes 2-3 minutes.
- First rise: Cover the bowl loosely with plastic wrap or a clean kitchen towel. Let it rise at room temperature for 12 to 18 hours (overnight works great). The dough will bubble and double in size—this slow fermentation is what makes the flavor so outstanding.
- Shape the dough: After the long rise, dust a clean surface with flour. Gently scrape the dough onto it (it will be very soft and sticky). Using floured hands or a bench scraper, fold the dough over itself a few times to shape it into a round ball. This should take about 5 minutes. Cover with a towel and let rest for 30 to 45 minutes—this second rise helps the dough relax and puff up.
- Bake the bread: About 30 minutes before baking, preheat your oven to 450°F (230°C) with your Dutch oven inside. Carefully transfer the dough into the hot pot (use parchment paper to avoid sticking). Score the top with a sharp knife or razor blade to allow for expansion. Cover and bake for 30 minutes, then remove the lid and bake for another 15 to 20 minutes until the crust is deep golden and crispy. Total baking time about 45-50 minutes.
When you take the bread out, it should sound hollow when tapped on the bottom—that’s the classic sign of a perfect crust. Let it cool completely on a wire rack before slicing. I know it’s tempting, but cutting too soon can make the crumb gummy.
Cooking Tips & Techniques
Here’s what I’ve learned through many batches (including a few flops!).
- Patience is your friend: The slow rise is critical. Rushing it leads to bland bread or dense crumb. You want those bubbles and that tangy flavor to develop.
- Water temperature matters: Too hot and you kill the yeast; too cold and it barely wakes up. Aim for warm, around 75°F (24°C). Use a thermometer if you’re unsure.
- Don’t skip the preheated Dutch oven: Baking in a tightly covered pot traps steam, which is key to that crispy crust. I’ve tried baking on a sheet pan, but it never gets quite the same.
- Scoring the dough: Use a sharp blade and quick, confident strokes. It helps the bread expand without cracking unpredictably.
- Cooling is crucial: Letting the loaf cool fully prevents gummy texture inside. I usually wait at least an hour before slicing.
Honestly, the first time I forgot to preheat the pot, the crust was soft and disappointing. Trust me, that step makes all the difference. Also, if your dough feels super sticky, don’t add extra flour—just dust your hands and surface lightly to keep the bread light and airy.
Variations & Adaptations
This easy crispy no-knead artisan bread recipe is a blank canvas—feel free to make it your own!
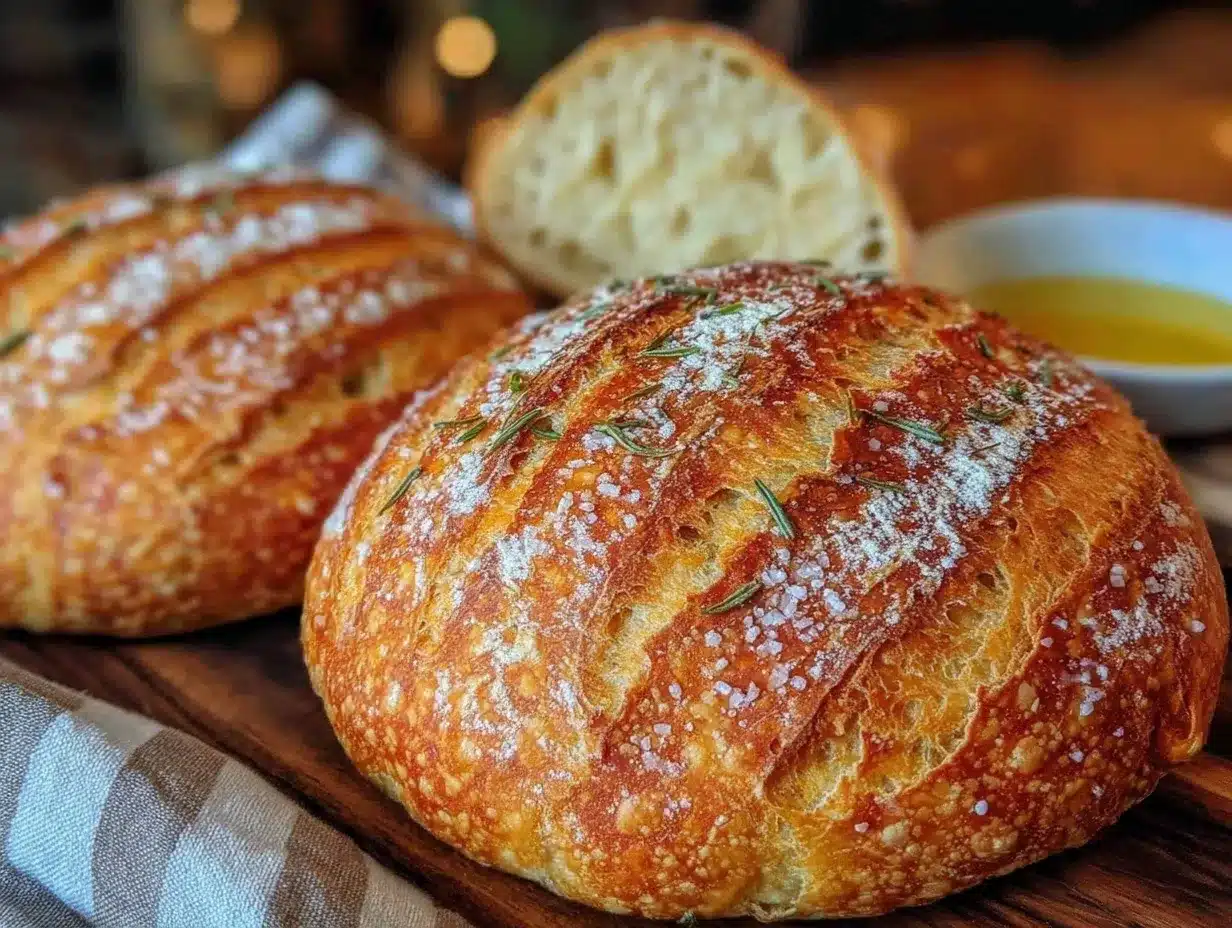
- Herbed bread: Add 1-2 teaspoons of dried rosemary, thyme, or oregano to the dry mix for a fragrant twist.
- Whole wheat version: Swap up to 1 cup (120g) of all-purpose flour for whole wheat flour. It adds a lovely nutty flavor and more fiber.
- Gluten-free option: Use a gluten-free flour blend with xanthan gum. The texture will be slightly different, but still delicious.
- Cheese and garlic: Fold in 1/2 cup (50g) shredded sharp cheddar and 1 teaspoon garlic powder before the first rise for a savory treat.
I once tried adding olives and sun-dried tomatoes—game changer for a Mediterranean vibe! Just be sure to chop add-ins finely so they integrate well without weighing down the dough.
Serving & Storage Suggestions
This bread is best served warm or at room temperature, sliced thick with butter melting in every bite. It pairs beautifully with soups, salads, or just a drizzle of olive oil and balsamic vinegar for dipping.
To store, wrap the cooled loaf in a clean kitchen towel or place it in a paper bag (avoid plastic to keep the crust crisp). It stays fresh for about 2 days at room temperature.
For longer storage, slice and freeze in airtight bags. To reheat, toast slices or warm in a 350°F (175°C) oven for 10 minutes wrapped in foil.
Fun fact: the flavor often deepens after a day or two, so if you can wait, it’s worth it. Leftover bread also makes fantastic croutons or bread pudding.
Nutritional Information & Benefits
Per serving (1/12 of loaf): approximately 150 calories, 1g fat, 31g carbohydrates, 5g protein.
This recipe is naturally low in fat and sugar, making it a wholesome option for daily bread. Using whole wheat flour boosts fiber and nutrients. The slow fermentation improves digestibility and flavor complexity.
It’s gluten-containing by default, but easy to adapt for gluten-free diets using specialty flour blends. Salt content is moderate, and you control the ingredients, so no preservatives or additives sneak in.
From a wellness perspective, there’s something comforting and grounding about baking your own bread. It connects you to simple ingredients and a satisfying rhythm in the kitchen.
Conclusion
This easy crispy no-knead artisan bread recipe is truly worth trying if you want bakery-level bread without the fuss. It’s simple, forgiving, and delivers that perfect crust and crumb every time. Plus, it invites customization so you can make it your own—from herbs to whole grains to cheesy delights.
Personally, I love how this bread brings my family together around the table, warm and smiling, with butter melting on a crispy slice. I encourage you to play with it, share your tweaks, and enjoy the process as much as the loaf itself.
If you give it a go, please drop a comment or share your variations—I’d love to hear how it turns out for you! Baking bread is a journey, and this recipe is a wonderful place to start.
FAQs About Easy Crispy No-Knead Artisan Bread
How long does the no-knead bread dough need to rise?
It needs a slow rise of 12 to 18 hours at room temperature for the best flavor and texture.
Can I use instant yeast instead of active dry yeast?
Yes, you can use instant yeast; just reduce the amount slightly (about 1/8 teaspoon) and mix it directly with the flour.
What if I don’t have a Dutch oven?
Use any heavy, oven-safe pot with a tight-fitting lid, or try a cast iron skillet covered with a heatproof bowl to trap steam.
Can I make the dough ahead and bake later?
Yes! After the first rise, you can refrigerate the dough for up to 2 days. Bring it back to room temperature before shaping and baking.
Why is my bread crust not crispy?
Make sure to bake in a covered pot to trap steam and remove the lid for the last 15-20 minutes to crisp up. Also, avoid storing bread in plastic, which softens the crust.
Pin This Recipe!

Easy Crispy No-Knead Artisan Bread
A simple, no-knead artisan bread recipe that delivers a perfect crispy crust and soft, airy crumb with minimal hands-on time. Ideal for weekend breakfasts, family gatherings, or gifting.
- Prep Time: 15 minutes
- Cook Time: 45-50 minutes
- Total Time: 13 to 18 hours 50 minutes
- Yield: 12 servings (1/12 of loaf per serving) 1x
- Category: Main Course
- Cuisine: American
Ingredients
- 3 cups (360g) all-purpose flour
- 1/4 teaspoon active dry yeast
- 1 1/2 teaspoons fine sea salt
- 1 1/2 cups (350ml) lukewarm water (around 75°F / 24°C)
- Optional: up to 1 cup (120g) whole wheat flour to substitute for all-purpose flour
- Optional: gluten-free flour blend (1:1 substitute) for gluten-free option
- Optional: 1-2 teaspoons herbs or garlic powder
- Optional: 1/2 cup (50g) shredded sharp cheddar and 1 teaspoon garlic powder for cheesy garlic variation
Instructions
- Mix the dry ingredients: In a large bowl, stir together 3 cups all-purpose flour, 1/4 teaspoon active dry yeast, and 1 1/2 teaspoons salt until evenly combined (about 2 minutes).
- Add water and stir: Pour in 1 1/2 cups lukewarm water and stir with a wooden spoon or spatula until a shaggy, sticky dough forms (2-3 minutes).
- First rise: Cover the bowl loosely with plastic wrap or a clean kitchen towel. Let it rise at room temperature for 12 to 18 hours until doubled in size and bubbly.
- Shape the dough: Dust a clean surface with flour. Gently scrape the dough onto it and fold over itself a few times to form a round ball (about 5 minutes). Cover with a towel and let rest for 30 to 45 minutes.
- Bake the bread: Preheat oven to 450°F (230°C) with a Dutch oven inside about 30 minutes before baking. Transfer dough into the hot pot using parchment paper, score the top, cover and bake for 30 minutes. Remove lid and bake for another 15 to 20 minutes until crust is deep golden and crispy.
- Cool: Remove bread and let cool completely on a wire rack before slicing.
Notes
Use warm water around 75°F (24°C) to activate yeast gently. Do not skip preheating the Dutch oven to trap steam for a crispy crust. Let bread cool completely before slicing to avoid gummy crumb. For gluten-free option, use a gluten-free flour blend with xanthan gum. Dough can be refrigerated after first rise for up to 2 days before shaping and baking.
Nutrition
- Serving Size: 1 slice (1/12 of loa
- Calories: 150
- Fat: 1
- Carbohydrates: 31
- Protein: 5
Keywords: no-knead bread, artisan bread, easy bread recipe, crispy crust bread, homemade bread, no-knead artisan bread, slow rise bread


