Let me tell you, the smell of bubbling sourdough starter filling my kitchen with that tangy, yeasty aroma is enough to make anyone’s mouth water. The first time I whipped up this easy fluffy sourdough starter, I was instantly hooked—the kind of moment where you pause, take a deep breath, and just smile because you know you’re onto something truly special. When I was knee-high to a grasshopper, my grandma used to bake bread that made our whole house feel like a warm hug. Years ago, I tried recreating that magic, and this simple sourdough starter recipe was my secret weapon. Honestly, it’s dangerously easy to make and brings pure, nostalgic comfort to your baking table.
My family couldn’t stop sneaking spoonfuls off the jar while it bubbled on the counter (and I can’t really blame them). You know what? This starter is perfect for potlucks, lazy weekend baking, or brightening up your Pinterest cookie board with fresh artisan bread. I’ve tested this recipe multiple times in the name of research, of course, and it’s now a staple for family gatherings and gifting. Trust me, once you’ve got this fluffy sourdough starter going, you’re going to want to bookmark this one forever.
Why You’ll Love This Recipe
This easy fluffy sourdough starter guide is designed with beginners in mind, making the sourdough journey approachable and fun. Here’s why you’re going to love it:
- Quick & Easy: Comes together in under 5 minutes of active prep, perfect for busy folks who want to bake without stress.
- Simple Ingredients: Just flour and water – no fancy gadgets or weird additives. You likely have everything right in your pantry.
- Perfect for Beginners: Clear, step-by-step instructions that take the guesswork out of starting your own starter.
- Crowd-Pleaser: Your homemade bread will get rave reviews from kids and adults alike, thanks to the fluffy texture and rich flavor.
- Unbelievably Delicious: This starter creates bread with that perfect tang and soft crumb that feels like comfort food with a twist.
What sets this recipe apart? I’ve refined the feeding schedule and hydration balance to produce a fluffy, lively starter without complicated techniques. No need for special flours or exotic ingredients here—just the classic combo, handled with care. Honestly, this starter isn’t just good; it’s the kind that makes you close your eyes after the first bite and say, “Yep, that’s the one.” It’s sourdough comfort food made easy, healthier, and downright addictive. Perfect for impressing guests without any stress or turning a simple loaf into something memorable.
What Ingredients You Will Need
This easy fluffy sourdough starter recipe uses just two simple, wholesome ingredients to build that bold flavor and bubbly texture you want without any fuss. Here’s what you’ll need:
- Unbleached all-purpose flour (about 120 grams / 1 cup) – This is your starter’s fuel; I recommend a trusted brand like King Arthur for consistent results.
- Filtered or bottled water (120 ml / ½ cup), room temperature – Chlorine in tap water can slow fermentation, so filtered water helps keep your starter lively.
That’s it! The magic happens when these two ingredients mingle over days. You can also experiment with whole wheat or rye flour to add depth and speed up fermentation once you’re comfortable. For now, keep it simple with unbleached all-purpose flour to get that fluffy, bubbly starter going strong.
Equipment Needed
- Glass or plastic container (at least 1-quart size) – I prefer glass because it’s easy to see the bubbles and keeps the starter healthy. Avoid metal containers, which can react with acidity.
- Kitchen scale (highly recommended) – Accurate measurement is key for a balanced starter; this helps you avoid guesswork.
- Mixing spoon or spatula – A simple silicone spatula works great for scraping down the sides.
- Breathable cover (like a clean kitchen towel or coffee filter) – Keeps out dust but lets your starter breathe and grow.
If you don’t have a scale, measuring cups will do in a pinch, but expect slight variations in texture. I once tried a metal container and regretted it (starter turned grayish and sad), so stick to glass or food-safe plastic to keep your starter happy and fluffy. Budget-friendly kitchen scales can be found online for under $20, making this starter hobby super accessible.
Preparation Method
- Day 1: Mix your starter (5 minutes) – Combine 120 grams (1 cup) of unbleached all-purpose flour with 120 ml (½ cup) of filtered, room temperature water in your clean container. Stir vigorously until smooth and no dry flour remains. The batter should be thick but stirrable, like pancake batter. Cover loosely with a breathable cloth and leave at room temperature (70–75°F / 21–24°C) for 24 hours.
- Day 2: Check for bubbles (2 minutes) – You might see a few tiny bubbles or none at all; don’t worry if your starter looks quiet. Stir it once to introduce air, cover again, and let it rest for another 24 hours.
- Day 3: Feed your starter (5 minutes) – Discard half of the starter (about 120 grams / ½ cup) – don’t throw it away; compost or use in pancakes! Add 120 grams (1 cup) flour and 120 ml (½ cup) water to the remaining starter and stir well. Cover and rest for 24 hours. By now, you should notice bubbles and a tangy smell.
- Day 4: Repeat feeding (5 minutes) – Repeat the discard and feed process from Day 3. Your starter should be doubling in size between feedings and smell pleasantly sour but fresh.
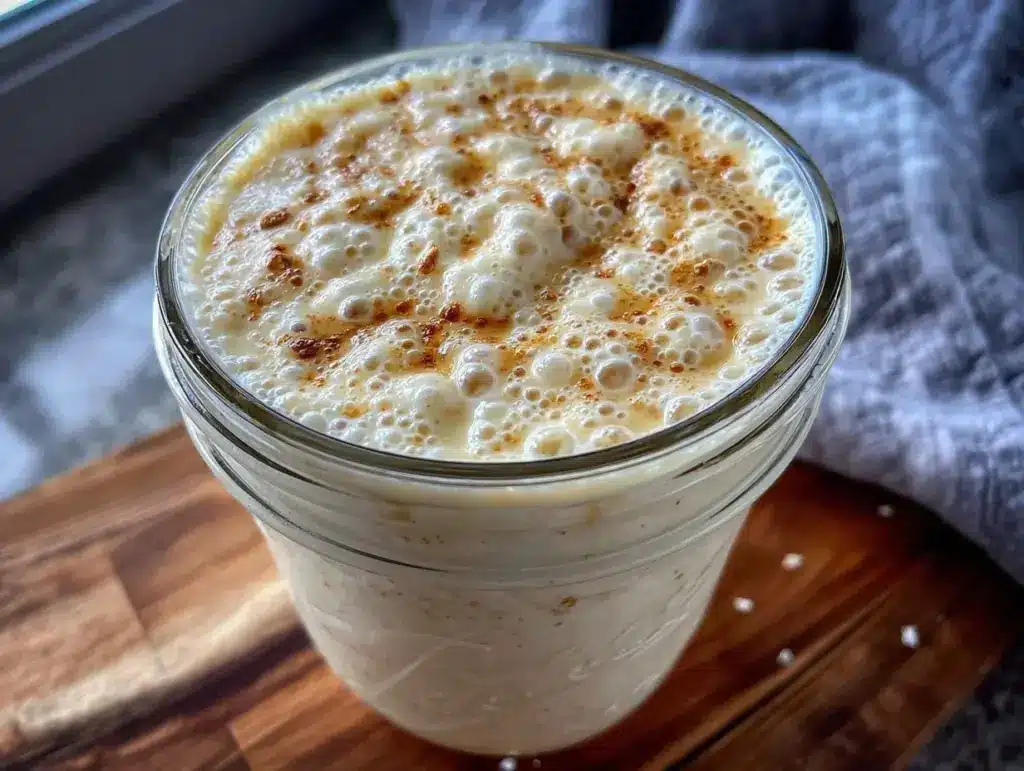
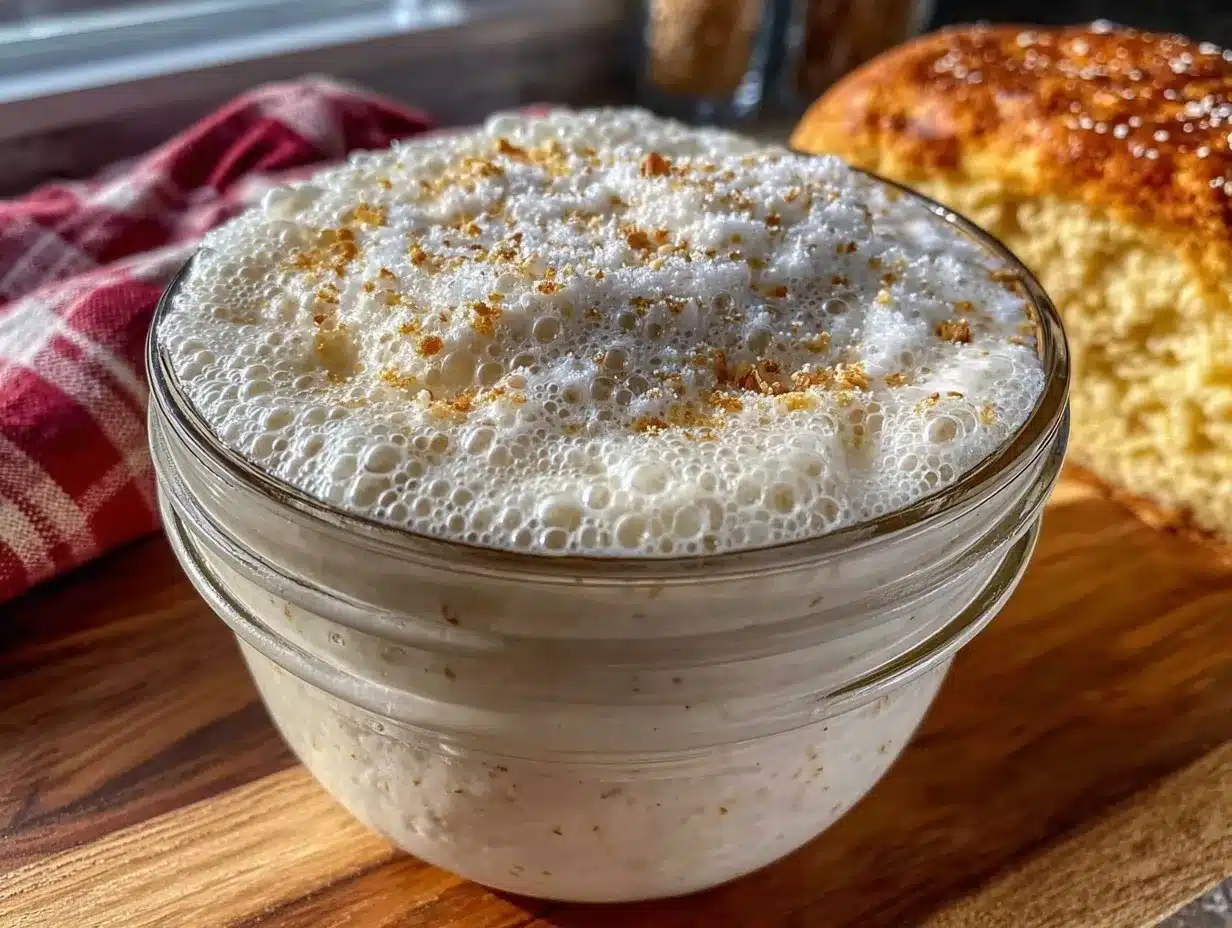
- Day 5: Ready to bake! (5 minutes) – After feeding, your starter should be bubbly, fluffy, and at least doubled in size within 6–8 hours. Give it the float test: drop a spoonful in water; if it floats, it’s ready for baking your first loaf. If not, keep feeding daily until it passes the test.
Pro tip: Keep your starter in a warm spot but out of direct sunlight. If your home is cold, a proofing box or oven with just the light on works wonders. If you see any pink or orange tints, or a strong unpleasant smell, discard and start fresh—those are signs of unwanted bacteria.
Cooking Tips & Techniques
Let me share a few tricks I’ve picked up—some the hard way—while coaxing this easy fluffy sourdough starter to life. First, consistency is king. Feed your starter at roughly the same time each day to build a reliable fermentation rhythm. I learned this after skipping feedings and ending up with a sad, sluggish starter that refused to rise.
Use room temperature water—not too hot, not too cold. Hot water can kill the wild yeast, and cold water slows fermentation. Also, don’t overmix; stir just enough to combine and aerate. Overstirring can break down the bubbles you’re trying to build.
Keep an eye on the discard amount. It may feel wasteful, but discarding half keeps your starter manageable and healthy. You can use discard creatively in pancakes, crackers, or pizza dough, so it’s not really waste.
Finally, patience pays off. Sometimes your starter takes a bit longer to get bubbly, especially in cooler weather. Resist the urge to add commercial yeast or speed things up artificially—that defeats the purpose of true sourdough magic.
Variations & Adaptations
You can easily tailor this sourdough starter guide to fit your preferences or dietary needs. Here are a few variations I’ve tried and recommend:
- Whole wheat or rye starter: Swap half or all of the all-purpose flour with whole wheat or rye flour for a more robust flavor and faster fermentation. Rye, in particular, encourages wild yeast growth.
- Gluten-free starter: Use brown rice flour or sorghum flour instead of wheat flour. Keep in mind gluten-free starters behave a bit differently, so expect a looser texture and adjust feeding frequency.
- Hydration tweaks: For a thicker, pancake-batter consistency, use equal parts flour and water by weight. For a thinner starter, increase water slightly. This affects rise speed and sourness intensity.
Personally, I love a 50/50 blend of all-purpose and whole wheat flour for a perfect balance of fluffiness and flavor. Also, if you want a less sour starter, feed it twice daily once it’s established to keep acidity in check.
Serving & Storage Suggestions
Once your easy fluffy sourdough starter is active and bubbly, it’s ready to fuel all kinds of delicious bread, pancakes, waffles, and more. Serve your sourdough bread warm from the oven with butter, honey, or your favorite jam for pure joy.
If you’re not baking daily, store your starter in the refrigerator with a loose lid or breathable cover. Feed it once a week to keep it healthy. When ready to bake, bring it back to room temperature and feed it 12–24 hours prior for best results.
To revive a refrigerated starter, discard half, feed, and keep at room temperature until bubbly again. This usually takes 1–2 feedings. Avoid freezing your starter unless you’re prepared for slower revival.
Flavors deepen with age, so the longer you nurture your starter, the more complex and tangy your bread will taste. It’s like a living tradition growing in your kitchen.
Nutritional Information & Benefits
An easy fluffy sourdough starter itself is low in calories and made simply from flour and water, but it packs powerful benefits. The wild fermentation process breaks down gluten and phytic acid, making your bread easier to digest and improving nutrient absorption.
Sourdough fermentation also produces beneficial bacteria that can support gut health. Compared to commercial yeast breads, sourdough often has a lower glycemic index, meaning it won’t spike your blood sugar as quickly.
Since this starter is just flour and water, it’s naturally vegan and can be gluten-free if you use gluten-free flours. Always check your flour choice if allergies are a concern.
Conclusion
Creating your own easy fluffy sourdough starter is a rewarding adventure that connects you with a centuries-old baking tradition. This simple guide strips away the mystery with clear steps and practical tips, making sourdough baking accessible and fun for beginners and seasoned bakers alike. Customize it with your favorite flours and feeding schedules, and watch your starter grow into a bubbling, living partner for countless delicious loaves.
Personally, I love how this starter feels like a warm friend in my kitchen—reliable, comforting, and full of potential. Now it’s your turn! Give it a try, share your results, and join the wonderful world of sourdough baking. If you have any questions or recipe twists, I’d love to hear about them in the comments below. Happy baking!
FAQs About Easy Fluffy Sourdough Starter
How long does it take to make a sourdough starter?
Typically, about 5 days to get a bubbly, active starter ready for baking. Some starters take a bit longer depending on temperature and flour.
Can I use tap water for my starter?
It’s best to use filtered or bottled water because chlorine in tap water can slow fermentation or kill the wild yeast.
What if my starter smells bad or turns pink?
If you notice pink, orange, or an unpleasant smell, it’s a sign of contamination. It’s safest to discard and start fresh with clean equipment.
How do I know when my starter is ready to bake with?
When it doubles in size 6–8 hours after feeding, is bubbly, and passes the float test (a spoonful floats in water), it’s ready.
Can I store my starter in the fridge?
Yes! Refrigerate with a loose lid and feed once a week. Bring it back to room temperature and feed before baking.
Pin This Recipe!
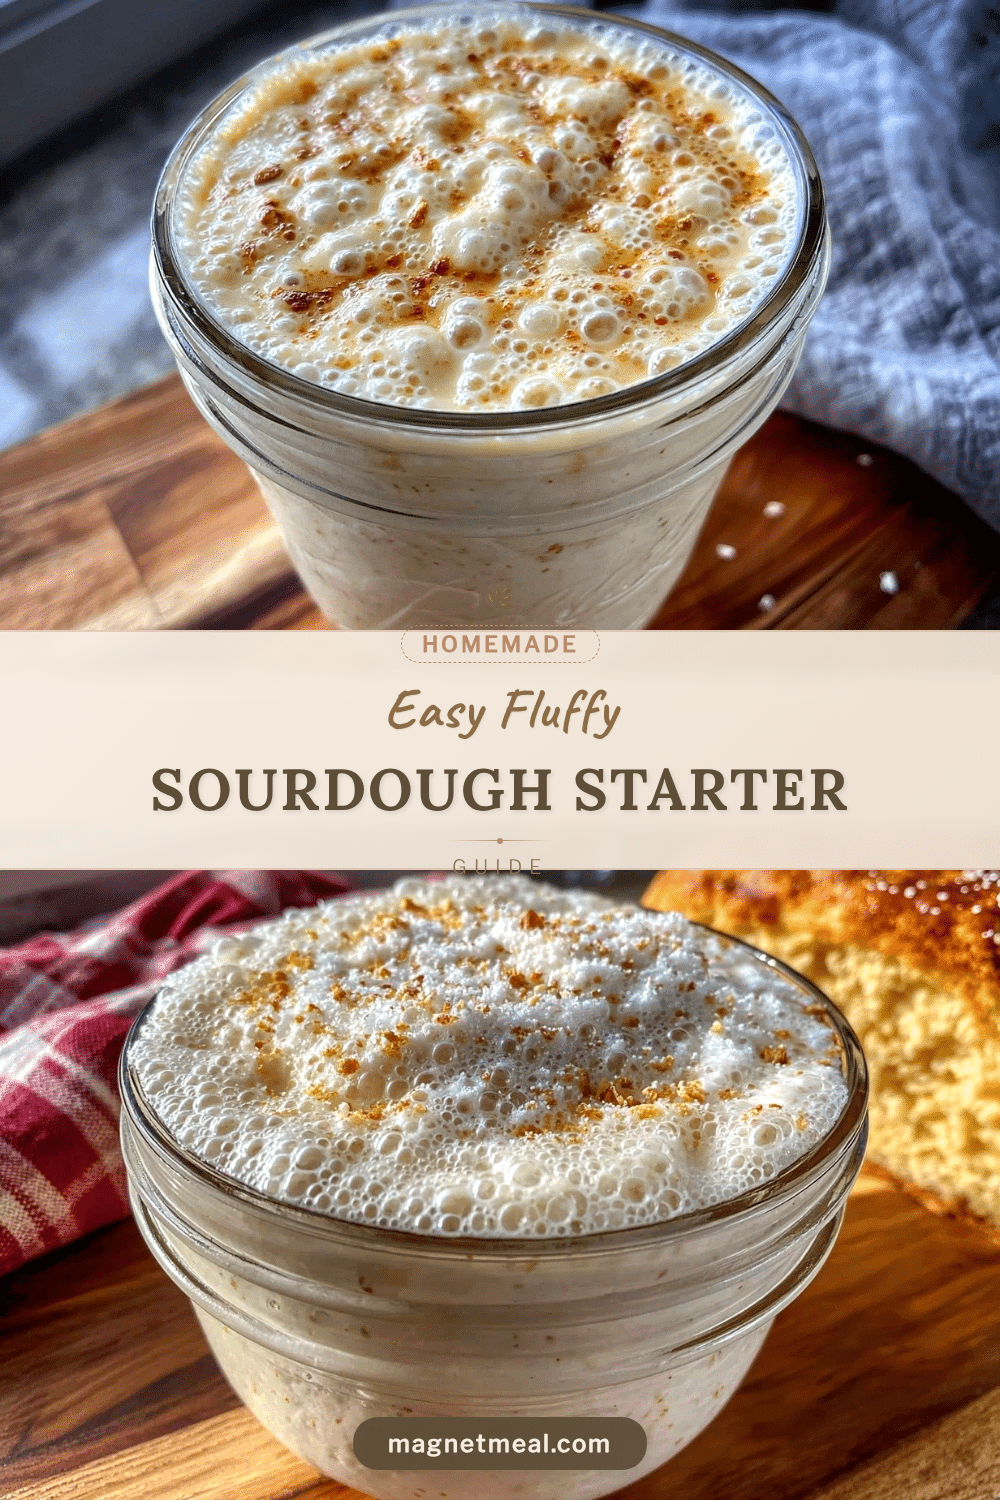
Easy Fluffy Sourdough Starter Guide for Beginners with 5 Simple Steps
This easy fluffy sourdough starter recipe is perfect for beginners, requiring just flour and water to create a bubbly, lively starter that brings nostalgic comfort to your baking.
- Prep Time: 5 minutes active prep per day
- Cook Time: 0 minutes
- Total Time: 5 days (with daily feedings)
- Yield: Starter quantity sufficient for baking multiple loaves
- Category: Baking
- Cuisine: American
Ingredients
- 120 grams (1 cup) unbleached all-purpose flour
- 120 ml (½ cup) filtered or bottled water, room temperature
Instructions
- Day 1: Mix 120 grams (1 cup) of unbleached all-purpose flour with 120 ml (½ cup) of filtered, room temperature water in a clean glass or plastic container. Stir vigorously until smooth and no dry flour remains. Cover loosely with a breathable cloth and leave at room temperature (70–75°F / 21–24°C) for 24 hours.
- Day 2: Check for bubbles. Stir once to introduce air, cover again, and let rest for another 24 hours.
- Day 3: Discard half of the starter (about 120 grams / ½ cup). Add 120 grams (1 cup) flour and 120 ml (½ cup) water to the remaining starter and stir well. Cover and rest for 24 hours.
- Day 4: Repeat the discard and feed process from Day 3. Starter should be doubling in size and smell pleasantly sour.
- Day 5: After feeding, starter should be bubbly, fluffy, and doubled in size within 6–8 hours. Perform the float test by dropping a spoonful in water; if it floats, it’s ready for baking. If not, continue daily feedings until it passes.
Notes
Use filtered or bottled water to avoid chlorine which can inhibit fermentation. Keep starter in a warm spot out of direct sunlight. Discard half of the starter during feedings to maintain health and manageability. Use discard in pancakes or crackers to avoid waste. If pink or orange tints or unpleasant smells appear, discard starter and start fresh. Consistency in feeding times is important. Avoid overmixing to preserve bubbles.
Nutrition
- Serving Size: Not applicable (star
- Calories: 110
- Carbohydrates: 23
- Fiber: 1
- Protein: 4
Keywords: sourdough starter, easy sourdough, fluffy sourdough, beginner sourdough, homemade starter, bread starter, fermentation, baking starter