“Do you really want to try making kimchi at home?” my friend asked with a raised eyebrow the first time I mentioned it. Honestly, I wasn’t sure either. I’d always thought kimchi was some mysterious, complicated Korean thing best left to experts or specialty shops. But after a late night binge of Korean dramas, where the vibrant jars of kimchi kept popping up on the table, I got curious. The crunch, the tang, the fiery kick—it all seemed so inviting and, frankly, kind of magical. So, one weekend, I rolled up my sleeves, grabbed some napa cabbage, and just went for it.
What started as a hesitant experiment quickly turned into a delightful obsession. The whole kitchen smelled alive with garlic, ginger, and chili pepper, and I found myself checking on the fermentation progress like it was a tiny, bubbling science project. It’s funny how a recipe can quietly sneak into your routine and become a staple. This flavorful authentic Korean kimchi homemade recipe isn’t just about food; it’s a little ritual that brings zest and warmth to even the dullest days. And between you and me, it’s way easier than I expected.
After making this basic yet bold kimchi several times (and tweaking it here and there), I realized it’s the kind of recipe that feels like a friendly handshake from Korea itself—unpretentious, vibrant, and genuinely welcoming. The best part? You don’t need a pantry stocked with obscure ingredients or a professional fermenter. Just simple, fresh stuff and a little patience. So, here’s my take on an authentic Korean kimchi recipe that’s approachable, flavorful, and perfect for anyone ready to add a homemade kick to their meals.
Why You’ll Love This Recipe
This authentic Korean kimchi recipe has become a kitchen favorite for many reasons. After several rounds of testing and fine-tuning, I can confidently say it hits all the right marks, whether you’re a seasoned fermenter or a curious newbie. Here’s why it’s worth your time:
- Quick & Easy: While fermentation takes time, the actual prep comes together in under 45 minutes—great for busy days when you want to set it and forget it.
- Simple Ingredients: Most of what you need is probably already in your fridge or local grocery store. No need for specialty markets or exotic finds.
- Perfect for Any Occasion: Whether you’re hosting a casual dinner, making a comforting meal for yourself, or jazzing up your lunchbox, kimchi adds a bright, tangy punch.
- Crowd-Pleaser: Friends and family always ask for the recipe once they taste this version. It’s mildly spicy but balanced, so it appeals to a broad range of palates.
- Unbelievably Delicious: The blend of garlic, ginger, and chili flakes with the crisp cabbage creates a texture and flavor combo that’s deeply satisfying and genuinely authentic.
What makes this recipe stand out is the particular balance between the spicy and sour notes, plus a subtle sweetness from the pear and a savory depth from the fish sauce. I’ve tweaked the fermentation time to be just right—not too sharp or overpowering. For those who want to experiment, you can even try blending the cottage cheese for a creamy twist, but honestly, the classic version holds its own beautifully. This kimchi is a gateway to Korean cooking and pairs especially well with dishes like BBQ chicken cheddar wraps or a hearty bowl of kimchi ramen. It’s a recipe that invites you to savor the moment and enjoy the simple joy of homemade flavor.
What Ingredients You Will Need
This recipe relies on straightforward, wholesome ingredients that work together to create that unmistakable kimchi flavor and texture. Each component plays a role—some add heat, others bring umami or crunch. Most are pantry staples or easy to find at any grocery store with an Asian food aisle.
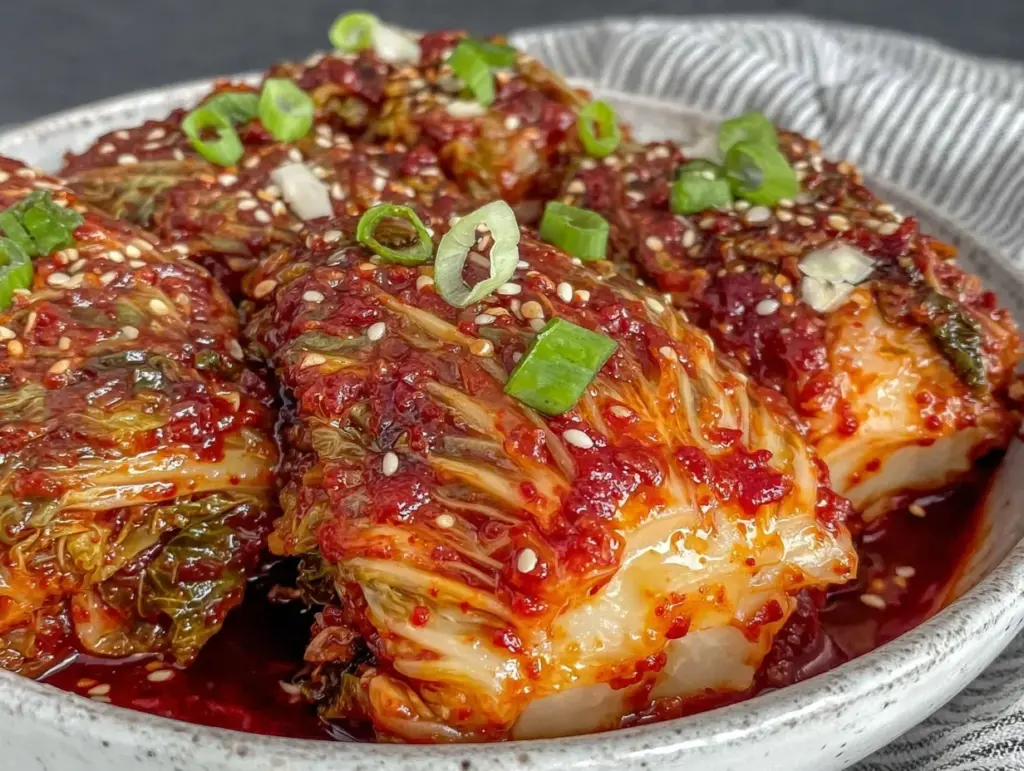
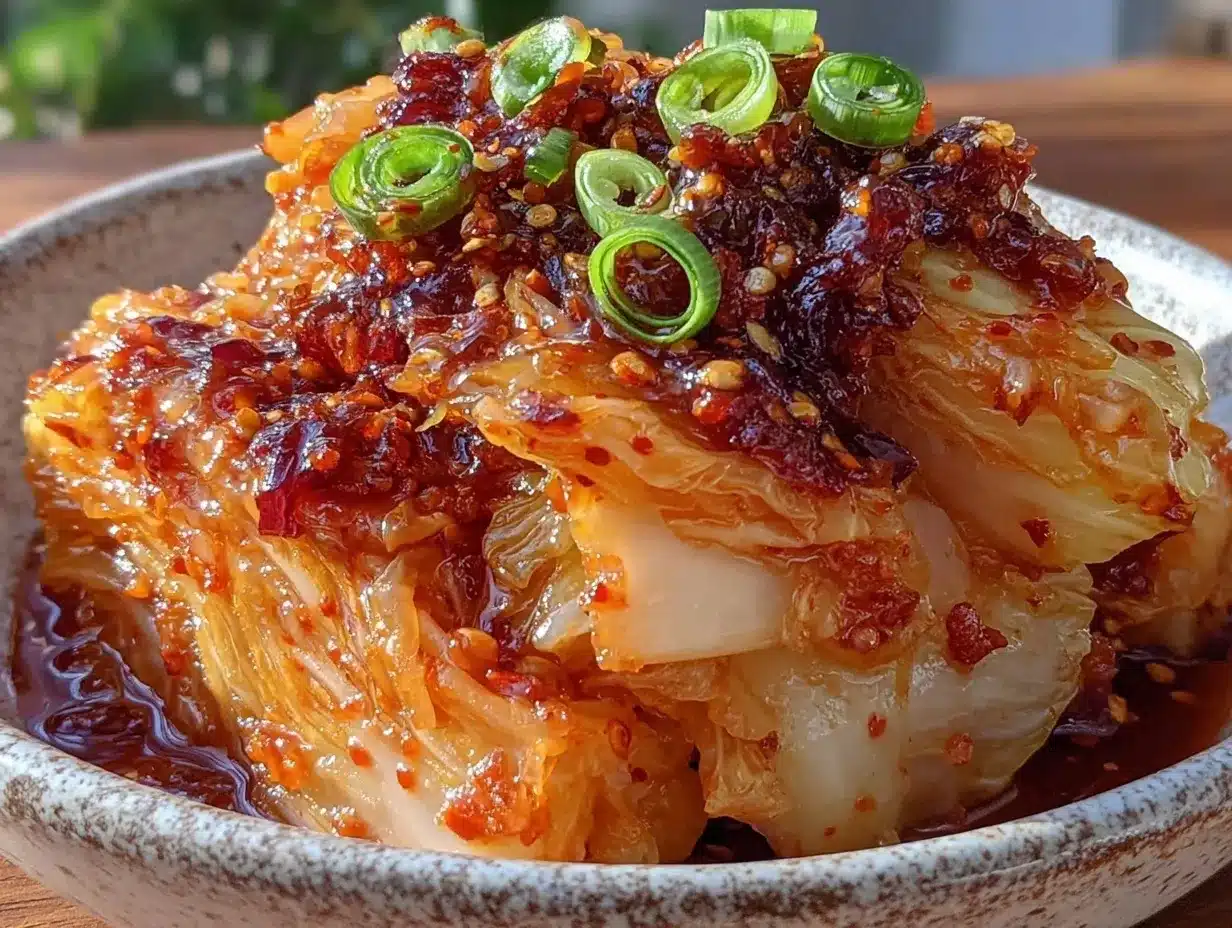
- Napa cabbage: 2 medium heads (about 3 lbs / 1.4 kg), the star of the dish, provides crispness and absorbs the seasoning wonderfully.
- Salt: 1/2 cup (120 g) kosher salt or sea salt, for salting and softening the cabbage.
- Water: About 6 cups (1.4 liters), to soak the cabbage during the salting process.
- Korean red pepper flakes (gochugaru): 1/2 cup (40 g), gives kimchi its iconic spicy kick and vibrant color. I recommend Chung Jung One brand for authentic flavor.
- Garlic: 8 cloves, minced, for that pungent, aromatic backbone.
- Ginger: 2 tablespoons, freshly grated, adds a warm, zesty note.
- Green onions: 4–5 stalks, chopped into 1-inch pieces, for freshness and crunch.
- Fish sauce: 1/4 cup (60 ml), traditional and essential for umami depth. If you’re vegan, substitute with soy sauce or tamari.
- Sugar: 1 tablespoon, balances the heat and sour elements.
- Korean radish (mu): 1 cup, julienned, adds crunch and sweetness. If unavailable, daikon radish works fine.
- Asian pear (optional): 1 small, grated, for subtle sweetness and tenderizing effect.
Many of these ingredients can be swapped with close alternatives. For instance, if you want to make this gluten-free, just ensure your fish sauce or soy sauce is certified gluten-free. Also, in summer months, fresh local radishes can replace Korean radish for a seasonal twist. The key is balancing the bold flavors with the crisp textures.
Equipment Needed
Making kimchi at home doesn’t require fancy gadgets, but a few tools make the process smoother and more enjoyable. Here’s what you’ll need:
- Large mixing bowl: For soaking the cabbage in salted water. Glass or stainless steel is best—avoid reactive metals like aluminum.
- Colander or strainer: To drain the cabbage after salting.
- Sharp knife and cutting board: For chopping cabbage, radish, and green onions.
- Gloves: Food-safe nitrile or latex gloves protect your hands from the chili’s sting and make mixing easier.
- Glass or plastic fermentation jar: A 1-gallon (4-liter) wide-mouth jar works well. Avoid metal containers which can react with the acids.
- Weight: Something to keep the kimchi submerged during fermentation, like a glass weight or a smaller jar filled with water.
- Wooden spoon or spatula: For mixing the kimchi paste and ingredients.
If you don’t have a fermentation weight, a clean zip-top bag filled with water can work as a makeshift weight. Personally, I like glass jars with wide mouths because it’s easier to press and pack the kimchi down. Keeping your tools clean is crucial for great fermentation results, so make sure everything is sanitized before use.
Preparation Method
- Prepare the cabbage: Remove any damaged outer leaves from the napa cabbages. Cut each head into quarters lengthwise, then chop into 2-inch (5 cm) pieces. Rinse under cold water.
- Salt the cabbage: In a large bowl, dissolve 1/2 cup kosher salt in 6 cups cold water. Submerge the cabbage pieces fully in the brine. Let sit for 1.5 to 2 hours, tossing every 30 minutes to ensure even salting. The cabbage will soften and shrink—this is normal.
- Rinse and drain: After salting, rinse the cabbage thoroughly under cold water to remove excess salt. Drain well in a colander for about 20 minutes. Squeeze gently to remove extra water but don’t crush the leaves.
- Make the kimchi paste: In a medium bowl, combine 1/2 cup gochugaru, minced garlic, grated ginger, fish sauce, sugar, and grated pear (if using). Stir to make a thick, spicy paste. Adjust the chili flakes if you want more or less heat.
- Mix the vegetables: Add the chopped radish and green onions to the paste. Using gloved hands, mix everything thoroughly until well coated.
- Combine cabbage with paste: Add the drained cabbage to the bowl with the kimchi paste. Wearing gloves, massage and toss everything together until the cabbage pieces are evenly coated. This can take about 5-7 minutes. The cabbage should look juicy and vibrant.
- Pack into jar: Transfer the kimchi into your fermentation jar, pressing down firmly to remove air pockets. Leave about 1-2 inches (2.5-5 cm) of headspace at the top. Place a weight on top to keep the vegetables submerged under their own juices.
- Ferment: Seal the jar loosely or cover with a cloth to allow gases to escape. Leave it at room temperature (65-72°F / 18-22°C) for 1-5 days depending on your taste preference. Check daily; you might see bubbles or a slight tang developing.
- Refrigerate: Once it reaches your desired level of fermentation, tighten the lid and refrigerate. The flavors continue to develop slowly in the fridge for several weeks.
Tip: If you notice any white film on top, it’s just harmless kahm yeast—skim it off and continue fermenting. Avoid any mold or off smells. The cabbage should smell pleasantly sour and a bit spicy.
Cooking Tips & Techniques
Kimchi making is part art, part science, and a pinch of patience. Here’s what I’ve learned along the way to get the best results:
- Salting is key: Don’t rush the salting step. It softens the cabbage and prevents sogginess later. Tossing the cabbage every 30 minutes during soaking ensures even salt absorption.
- Gochugaru quality matters: Fresh Korean red pepper flakes give that vibrant color and flavor. Older flakes can taste dull or bitter. Store them in an airtight container away from light.
- Gloves are your best friend: Mixing the spicy paste can sting your hands more than you expect. Plus, gloves help keep everything hygienic.
- Press down firmly: To avoid mold and spoilage, make sure the cabbage stays submerged in its own juices. Use a fermentation weight or a smaller jar as a press.
- Fermentation timing varies: I usually leave mine 3 days at room temp for a nice balance of tang and spice, but cooler kitchen temps mean longer fermentation. Taste daily to find your sweet spot.
- Don’t panic about bubbles: Bubbling is a good sign that fermentation is active. Just burp your jar daily to release pressure and keep the lid loose initially.
Once, I accidentally left my kimchi fermenting for a week in a warm kitchen, and it turned out incredibly tangy and punchy—too much for some but perfect for those who like bold flavors. Learning your preference and environment is part of the fun.
Variations & Adaptations
Kimchi is wonderfully versatile, and you can customize it in several ways without losing its soul:
- Vegetable swaps: Try adding carrots, mustard greens, or bok choy along with the cabbage for extra texture and flavor.
- Mild version: Reduce the gochugaru by half and add a splash of apple juice or honey to tone down the heat but keep sweetness.
- Vegan kimchi: Replace fish sauce with tamari or soy sauce and omit any seafood-based ingredients. The flavor remains rich and tangy.
- Quick kimchi: Skip fermentation and enjoy it fresh as a spicy salad or side dish. It won’t have the same depth but still packs a punch.
- Fermentation length: For a crunchier, fresher kimchi, refrigerate after 1-2 days. For more sour and complex notes, ferment up to a week at room temperature before chilling.
Personally, I’ve tried adding a touch of avocado tuna salad on the side for an unusual but delicious contrast. It’s a reminder kimchi plays well in many culinary settings.
Serving & Storage Suggestions
Kimchi shines best chilled and slightly tangy but can be served in so many ways:
- Serving: Enjoy it straight from the jar as a side with rice or grilled meats. The crisp texture and spicy punch brighten up any meal.
- Pairings: Classic with Korean dishes, but also excellent alongside dishes like butter-basted ribeye steak or spicy peanut noodles with chicken for a fusion twist.
- Storage: Keep kimchi refrigerated in an airtight jar for up to 3 months. The flavor deepens and mellows over time—some say it gets better with age!
- Reheating: Kimchi is usually eaten cold, but it can be added to soups or stews toward the end of cooking to warm through and add zing.
When first opened, kimchi might have a strong aroma—just a sign it’s alive and fermenting. If you’re new to kimchi, start with small amounts and mix it into dishes to balance the flavors.
Nutritional Information & Benefits
Kimchi is more than just a tasty condiment; it’s a probiotic powerhouse with several health perks:
- Low in calories but packed with fiber, vitamins A, B, and C.
- Contains beneficial bacteria from fermentation that support gut health and digestion.
- Rich in antioxidants from garlic, ginger, and chili peppers, which can help reduce inflammation.
- Gluten-free and naturally low-carb, making it a good fit for many diets.
Be mindful that kimchi contains sodium from the salting process, so enjoy it in moderation if you’re watching your salt intake. Personally, I love how this recipe brings a burst of flavor without any artificial ingredients or preservatives—just honest, wholesome nourishment.
Conclusion
Making authentic Korean kimchi at home is a rewarding journey filled with rich flavors, satisfying textures, and a bit of bubbling magic. This recipe invites you to connect with tradition while adding your own touch—whether that’s dialing up the spice or trying a vegan version. I keep coming back to it because it’s simple enough for weeknight cooking but special enough to impress guests quietly.
Remember, kimchi is as much about the process as the result. It’s about patience, curiosity, and savoring the transformation of humble ingredients into something vibrant and alive. I hope this guide gives you the confidence to try your hand at homemade kimchi—it’s a kitchen ritual worth having. And if you ever want a comforting dish to pair it with, dishes like the rich creamy ramen carbonara or the hearty classic tuna melt make perfect companions.
Enjoy the adventure, and may your kimchi always be flavorful and fresh!
FAQs
- How long does kimchi take to ferment? Typically 1-5 days at room temperature depending on your taste and kitchen temperature. After that, refrigerate to slow fermentation.
- Can I use regular cabbage instead of napa cabbage? Napa cabbage is preferred for its texture and flavor, but green cabbage can be used with slightly different results.
- Is kimchi gluten-free? Yes, if you use gluten-free fish sauce or tamari and avoid any added wheat-based ingredients.
- How spicy is this kimchi recipe? It has a moderate heat level from gochugaru. You can adjust the chili flakes to your preference.
- Can I eat kimchi without fermenting it? Yes, fresh kimchi is tasty as a spicy salad, though fermentation adds depth and complexity.
Pin This Recipe!

Authentic Korean Kimchi Recipe Easy Homemade Flavorful Guide

This authentic Korean kimchi recipe is approachable, flavorful, and perfect for anyone ready to add a homemade kick to their meals. It combines simple ingredients to create a vibrant, tangy, and mildly spicy fermented side dish.
- Prep Time: 30 minutes
- Cook Time: 0 minutes
- Total Time: 1.5 to 2 hours prep + 1-5 days fermentation
- Yield: About 8 servings 1x
- Category: Side Dish
- Cuisine: Korean
Ingredients
- 2 medium heads napa cabbage (about 3 lbs / 1.4 kg)
- 1/2 cup kosher salt or sea salt (120 g)
- About 6 cups water (1.4 liters)
- 1/2 cup Korean red pepper flakes (gochugaru) (40 g)
- 8 cloves garlic, minced
- 2 tablespoons freshly grated ginger
- 4–5 stalks green onions, chopped into 1-inch pieces
- 1/4 cup fish sauce (60 ml) (substitute soy sauce or tamari for vegan)
- 1 tablespoon sugar
- 1 cup Korean radish (mu), julienned (or daikon radish)
- 1 small Asian pear, grated (optional)
Instructions
- Remove any damaged outer leaves from the napa cabbages. Cut each head into quarters lengthwise, then chop into 2-inch pieces. Rinse under cold water.
- In a large bowl, dissolve 1/2 cup kosher salt in 6 cups cold water. Submerge the cabbage pieces fully in the brine. Let sit for 1.5 to 2 hours, tossing every 30 minutes to ensure even salting.
- After salting, rinse the cabbage thoroughly under cold water to remove excess salt. Drain well in a colander for about 20 minutes. Squeeze gently to remove extra water but don’t crush the leaves.
- In a medium bowl, combine 1/2 cup gochugaru, minced garlic, grated ginger, fish sauce, sugar, and grated pear (if using). Stir to make a thick, spicy paste. Adjust chili flakes to taste.
- Add the chopped radish and green onions to the paste. Using gloved hands, mix everything thoroughly until well coated.
- Add the drained cabbage to the bowl with the kimchi paste. Wearing gloves, massage and toss everything together until the cabbage pieces are evenly coated, about 5-7 minutes.
- Transfer the kimchi into your fermentation jar, pressing down firmly to remove air pockets. Leave 1-2 inches of headspace at the top. Place a weight on top to keep the vegetables submerged.
- Seal the jar loosely or cover with a cloth to allow gases to escape. Leave at room temperature (65-72°F) for 1-5 days depending on taste preference. Check daily for bubbles or tang.
- Once desired fermentation is reached, tighten the lid and refrigerate. Flavors will continue to develop slowly in the fridge for several weeks.
Notes
[‘Salting the cabbage thoroughly is key to softening and preventing sogginess.’, ‘Use fresh gochugaru for best flavor and vibrant color.’, ‘Wear gloves to protect your hands from chili irritation and for hygiene.’, ‘Keep cabbage submerged under its own juices during fermentation to avoid mold.’, ‘Fermentation time varies by temperature and taste preference; taste daily.’, ‘If white kahm yeast forms, skim it off; avoid mold or off smells.’, ‘Kimchi can be eaten fresh without fermentation as a spicy salad.’, ‘For vegan kimchi, substitute fish sauce with tamari or soy sauce.’, ‘Store kimchi refrigerated in an airtight jar for up to 3 months.’]
Nutrition
- Serving Size: Approximately 1/2 cu
- Calories: 25
- Sugar: 2
- Sodium: 600
- Fat: 0.2
- Carbohydrates: 5
- Fiber: 2
- Protein: 1
Keywords: kimchi, Korean kimchi, fermented vegetables, homemade kimchi, spicy kimchi, gochugaru, napa cabbage, probiotic foods


