“Are you sure you don’t want to just buy a frozen pizza?” my partner asked, eyeing the pile of dishes I’d already ignored in favor of testing this crust technique. Honestly, that night was one of those rare ones when I was tired, cranky, and ready to throw in the towel on dinner. But the craving for something crispy, cheesy, and just right kept nagging. So, I rummaged through the cabinet, grabbed my trusty cast iron skillet, and decided to give this cast iron pizza crust recipe a shot.
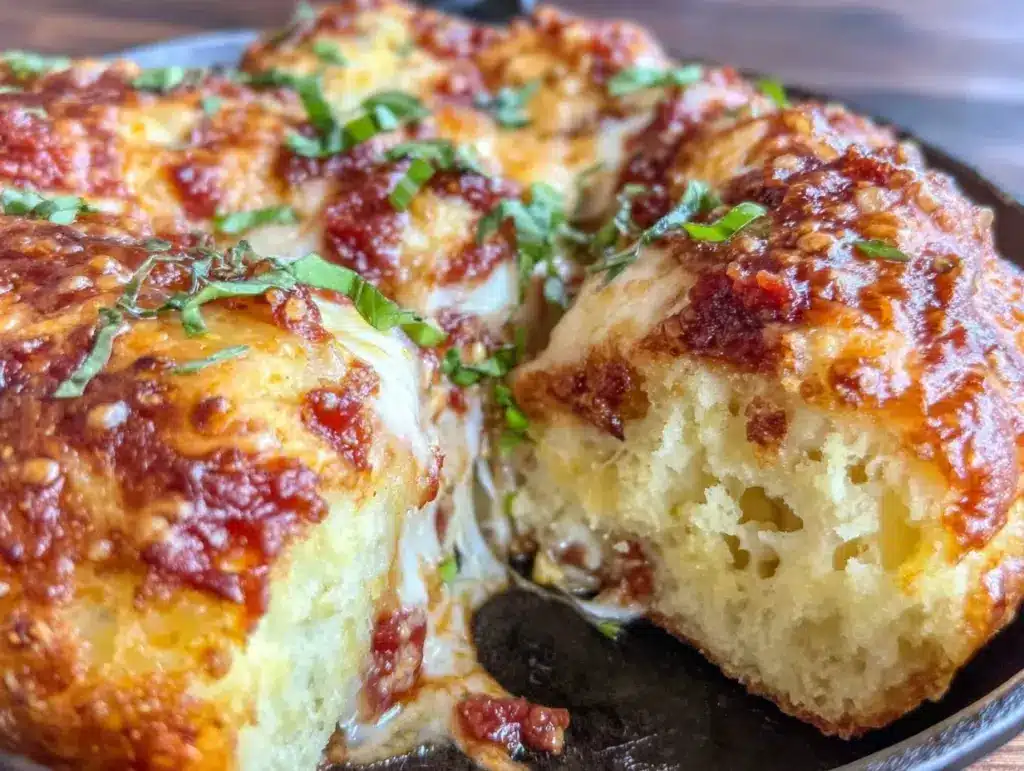
At first, I was skeptical — I mean, can a skillet really give you that perfect crunch without turning the dough into a rock? But the sizzle when the dough hit the hot pan was so satisfying, like a promise that this might actually work. As the edges bubbled and browned with that unmistakable golden crisp, I realized this wasn’t just any pizza crust. It was the kind of crust that makes you pause, mid-bite, to appreciate the crunch before diving back in.
It wasn’t about fancy toppings or complicated steps; it was the crust itself that stole the show. That night, this crispy cast iron pizza crust recipe became my secret weapon for quick, satisfying homemade pizza — no fancy oven or pizza stone needed. It stuck with me because it’s the perfect crunch you want on a busy weeknight, but still feels a bit special. And hey, if it can rescue a tired cook like me on a bad day, maybe it’ll find a place in your kitchen too.
Why You’ll Love This Recipe
After testing this crispy cast iron pizza crust recipe several times (okay, maybe more than several — can’t stop, won’t stop), I’m convinced it’s a game changer for homemade pizza. Here’s why it’s become my go-to:
- Quick & Easy: From mixing the dough to a golden finish in the skillet, it takes about 30 minutes — perfect for when you want homemade without hassle.
- Simple Ingredients: No weird flours or exotic products. Just staples like flour, yeast, water, and olive oil — stuff you likely have in your pantry.
- Perfect for Weeknight Dinners: Whether it’s a solo pizza night or feeding a small crowd, this crust delivers consistent crunch and flavor.
- Crowd-Pleaser: My family, friends, even the picky eaters ask for it again — that’s a win in my book!
- Unbelievably Delicious: The cast iron skillet sears the dough to a crisp that’s slightly charred but never burnt, with a chewy interior that feels just right.
- Unique Technique: Unlike baking on a stone or sheet, the skillet locks in heat and creates a crust that’s crispy on the bottom and edges, without drying out the toppings.
What sets this recipe apart is the way it balances ease with that perfect crunch. It isn’t just another pizza crust recipe; it’s the one that makes you realize how satisfying simple, well-executed technique can be. Plus, it pairs beautifully with a variety of toppings — from classic pepperoni to something fresh like a Mediterranean spread. If you want to mix it up, try pairing it with a light salad or even a fresh avocado tuna salad for a refreshing contrast.
What Ingredients You Will Need
This crispy cast iron pizza crust recipe keeps things straightforward by using basic, wholesome ingredients that come together to create that perfect crunch and satisfying chew. These are pantry staples for the most part, and if you ever need to swap something out, I’ve got you covered.
- All-purpose flour: 2 cups (240g) — the foundation for your dough. I prefer King Arthur for consistent results.
- Active dry yeast: 1 teaspoon — gives the dough a good rise and lightness.
- Warm water: 3/4 cup (180ml), around 110°F (43°C) — activates the yeast without cooking it.
- Sugar: 1 teaspoon — helps jumpstart the yeast.
- Salt: 1 teaspoon — balances flavor and strengthens gluten.
- Olive oil: 2 tablespoons — adds richness and helps achieve that crispy crust.
If you want to experiment, you can swap the all-purpose flour for bread flour to get a chewier texture, or use gluten-free flour blends if needed. For dairy-free options, olive oil works perfectly, so no worries there.
For toppings, the sky’s the limit — but for a crisp crust, try to keep the toppings light and avoid watery ingredients that can make your crust soggy. Some of my favorite combos are classic tomato sauce with mozzarella and fresh basil or a lighter option like a smoky BBQ chicken topping (which you might appreciate after trying the BBQ chicken cheddar wrap).
Equipment Needed
- Cast iron skillet (10–12 inches): This is the star player that gives the crust its signature crisp. A well-seasoned pan works best for easy release.
- Mixing bowl: For combining ingredients and proofing the dough.
- Measuring cups and spoons: Accurate measurements make all the difference.
- Wooden spoon or dough whisk: Helpful for mixing the dough without overworking it.
- Kitchen towel or plastic wrap: To cover the dough while it rises.
- Spatula or pizza peel: Useful for transferring the pizza in and out of the skillet.
If you don’t own a cast iron skillet yet, no worries — a heavy-bottomed oven-safe skillet can work too, but the crispiness will be less intense. I’ve had great luck with budget-friendly Lodge skillets, which develop more flavor with each use (just remember to keep them oiled and dry).
Preparation Method

- Activate the yeast: In your mixing bowl, combine 3/4 cup (180ml) warm water with 1 teaspoon sugar and 1 teaspoon active dry yeast. Stir gently and let it sit for 5–10 minutes until foamy. If it’s not bubbly, your yeast might be old or the water too hot/cold.
- Mix the dough: Add 2 cups (240g) all-purpose flour and 1 teaspoon salt to the yeast mixture. Stir in 2 tablespoons olive oil. Use a wooden spoon or dough whisk to combine until a shaggy dough forms. It’ll be slightly sticky — that’s good.
- Knead the dough: Turn the dough onto a lightly floured surface and knead for about 5-7 minutes until smooth and elastic. You can add a little flour if it’s too sticky, but avoid adding too much; the dough should feel soft and slightly tacky.
- First rise: Place the dough in a lightly oiled bowl, cover with a kitchen towel or plastic wrap, and let it rise in a warm spot for about 1 hour or until doubled in size. This step is crucial for a light, airy crust.
- Preheat the skillet: While the dough is rising, place your cast iron skillet on the stove over medium heat to warm up. You want it hot enough to sizzle but not smoke.
- Shape the dough: After rising, punch down the dough and gently stretch or roll it into a circle slightly smaller than your skillet (about 10 inches / 25 cm diameter). If the dough resists stretching, let it rest for 5 minutes and try again.
- Cook the crust: Add a drizzle of olive oil to the hot skillet, swirl to coat. Carefully place the dough in the skillet. Cook over medium heat for 3-5 minutes until the bottom is golden and crisp (you can peek by lifting an edge with a spatula).
- Add toppings: Quickly remove from heat, spread your favorite sauce, cheese, and toppings evenly on the crust.
- Finish in the oven: Transfer the skillet to a preheated oven at 475°F (245°C). Bake for 8-12 minutes until the cheese is melted and bubbly, and the edges are golden brown.
- Serve: Let the pizza cool for a minute or two before slicing. The crust will remain crispy and just perfect for that satisfying crunch.
Pro tip: If you want a bit more char and crunch, finish the pizza under the broiler for the last 1-2 minutes — just watch it closely!
Cooking Tips & Techniques
Getting that perfect crispy cast iron pizza crust isn’t just about following steps — little details make a big difference.
- Don’t rush the rise: I’ve learned the hard way that skipping or shortening the dough rise results in a dense crust. Patience pays off with lightness and texture.
- Preheat the skillet well: A hot pan is key to that amazing bottom crunch. If the skillet isn’t hot enough, the dough will absorb oil and get soggy instead.
- Watch the heat: Medium heat is your friend. Too high, and the crust burns before the toppings cook. Too low, and the crust won’t crisp up properly.
- Handle the dough gently: Overworking can toughen the crust. Stretch it slowly and let it rest if it resists.
- Use a light hand with toppings: Too many wet toppings can weigh down the crust. For juicy ingredients like tomatoes or mushrooms, pat them dry beforehand.
- Multitask with oven timing: While the pizza bakes, it’s a great moment to whip up a quick salad or warm a side dish like a classic tuna melt on sourdough bread to round out your meal.
Honestly, the first few times I tried this method, my crusts were uneven or slightly soggy, but adjusting the skillet temperature and dough handling made all the difference. Now, it’s a reliable go-to that never fails to impress.
Variations & Adaptations
This crispy cast iron pizza crust recipe is a fantastic canvas for creativity. Here are a few ways to switch it up:
- Gluten-Free Option: Use a 1:1 gluten-free flour blend designed for baking. The texture will be a bit different, but still delicious and crispy.
- Whole Wheat Twist: Swap half the all-purpose flour for whole wheat flour for a nuttier flavor and extra fiber.
- Stuffed Crust: Before adding toppings, fold the edges over a layer of shredded mozzarella for a melty surprise.
- Spiced Crust: Add dried herbs like oregano, garlic powder, or chili flakes to the dough for extra flavor.
- Pan Pizza Style: Let the dough rise in the skillet itself before cooking to get a thicker, chewier base with crispy edges.
I once tried baking a Mediterranean-inspired pizza with olives, feta, and artichokes on this crust, and it was a hit! The crisp bottom balanced those bold toppings perfectly.
Serving & Storage Suggestions
This pizza is best served hot and fresh right from the skillet — the crust is at its crispiest and toppings are melty. If you’re serving guests, slice into wedges and serve with a simple side salad or some roasted veggies.
For leftovers, let the pizza cool completely, then store in an airtight container in the refrigerator for up to 3 days. To reheat, place slices in a hot skillet over medium heat for 3-4 minutes or bake at 375°F (190°C) for about 8 minutes to bring back that crunch without sogginess.
If you want to freeze, wrap individual slices tightly in plastic wrap and foil. Reheat straight from frozen in the oven at 375°F (190°C) for 10-12 minutes. The crust holds up surprisingly well!
Fun fact: letting the pizza sit for a few hours actually melds the flavors beautifully, but you might lose a bit of that initial crunch. That’s why reheating gently is key.
Nutritional Information & Benefits
Here’s a rough estimate per serving (1/4 of pizza):
| Calories | 320 kcal |
|---|---|
| Carbohydrates | 38g |
| Protein | 12g |
| Fat | 10g |
| Fiber | 2g |
Using olive oil provides heart-healthy monounsaturated fats, and the homemade dough avoids preservatives found in store-bought crusts. You can easily adjust toppings for a low-carb or vegetarian option. Just watch for common allergens like gluten and dairy if you’re sensitive.
Personally, I appreciate how this recipe balances indulgence with wholesome ingredients — it feels like a treat without the guilt. If you’re looking for other simple, satisfying meals, the spicy peanut noodles with chicken might also become a favorite for your dinner rotation.
Conclusion
This crispy cast iron pizza crust recipe has become a quiet favorite in my kitchen — the kind of recipe you don’t shout about, but quietly return to when you want something truly satisfying. It’s straightforward, forgiving, and gives you that perfect crunch without a fuss.
Feel free to tweak the toppings, experiment with flours, or turn it into a pan pizza — this recipe welcomes your personal touch. For me, it’s the crust that makes all the difference, and this method nails it every time.
If you give it a try, I’d love to hear how it turns out or what toppings you picked. Share your stories or questions below — nothing beats swapping kitchen wins and lessons. Here’s to many crispy, cheesy nights ahead!
FAQs
Can I use a non-cast iron skillet for this pizza crust?
You can, but the cast iron’s heat retention is key to achieving that perfect crunch. A heavy stainless steel or oven-safe skillet may work but expect less crispiness.
How do I prevent the crust from getting soggy?
Preheat the skillet well, avoid overloading toppings (especially watery ones), and bake the pizza in a hot oven to set the crust quickly.
Can I make the dough ahead of time?
Absolutely. You can prepare the dough, let it rise, then refrigerate it for up to 24 hours. Bring it to room temperature before shaping and cooking.
What if my dough doesn’t rise?
Check your yeast freshness and water temperature. Yeast should foam within 5-10 minutes when activated. If not, try fresh yeast and ensure the water is warm but not hot.
How do I clean my cast iron skillet after making pizza?
Once cooled, wipe it out with a paper towel or soft cloth. Avoid soap and soaking. If food sticks, scrub gently with a brush and dry immediately to keep your pan seasoned.
Pin This Recipe!
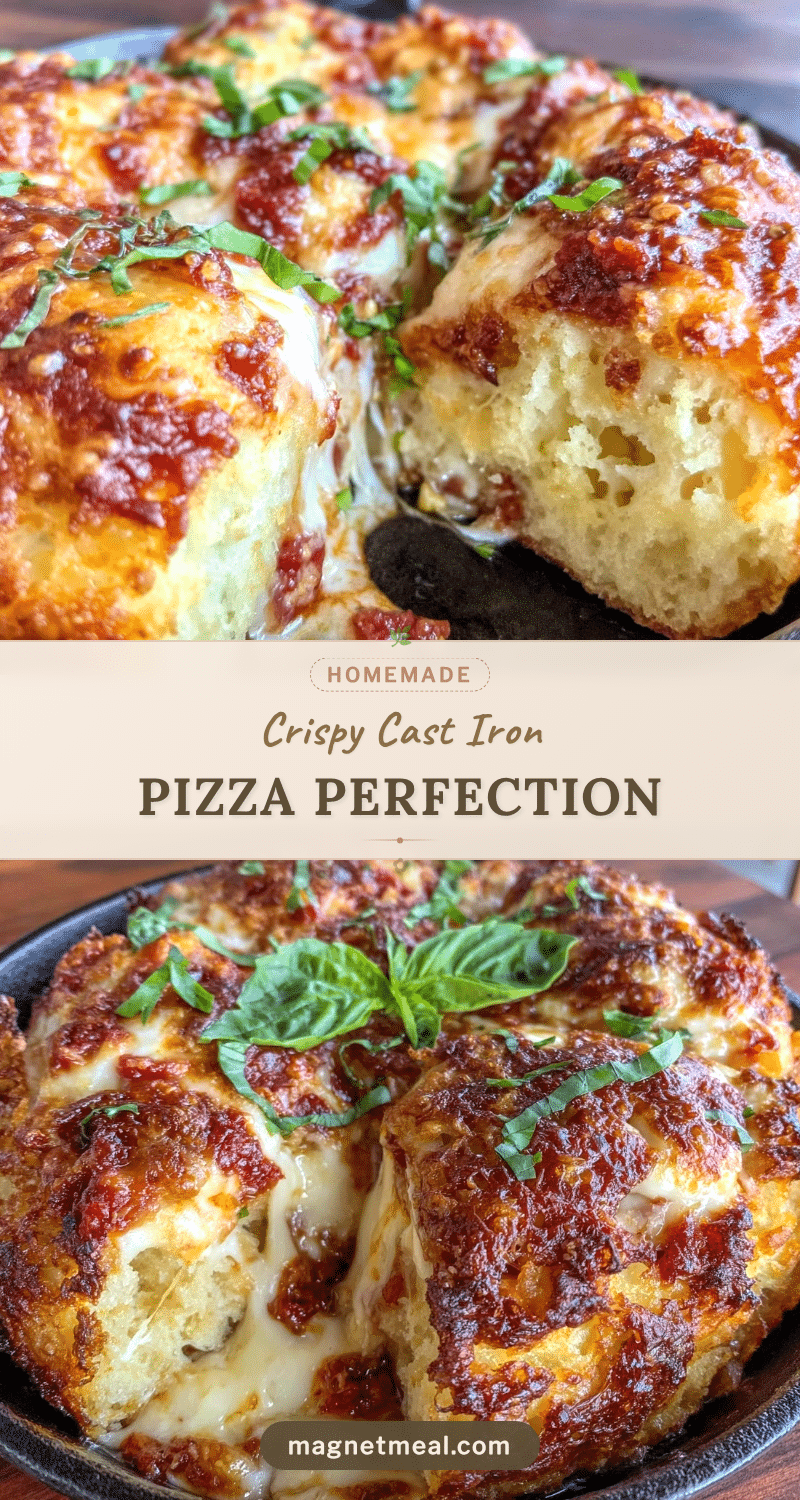
Crispy Cast Iron Pizza Crust Recipe Easy Steps for Perfect Crunch

This recipe delivers a quick and easy homemade pizza crust with a perfect crispy bottom and chewy interior using a cast iron skillet. Ideal for weeknight dinners, it requires simple pantry ingredients and no fancy equipment.
- Prep Time: 15 minutes
- Cook Time: 15 minutes
- Total Time: 1 hour 30 minutes
- Yield: 4 servings 1x
- Category: Main Course
- Cuisine: American
Ingredients
- 2 cups (240g) all-purpose flour
- 1 teaspoon active dry yeast
- 3/4 cup (180ml) warm water (around 110°F / 43°C)
- 1 teaspoon sugar
- 1 teaspoon salt
- 2 tablespoons olive oil
Instructions
- Activate the yeast: In a mixing bowl, combine warm water, sugar, and active dry yeast. Stir gently and let sit for 5–10 minutes until foamy.
- Mix the dough: Add flour and salt to the yeast mixture. Stir in olive oil and combine until a shaggy dough forms.
- Knead the dough: Turn dough onto a floured surface and knead for 5-7 minutes until smooth and elastic.
- First rise: Place dough in a lightly oiled bowl, cover, and let rise in a warm spot for about 1 hour or until doubled in size.
- Preheat the skillet: Warm cast iron skillet over medium heat until hot but not smoking.
- Shape the dough: Punch down dough and stretch or roll into a 10-inch circle.
- Cook the crust: Drizzle olive oil in skillet, place dough in skillet, and cook over medium heat for 3-5 minutes until bottom is golden and crisp.
- Add toppings: Remove from heat and spread sauce, cheese, and toppings evenly.
- Finish in oven: Transfer skillet to preheated oven at 475°F (245°C) and bake for 8-12 minutes until cheese is melted and edges are golden.
- Serve: Let cool for a minute or two before slicing.
Notes
Do not rush the dough rise for best texture. Preheat skillet well to achieve a crispy crust. Use medium heat to avoid burning. Handle dough gently and avoid overloading with wet toppings to prevent sogginess. For extra char, finish under broiler for 1-2 minutes watching closely.
Nutrition
- Serving Size: 1/4 of pizza
- Calories: 320
- Fat: 10
- Carbohydrates: 38
- Fiber: 2
- Protein: 12
Keywords: pizza crust, cast iron skillet, crispy pizza, homemade pizza, easy pizza crust, quick pizza dough


