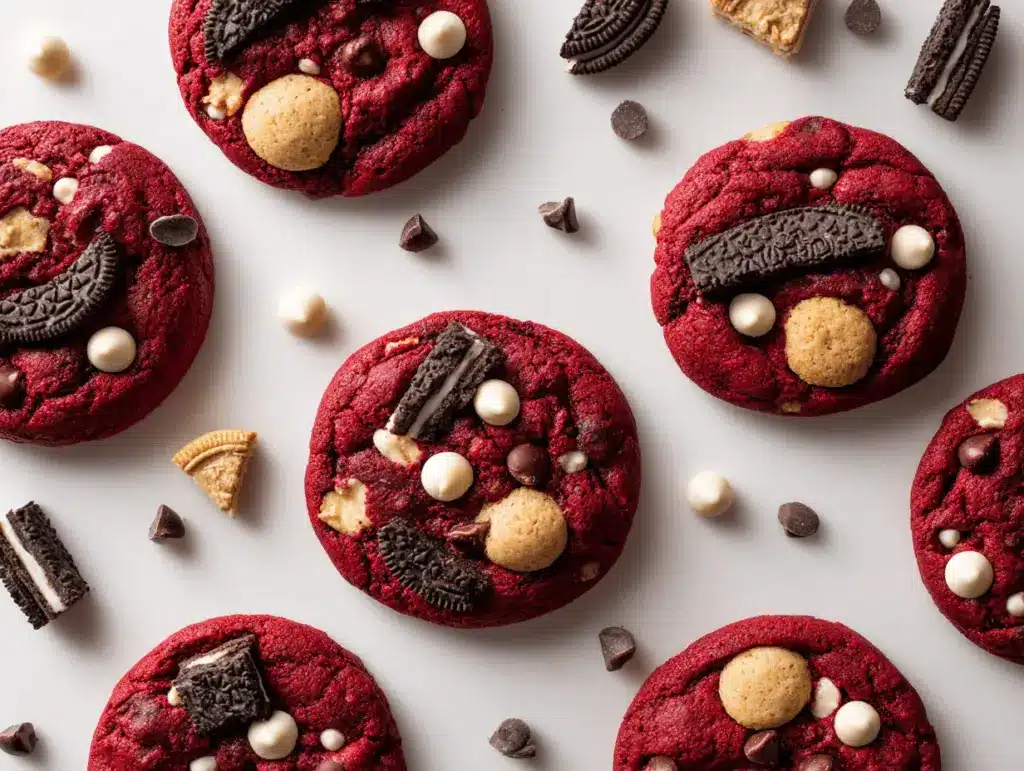
The first time I baked these Red Velvet Cookie Monster Cookies, the kitchen filled with a sweet, cocoa-rich aroma and my family practically sprinted in. There’s something about that deep red hue, melty chocolate chips, and a playful Cookie Monster twist that feels both nostalgic and totally over the top. You know those cookies you just can’t stop thinking about? These are it. They’re as fun as they are delicious—half classic red velvet, half blue, all the way a crowd-pleaser. If you’re hunting for the ultimate indulgence, or just a cookie that’ll make everyone smile, you’re in the right spot.
I stumbled across this recipe idea during a baking marathon with my niece, who’s obsessed with Cookie Monster. We wanted something dramatic for a bake sale—something that would stand out. After a few trial runs (and some blue-stained hands), these Red Velvet Cookie Monster Cookies were born. They’re now a birthday and holiday staple at my house, and honestly, I never get tired of watching guests’ eyes light up at first sight.
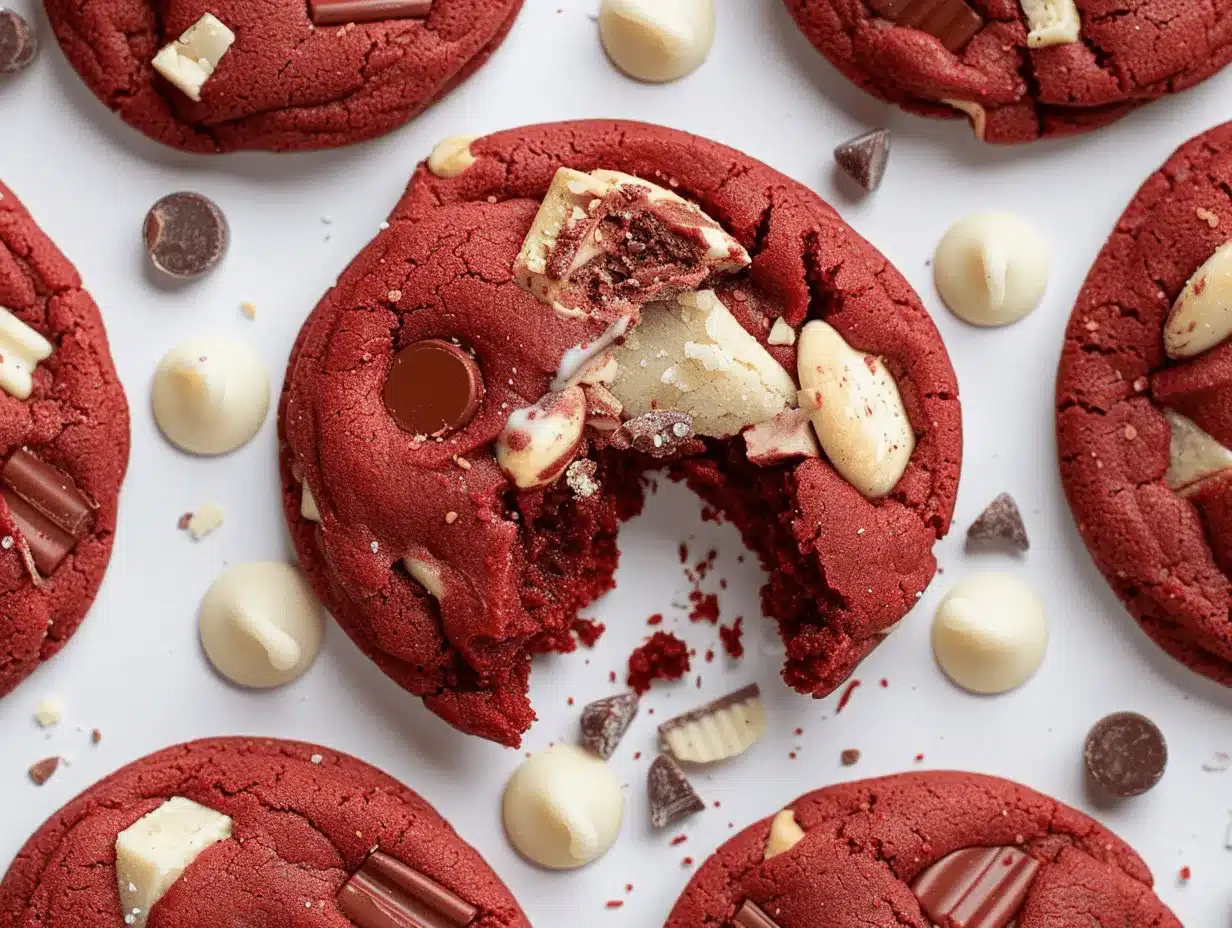
Why do I keep coming back to this recipe? For starters, the flavor is unreal—think soft, thick red velvet with creamy white chocolate chunks and crunchy cookie bits, all swirled with playful blue dough. The texture is chewy at the edges, gooey in the center, and every bite is a little adventure. These cookies are a dream for busy parents, Pinterest fans, and anyone who loves a whimsical kitchen project. Plus, as someone who’s tested over a dozen versions, I can promise: this is the ultimate Red Velvet Cookie Monster Cookies recipe. Let’s get baking!
Why You’ll Love This Red Velvet Cookie Monster Cookies Recipe
- Quick & Easy: These Red Velvet Cookie Monster Cookies come together in about 30 minutes—perfect for last-minute parties, playdates, or just when you need a sweet fix fast.
- Simple Ingredients: No weird specialty flours or hard-to-find candies required. Most of what you need is probably sitting in your pantry or fridge right now.
- Perfect for Celebrations: Whether it’s a birthday bash, baby shower, or just a weekend treat, these cookies are guaranteed to steal the show. They’re eye-catching and absolutely irresistible.
- Crowd-Pleaser: Kids adore the Cookie Monster theme, but honestly, adults get just as excited. These cookies have a magical way of making people smile, no matter their age.
- Unbelievably Delicious: The combo of red velvet, white and dark chocolate chips, and cookie bits is pure comfort. Every bite is soft, chewy, and so decadent you’ll want a second (or third).
This isn’t just another cookie recipe—it’s my best version, tested and tweaked until every bite was pure joy. The secret? I blend part of the dough with a bold blue gel color for those Cookie Monster swirls, then load up on chocolate chips and mini cookies for texture. The result is a playful, bakery-style cookie with a flavor that’s as memorable as its look.
I know for sure: these cookies make people happy. They’re the ones friends beg me to bring to potlucks, and the recipe I trust for impressing new neighbors or cheering up a tough week. There’s something about the mix of nostalgia, comfort, and just plain fun that makes them a must-bake for any cookie lover.
What Ingredients You Will Need
This recipe uses simple, wholesome ingredients to deliver bold flavor and a playful look—no fuss, just fun and deliciousness. Most are pantry staples, and a couple are easy to swap for dietary needs.
- For the Red Velvet Dough:
- 1 1/2 cups (190g) all-purpose flour
- 1/4 cup (24g) unsweetened cocoa powder (Dutch-processed for deeper color)
- 1/2 tsp baking soda
- 1/4 tsp salt
- 1/2 cup (113g) unsalted butter, softened
- 3/4 cup (150g) light brown sugar, packed
- 1/4 cup (50g) granulated sugar
- 1 large egg, room temperature
- 1 1/2 tsp vanilla extract
- 2 tsp red gel food coloring (I like AmeriColor Super Red for the boldest color)
- 1/2 cup (85g) white chocolate chips
- For the Cookie Monster Dough:
- 1 1/2 cups (190g) all-purpose flour
- 1/2 tsp baking soda
- 1/4 tsp salt
- 1/2 cup (113g) unsalted butter, softened
- 3/4 cup (150g) light brown sugar, packed
- 1/4 cup (50g) granulated sugar
- 1 large egg, room temperature
- 1 1/2 tsp vanilla extract
- 2 tsp blue gel food coloring (AmeriColor Sky Blue gives the best Cookie Monster color)
- 1/2 cup (85g) dark or semi-sweet chocolate chips
- 1/2 cup (around 35g) mini chocolate chip cookies (crushed slightly—Chips Ahoy Mini or homemade are great)
- For Decoration:
- More mini cookies (for pressing on top)
- Extra chocolate chips (white, dark, or both)
- Candy eyes (optional, but so fun for the “monster” look—available at most craft or grocery stores)
Ingredient tips & swaps:
- For gluten-free: Swap in a 1:1 gluten-free flour blend (I’ve had great results with King Arthur Measure for Measure).
- For dairy-free: Use vegan butter and dairy-free chocolate chips.
- No mini cookies? Crush some vanilla wafers or use animal crackers for a similar crunch.
- If you want less food dye, use natural food coloring or reduce the amount—the color will be softer but still fun.
I always like to keep an extra bag of chocolate chips and a tube of gel coloring handy, just in case inspiration (or a cookie craving) strikes!
Equipment Needed
- Mixing Bowls (2): You’ll want one for each dough color. I’ve used regular glass bowls, but stainless steel is just as good.
- Electric Mixer or Stand Mixer: Makes creaming the butter and sugars a breeze. A sturdy hand mixer works just fine if you don’t have a stand mixer.
- Measuring Cups & Spoons: For accuracy, especially with flour and cocoa powder.
- Baking Sheets: Standard rimmed half-sheet pans work best. If you only have one, bake in batches.
- Parchment Paper or Silicone Baking Mat: Keeps cookies from sticking and helps them bake evenly. I’ve used both; silicone mats are reusable and easy to clean.
- Cookie Scoop or Ice Cream Scoop: For uniform cookies and easy portioning. If you don’t have one, two spoons work in a pinch.
- Rubber Spatula: For folding in chocolate chips and scraping down the sides.
- Wire Cooling Rack: Let the cookies cool completely without getting soggy bottoms.
Pro tip: If you bake cookies often, investing in a silicone baking mat and a medium cookie scoop saves time and mess—mine have lasted for years.
Budget tip: No electric mixer? You can cream butter and sugar by hand with a sturdy wooden spoon, just with a little more elbow grease. I did this in my college apartment days, and it still works!
How to Make Red Velvet Cookie Monster Cookies
-
Prep and Preheat:
- Preheat your oven to 350°F (175°C). Line two baking sheets with parchment paper or silicone baking mats.
- Set out your butter and eggs to come to room temperature (about 15–20 minutes).
-
Make the Red Velvet Dough:
- In a medium bowl, whisk together 1 1/2 cups (190g) flour, 1/4 cup (24g) cocoa powder, 1/2 tsp baking soda, and 1/4 tsp salt. Set aside.
- In a large mixing bowl, cream 1/2 cup (113g) butter, 3/4 cup (150g) brown sugar, and 1/4 cup (50g) granulated sugar until light and fluffy (about 2–3 minutes) using an electric mixer.
- Beat in 1 egg and 1 1/2 tsp vanilla extract, followed by 2 tsp red gel food coloring. Scrape down the sides as needed.
- Gradually add the flour mixture, mixing on low just until combined. Don’t overmix.
- Fold in 1/2 cup (85g) white chocolate chips with a spatula.
Note: The dough will be thick and bright red. If it looks dry, add 1–2 tsp milk.
-
Make the Cookie Monster Dough:
- In a separate bowl, whisk 1 1/2 cups (190g) flour, 1/2 tsp baking soda, and 1/4 tsp salt.
- Cream 1/2 cup (113g) butter, 3/4 cup (150g) brown sugar, and 1/4 cup (50g) granulated sugar until fluffy (about 2–3 minutes).
- Beat in 1 egg, 1 1/2 tsp vanilla, and 2 tsp blue gel food coloring until vibrant and smooth.
- Mix in the dry ingredients just until combined, then fold in 1/2 cup (85g) dark chocolate chips and 1/2 cup (35g) crushed mini cookies.
Note: The blue dough should look like play-dough—don’t worry if it seems sticky at first; chilling helps.
-
Chill the Dough (Optional but Recommended):
- If you have time, cover both doughs and chill for 20–30 minutes. This makes scooping easier and helps cookies stay thick and chewy.
-
Shape the Cookies:
- Scoop 1 tablespoon of red velvet dough and 1 tablespoon of blue Cookie Monster dough. Press together in your palms, gently twisting for a marbled, half-and-half effect. Don’t overmix—you want distinct colors.
- Place on the prepared baking sheet, leaving about 2 inches (5cm) between cookies.
- Press a few extra chocolate chips, mini cookies, and candy eyes (if using) into the tops for that Cookie Monster look.
-
Bake:
- Bake for 10–12 minutes, until the edges are set but the centers look slightly underbaked. They’ll firm up as they cool—trust me, don’t overbake.
- If the cookies are spreading too much, chill the dough balls for 10 minutes before baking.
-
Cool and Enjoy:
- Let cookies cool on the baking sheet for 5 minutes (they’re fragile when hot), then transfer to a wire rack to cool completely.
- Enjoy warm for melty chocolate, or let cool for a classic, chewy bite.
Troubleshooting: If your cookies look pale, check your food coloring (gel works better than liquid). Too puffy? They may need a touch less flour. Too flat? Chill the dough longer. And don’t worry if a few are lopsided—it just adds to the charm!
Cookie Monster Cookie Baking Tips & Techniques
- Use Gel Food Coloring: Liquid food coloring just doesn’t give you that bold, Instagram-worthy color. I learned this after a batch of sad, pastel-blue cookies—stick to gel!
- Don’t Overmix: Once you add flour, mix until just combined. Overmixing can make cookies tough and take away from that soft, chewy center we all love.
- Chill the Dough: Even a short chill (20 minutes) helps prevent overspreading and keeps the colors vibrant. I skip chilling only when I’m super impatient.
- Marbling Technique: Gently twist the two doughs together for a dramatic look. If you knead them too much, you’ll get purple cookies—still tasty, but less Cookie Monster-y.
- Decorate Before Baking: Press extra chocolate chips, mini cookies, and candy eyes into the tops right before baking for the cutest presentation. They’ll stay put and look picture-perfect.
- Watch the Bake Time: Every oven’s a little different. Check at the 10-minute mark—the centers should look slightly glossy but not raw. Overbaking is the #1 way to lose that perfect texture.
- Batch Baking: If baking multiple trays, rotate them halfway through for even results. And always let trays cool before putting new dough on—hot pans can cause extra spreading.
- Consistency Check: If the dough is too sticky, add a tablespoon of flour at a time. If too dry, a splash of milk does wonders. I tweak this every time, depending on humidity.
Honestly, my first few tries were a little wonky—blue hands, cookies that spread into each other, even a few with uneven coloring. But practice makes perfect, and these easy fixes make all the difference!
Variations & Adaptations
These Red Velvet Cookie Monster Cookies are endlessly customizable! Here are some of my favorite tweaks and swaps:
- Gluten-Free: Use a 1:1 gluten-free flour blend in place of all-purpose flour. I always double-check that my mini cookies are gluten-free too.
- Dairy-Free: Switch to vegan butter and dairy-free chocolate chips. For the mini cookies, look for store-bought dairy-free brands or make your own.
- Flavor Twists: Try butterscotch chips, peanut butter chips, or chopped Oreos in place of chocolate chips. My nephew loves the cookies with a swirl of Nutella in the blue dough!
- Holiday Version: Swap the red and blue for green and red (with festive sprinkles) for Christmas, or orange and purple for Halloween. The base recipe stays the same—just change the colors.
- Personalized Cookie Monsters: Add a dash of espresso powder to the red velvet dough for a mocha twist, or sprinkle in freeze-dried raspberries for a fruity zing.
- Alternative Baking Methods: Don’t have an oven? Try baking these on a countertop toaster oven in small batches (watch the time, as they bake fast).
My personal favorite? Swapping half the white chocolate chips for caramel bits—extra gooey, super rich, and always a hit with caramel fans. Don’t be afraid to experiment—half the fun is making these cookies your own!
Serving & Storage Suggestions
These Red Velvet Cookie Monster Cookies are best served slightly warm, with the chocolate still gooey and the mini cookies crunchy on top. I love piling them onto a big platter for a party, or arranging them on a wooden board with a glass of milk for a retro, Pinterest-worthy vibe.
Serving Ideas:
- Pair with cold milk or a creamy vanilla milkshake for the ultimate treat.
- Serve alongside ice cream (vanilla or cookies & cream) for a decadent dessert.
- For parties, tuck a few into cute cellophane bags with ribbons—makes a perfect party favor or bake sale item.
Storage:
- Store leftovers in an airtight container at room temperature for up to 4–5 days. They stay soft!
- For longer storage, freeze baked cookies in a zip-top bag for up to 2 months. Thaw at room temp or warm gently in the microwave for that “just-baked” magic.
- If freezing dough, shape and freeze on a tray, then transfer to a freezer bag. Bake straight from frozen, adding 1–2 minutes to the bake time.
Honestly, the flavors get even better on day two as the dough settles and the chocolate chips meld into the cookie. If you can resist eating them all at once, you’ll be rewarded!
Nutritional Information & Benefits
Here’s a quick look at what you’re getting in each Red Velvet Cookie Monster Cookie (based on one cookie, recipe yields about 20):
- Calories: ~180
- Fat: 8g
- Carbs: 25g
- Protein: 2g
- Sugar: 13g
The real treat here is the mood-boosting power of chocolate and the nostalgia of a fun, playful cookie. Cocoa powder adds a hint of antioxidants, while using unsalted butter lets you control the sodium.
These cookies can easily be made gluten-free or dairy-free with a couple of simple swaps, making them accessible for most diets. Just watch out for the mini cookies and chocolate chips if you have allergies—always check the labels.
I believe in balance, and a cookie like this brings a little happiness to any day. Enjoy every bite—no guilt, just joy!
Conclusion
These Red Velvet Cookie Monster Cookies are more than a treat—they’re a conversation starter, a joy-spark, and the kind of recipe you’ll want to make again and again. Whether you’re baking for a party, cheering up a friend, or just indulging your inner child, these cookies deliver bold color, playful texture, and pure deliciousness every time.
Don’t be afraid to mix up the flavors or customize with your favorite add-ins. I’ve baked them with peanut butter chips, swapped colors for holidays, and even let my kids decorate with their own wild creations. Every batch is a new adventure!
I’d love to hear how your Red Velvet Cookie Monster Cookies turn out. Leave a comment, share your photos, or tag me on social media with your cookie masterpieces. Happy baking—and remember, sometimes the best cookies are the ones that make you smile!
Frequently Asked Questions
How do I get the bright blue and red colors in my cookies?
Use gel food coloring for the most vibrant colors. Liquid food coloring can be too pale and sometimes changes the texture—gel is concentrated and works best.
Can I make the dough ahead of time?
Absolutely! Both doughs can be made up to 48 hours in advance. Store them tightly wrapped in the fridge, then let them sit at room temperature for 10–15 minutes before shaping and baking.
What if I don’t have mini cookies for the Cookie Monster dough?
No worries! Crush vanilla wafers, animal crackers, or even graham crackers for that crunchy texture. You can also skip them if needed—still delicious.
How do I keep my cookies soft and chewy?
Don’t overbake—remove them when the centers still look a bit glossy. Store in an airtight container with a slice of bread to keep them soft for days.
Can I freeze these cookies?
Yes! Freeze baked cookies in a zip-top bag for up to 2 months, or freeze shaped dough balls and bake from frozen whenever a cookie craving hits.
Pin This Recipe!
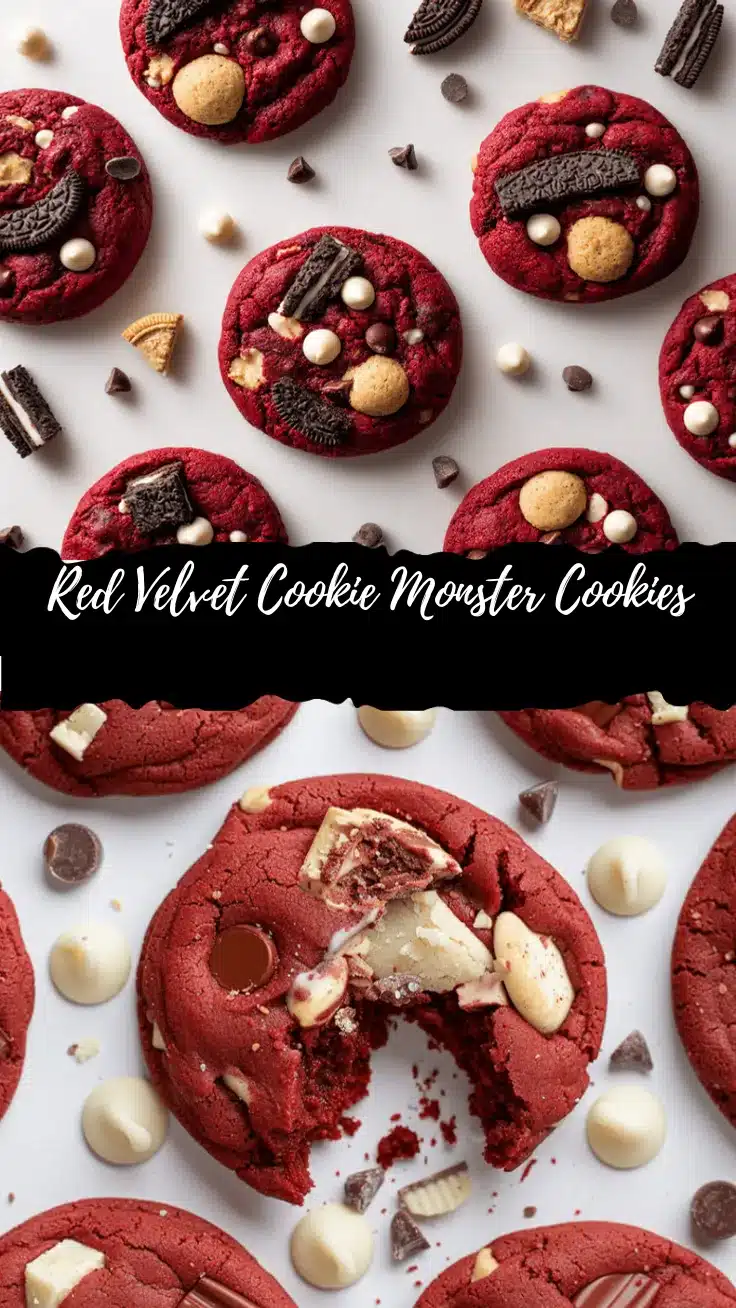
Red Velvet Cookie Monster Cookies

These playful Red Velvet Cookie Monster Cookies combine classic red velvet and vibrant blue cookie dough, loaded with chocolate chips and mini cookies for a whimsical, crowd-pleasing treat. Soft, chewy, and perfect for parties or bake sales, they’re as fun to make as they are to eat.
- Prep Time: 20 minutes
- Cook Time: 12 minutes
- Total Time: 32 minutes
- Yield: 20 cookies 1x
- Category: Dessert
- Cuisine: American
Ingredients
- 1 1/2 cups (190g) all-purpose flour (for red velvet dough)
- 1/4 cup (24g) unsweetened cocoa powder (Dutch-processed for deeper color)
- 1/2 tsp baking soda (for red velvet dough)
- 1/4 tsp salt (for red velvet dough)
- 1/2 cup (113g) unsalted butter, softened (for red velvet dough)
- 3/4 cup (150g) light brown sugar, packed (for red velvet dough)
- 1/4 cup (50g) granulated sugar (for red velvet dough)
- 1 large egg, room temperature (for red velvet dough)
- 1 1/2 tsp vanilla extract (for red velvet dough)
- 2 tsp red gel food coloring
- 1/2 cup (85g) white chocolate chips
- 1 1/2 cups (190g) all-purpose flour (for Cookie Monster dough)
- 1/2 tsp baking soda (for Cookie Monster dough)
- 1/4 tsp salt (for Cookie Monster dough)
- 1/2 cup (113g) unsalted butter, softened (for Cookie Monster dough)
- 3/4 cup (150g) light brown sugar, packed (for Cookie Monster dough)
- 1/4 cup (50g) granulated sugar (for Cookie Monster dough)
- 1 large egg, room temperature (for Cookie Monster dough)
- 1 1/2 tsp vanilla extract (for Cookie Monster dough)
- 2 tsp blue gel food coloring
- 1/2 cup (85g) dark or semi-sweet chocolate chips
- 1/2 cup (35g) mini chocolate chip cookies, crushed slightly
- More mini cookies (for pressing on top)
- Extra chocolate chips (white, dark, or both, for decoration)
- Candy eyes (optional, for decoration)
Instructions
- Preheat your oven to 350°F (175°C). Line two baking sheets with parchment paper or silicone baking mats. Set out butter and eggs to come to room temperature (about 15–20 minutes).
- Make the Red Velvet Dough: In a medium bowl, whisk together 1 1/2 cups flour, 1/4 cup cocoa powder, 1/2 tsp baking soda, and 1/4 tsp salt. In a large mixing bowl, cream 1/2 cup butter, 3/4 cup brown sugar, and 1/4 cup granulated sugar until light and fluffy (2–3 minutes). Beat in 1 egg and 1 1/2 tsp vanilla extract, then 2 tsp red gel food coloring. Gradually add the flour mixture, mixing on low just until combined. Fold in 1/2 cup white chocolate chips.
- Make the Cookie Monster Dough: In a separate bowl, whisk 1 1/2 cups flour, 1/2 tsp baking soda, and 1/4 tsp salt. Cream 1/2 cup butter, 3/4 cup brown sugar, and 1/4 cup granulated sugar until fluffy (2–3 minutes). Beat in 1 egg, 1 1/2 tsp vanilla, and 2 tsp blue gel food coloring. Mix in the dry ingredients just until combined, then fold in 1/2 cup dark chocolate chips and 1/2 cup crushed mini cookies.
- Optional: Cover both doughs and chill for 20–30 minutes for easier scooping and thicker cookies.
- Shape the Cookies: Scoop 1 tablespoon of red velvet dough and 1 tablespoon of blue Cookie Monster dough. Press together in your palms, gently twisting for a marbled, half-and-half effect. Place on the prepared baking sheet, leaving about 2 inches between cookies. Press extra chocolate chips, mini cookies, and candy eyes (if using) into the tops.
- Bake for 10–12 minutes, until the edges are set but the centers look slightly underbaked. If cookies are spreading too much, chill the dough balls for 10 minutes before baking.
- Let cookies cool on the baking sheet for 5 minutes, then transfer to a wire rack to cool completely. Enjoy warm or at room temperature.
Notes
For best color, use gel food coloring. Chill dough for thicker, chewier cookies. Don’t overmix after adding flour. Press decorations on before baking for the best look. Easily adapt for gluten-free or dairy-free diets by swapping flour and butter/chocolate chips. Store in an airtight container for up to 4–5 days or freeze for up to 2 months.
Nutrition
- Serving Size: 1 cookie
- Calories: 180
- Sugar: 13
- Sodium: 90
- Fat: 8
- Saturated Fat: 5
- Carbohydrates: 25
- Fiber: 1
- Protein: 2
Keywords: red velvet cookies, cookie monster cookies, fun cookies, bake sale, party cookies, chocolate chip cookies, kids cookies, colorful cookies, easy cookie recipe, homemade cookies


