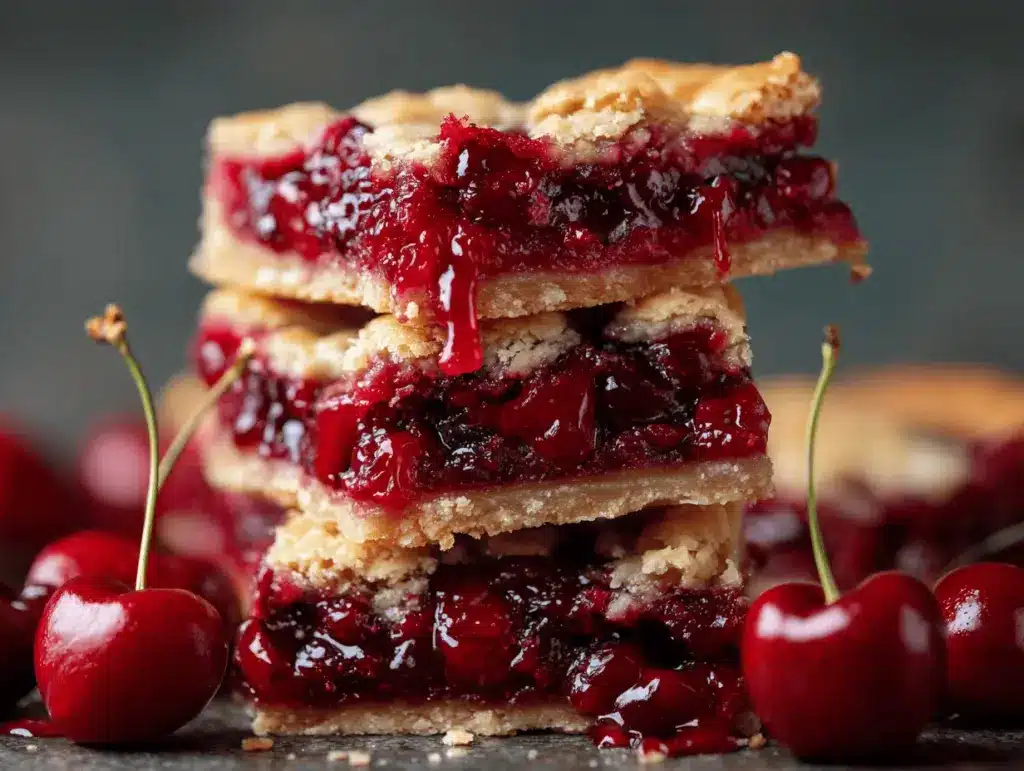
The first time I pulled a pan of cherry pie bars from the oven, the scent of bubbling cherries and buttery crust stopped my whole family in their tracks. Seriously, there’s nothing quite like that moment when the edges turn golden and the filling peeks through in ruby-red pools. I still remember thinking, “Why did I wait so long to make dessert bars this easy?” If cherry pie feels a little too fussy for a weeknight or potluck, this cherry pie bars recipe is your new best friend.
Honestly, I stumbled upon this recipe during a summer picnic disaster—my classic pie didn’t set and it oozed everywhere. I needed something portable, less messy, and just as delicious. Enter these homemade cherry pie bars. They bake up with a tender, almost shortbread-like base, a jammy cherry filling, and a sweet drizzle on top. It’s all the flavor of homemade cherry pie, but in a pick-up-and-go form. If you love easy fruit dessert bars or need a show-stopping treat for your next gathering, these cherry pie bars are about to become your go-to.
After testing this recipe more times than I can count (hey, I have a weakness for cherries!), I’ve dialed in the perfect ratio of crust to filling. I also picked up a few tricks for getting those clean, bakery-style cuts and a crust that never gets soggy. Whether you’re baking for a crowd, making lunchbox treats, or just want something sweet with your coffee, these cherry pie bars deliver every single time. Trust me, you won’t regret baking up a batch tonight.
Why You’ll Love This Recipe
- Quick & Easy: These cherry pie bars come together in about 15 minutes of prep (plus baking). No pie crust rolling, no chilling—just mix, layer, and bake. Perfect for last-minute dessert emergencies!
- Simple Ingredients: Everything you need is probably already in your pantry and fridge: flour, sugar, butter, eggs, and a can of cherry pie filling. You can even use fresh or frozen cherries if you’re feeling fancy.
- Perfect for Any Occasion: Whether it’s a backyard BBQ, holiday party, school bake sale, or cozy Sunday brunch, these bars fit right in. They’re easy to transport and don’t require plates or forks (unless you want to be super proper).
- Crowd-Pleaser: I’ve never brought home leftovers from a party with these. Kids love the bright cherry filling, and adults go crazy for the buttery crust. You might want to double the batch!
- Unbelievably Delicious: The combo of sweet-tart cherries, tender base, and vanilla drizzle hits all the right notes. Close your eyes on the first bite—you’ll see what I mean.
What really sets this cherry pie bars recipe apart is the texture. The bottom is soft but sturdy (no soggy mess), the middle is loaded with fruity goodness, and the top gets just the right amount of crunch. I use a little almond extract in the batter for a bakery-style flavor that always surprises people. Plus, you can customize with fresh fruit or a homemade cherry filling if you’re up for it!
For me, these bars are more than a quick dessert—they’re a little slice of nostalgia. They remind me of summer fairs and family gatherings, but they’re simple enough for a random Tuesday. It’s those “just because” desserts that always taste best, right?
What Ingredients You Will Need
This recipe uses basic, honest ingredients that don’t require a special trip to the store. Most of them are staples in my kitchen—and probably yours too! Here’s what you need for the cherry pie bars:
- For the Crust and Topping:
- 2 cups (250g) all-purpose flour
- 1 cup (200g) granulated sugar
- 1/2 teaspoon baking powder
- 1/4 teaspoon salt
- 1 cup (226g) unsalted butter, cold and cubed (I stick with real butter for best flavor)
- 2 large eggs, room temperature
- 1 teaspoon vanilla extract (pure vanilla gives a warmer flavor)
- 1/4 teaspoon almond extract (optional, but it adds a lovely bakery note)
- For the Filling:
- 1 can (21 ounces / 595g) cherry pie filling (I like Lucky Leaf or Comstock for a classic pie taste)
- OR about 2 1/2 cups (400g) fresh or frozen pitted cherries, tossed with 1/3 cup sugar and 2 tablespoons cornstarch (if you want to go homemade)
- For the Glaze:
- 1 cup (120g) powdered sugar
- 2-3 tablespoons milk (or dairy-free alternative)
- 1/2 teaspoon vanilla extract
Ingredient swaps and pro-tips:
- You can use gluten-free 1:1 baking flour if needed (Bob’s Red Mill is my pick!)
- Swap almond extract for lemon zest for a citrusy twist.
- If you’re using homemade cherry filling, taste to adjust sweetness before adding to the bars.
- Butter is key here—don’t sub with margarine if you want the real deal flavor.
One of my favorite things is how forgiving this recipe is. If you’re out of almond extract, just skip it. Want to try blueberry or raspberry pie filling instead? Go for it! These bars are all about making dessert easy and fun.
Equipment Needed
- 9×13-inch Baking Pan: Standard size for perfect bar thickness. In a pinch, you can use two 8×8 pans (just watch the bake time).
- Mixing Bowls: At least two—one for the crust and one for the glaze. I use glass, but anything works.
- Hand Mixer or Stand Mixer: Makes creaming the butter and sugar much easier, but you can do it by hand with a sturdy spoon (just takes some muscle).
- Measuring Cups and Spoons: For accuracy! A kitchen scale is handy if you like to be extra precise (highly recommend for baking).
- Rubber Spatula: For scraping every last bit of batter and filling.
- Whisk: Useful for the glaze and mixing dry ingredients together.
- Parchment Paper: Optional, but lining your pan makes it so much easier to lift out and slice the bars cleanly.
I’ve made these bars in old metal pans, glass Pyrex, and even disposable foil trays for potlucks. They all work, but parchment paper is my not-so-secret trick for perfect slices and an easy clean-up. If you don’t have a mixer, just make sure your butter is cold but not rock-hard, and cut it in with a fork or pastry blender. Oh, and don’t forget to check your oven rack placement—middle position is best for even baking!
Preparation Method
- Prep the Pan: Line a 9×13-inch (23x33cm) baking pan with parchment paper, leaving a little overhang for easy removal. Lightly grease the paper and sides of the pan. Preheat your oven to 350°F (175°C).
- Mix Dry Ingredients: In a large bowl, whisk together 2 cups (250g) all-purpose flour, 1 cup (200g) sugar, 1/2 teaspoon baking powder, and 1/4 teaspoon salt.
- Cut in the Butter: Add 1 cup (226g) cold, cubed butter to the dry mixture. Use a pastry blender, fork, or your fingers to work the butter in until the mixture resembles coarse crumbs. If you’re using a stand mixer, pulse on low until crumbly. The dough should be slightly clumpy but not fully combined.
- Add Eggs and Extracts: Beat 2 eggs in a small bowl, then add to the crumb mixture along with 1 teaspoon vanilla extract and 1/4 teaspoon almond extract. Mix just until combined—a few floury streaks are okay. Don’t overmix or the base can get tough.
- Layer the Crust: Scoop about 2/3 of the mixture into your prepared pan. Press it evenly into the bottom with your hands or the back of a measuring cup. It should form a mostly even layer, but don’t stress if it’s not perfect—rustic is good!
- Add Cherry Filling: Spread the cherry pie filling (21 ounces/595g) evenly over the crust. If you’re using homemade filling, make sure it’s cooled to room temperature before spreading. Try not to let the filling reach the very edges to prevent sticking.
- Top with Remaining Crust: Crumble the remaining dough over the cherries. It won’t cover completely, and that’s okay—you want some cherry peeking through for those gorgeous red ribbons!
- Bake: Bake in the preheated oven for 35-40 minutes, or until the top is golden and the cherry filling is bubbling in places. If you notice the top browning too quickly, loosely cover with foil for the last 10 minutes.
- Cool Completely: Let the bars cool in the pan for at least 1 hour (longer is better for clean cuts). If you try to slice while warm, they’ll be a bit messy—totally edible, but not as pretty.
- Make the Glaze: In a small bowl, whisk together 1 cup (120g) powdered sugar, 2-3 tablespoons milk, and 1/2 teaspoon vanilla extract until smooth and pourable. If it’s too thick, add a splash more milk.
- Drizzle and Slice: Lift the bars out of the pan using the parchment overhang. Drizzle the glaze over the cooled bars, allow it to set for about 10 minutes, then use a sharp knife to cut into 24 squares or rectangles.
Troubleshooting Tips:
- If your crust seems dry, add a tablespoon of milk to help it come together.
- Uneven baking? Rotate the pan halfway through.
- If the cherry filling looks thin, it will thicken as it cools—don’t panic!
Personal tip: For the neatest slices, wipe your knife clean between cuts and chill the bars before slicing if you want bakery-perfect edges. Otherwise, dive in with a fork while they’re still warm and gooey—I won’t judge.
Cooking Tips & Techniques
- Cold Butter is Key: Don’t let your butter get too soft! Cold, cubed butter gives that signature crumbly, tender crust you want in cherry pie bars. If your kitchen is warm, pop the crust mixture in the fridge for a few minutes before pressing it into the pan.
- Don’t Overbake: The bars should be lightly golden and the filling just bubbling at the edges. Overbaking makes the crust dry. Check at 35 minutes and add a few more minutes only if needed.
- Let Bars Cool Completely: I learned this the hard way—trying to cut while warm leads to cherry lava! For neat bars, patience really pays off. If you’re in a hurry, chill them in the fridge for 30 minutes after cooling at room temp.
- Use Parchment for Easy Removal: Seriously, this makes life easier. Otherwise, you might be digging sticky bars out of the pan (been there, not fun).
- Glaze Consistency: For thick, bakery-style drizzle, use less milk. For a thin, shiny glaze, add a bit more. I like mine somewhere in the middle—just thick enough to hold pretty zig-zags.
- Mix by Hand or Machine: I’ve made these with both a stand mixer and good old elbow grease. If you’re mixing by hand, use a pastry blender or two forks for the butter step. It’s a mini arm workout, but worth it!
My first batch of cherry pie bars was a bit too dry because I overmixed the crust. Now, I stop as soon as the dough holds together in clumps. If you’re multitasking (because, let’s face it, who isn’t?), set a timer for each step so nothing gets forgotten. And always taste your cherry filling—sometimes canned fillings are super sweet, so a squeeze of lemon juice can balance things out.
Variations & Adaptations
- Gluten-Free: Swap in a cup-for-cup gluten-free flour blend. I’ve had great luck with King Arthur and Bob’s Red Mill. The bars turn out just as tender and delicious.
- Vegan: Use a good quality vegan butter and plant-based milk for the glaze. For eggs, substitute with flax eggs (2 tablespoons ground flax + 5 tablespoons water, let sit 5 minutes). The crust is a bit more crumbly, but still tasty.
- Different Fruit Fillings: Change up the cherry pie filling for blueberry, apple, lemon curd, or even strawberry-rhubarb—just use the same amount by weight. In the summer, I love using fresh cherries or berries tossed with a little sugar and cornstarch.
- Nutty Crunch: Add 1/2 cup (60g) sliced almonds or chopped pecans to the topping for extra crunch. Toast them first for deeper flavor.
- Spiced Bars: Add 1/2 teaspoon ground cinnamon or cardamom to the crust for a cozy note in fall and winter.
- Personal Twist: I sometimes swirl a bit of cream cheese (softened and sweetened) into the cherry layer for a cheesecake-bar vibe. It’s decadent and totally worth trying for special occasions!
These cherry pie bars are endlessly adaptable. If you’re working around food allergies, just use your favorite safe substitutions. And don’t be afraid to get creative—sometimes the best bars come from a little kitchen improvisation!
Serving & Storage Suggestions
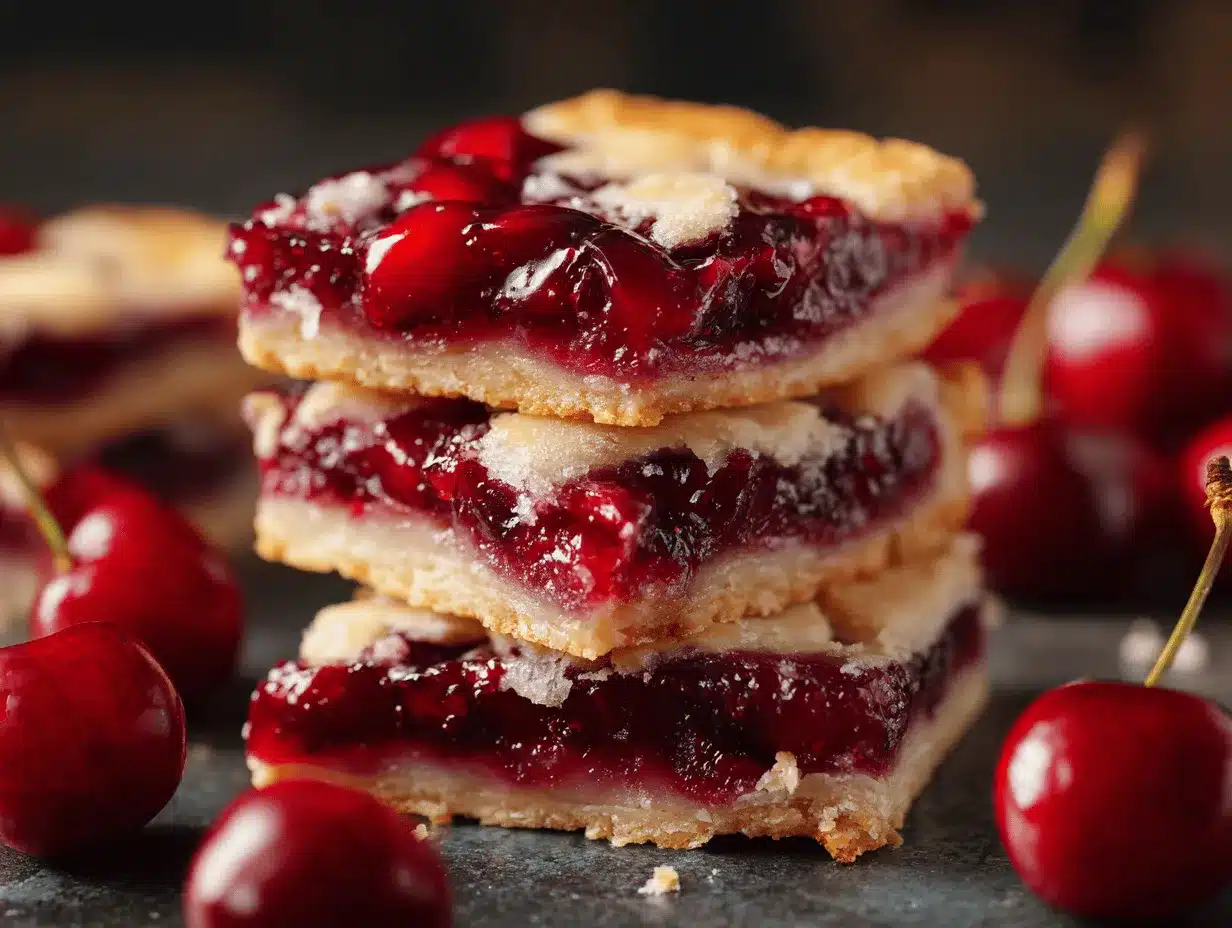
Cherry pie bars are best enjoyed at room temperature, but they’re also fantastic slightly chilled (especially on a hot day). For a pretty presentation, arrange the bars on a platter and dust with a little extra powdered sugar or scatter a few fresh cherries on top. They pair beautifully with whipped cream, a scoop of vanilla ice cream, or a cup of strong coffee.
To store, keep the bars in an airtight container at room temperature for up to 3 days—though they rarely last that long in my house! For longer storage, pop them in the fridge for up to a week. If you want to freeze, layer the bars between sheets of parchment paper in a freezer-safe container; they’ll keep for about 2 months. Thaw overnight in the fridge and bring to room temp before serving for the best texture.
For reheating, a quick 10-15 seconds in the microwave revives the flavor, but don’t overdo it or the glaze will melt. I actually think the flavors get even better after a day or two—the crust softens just a bit, melding with the cherry filling for a classic bakery taste.
Nutritional Information & Benefits
One cherry pie bar (1/24th of the recipe) contains approximately:
- Calories: 180
- Fat: 7g
- Carbohydrates: 28g
- Protein: 2g
- Sugar: 16g
The star here is, of course, the cherries—packed with antioxidants, vitamin C, and fiber. Using real butter instead of shortening means a richer flavor and a bit of vitamin A. You can make these bars gluten-free and dairy-free as needed, and they’re nut-free unless you add nuts to the topping. If you have food allergies, double-check your pie filling and extracts for hidden ingredients.
As someone who’s always looking for balance, I love these bars as a treat that brings fruit front and center. They’re indulgent but not over-the-top, and homemade means you control the quality of every ingredient.
Conclusion
If you’ve made it this far, I hope you’re ready to whip up a batch of these irresistible cherry pie bars! They’re everything you want in a homemade fruit dessert bar—simple, quick, and bursting with real cherry flavor. Whether you stick to the classic recipe or make it your own with a fun twist, you really can’t go wrong.
Honestly, I never get tired of making these. They remind me of happy gatherings, easy potlucks, and the simple joy of sharing something sweet. If you give them a try, I’d love to hear how you customize them or who you share them with. Don’t forget to leave a comment below, share this recipe with fellow dessert lovers, or pin it for later. Happy baking—and remember, dessert doesn’t have to be complicated to be unforgettable!
Frequently Asked Questions
Can I use homemade cherry pie filling instead of canned?
Absolutely! Just cook about 2 1/2 cups of pitted cherries with 1/3 cup sugar and 2 tablespoons cornstarch until thickened. Let it cool before using in the recipe.
Do cherry pie bars need to be refrigerated?
No, they’re fine at room temperature for up to 3 days. For longer storage, keep them in the fridge for up to a week or freeze for up to 2 months.
Can I make these gluten-free?
Yes! Use a 1:1 gluten-free baking flour blend in place of all-purpose flour. The texture will still be tender and delicious.
What’s the best way to cut cherry pie bars cleanly?
Let the bars cool completely, then use the parchment paper to lift them out of the pan. Use a sharp knife, wiping it clean between cuts for neat slices.
Can I swap out the cherry filling for other fruits?
Definitely! Blueberry, apple, peach, or a mix of berries all work great. Just keep the amount the same by weight or volume for best results.
Pin This Recipe!
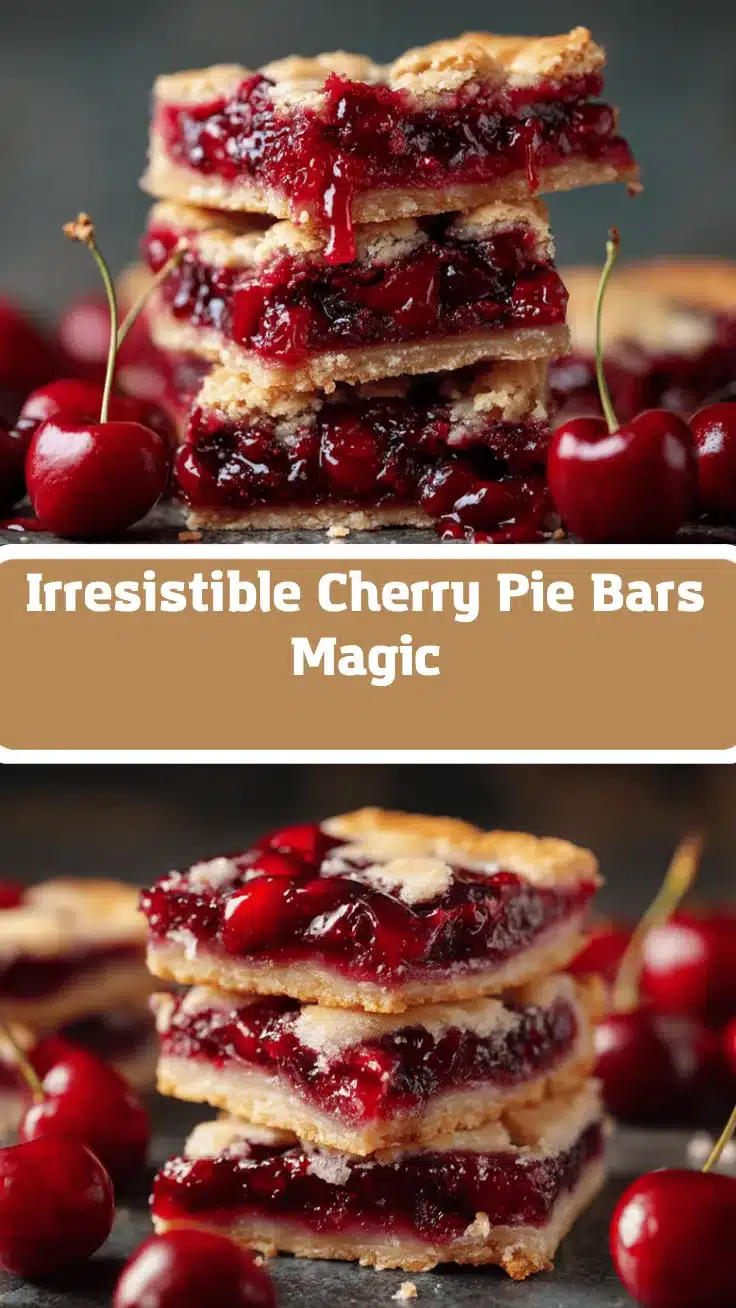
Cherry Pie Bars
These easy homemade cherry pie bars feature a buttery, tender crust, a jammy cherry filling, and a sweet vanilla glaze. All the flavor of cherry pie in a portable, crowd-pleasing dessert bar—perfect for potlucks, picnics, or a simple weeknight treat.
- Prep Time: 15 minutes
- Cook Time: 35-40 minutes
- Total Time: 1 hour 15 minutes
- Yield: 24 bars 1x
- Category: Dessert
- Cuisine: American
Ingredients
- 2 cups (250g) all-purpose flour
- 1 cup (200g) granulated sugar
- 1/2 teaspoon baking powder
- 1/4 teaspoon salt
- 1 cup (226g) unsalted butter, cold and cubed
- 2 large eggs, room temperature
- 1 teaspoon vanilla extract
- 1/4 teaspoon almond extract (optional)
- 1 can (21 ounces / 595g) cherry pie filling OR 2 1/2 cups (400g) fresh or frozen pitted cherries, tossed with 1/3 cup sugar and 2 tablespoons cornstarch
- 1 cup (120g) powdered sugar
- 2–3 tablespoons milk (or dairy-free alternative)
- 1/2 teaspoon vanilla extract
Instructions
- Line a 9×13-inch baking pan with parchment paper, leaving overhang for easy removal. Lightly grease the paper and sides. Preheat oven to 350°F (175°C).
- In a large bowl, whisk together flour, granulated sugar, baking powder, and salt.
- Add cold, cubed butter to the dry mixture. Cut in with a pastry blender, fork, or fingers until the mixture resembles coarse crumbs.
- Beat eggs in a small bowl. Add eggs, vanilla extract, and almond extract (if using) to the crumb mixture. Mix just until combined; do not overmix.
- Press about 2/3 of the mixture evenly into the bottom of the prepared pan.
- Spread cherry pie filling (or homemade cherry mixture) evenly over the crust, avoiding the very edges.
- Crumble the remaining dough over the cherry layer. It will not cover completely.
- Bake for 35-40 minutes, or until the top is golden and the filling is bubbling. If browning too quickly, cover loosely with foil for the last 10 minutes.
- Cool completely in the pan for at least 1 hour.
- For the glaze, whisk together powdered sugar, milk, and vanilla extract until smooth and pourable.
- Lift bars out of the pan using parchment overhang. Drizzle glaze over cooled bars, let set for 10 minutes, then cut into 24 squares or rectangles.
Notes
For clean slices, cool bars completely and wipe knife between cuts. Use parchment for easy removal. Swap in gluten-free flour for a GF version, or use vegan butter and flax eggs for vegan bars. Try with other fruit fillings like blueberry or apple. If using homemade cherry filling, adjust sweetness to taste. Bars store well at room temp for 3 days, or refrigerate/freeze for longer storage.
Nutrition
- Serving Size: 1 bar (1/24th of recipe)
- Calories: 180
- Sugar: 16
- Sodium: 60
- Fat: 7
- Saturated Fat: 4
- Carbohydrates: 28
- Fiber: 1
- Protein: 2
Keywords: cherry pie bars, fruit dessert bars, easy cherry dessert, potluck dessert, picnic bars, cherry bars, homemade cherry bars, summer dessert, crowd-pleaser, cherry pie filling


