Cherry Pie Bars
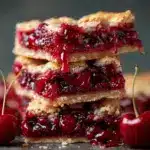
These easy homemade cherry pie bars feature a buttery, tender crust, a jammy cherry filling, and a sweet vanilla glaze. All the flavor of cherry pie in a portable, crowd-pleasing dessert bar—perfect for potlucks, picnics, or a simple weeknight treat.
- Prep Time: 15 minutes
- Cook Time: 35-40 minutes
- Total Time: 1 hour 15 minutes
- Yield: 24 bars 1x
- Category: Dessert
- Cuisine: American
Ingredients
- 2 cups (250g) all-purpose flour
- 1 cup (200g) granulated sugar
- 1/2 teaspoon baking powder
- 1/4 teaspoon salt
- 1 cup (226g) unsalted butter, cold and cubed
- 2 large eggs, room temperature
- 1 teaspoon vanilla extract
- 1/4 teaspoon almond extract (optional)
- 1 can (21 ounces / 595g) cherry pie filling OR 2 1/2 cups (400g) fresh or frozen pitted cherries, tossed with 1/3 cup sugar and 2 tablespoons cornstarch
- 1 cup (120g) powdered sugar
- 2–3 tablespoons milk (or dairy-free alternative)
- 1/2 teaspoon vanilla extract
Instructions
- Line a 9×13-inch baking pan with parchment paper, leaving overhang for easy removal. Lightly grease the paper and sides. Preheat oven to 350°F (175°C).
- In a large bowl, whisk together flour, granulated sugar, baking powder, and salt.
- Add cold, cubed butter to the dry mixture. Cut in with a pastry blender, fork, or fingers until the mixture resembles coarse crumbs.
- Beat eggs in a small bowl. Add eggs, vanilla extract, and almond extract (if using) to the crumb mixture. Mix just until combined; do not overmix.
- Press about 2/3 of the mixture evenly into the bottom of the prepared pan.
- Spread cherry pie filling (or homemade cherry mixture) evenly over the crust, avoiding the very edges.
- Crumble the remaining dough over the cherry layer. It will not cover completely.
- Bake for 35-40 minutes, or until the top is golden and the filling is bubbling. If browning too quickly, cover loosely with foil for the last 10 minutes.
- Cool completely in the pan for at least 1 hour.
- For the glaze, whisk together powdered sugar, milk, and vanilla extract until smooth and pourable.
- Lift bars out of the pan using parchment overhang. Drizzle glaze over cooled bars, let set for 10 minutes, then cut into 24 squares or rectangles.
Notes
For clean slices, cool bars completely and wipe knife between cuts. Use parchment for easy removal. Swap in gluten-free flour for a GF version, or use vegan butter and flax eggs for vegan bars. Try with other fruit fillings like blueberry or apple. If using homemade cherry filling, adjust sweetness to taste. Bars store well at room temp for 3 days, or refrigerate/freeze for longer storage.
Nutrition
- Serving Size: 1 bar (1/24th of recipe)
- Calories: 180
- Sugar: 16
- Sodium: 60
- Fat: 7
- Saturated Fat: 4
- Carbohydrates: 28
- Fiber: 1
- Protein: 2
Keywords: cherry pie bars, fruit dessert bars, easy cherry dessert, potluck dessert, picnic bars, cherry bars, homemade cherry bars, summer dessert, crowd-pleaser, cherry pie filling