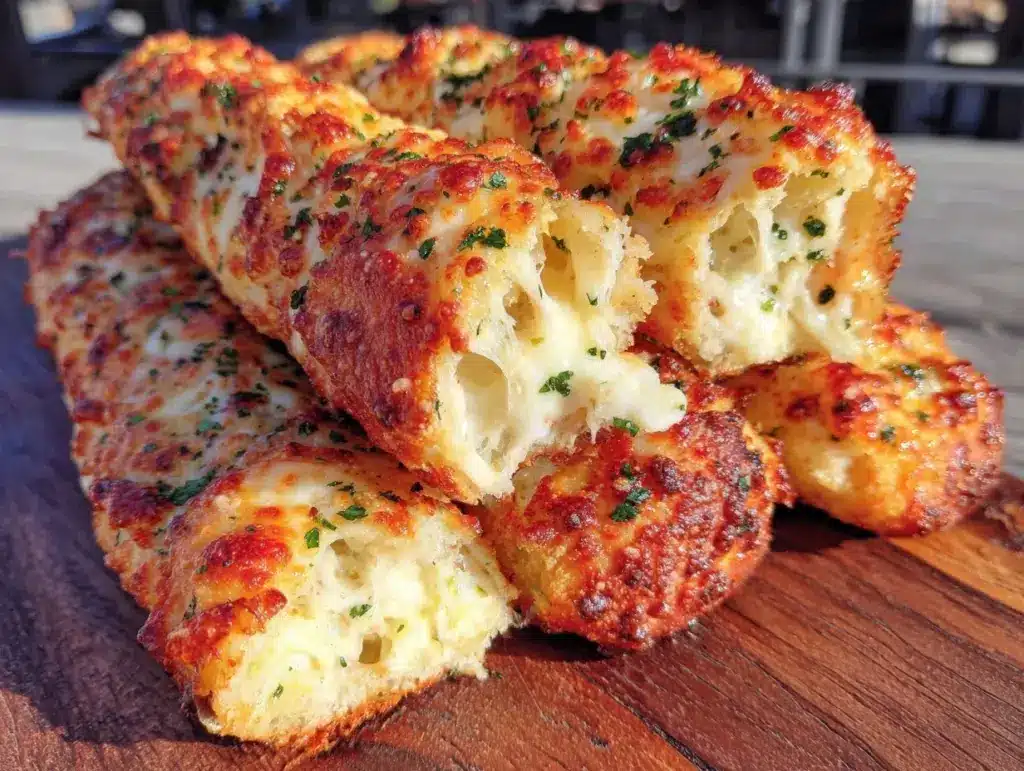
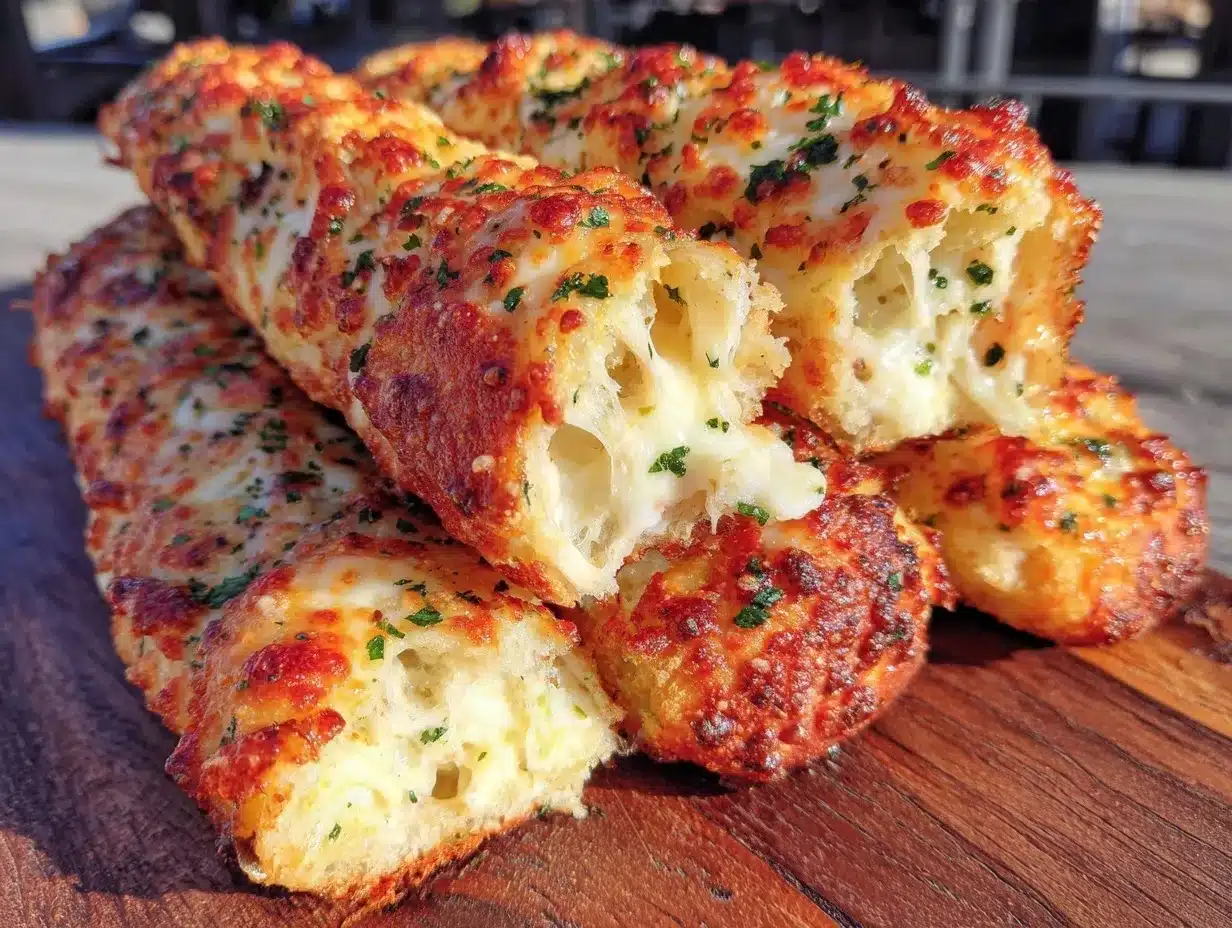
There was this one evening when I was scrambling to pull together a last-minute snack for a few unexpected guests. Honestly, I was running on fumes—just came back from a long day, and the fridge was looking pretty sad. But then, out of nowhere, I spotted some leftover pizza dough in the fridge and a lonely block of mozzarella hanging out in the fridge. I thought, “Why not?” and threw together what would soon become my go-to crispy garlic cheese breadsticks with a golden-brown crust.
At first, I wasn’t convinced it would turn out well—after all, breadsticks seemed fancy and complicated, right? But as these golden strands baked and filled the kitchen with that irresistible garlic and cheese aroma, my doubts melted away just like the mozzarella. The crust was perfectly crisp, the inside delightfully soft, and that garlicky, cheesy combo? Pure magic.
Since that night, I’ve made these breadsticks so many times I’ve lost count. They’ve turned chaotic evenings into cozy moments, simple ingredients into crowd-pleasers, and have honestly become a little comfort ritual. So here’s the story behind this recipe and why it’s stuck around in my kitchen—because sometimes, the best dishes are born from a pinch of improvisation and a sprinkle of luck.
Why You’ll Love This Recipe
- Quick & Easy: Comes together in just about 30 minutes, perfect when you need a fast, satisfying snack or side.
- Simple Ingredients: Uses pantry staples you probably already have—flour, garlic, cheese, and a few basics.
- Perfect for Entertaining: Whether it’s family movie night, game day, or a casual get-together, these breadsticks disappear fast.
- Crowd-Pleaser: Kids, adults, picky eaters—they all ask for seconds thanks to the crispy-cheesy goodness.
- Unbelievably Delicious: The golden-brown crust has that perfect crunch, while the inside stays soft and cheesy, with a fragrant garlic punch.
- This isn’t just another breadstick recipe—I’ve perfected the balance of garlic butter brushing and cheese layering so every bite sings.
- It’s comfort food that feels a bit fancy without the fuss, making it a reliable winner in my kitchen every single time.
What Ingredients You Will Need
This recipe uses simple, wholesome ingredients to deliver bold flavor and satisfying texture without the fuss. Most are pantry staples, and substitutions are easy if needed.
- For the dough:
- All-purpose flour, 3 cups (you can swap part with whole wheat for a nuttier flavor)
- Active dry yeast, 2 ¼ teaspoons (one packet)
- Warm water, 1 cup (about 110°F / 43°C to activate the yeast)
- Granulated sugar, 1 tablespoon (helps yeast bloom)
- Salt, 1 teaspoon
- Olive oil, 2 tablespoons (adds tenderness and flavor)
- For the garlic butter:
- Unsalted butter, ¼ cup (softened for easy mixing)
- Garlic cloves, 3 large (minced finely for that punch)
- Fresh parsley, 2 tablespoons (chopped, optional but highly recommended)
- Salt, a pinch
- For the cheese topping:
- Shredded mozzarella cheese, 1 ½ cups (I prefer whole-milk mozzarella for meltiness)
- Grated Parmesan cheese, ¼ cup (adds a sharp, savory edge)
If you want to try a dairy-free version, swap butter for vegan margarine and cheese for a plant-based shredded alternative. For gluten-free, you can use a gluten-free all-purpose flour blend, but expect slightly different texture.
Equipment Needed
- Large mixing bowl – for combining dough ingredients
- Measuring cups and spoons – accuracy matters here to get the dough right
- Wooden spoon or dough hook attachment for a stand mixer (optional, but helpful)
- Baking sheet or pizza stone – a rimmed baking sheet works perfectly
- Parchment paper or silicone baking mat – prevents sticking and easy cleanup
- Pastry brush – for applying garlic butter evenly
- Sharp knife or pizza cutter – for slicing breadsticks before baking
I usually use a stand mixer with a dough hook; it saves my hands from the workout, but hand mixing works fine too. If you don’t have a pastry brush, a spoon or even your fingers can gently spread the garlic butter.
Preparation Method
- Activate the yeast: In your large mixing bowl, combine warm water (1 cup, about 110°F/43°C), sugar (1 tbsp), and the yeast (2 ¼ tsp). Stir gently, then let it sit for 5-10 minutes until foamy and bubbly. This step wakes up the yeast and ensures your dough will rise well.
- Make the dough: To the yeast mixture, add olive oil (2 tbsp), salt (1 tsp), and about 2 ½ cups of flour. Stir until combined, then gradually add the remaining flour until the dough pulls away from the sides but is still slightly sticky. It usually takes around 3 cups total. If it’s too sticky, add flour a tablespoon at a time.
- Knead: Transfer the dough to a floured surface and knead for about 8-10 minutes, or until smooth and elastic. (If using a stand mixer, knead with the dough hook on medium speed for 6-7 minutes.) The dough should bounce back when poked lightly.
- First rise: Lightly oil the mixing bowl, place the dough back inside, and cover with a clean kitchen towel or plastic wrap. Let it rise in a warm spot for 1 to 1 ½ hours, or until doubled in size. A cozy sunny window or near a warm stove works well.
- Prepare garlic butter: While the dough is rising, mix softened butter (¼ cup), minced garlic (3 cloves), chopped parsley (2 tbsp), and a pinch of salt in a small bowl. Set aside, letting the flavors meld.
- Shape the breadsticks: Once risen, punch down the dough gently to release air. Roll it out on a parchment-lined baking sheet into a rectangle about 12×9 inches (30×23 cm). Brush half of the garlic butter mixture evenly over the dough.
- Add cheese: Sprinkle shredded mozzarella (1 ½ cups) and Parmesan (¼ cup) evenly over the buttered dough. Then, fold the dough in half lengthwise so the cheese is sandwiched inside.
- Slice: Using a sharp knife or pizza cutter, slice the folded dough crosswise into 10-12 strips. Twist each strip a few times if you like a fun spiral shape.
- Second rise: Place the twisted strips apart on the baking sheet and cover loosely with a towel. Let them rest for 20-30 minutes to puff up slightly.
- Bake: Preheat your oven to 400°F (200°C). Bake the breadsticks for 15-18 minutes or until golden brown and crispy on the edges. Keep an eye on them—the cheese should bubble and the crust should crisp nicely.
- Final touch: Right after baking, brush the remaining garlic butter over the hot breadsticks for an extra flavor punch. Serve warm.
Pro tip: If you notice the edges browning too quickly, tent loosely with foil halfway through baking to avoid burning. The smell of garlic and melted cheese filling your kitchen will tell you you’re on the right track!
Cooking Tips & Techniques
Getting that perfect golden-brown crust with a crispy yet tender inside isn’t magic—it’s about a few key details. First, the dough temperature matters; too cold and it won’t rise right, too hot and you risk killing the yeast. I learned the hard way to always test the water temperature with my wrist before adding yeast.
When kneading, aim for a dough that’s smooth and elastic but not dry. Sticky dough is okay—you can always dust your surface lightly with flour, but resist the urge to add too much, or your breadsticks will turn out dense.
One trick I swear by is folding the dough over the cheese and slicing before baking. This way, the cheese melts inside, keeping the breadsticks moist and flavorful rather than just sitting on top and drying out.
Don’t skip the second rise after shaping—it’s a small wait that makes a big difference in lightness and texture.
Lastly, brushing the breadsticks with garlic butter twice (before and after baking) layers the flavor and keeps them irresistibly moist. If you’re multitasking, prepare the garlic butter ahead and keep it chilled so it’s ready when you need it.
Variations & Adaptations
- Spicy kick: Add a pinch of red pepper flakes to the garlic butter for a subtle heat that pairs amazingly with the cheese.
- Herb mix: Swap parsley for a mix of rosemary and thyme for an earthy, fragrant twist.
- Cheese swap: Try sharp cheddar or a blend of mozzarella and provolone for a deeper cheesy flavor.
- Gluten-free option: Use a gluten-free flour blend designed for yeast breads; expect a slightly different texture but still delicious.
- Dairy-free: Replace butter with plant-based margarine and use vegan cheese shreds for a dairy-free delight.
- I once added caramelized onions inside the fold for a sweet-savory surprise that was a total hit at brunch.
Serving & Storage Suggestions
These crispy garlic cheese breadsticks are best served warm—fresh out of the oven when the cheese is gooey and the crust crackles satisfyingly. They make a great side to soups, salads, or pasta dishes, and are a perfect snack on their own.
If you have leftovers (which is rare!), store them in an airtight container at room temperature for up to 2 days. For longer storage, freeze them wrapped tightly in foil or plastic wrap for up to 2 months.
To reheat, pop them in a preheated oven at 350°F (175°C) for about 8-10 minutes until warmed through and crisp again. Avoid microwaving if possible—it tends to make them chewy.
Flavors actually deepen after resting a bit, so if you can wait 10-15 minutes before serving, the garlic and cheese meld beautifully.
Nutritional Information & Benefits
Each breadstick (assuming 12 pieces) has approximately 150-180 calories, with around 8 grams of fat, 15 grams of carbohydrates, and 6 grams of protein. The cheese provides calcium and protein, while garlic adds antioxidants and supports immune health.
This recipe can easily fit into a balanced diet when enjoyed in moderation. Using olive oil and fresh garlic adds heart-healthy fats and flavor without artificial ingredients.
For those watching carbs or gluten, swapping flours or reducing portion size can help tailor to your needs without losing the essence of this comforting treat.
Conclusion
The crispy garlic cheese breadsticks with a golden-brown crust have become one of those recipes I turn to when I want something satisfying but uncomplicated. It’s a bit of comfort, a bit of indulgence, and a whole lot of flavor, all wrapped up in a simple homemade package.
Feel free to tweak the herbs, cheeses, or spice level to suit your taste—that’s part of the fun! Honestly, once you try making these yourself, you might find yourself baking them on repeat like I do.
So go ahead, give this recipe a whirl, and share your own versions or stories—I’d love to hear how it becomes part of your kitchen routine.
Here’s to crispy, cheesy, garlicky goodness that never fails to bring a smile.
FAQs
Can I use store-bought pizza dough instead of making my own?
Absolutely! Store-bought dough works well and saves time. Just make sure to let it come to room temperature before shaping and adding toppings.
How do I prevent the breadsticks from being soggy?
Make sure to bake them on a hot baking sheet and brush on enough garlic butter before and after baking. Also, avoid overloading with cheese to keep the crust crispy.
Can I prepare these breadsticks ahead of time?
You can shape and slice them, then refrigerate covered for up to 12 hours before baking. Let them come to room temperature before putting them in the oven.
What’s the best cheese for melting in this recipe?
Mozzarella is ideal for meltiness and stretch, but mixing in Parmesan or provolone adds flavor depth without compromising texture.
How do I store leftover breadsticks?
Store at room temperature in an airtight container for 1-2 days, or freeze tightly wrapped for up to 2 months. Reheat in the oven for best results.
Pin This Recipe!
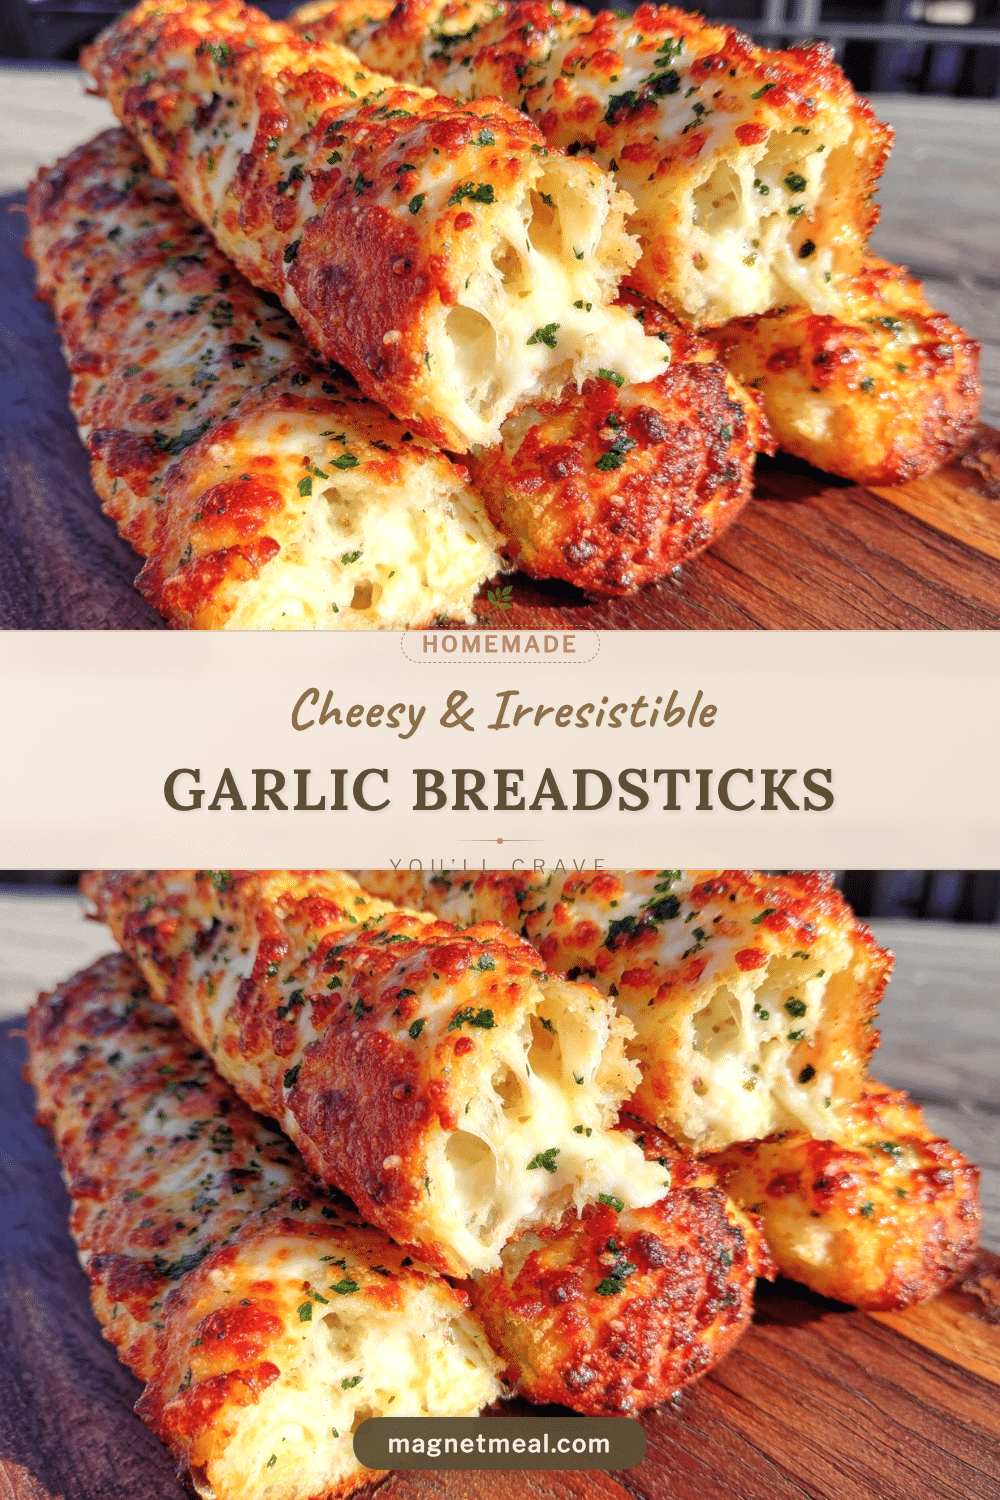
Crispy Garlic Cheese Breadsticks

These crispy garlic cheese breadsticks feature a golden-brown crust with a soft, cheesy inside and a fragrant garlic punch. Perfect for a quick snack or entertaining, they come together in about 30 minutes using simple pantry ingredients.
- Prep Time: 15 minutes
- Cook Time: 18 minutes
- Total Time: 1 hour 45 minutes
- Yield: 12 breadsticks 1x
- Category: Snack
- Cuisine: American
Ingredients
- 3 cups all-purpose flour (can substitute part with whole wheat flour)
- 2 ¼ teaspoons active dry yeast (one packet)
- 1 cup warm water (about 110°F / 43°C)
- 1 tablespoon granulated sugar
- 1 teaspoon salt
- 2 tablespoons olive oil
- ¼ cup unsalted butter, softened
- 3 large garlic cloves, minced
- 2 tablespoons fresh parsley, chopped (optional)
- Pinch of salt (for garlic butter)
- 1 ½ cups shredded mozzarella cheese (preferably whole-milk)
- ¼ cup grated Parmesan cheese
Instructions
- Activate the yeast: In a large mixing bowl, combine warm water, sugar, and yeast. Stir gently and let sit for 5-10 minutes until foamy.
- Make the dough: Add olive oil, salt, and about 2 ½ cups of flour to the yeast mixture. Stir until combined, then gradually add remaining flour until dough pulls away from sides but is slightly sticky.
- Knead the dough: Transfer to a floured surface and knead for 8-10 minutes until smooth and elastic. Alternatively, knead with a stand mixer dough hook on medium speed for 6-7 minutes.
- First rise: Lightly oil the mixing bowl, place dough inside, cover, and let rise in a warm spot for 1 to 1 ½ hours until doubled in size.
- Prepare garlic butter: Mix softened butter, minced garlic, chopped parsley, and a pinch of salt in a small bowl. Set aside.
- Shape breadsticks: Punch down dough and roll out on parchment-lined baking sheet into a 12×9 inch rectangle. Brush half the garlic butter evenly over dough.
- Add cheese: Sprinkle mozzarella and Parmesan evenly over buttered dough. Fold dough in half lengthwise to sandwich the cheese inside.
- Slice: Cut folded dough crosswise into 10-12 strips. Twist each strip a few times if desired.
- Second rise: Place twisted strips apart on baking sheet, cover loosely, and let rest for 20-30 minutes to puff up.
- Bake: Preheat oven to 400°F (200°C). Bake breadsticks for 15-18 minutes until golden brown and crispy.
- Final touch: Immediately brush remaining garlic butter over hot breadsticks. Serve warm.
Notes
If edges brown too quickly, tent with foil halfway through baking. Use water at about 110°F to activate yeast properly. Brush garlic butter twice for best flavor and moisture. Let breadsticks rest 10-15 minutes before serving to deepen flavors. Store leftovers in airtight container at room temperature for up to 2 days or freeze for up to 2 months. Reheat in oven at 350°F for 8-10 minutes; avoid microwaving.
Nutrition
- Serving Size: 1 breadstick
- Calories: 165
- Sugar: 1
- Sodium: 250
- Fat: 8
- Saturated Fat: 4
- Carbohydrates: 15
- Fiber: 1
- Protein: 6
Keywords: garlic breadsticks, cheese breadsticks, crispy breadsticks, homemade breadsticks, easy snack, garlic cheese bread


