
“Hey, you coming to the party tonight? Bring something easy and tasty!” That text popped up just as I was scrambling through a hectic afternoon, wondering how to pull off something fun without burning the place down. Honestly, I almost rolled my eyes, thinking quesadillas? Really? But then I remembered this little trick I stumbled on last summer when a last-minute neighborhood get-together caught me off guard.
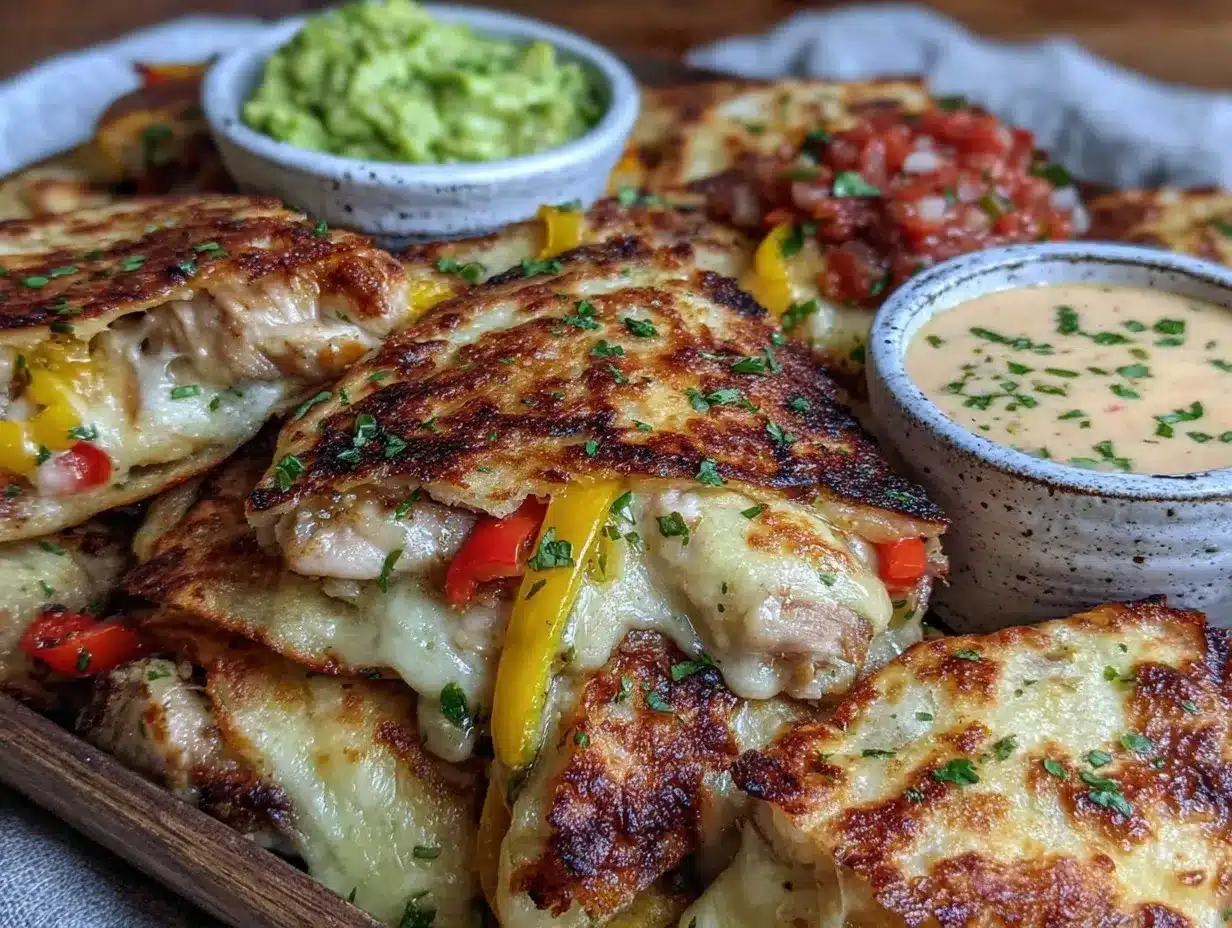
I had just tossed together some leftover chicken, cheese, and tortillas on a baking sheet, threw it in the oven, and by the time I grabbed a drink, these crispy, golden quesadillas were ready to go. The crowd went wild, dipping each piece into the trio of sauces I had quickly whipped up—spicy salsa, creamy guacamole, and a tangy sour cream blend. It wasn’t fancy, but it was exactly what we needed: effortless, crispy, and totally shareable.
That night stuck with me—not because it was the healthiest or the most elaborate, but because it was simple and brought everyone together around one pan. Since then, I find myself making this crispy sheet pan quesadilla party platter with three dips whenever I want to throw a low-stress gathering or even just for a casual family snack night. It’s like comfort food with a little party twist, you know?
What I love is how the crispy edges crackle just right, and the melty cheese pulls apart with a satisfying stretch. Plus, having those three dips means everyone can customize their bite—a little heat, a little cool creaminess, or fresh zest. It’s a recipe that’s easy to tweak depending on what’s in your fridge, and it’s always a hit. Honestly, it’s the kind of dish that makes you realize you don’t need hours in the kitchen to impress.
So yeah, this platter isn’t just a recipe; it’s a little secret weapon for any party or laid-back evening. It’s the kind of meal that quietly wins over skeptics (like my friend who once doubted quesadillas could be a full-on crowd-pleaser). And that’s why it’s stuck around in my rotation, quietly promising good times and great flavors.
Why You’ll Love This Recipe
- Quick & Easy: Ready in under 30 minutes, this sheet pan quesadilla platter is perfect for those busy nights when you want something fast but satisfying.
- Simple Ingredients: No need for fancy or hard-to-find items. Most of these ingredients are pantry staples or easy to swap with what you already have.
- Perfect for Parties: Whether it’s a casual get-together, game day, or a family movie night, this platter brings people together effortlessly.
- Crowd-Pleaser: Kids, adults, and picky eaters alike give this recipe rave reviews—probably because who doesn’t love crispy, melty cheese in a crispy tortilla?
- Unbelievably Delicious: The combination of crispy edges, gooey cheese, and flavorful fillings, paired with three distinct dips, makes every bite a little celebration.
This isn’t just another quesadilla recipe. What makes it special is the sheet pan technique that crisps up every edge evenly without standing over a skillet flipping tortillas one by one. Plus, the three dips cover a spectrum of flavors—a smoky salsa, a creamy guacamole, and a zesty sour cream dip—giving your taste buds a fun playground to explore.
If you’re after a recipe that delivers that perfect crunch and melty cheese combo with minimal effort, this platter hits the spot every time. Plus, it’s a great way to impress guests without breaking a sweat or spending hours in the kitchen. I think that’s why it’s become my go-to when hosting casual hangouts or even for a fun twist on easy lunch ideas.
What Ingredients You Will Need
This recipe uses straightforward, wholesome ingredients to bring bold flavors and satisfying textures without fuss. Most are pantry basics, and you can swap things out if needed.
- Flour tortillas: Large size, preferably 10-inch (25 cm). Flour tortillas crisp up better than corn for this sheet pan method.
- Shredded cheese: A mix of sharp cheddar and Monterey Jack (about 3 cups / 340 grams total) for meltiness and flavor balance.
- Cooked chicken: Roughly 2 cups (about 250 grams), shredded or diced. Leftover rotisserie chicken works perfectly.
- Bell peppers: 1 medium, diced small (adds sweetness and crunch).
- Red onion: Half, finely chopped (for a mild sharpness).
- Jalapeño: 1 small, deseeded and minced (optional, for a little heat).
- Olive oil: 2 tablespoons, for brushing tortillas and roasting veggies.
- Ground cumin: 1 teaspoon, adds warm earthiness.
- Smoked paprika: 1 teaspoon, brings subtle smoky depth.
- Salt and pepper: To taste.
For the Dips
- Salsa: 1 cup (250 ml) of your favorite chunky salsa; homemade or store-bought. I like a smoky chipotle salsa.
- Guacamole: 2 ripe avocados mashed with lime juice, salt, and a pinch of garlic powder.
- Sour cream dip: 1/2 cup (120 ml) sour cream mixed with fresh chopped cilantro and a squeeze of lime.
Ingredient tips: I recommend using freshly shredded cheese rather than pre-shredded for better melt and texture. If you prefer a gluten-free option, swap the flour tortillas for certified gluten-free tortillas. For dairy-free, choose vegan cheese and substitute sour cream with coconut yogurt.
Equipment Needed
- Large rimmed baking sheet (sheet pan): A half-sheet pan (about 18×13 inches / 46×33 cm) works best for crisping up multiple quesadillas at once.
- Parchment paper or silicone baking mat: Prevents sticking and makes cleanup a breeze.
- Mixing bowls: For tossing veggies and mixing dips.
- Sharp knife and cutting board: For prepping veggies and chicken.
- Measuring spoons and cups: To get seasoning just right.
If you don’t have a large sheet pan, two smaller pans will do (just rotate midway through baking). I used to rely on my trusty old baking sheet from college, but upgrading to a heavier half-sheet pan made the crisping way more even. Parchment paper is a lifesaver here; it keeps everything from sticking and saves you scrubbing time later.
Preparation Method
- Preheat the oven: Set it to 425°F (220°C). This high heat is key for getting those tortillas crispy without drying out the filling.
- Prepare the veggies and chicken: In a bowl, toss diced bell peppers, red onion, and jalapeño with 1 tablespoon olive oil, cumin, smoked paprika, salt, and pepper. Spread on a small baking sheet or pan and roast for 10 minutes until slightly softened. Meanwhile, shred or chop the cooked chicken. Tip: Roasting the peppers and onions beforehand brings out sweetness and prevents soggy quesadillas.
- Assemble the quesadillas: Lay out 4 tortillas on your sheet pan lined with parchment. Evenly distribute half the shredded cheese over each tortilla, leaving about 1/2 inch (1.25 cm) border. Sprinkle the roasted veggies and chicken on top, then top with the remaining cheese and another tortilla each.
- Brush and bake: Lightly brush the tops of the quesadillas with olive oil. This helps them brown beautifully. Bake in the oven for 12–15 minutes, or until tortillas are golden and crispy and cheese is melted. Rotate the pan halfway through to ensure even browning.
- Cool and slice: Remove from oven and let cool for 5 minutes—this lets the cheese set slightly, so your slices hold together. Use a sharp pizza cutter or knife to slice each quesadilla into 6 wedges.
- Prepare dips: While baking, mash avocados with lime juice, salt, and garlic powder for guacamole. Mix sour cream with chopped cilantro and lime juice. Pour salsa into a bowl. Arrange all three dips in small dishes for serving.
- Serve and enjoy: Arrange quesadilla wedges on a large platter with dips around. Watch everyone dig in!
Pro tip: If your tortillas feel a little stiff before assembling, warming them briefly in a dry skillet or microwave makes them more pliable and easier to work with. Also, don’t overload the filling to avoid sogginess.
Cooking Tips & Techniques
Getting that perfect crisp on a sheet pan quesadilla is a bit of a balancing act, but here are some tricks I’ve learned from a few trial-and-error sessions:
- Use high heat: Baking at 425°F (220°C) crisps the tortillas without drying out the filling. Lower temps make them chewy instead of crispy.
- Don’t skip the oil brush: Brushing olive oil on top of the quesadillas helps them brown evenly and adds a nice golden color.
- Even layering: Spread cheese on both tortilla sides to act like glue, keeping everything together when sliced.
- Roast veggies first: Raw peppers and onions release moisture, which can make quesadillas soggy. Roasting cuts this risk and adds flavor.
- Let them rest: Cooling for a few minutes after baking lets the cheese firm up, making clean slicing easier.
- Use a sharp cutter: A pizza cutter works best to slice through crispy edges without tearing.
I once tried skipping the oil brush and thought it would save time, but ended up with pale, floppy tortillas. Lesson learned! Also, multitasking by roasting the veggies while the oven preheats saves precious minutes. It’s the little things that make the whole process smooth.
Variations & Adaptations
This sheet pan quesadilla platter is super flexible and can be customized for different tastes or dietary needs:
- Vegetarian option: Swap chicken for black beans or sautéed mushrooms. Add corn kernels for a sweet crunch.
- Spicy twist: Add chopped chipotle peppers in adobo to the chicken mixture or mix hot sauce into the sour cream dip.
- Cheese swap: Use pepper jack for a little kick or mozzarella for extra gooey stretchiness.
- Gluten-free: Use gluten-free tortillas; just watch the baking time as they may crisp quicker.
- Different proteins: Try shredded pork or steak strips for a more carnivore-friendly version, similar in spirit to the butter-basted ribeye steak recipe if you want to add a hearty touch to your party spread.
One time, I mixed in some leftover BBQ chicken and swapped the salsa for a tangy BBQ sauce for a Southern flair. It was a hit and gave the platter a whole new personality! Honestly, that’s the best part—you can keep making this your own based on whatever’s in season or your mood.
Serving & Storage Suggestions
Serve the quesadilla wedges warm or at room temperature—both work well for parties. Arrange them on a large platter surrounded by the three dips for easy grabbing and sharing. Pair with a crisp salad or chips for a fuller spread.
For storage, wrap leftovers tightly in foil or place in an airtight container. Refrigerate for up to 3 days. To reheat, pop them on a baking sheet in a 375°F (190°C) oven for about 10 minutes to regain that crispiness. Avoid microwaving, which makes tortillas soggy.
Flavors actually deepen after a day, so if you can resist, leftovers can be surprisingly tasty the next day. The dips, especially guacamole, are best made fresh but can be stored separately for a day.
Nutritional Information & Benefits
Each serving (about 2 wedges) offers approximately:
| Calories | 320 |
|---|---|
| Protein | 20g |
| Fat | 18g |
| Carbohydrates | 22g |
| Fiber | 3g |
This recipe packs a good protein punch thanks to the chicken and cheese, making it satisfying and energy-boosting. The peppers and avocado in the dips add vitamins, fiber, and healthy fats. If you’re watching carbs, opting for low-carb tortillas or reducing cheese slightly can help keep it lighter.
Be aware of potential allergens like dairy and gluten, but substitutions can make this friendly to many diets. Personally, I appreciate how this platter balances indulgence with wholesome ingredients, making it a treat that doesn’t leave me feeling weighed down.
Conclusion
This crispy sheet pan quesadilla party platter with three dips has earned a permanent spot in my recipe box because it delivers fun, flavor, and ease all on one tray. It’s the kind of recipe you can trust to please a crowd without a fuss or fancy ingredients.
Feel free to make it your own—switch up the fillings, spice levels, or dips to suit your taste. I love how flexible and forgiving this dish is, which means every version tells its own tasty story.
Next time you want to throw a stress-free party or just crave that perfect cheesy crunch, this platter’s got your back. I can’t wait to hear how you customize it and what your favorite dip combo turns out to be. Don’t hesitate to share your twists in the comments below—let’s keep the ideas flowing!
FAQs About Crispy Sheet Pan Quesadilla Party Platter
Can I make this recipe ahead of time?
Yes! You can assemble the quesadillas and keep them covered in the fridge for up to 4 hours before baking. Just add a couple of extra minutes to the baking time if baking straight from the fridge.
What if I don’t have cooked chicken?
No problem. You can use canned beans, sautéed veggies, or even store-bought rotisserie chicken shredded for convenience.
How do I keep the quesadillas from getting soggy?
Roasting the veggies first and not overfilling the quesadillas helps keep them crisp. Also, brushing the tortillas with oil before baking is essential.
Can I freeze leftover quesadilla wedges?
Yes! Freeze cooled quesadilla wedges in a single layer on a baking sheet, then transfer to a freezer bag. Reheat in the oven straight from frozen for best results.
What are some good side dishes to serve with this platter?
Try a fresh green salad, Mexican street corn, or even loaded tater tot nachos to keep the party vibe going strong.
Pin This Recipe!

Crispy Sheet Pan Quesadilla Party Platter Easy Recipe with 3 Dips

A quick and easy sheet pan quesadilla recipe perfect for parties, featuring crispy tortillas, melty cheese, chicken, roasted veggies, and three delicious dips.
- Prep Time: 15 minutes
- Cook Time: 25 minutes
- Total Time: 40 minutes
- Yield: 4 servings 1x
- Category: Main Course
- Cuisine: Mexican
Ingredients
- 4 large flour tortillas (10-inch)
- 3 cups (340 grams) shredded cheese (sharp cheddar and Monterey Jack mix)
- 2 cups (250 grams) cooked chicken, shredded or diced
- 1 medium bell pepper, diced small
- 1/2 red onion, finely chopped
- 1 small jalapeño, deseeded and minced (optional)
- 2 tablespoons olive oil
- 1 teaspoon ground cumin
- 1 teaspoon smoked paprika
- Salt and pepper to taste
- For the dips:
- 1 cup (250 ml) chunky salsa (smoky chipotle recommended)
- 2 ripe avocados mashed with lime juice, salt, and a pinch of garlic powder
- 1/2 cup (120 ml) sour cream mixed with fresh chopped cilantro and a squeeze of lime
Instructions
- Preheat the oven to 425°F (220°C).
- In a bowl, toss diced bell peppers, red onion, and jalapeño with 1 tablespoon olive oil, cumin, smoked paprika, salt, and pepper. Spread on a small baking sheet and roast for 10 minutes until slightly softened. Meanwhile, shred or chop the cooked chicken.
- Line a large rimmed baking sheet with parchment paper. Lay out 4 tortillas on the sheet.
- Evenly distribute half the shredded cheese over each tortilla, leaving about a 1/2 inch border.
- Sprinkle the roasted veggies and chicken on top of the cheese.
- Top with the remaining cheese and place another tortilla on each assembled quesadilla.
- Lightly brush the tops of the quesadillas with olive oil.
- Bake in the oven for 12–15 minutes, rotating the pan halfway through, until tortillas are golden and crispy and cheese is melted.
- Remove from oven and let cool for 5 minutes to let the cheese set.
- Slice each quesadilla into 6 wedges using a sharp pizza cutter or knife.
- While baking, prepare the dips: mash avocados with lime juice, salt, and garlic powder for guacamole; mix sour cream with chopped cilantro and lime juice; pour salsa into a bowl.
- Arrange quesadilla wedges on a large platter with the three dips around and serve.
Notes
Use freshly shredded cheese for better melt and texture. For gluten-free, use certified gluten-free tortillas. For dairy-free, substitute vegan cheese and coconut yogurt for sour cream. Warm tortillas briefly before assembling if stiff. Do not overload filling to avoid sogginess. Rotate pan halfway through baking for even crisping. Leftovers can be refrigerated up to 3 days and reheated in oven at 375°F for 10 minutes. Avoid microwaving to keep crispiness.
Nutrition
- Serving Size: About 2 quesadilla w
- Calories: 320
- Fat: 18
- Carbohydrates: 22
- Fiber: 3
- Protein: 20
Keywords: quesadilla, sheet pan, party platter, easy recipe, chicken quesadilla, dips, crispy quesadilla, quick dinner, crowd-pleaser


