There was this one late afternoon, just days before Easter, when I found myself staring at a lonely bag of marshmallows and a half-empty box of Rice Krispies, wondering what on earth to whip up for the kids’ spring party. Honestly, I wasn’t aiming for anything fancy—just a quick, sweet treat that wouldn’t keep me stuck in the kitchen forever. That’s when the idea of Easy Easter Egg Nest Rice Krispie Treats popped into my head. The concept was simple, but the result? Surprisingly charming and festive.
I remember sneaking bites as I shaped each nest, the buttery marshmallow mixture sticky and warm between my fingers. The little candy eggs nestled in the center instantly brought a smile—not just to me, but everyone who caught sight of them. It felt like a tiny celebration of spring itself, all wrapped up in a crunchy, sweet nest.
What’s funny is, I was skeptical at first—could something so easy really turn into a showstopper? But it did. These treats became the highlight of the gathering, and I ended up making them multiple times that week. They’re a sweet reminder that sometimes, the simplest ideas can bring the most joy. So if you’re looking for a recipe that’s quick, festive, and just plain fun to make, these Rice Krispie nests might be just the thing you didn’t know you needed this spring.
Why You’ll Love This Recipe
- Quick & Easy: Comes together in under 20 minutes, perfect for last-minute spring celebrations or when you need a sweet fix fast.
- Simple Ingredients: No need for exotic items—just pantry staples like marshmallows, butter, and cereal.
- Perfect for Spring & Easter: The nest shape and candy eggs make it ideal for festive brunches, classroom parties, or family gatherings.
- Crowd-Pleaser: Kids love the crunchy, gooey texture, and adults appreciate the nostalgic twist on a classic treat.
- Unbelievably Delicious: The buttery marshmallow blend with crispy cereal is comfort food magic—but with a fun seasonal twist.
This isn’t just your regular Rice Krispie treat. The way the nests cradle those pastel candy eggs gives each bite that little pop of springtime whimsy. Plus, I’ve found that melting the butter and marshmallows slowly over low heat helps create a smoother, silkier mixture that’s easier to mold. Trust me, this technique makes all the difference between a crumbly mess and perfect nests every time.
Whether you’re aiming to impress guests without fuss or just want a simple, sweet project with the kids, these Easy Easter Egg Nest Rice Krispie Treats have a way of making everyone smile. They’re not over the top—just sweet, seasonal, and satisfying.
What Ingredients You Will Need
This recipe uses simple, wholesome ingredients to deliver bold flavor and a satisfying texture without any fuss. Most of these are pantry staples, and you can find the candy eggs in most grocery stores around spring.
- Unsalted butter (1/4 cup / 57g, for that rich, smooth base)
- Mini marshmallows (4 cups / approx. 120g; mini sizes melt evenly and help with shaping)
- Rice Krispies cereal (6 cups / 150g; the classic crunchy element—try Kellogg’s for best texture)
- Vanilla extract (1 teaspoon; adds subtle depth to the sweetness)
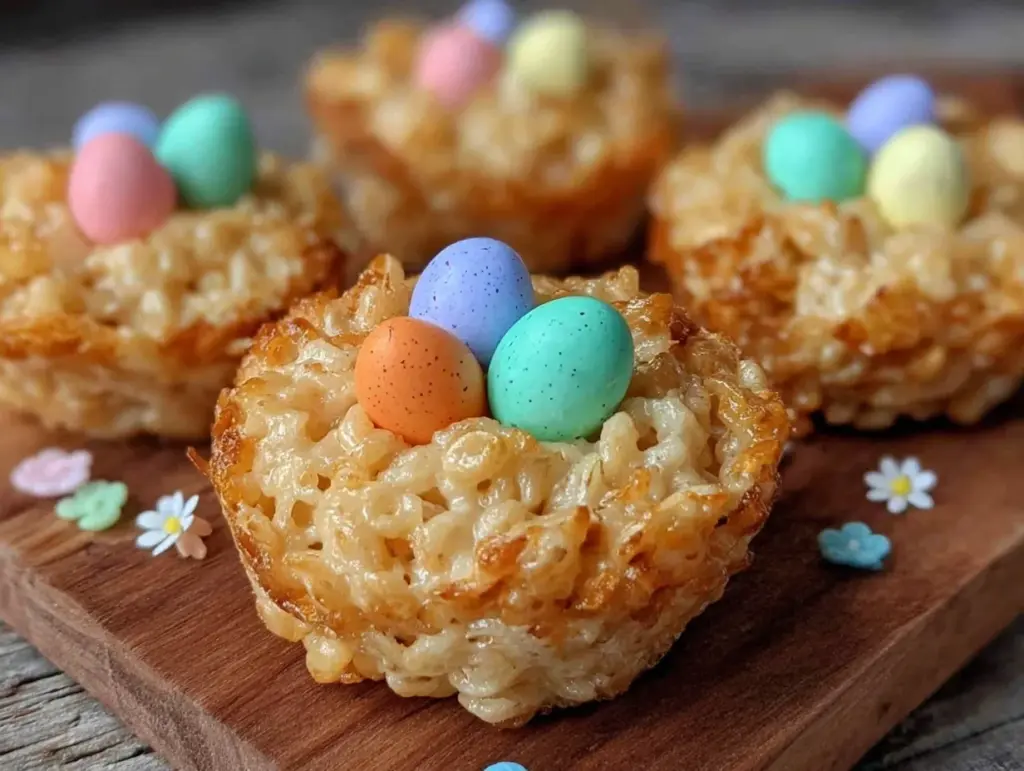
- Pastel candy-coated chocolate eggs (1-2 cups; these are the “eggs” that make the nests festive—look for brands with a crisp shell like Cadbury Mini Eggs)
Ingredient tips: If you want to switch things up, you can use gluten-free crispy rice cereal instead. For a dairy-free version, swap butter for coconut oil and use vegan marshmallows. When picking your candy eggs, smaller sizes work best to fit snugly in the nest without overwhelming it.
Equipment Needed
- Large saucepan (for melting butter and marshmallows evenly)
- Wooden spoon or heat-resistant spatula (to stir without scratching)
- Large mixing bowl (to combine the cereal and marshmallow mixture)
- Wax paper or parchment paper (to place the nests on for cooling)
- Measuring cups and spoons (for precision)
- Optional: Small cookie scoop or melon baller (to shape the nests consistently)
If you don’t have a cookie scoop, your hands work just fine—just slightly wet them to prevent sticking. And if your saucepan is thicker-bottomed, it helps with even heat distribution, reducing the chance of burning the marshmallows. I’ve used a budget-friendly non-stick pan for this recipe with great results.
Preparation Method
- Prepare your workspace: Line a baking sheet with wax or parchment paper to set the nests on later. This helps prevent sticking and keeps things tidy. (5 minutes)
- Melt the butter: In a large saucepan over low heat, melt 1/4 cup (57g) of unsalted butter. Stir gently to avoid burning. (3–4 minutes)
- Add marshmallows: Toss in 4 cups (about 120g) of mini marshmallows. Stir continuously until they’re completely melted and smooth. This should take about 5 minutes. If the mixture starts to stick or bubble too aggressively, lower the heat. (5 minutes)
- Blend in vanilla: Remove the pan from heat and stir in 1 teaspoon of vanilla extract. This little addition really lifts the flavor.
- Mix cereal in: Immediately add 6 cups (150g) of Rice Krispies cereal to the melted marshmallow mixture. Stir quickly but gently until all cereal is coated evenly. (2–3 minutes)
- Shape nests: Using a small cookie scoop or your buttered hands, form the mixture into rounded nests on the prepared baking sheet. Press your thumb gently into the center of each to create a hollow “nest” for the candy eggs. (10–15 minutes)
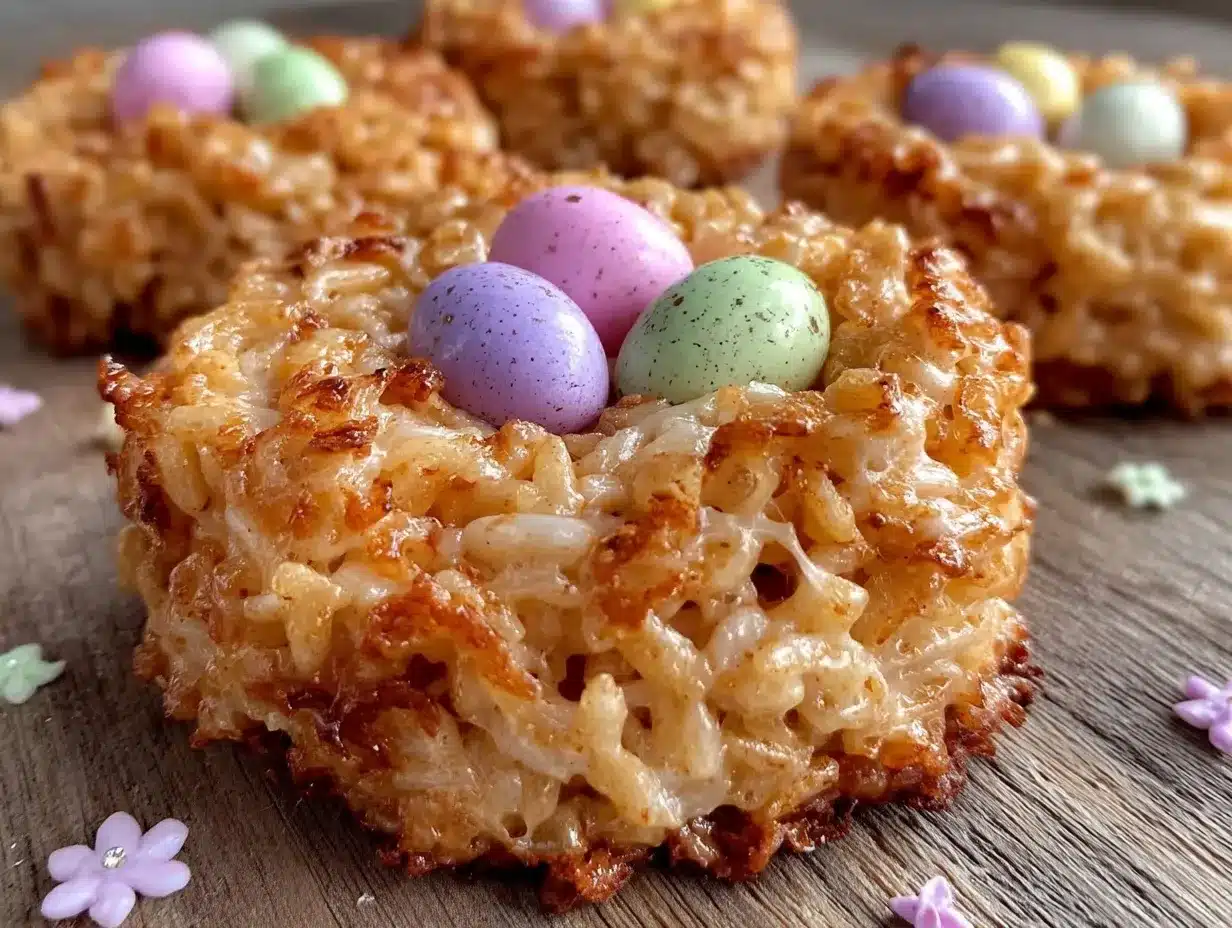
- Add candy eggs: Place 3–4 pastel candy-coated chocolate eggs into the center of each nest while the treats are still warm. The eggs will stick nicely as the mixture cools.
- Cool and set: Let the nests cool at room temperature for about 30 minutes until firm. Avoid refrigerating as it can make them too hard and less chewy.
Pro tip: If your marshmallow mixture cools too quickly and becomes sticky to handle, warm it slightly in the pan off the heat or microwave for 10 seconds to soften. Also, don’t over-press the nests or they’ll become too dense rather than light and airy.
Cooking Tips & Techniques
One thing I learned early is that marshmallows can be tricky—they go from melty to burnt faster than you’d expect. Keeping the heat low and stirring constantly makes all the difference. I’ve ruined batches by rushing this step, so patience here really pays off.
When mixing in the cereal, fold gently to preserve that crispy texture. Over-stirring can crush the cereal and leave you with a dense, gummy mess. Using a wooden spoon helps you gauge the right amount of mixing pressure.
Shaping the nests can get sticky, so I recommend buttering your hands or using a small scoop. This way, the marshmallow mixture won’t cling and you get nice, rounded nests every time. Also, avoid making them too flat; you want a cupped shape that holds the eggs snugly.
Timing is everything. Don’t wait too long to add your candy eggs, or they won’t stick properly. Adding them while the nests are still warm ensures they stay put without sliding off.
Lastly, skip the fridge. I know it’s tempting to speed things up, but chilling makes the treats hard and crumbly. Let them set at room temp for the best chewy yet firm texture.
Variations & Adaptations
- Dietary swaps: Use gluten-free crispy rice cereal to make the nests gluten-free. Swap butter for coconut oil and use vegan marshmallows for a dairy-free and vegan-friendly version.
- Flavor twists: Add a pinch of cinnamon or nutmeg to the melted marshmallow mix for a hint of warm spice. Or stir in a handful of shredded coconut for extra texture.
- Seasonal variations: Swap pastel candy eggs for small jelly beans or gummy worms for a fun spring or Halloween twist.
- Cooking method: For an even quicker melt, microwave butter and marshmallows in 30-second bursts, stirring in between, but watch carefully to prevent overheating.
- Personal favorite: I once mixed in a handful of mini chocolate chips into the mixture before shaping—gave the nests a surprise chocolatey crunch that vanished fast at parties.
Serving & Storage Suggestions
These Rice Krispie nests are best served at room temperature. The delicate crunch and chewy marshmallow texture come through perfectly without being too hard or sticky. They make a lovely centerpiece dessert for any spring gathering—arranged on a platter or individually wrapped in clear bags tied with pastel ribbons for gifting.
To store, keep the nests in an airtight container at room temperature for up to 3 days. Avoid the fridge since it can dry them out and make the texture less enjoyable. For longer storage, you can freeze them individually wrapped in plastic wrap and place them in a sealed bag for up to 2 weeks. Thaw at room temp before serving.
Flavors tend to mellow slightly after resting, which some people actually prefer as it lets the vanilla and butter notes blend more deeply. Just don’t let them sit too long or they might lose that fresh bite.
Nutritional Information & Benefits
Each Easy Easter Egg Nest Rice Krispie Treat contains roughly 150–180 calories depending on size and candy egg quantity. They are primarily a sweet treat with simple carbs and fats from butter and marshmallows.
While not a health food, the recipe uses real butter and vanilla extract, avoiding artificial flavors or preservatives. Using mini marshmallows helps with portion control, and swapping in gluten-free or dairy-free ingredients can accommodate dietary needs.
For those mindful of allergens, note that the candy eggs typically contain milk and soy. Always check labels if serving to sensitive guests.
Personally, I see these treats as a fun, occasional indulgence—perfect for bringing a little joy and festivity without overcomplicating things.
Conclusion
Easy Easter Egg Nest Rice Krispie Treats are proof that simple ingredients and a little creativity can turn into something special. They strike a perfect balance between nostalgic comfort and spring celebration charm. I love how they bring people together, whether at a casual brunch or a festive classroom party.
Feel free to tweak the candy or add your own flavor twists to make these nests truly your own. They’re forgiving, fun to make, and always a crowd favorite. I hope this recipe finds a happy spot in your spring traditions, just like it did in mine.
Can’t wait to hear how you customize your nests—drop a comment or share your photos. Here’s to sweet, simple celebrations!
FAQs
Can I make these nests ahead of time?
Yes! You can prepare the nests a day or two in advance and store them in an airtight container at room temperature. Avoid refrigerating to keep the texture just right.
What can I use instead of candy eggs?
Small jelly beans, mini chocolate chips, or gummy candies work well as alternatives. Just pick something small enough to fit inside the nest.
How do I prevent the marshmallow mixture from sticking to my hands?
Lightly butter your hands or spray them with non-stick cooking spray before shaping the nests. This makes handling much easier.
Can I use regular-sized marshmallows?
Mini marshmallows melt more evenly and create a better texture, but you can use regular marshmallows by cutting them into smaller pieces before melting.
Is there a way to make these nests gluten-free?
Absolutely! Use gluten-free crispy rice cereal instead of the regular kind, and double-check that your candy eggs are gluten-free as well.
Pin This Recipe!
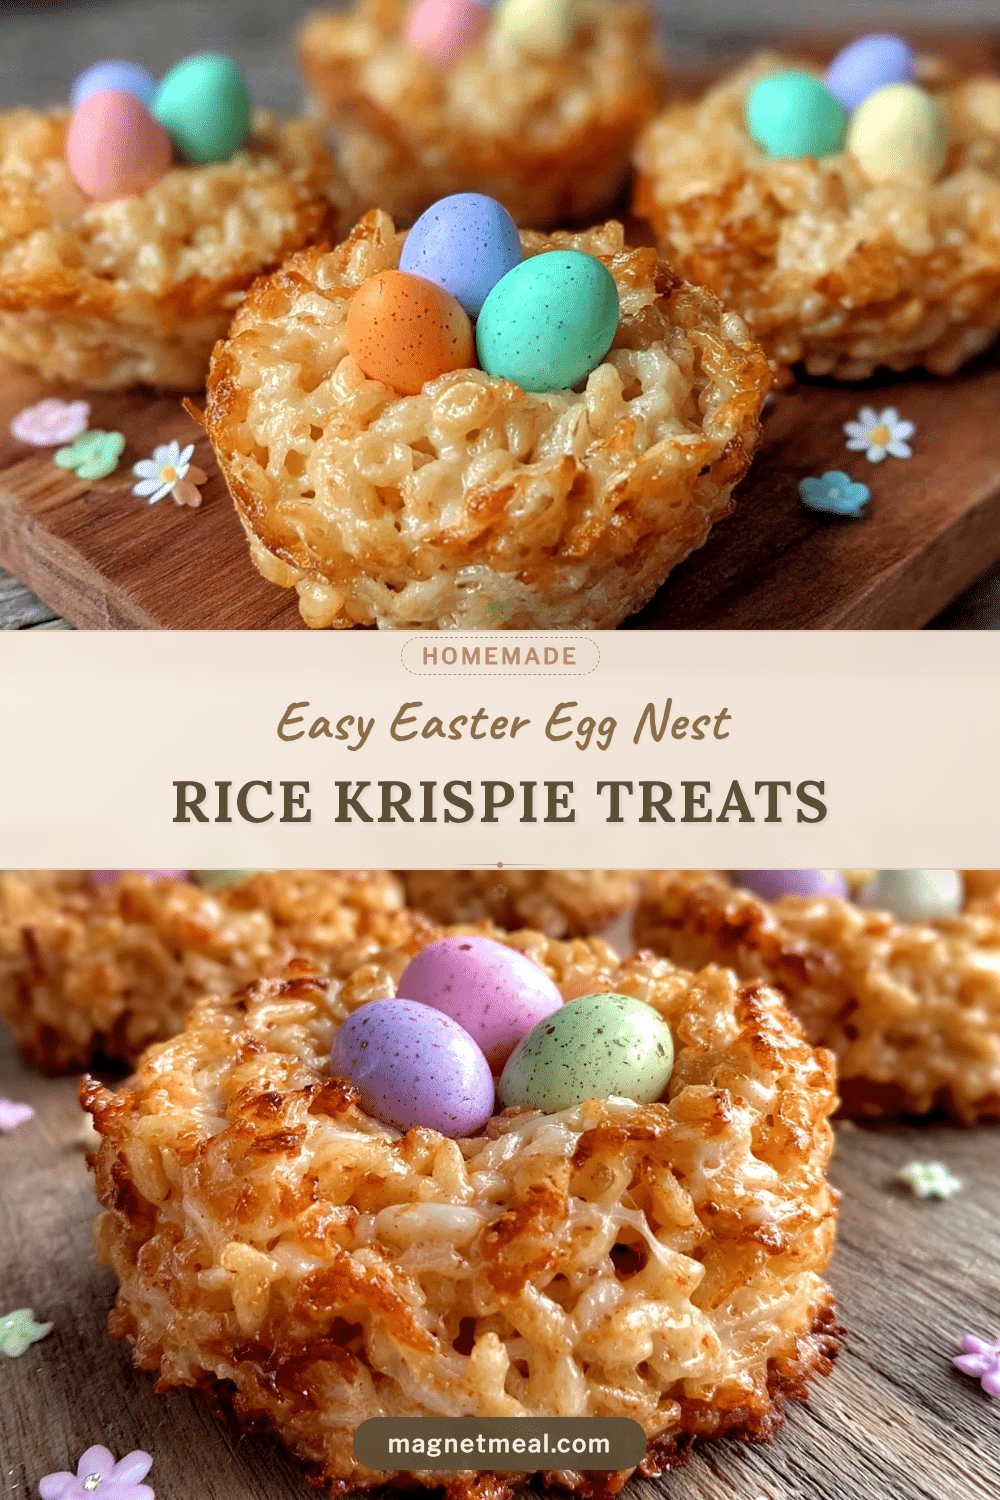
Easy Easter Egg Nest Rice Krispie Treats Perfect for Spring Celebrations

A quick and festive Rice Krispie treat shaped like nests filled with pastel candy eggs, perfect for spring and Easter celebrations. These treats are easy to make, kid-friendly, and bring a nostalgic twist to a classic dessert.
- Prep Time: 10 minutes
- Cook Time: 15 minutes
- Total Time: 45 minutes
- Yield: 12-15 nests 1x
- Category: Dessert
- Cuisine: American
Ingredients
- 1/4 cup (57g) unsalted butter
- 4 cups (approx. 120g) mini marshmallows
- 6 cups (150g) Rice Krispies cereal
- 1 teaspoon vanilla extract
- 1–2 cups pastel candy-coated chocolate eggs (e.g., Cadbury Mini Eggs)
Instructions
- Line a baking sheet with wax or parchment paper to set the nests on later.
- In a large saucepan over low heat, melt 1/4 cup (57g) of unsalted butter. Stir gently to avoid burning.
- Add 4 cups (about 120g) of mini marshmallows to the melted butter. Stir continuously until completely melted and smooth, about 5 minutes. Lower heat if mixture bubbles too aggressively.
- Remove the pan from heat and stir in 1 teaspoon of vanilla extract.
- Immediately add 6 cups (150g) of Rice Krispies cereal to the melted marshmallow mixture. Stir quickly but gently until all cereal is coated evenly.
- Using a small cookie scoop or buttered hands, form the mixture into rounded nests on the prepared baking sheet. Press your thumb gently into the center of each to create a hollow nest for the candy eggs.
- Place 3–4 pastel candy-coated chocolate eggs into the center of each nest while the treats are still warm.
- Let the nests cool at room temperature for about 30 minutes until firm. Avoid refrigerating.
Notes
Use gluten-free crispy rice cereal for a gluten-free version. Swap butter for coconut oil and use vegan marshmallows for a dairy-free and vegan-friendly version. Butter or spray hands to prevent sticking when shaping nests. Avoid refrigerating to keep chewy texture. Add candy eggs while nests are warm to ensure they stick.
Nutrition
- Serving Size: 1 nest
- Calories: 150180
- Sugar: 18
- Sodium: 90
- Fat: 5
- Saturated Fat: 3
- Carbohydrates: 28
- Protein: 1
Keywords: Rice Krispie treats, Easter treats, spring desserts, candy egg nests, quick dessert, kid-friendly treats


