I did not trust no-bake bars to be truly satisfying. Honestly, the idea of skipping the oven for a chewy chocolate peanut butter oatmeal bar sounded like a shortcut that might compromise taste or texture. I figured they’d either be too soft, too crumbly, or just lacking that homemade charm you get from baking. But then, one rushed afternoon when I was juggling a million things and craving something sweet yet wholesome, I gave these bars a shot.
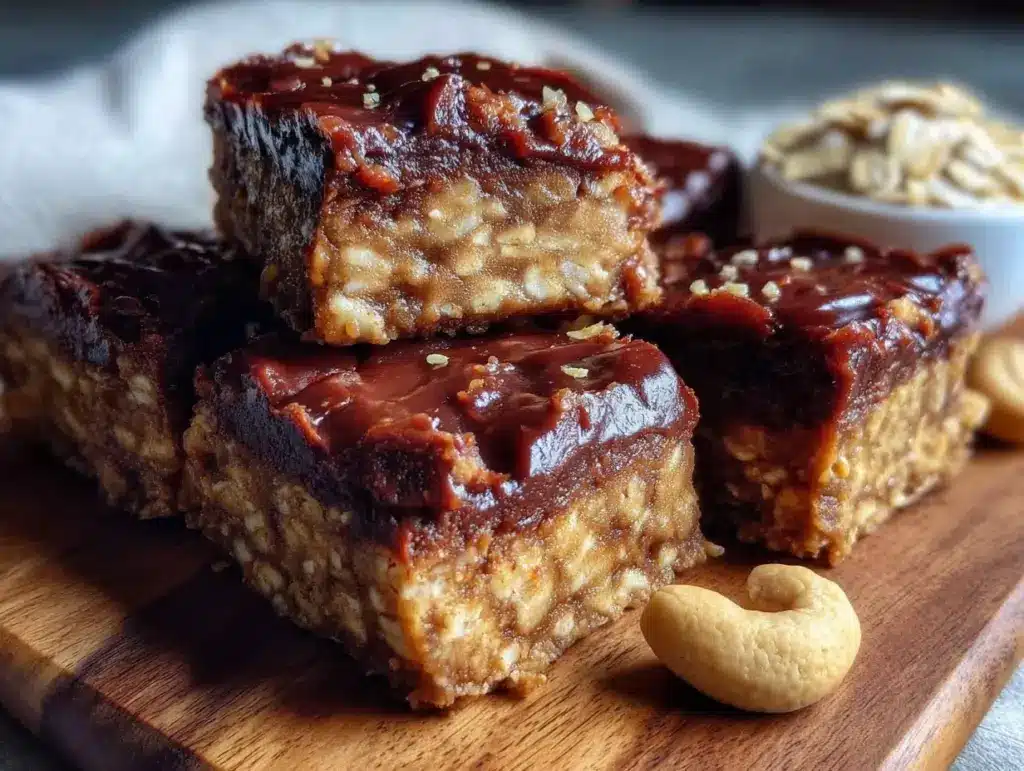
The moment I bit into one, there was this surprising chewiness and richness—the peanut butter and chocolate melded perfectly with the hearty oats. It wasn’t just a snack; it was a mini celebration of flavor and texture that felt honest and comforting. The bars had this nostalgic vibe, like a treat my childhood self would’ve begged for after school, but with a grown-up twist that didn’t feel like empty calories.
I guess it took that first bite to realize these Easy No-Bake Chewy Chocolate Peanut Butter Oatmeal Bars weren’t some gimmick—they’re a genuinely simple, dependable recipe that sticks with you, especially when life’s too hectic for anything fancier. What really won me over was how flexible and forgiving the recipe is, plus how it keeps well for days, always ready to rescue a snack attack or a quick breakfast on-the-go.
Now, whenever I’m in a pinch or just want that sweet-and-salty fix without firing up the oven, these bars are my go-to. They’ve quietly made their way into my routine, and honestly, that’s the kind of recipe I trust to stay around.
Why You’ll Love This Recipe
After messing around in the kitchen with no-bake treats, this recipe for Easy No-Bake Chewy Chocolate Peanut Butter Oatmeal Bars really stood out for a bunch of reasons. I’ve tested many versions, tweaking the ratios and timing, and this one nails it every time. Here’s why it’s become a staple:
- Quick & Easy: You can whip these bars together in under 15 minutes—no fancy techniques or long waits. Perfect for those last-minute snack cravings or a fast afternoon pick-me-up.
- Simple Ingredients: No obscure health food store runs required. The ingredients are basic pantry staples like oats, peanut butter, and cocoa powder, which you probably already have on hand.
- Perfect for Any Occasion: Whether it’s a lunchbox treat, a hiking snack, or a casual gathering, these bars fit right in. They’re also great for quick breakfasts when paired with a cup of coffee.
- Crowd-Pleaser: Kids love them, adults can’t get enough, and even my picky friends have asked for the recipe. That chewy, chocolatey peanut butter combo is just universal.
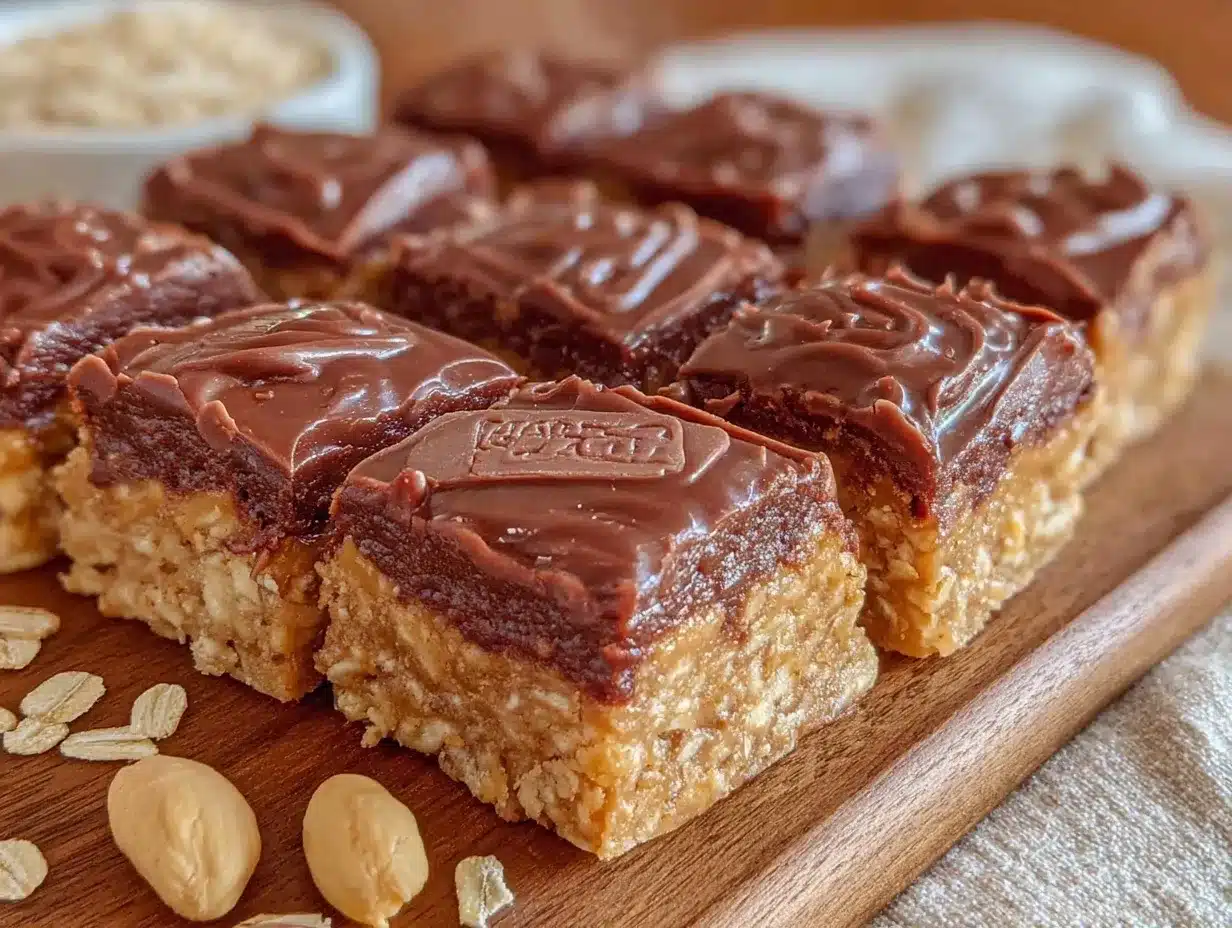
- Unbelievably Delicious: The balance of chewy oats, creamy peanut butter, and rich chocolate is just right—never too sweet or too dense. It’s comfort food that doesn’t feel heavy.
What sets this recipe apart is the texture—getting that chewy, not-too-firm bar is tricky without baking, but the trick is in the exact mix of peanut butter and honey, plus the gentle melting of chocolate to bind everything perfectly. Plus, you can swap in almond butter or add a sprinkle of sea salt on top for a little extra something special.
Honestly, these bars aren’t just snacks—they’re mini moments of joy you can grab anytime. That’s why they keep showing up in my kitchen, especially when I want something quick but satisfying. They quietly remind me that sometimes, the easiest recipes are the ones worth sticking with.
What Ingredients You Will Need
This recipe uses simple, wholesome ingredients to deliver bold flavor and satisfying texture without the fuss. Most of these are pantry staples, and you can easily customize based on what you have.
- Old-Fashioned Rolled Oats (2 cups / 180g) – The base of these bars, giving that hearty chew and fiber. I prefer rolled oats over quick oats for better texture.
- Creamy Peanut Butter (1 cup / 250g) – Use natural, unsweetened for the best flavor. Skippy or Jif works too if you like sweeter bars.
- Honey (1/2 cup / 170g) – Acts as the natural sweetener and binder. Raw honey adds a nice depth, but any honey is fine.
- Unsweetened Cocoa Powder (1/4 cup / 25g) – For that rich chocolate flavor without extra sugar. Dutch-processed makes a smoother taste.
- Vanilla Extract (1 teaspoon) – Just a splash to brighten the flavors.
- Salt (1/4 teaspoon) – Balances the sweetness and enhances the peanut butter.
- Mini Chocolate Chips (1/2 cup / 90g) – Optional, but I always add them to make it more chocolatey and fun.
- Chopped Nuts or Seeds (1/4 cup / 30g) – Optional for texture. I sometimes throw in chopped almonds or sunflower seeds.
Substitutions: Swap peanut butter with almond or cashew butter if preferred. Use maple syrup or agave instead of honey for a vegan option. Gluten-free rolled oats work well here too.
One tip: If your peanut butter is on the oily side, stir it well before measuring to get the right consistency. Also, don’t skip the salt—it’s a small touch that makes a big difference.
Equipment Needed
- Mixing Bowl: A large bowl for combining all ingredients. I like glass or stainless steel for easy cleanup.
- Microwave-Safe Bowl or Small Saucepan: For gently melting peanut butter and honey together. I usually use the microwave in 20-second bursts.
- 8×8-Inch Baking Pan: To press and set the bars. Line it with parchment paper for easy removal.
- Spatula or Wooden Spoon: For mixing and pressing the mixture evenly into the pan.
- Knife: For cutting the bars once set.
If you don’t have an 8×8 pan, a similar-sized container works—just adjust thickness. For melting, a double boiler can be used instead of a microwave if you prefer.
Keeping your spatula handy and using parchment paper are small things that make a big difference in cleanup and bar removal. I’ve used silicone spatulas for years and swear by them—they’re gentle and flexible.
Preparation Method
- Line Your Pan: Start by lining an 8×8-inch (20×20 cm) baking pan with parchment paper, leaving some overhang for easy lifting later. This step saves you from a sticky mess.
- Mix the Dry Ingredients: In a large mixing bowl, combine 2 cups (180g) of rolled oats, 1/4 cup (25g) unsweetened cocoa powder, 1/4 teaspoon salt, and if using, 1/4 cup (30g) chopped nuts or seeds. Stir these together until evenly distributed. This ensures every bite has balanced flavor.
- Melt the Peanut Butter and Honey: In a microwave-safe bowl or small saucepan, gently heat 1 cup (250g) creamy peanut butter and 1/2 cup (170g) honey together until smooth and runny—usually about 30-40 seconds in the microwave or low heat on the stovetop. Don’t overheat; you want it pourable but not scorching.
- Add Vanilla: Stir 1 teaspoon vanilla extract into the melted mixture. This little addition adds warmth and depth.
- Combine Wet and Dry: Pour the peanut butter-honey mix over the oats mixture. Use a spatula or wooden spoon to stir until everything is coated and sticky. It should look glossy and hold together well. If dry spots remain, keep mixing—it’ll come together.
- Fold in Chocolate Chips: Gently fold in 1/2 cup (90g) mini chocolate chips. They add little pockets of melty sweetness that make these bars irresistible.
- Press Into Pan: Transfer the mixture to your prepared pan. Use the back of a spatula or your hands (lightly greased or damp) to press the mixture firmly and evenly into the pan. Pressing well is key to chewy bars that hold shape.
- Chill: Pop the pan into the refrigerator for at least 2 hours or until firm to the touch. This chilling step sets the bars without baking.
- Slice and Serve: Use the parchment overhang to lift the slab out of the pan. Place on a cutting board and slice into 12 bars with a sharp knife. Store extras in an airtight container in the fridge.
Pro Tip: If your bars seem crumbly, it might be that the peanut butter was too thick or the mixture wasn’t pressed firmly enough. Next time, try warming the peanut butter a bit more or pressing harder. Also, these bars soften slightly at room temp, so keep them chilled if you want that classic chewy texture.
Cooking Tips & Techniques
Getting no-bake bars just right can be a bit of a balancing act, but here’s what I’ve learned from my trials (and occasional flops):
- Peanut Butter Texture Matters: Natural peanut butter with oil separation can make the mixture oily or too loose if not stirred well. Stir it thoroughly before measuring to keep the texture consistent.
- Don’t Skip the Chilling: These bars need time to firm up in the fridge. Patience here pays off—cutting too soon leads to crumbly pieces.
- Press Firmly: Use a spatula or your hands to really compact the mixture in the pan. This step helps the bars hold together without baking.
- Watch the Honey: If your honey is very thick, you can warm it slightly to make mixing easier. Avoid overheating to keep the natural flavors intact.
- Chocolate Chips Add Fun: Adding mini chocolate chips after mixing the wet and dry ingredients ensures they don’t melt completely but still add some gooey bites.
- Try a Mix of Oats: While rolled oats work best, you can blend in some quick oats for a slightly softer texture, but don’t replace all or bars might get too mushy.
I once tried skipping the salt and the bars tasted flat—trust me, that tiny pinch makes a surprising difference. Also, if you want a little crunch, folding in chopped nuts or seeds adds great texture and nutrition.
Variations & Adaptations
One of the best things about this recipe is how easy it is to tailor it to your tastes or dietary needs. Here are some ideas I’ve tried or recommend:
- Vegan Version: Swap honey for maple syrup or agave nectar and use a nut butter free of added dairy or honey. The texture is slightly different but still delicious.
- Nut-Free Option: Use sunflower seed butter or soy nut butter instead of peanut butter. Works well for school-safe snacks.
- Flavor Boosts: Add a teaspoon of cinnamon or a pinch of cayenne for a subtle kick. I like to sprinkle flaky sea salt on top before chilling for a salty-sweet contrast.
- Mix-Ins: Try dried cranberries, chopped dark chocolate chunks, or shredded coconut for variety. Just keep the total mix-ins under 1 cup to maintain the chewy texture.
- Protein-Packed: Stir in a scoop of unflavored or chocolate protein powder to boost nutrition. You might need to add a little extra honey or peanut butter to keep it sticky.
One personal favorite variation is swapping half the oats for puffed quinoa—gives a lightness and crunch that’s unexpected but delightful. If you want to experiment with different nut butters, almond butter gives a milder, sweeter flavor that pairs nicely with the chocolate.
Serving & Storage Suggestions
These Easy No-Bake Chewy Chocolate Peanut Butter Oatmeal Bars are best served chilled or at cool room temperature. They’re chewy and slightly firm right out of the fridge but soften a bit if left out for 10-15 minutes.
For a simple snack, I like pairing them with a glass of cold milk or a hot cup of coffee or tea. They also make a handy addition alongside a lunchbox sandwich, like the classic tuna melt on sourdough bread I recently enjoyed from that recipe.
Store leftovers in an airtight container in the refrigerator for up to 5 days. For longer storage, freeze the bars in a sealed container for up to 3 months. When ready to eat, thaw overnight in the fridge or at room temperature for 30 minutes.
As they sit, the flavors meld and deepen, making them taste even better after a day or two—if they last that long, that is! Just be sure to keep them cool to retain their chewy texture and prevent the chocolate chips from softening too much.
Nutritional Information & Benefits
Each bar (assuming 12 servings) contains roughly:
| Calories | 180-200 kcal |
|---|---|
| Protein | 5-6g |
| Fat | 10-12g (mostly healthy fats from peanut butter) |
| Carbohydrates | 18-20g |
| Fiber | 3-4g |
Key benefits stem from the wholesome oats, which provide fiber and sustained energy, and the peanut butter, which offers healthy fats and protein. Cocoa powder adds antioxidants without extra sugar.
These bars fit well into balanced diets and can be adjusted for gluten-free needs by choosing certified oats. They are free from artificial additives or preservatives, making them a cleaner snack option.
From a wellness standpoint, I appreciate how these bars curb sweet cravings with minimal sugar and pack enough protein to keep me fueled between meals. They’re a better alternative to packaged snacks loaded with processed ingredients.
Conclusion
These Easy No-Bake Chewy Chocolate Peanut Butter Oatmeal Bars have quietly become a staple in my kitchen because they hit that sweet spot of quick, satisfying, and flexible. They’re not just a snack but a little moment of homemade goodness you can pull together anytime.
Feel free to tweak the ingredients to match your taste or dietary needs—whether that’s swapping nut butters, adding mix-ins, or adjusting sweetness. That’s the beauty of this recipe: it’s forgiving and inviting.
Personally, I love how these bars bring a bit of comfort without the fuss, and they’ve saved me more than once when time was short but cravings were real. If you try them, I’d love to hear how you make them your own or what moments you reach for these bars in your day.
Happy snacking and cooking!
Frequently Asked Questions (FAQs)
Can I use quick oats instead of rolled oats for these bars?
Quick oats can be used, but the texture will be softer and less chewy. Rolled oats provide the ideal chewiness that defines these bars.
How long do these no-bake bars keep in the fridge?
Stored in an airtight container, they last about 5 days in the refrigerator. For longer storage, freezing is recommended.
Can I make these bars nut-free?
Yes, substitute peanut butter with sunflower seed butter or soy nut butter to keep them nut-free and safe for allergies.
Is it necessary to use honey, or can I use another sweetener?
Honey acts as a natural binder and sweetener, but maple syrup or agave nectar works for a vegan alternative. The texture might vary slightly.
Can I add protein powder to this recipe?
Absolutely! Adding a scoop of protein powder can boost nutrition. Just adjust the wet ingredients slightly if the mixture feels dry.
For a quick sweet treat that’s both wholesome and satisfying, these bars sit perfectly alongside other simple favorites like the spicy peanut noodles with chicken or a comforting slice of the stunning pink and green ombre wicked birthday cake. They remind me there’s always room for a little chocolate-peanut butter goodness in any meal plan.
Pin This Recipe!
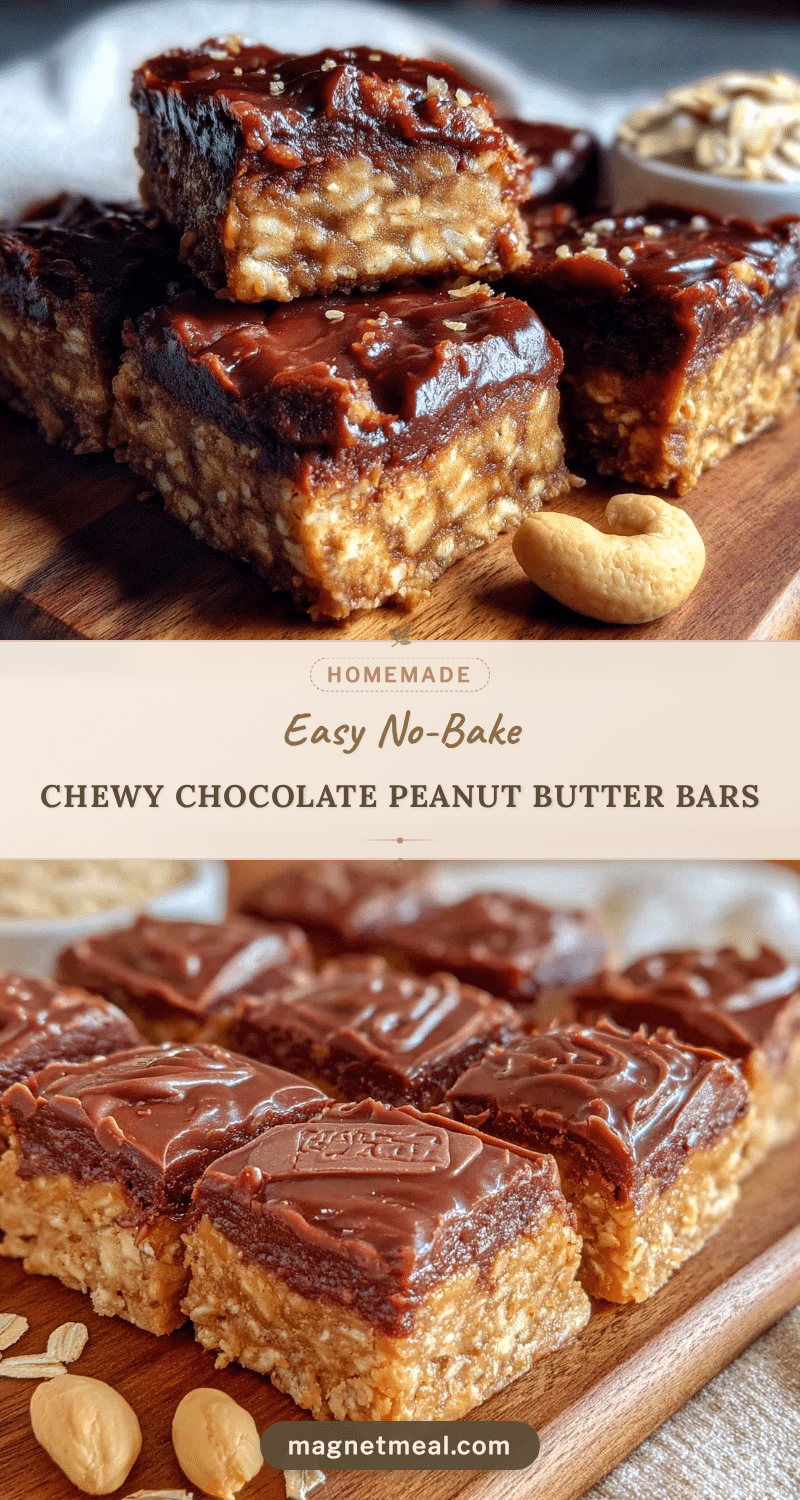
Easy No-Bake Chewy Chocolate Peanut Butter Oatmeal Bars
These no-bake bars combine chewy oats, creamy peanut butter, and rich chocolate for a quick, satisfying snack that requires no oven time. Perfect for busy days, they offer a wholesome treat with flexible ingredient options.
- Prep Time: 10 minutes
- Cook Time: 0 minutes
- Total Time: 2 hours 10 minutes
- Yield: 12 bars 1x
- Category: Snack
- Cuisine: American
Ingredients
- 2 cups (180g) old-fashioned rolled oats
- 1 cup (250g) creamy peanut butter (natural, unsweetened preferred)
- 1/2 cup (170g) honey
- 1/4 cup (25g) unsweetened cocoa powder
- 1 teaspoon vanilla extract
- 1/4 teaspoon salt
- 1/2 cup (90g) mini chocolate chips (optional)
- 1/4 cup (30g) chopped nuts or seeds (optional)
Instructions
- Line an 8×8-inch (20×20 cm) baking pan with parchment paper, leaving some overhang for easy lifting.
- In a large mixing bowl, combine rolled oats, cocoa powder, salt, and chopped nuts or seeds if using. Stir until evenly distributed.
- In a microwave-safe bowl or small saucepan, gently heat peanut butter and honey together until smooth and pourable, about 30-40 seconds in the microwave or low heat on stovetop. Avoid overheating.
- Stir vanilla extract into the melted peanut butter and honey mixture.
- Pour the wet mixture over the dry ingredients and stir with a spatula or wooden spoon until everything is coated and sticky.
- Fold in mini chocolate chips gently.
- Transfer the mixture to the prepared pan and press firmly and evenly using the back of a spatula or lightly greased/damp hands.
- Refrigerate for at least 2 hours or until firm to the touch.
- Lift the slab out using the parchment overhang and slice into 12 bars with a sharp knife.
- Store leftovers in an airtight container in the refrigerator for up to 5 days or freeze for up to 3 months.
Notes
Use natural peanut butter stirred well before measuring for best texture. Press mixture firmly into pan to avoid crumbly bars. Keep bars chilled for classic chewy texture. Optional add-ins include chopped nuts, seeds, or mini chocolate chips. For vegan version, substitute honey with maple syrup or agave nectar and use vegan nut butter.
Nutrition
- Serving Size: 1 bar
- Calories: 190
- Sugar: 10
- Sodium: 80
- Fat: 11
- Saturated Fat: 2
- Carbohydrates: 19
- Fiber: 3.5
- Protein: 5.5
Keywords: no-bake bars, peanut butter bars, chocolate oatmeal bars, chewy snack bars, quick snacks, healthy snacks, no oven dessert